How to Crochet Skirt for Every Occasion + Free Pattern

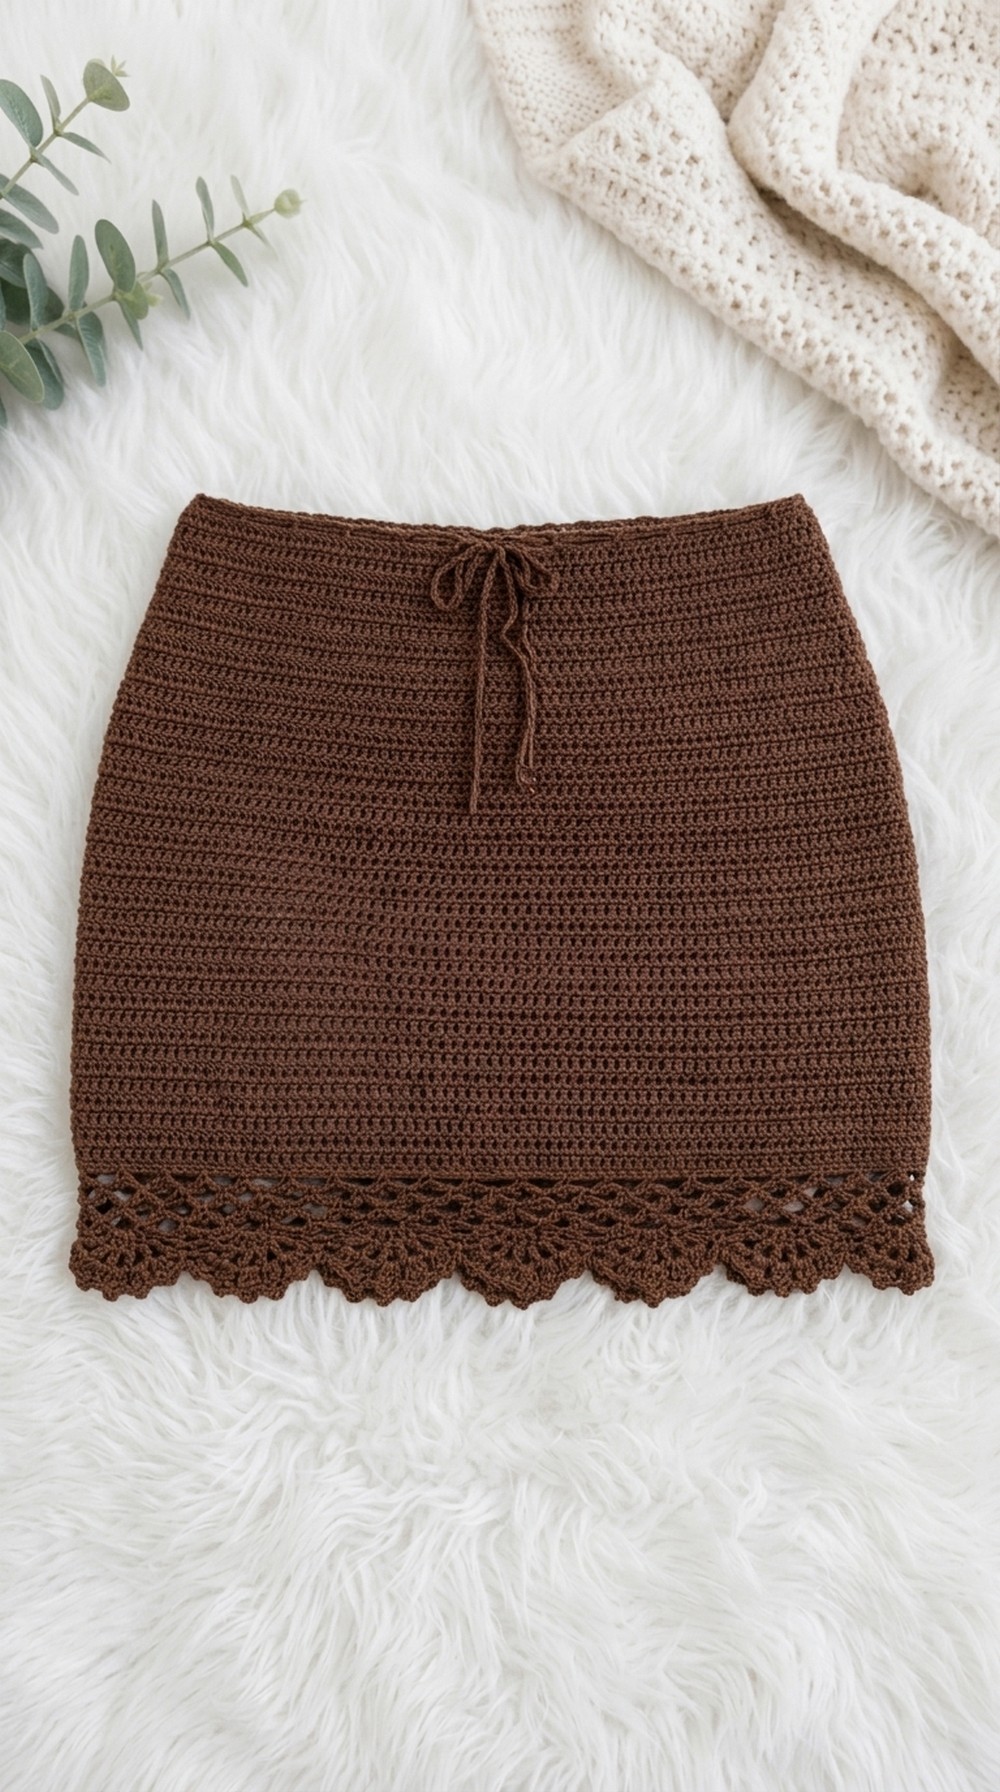
Refresh your look instantly through the Free Crochet Skirt Pattern, offering breezy comfort and modern accents for everyday wear.
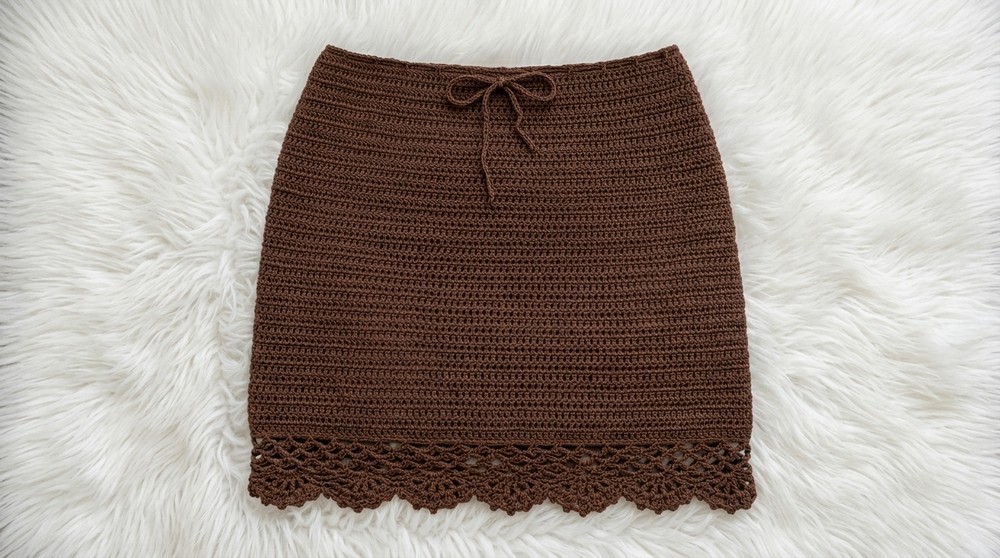
If you’ve been looking for the perfect crochet project that’s both stylish and functional, this beautiful crochet skirt pattern will surely catch your eye. Crocheted with fine cotton yarn and a 2.5mm hook, the pattern showcases a sleek and breathable texture that’s ideal for summer days or semi-formal occasions.
Comfortable free crochet skirt pattern for relaxing weekends
Whether you prefer solid color tones for a clean, elegant look or a mix of vibrant hues for a playful and bold statement, this pattern is endlessly versatile. One of its standout qualities is the combination of simple stitches such as the double crochet (DC) with delicate details like the picot stitch, which adds a sophisticated, lacy touch to the hem. It’s suitable for any crocheter who loves light, airy designs that highlight crochetsmanship.
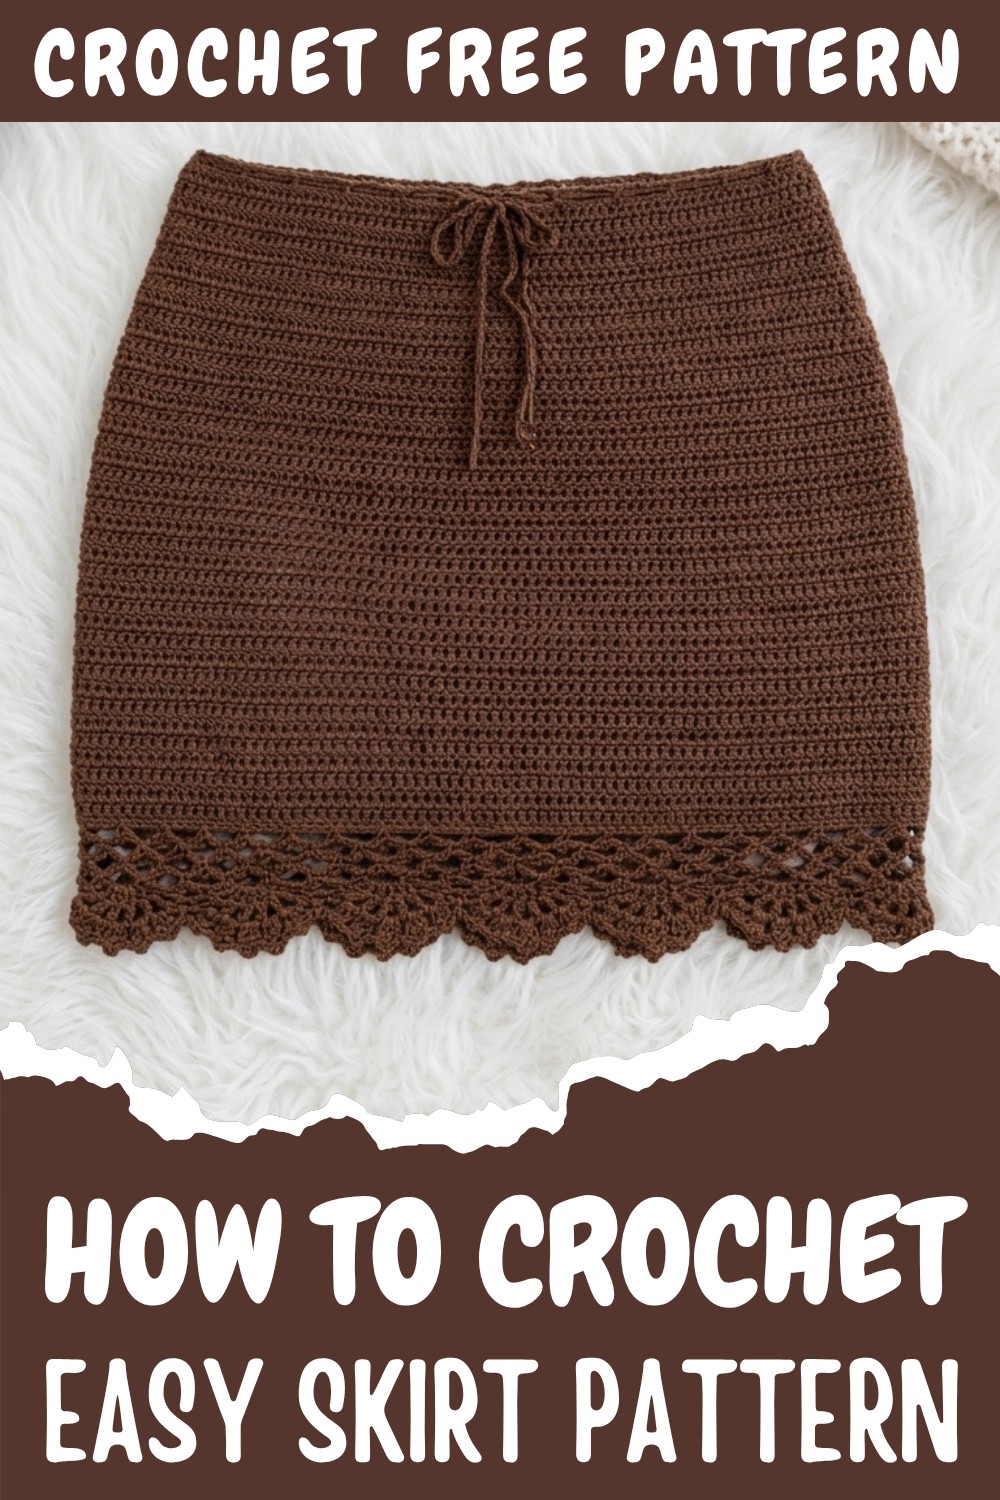
This pattern wraps perfectly around the waist with an adjustable drawstring you can crochet yourself, ensuring it’s customizable for any size. The skirt’s structure includes rounds of decreases, making it beautifully tapered to enhance fit and comfort. Along the way, you’ll find yourself immersed in creating elegant details like chained lace rounds and decorative picot work, making it not just a casual piece but a true statement garment. This pattern is beginner-friendly yet introduces intermediate techniques, making it a wonderful learning experience for new crocheters who want to challenge themselves.
Crochet Skirt Pattern: Step-by-Step Guide
Creating a crochet skirt is a rewarding project, especially when using delicate stitches like the double crochet decrease and the picot stitch to give your design texture and flair. This pattern features a simple yet elegant layout, perfect for beginners and advanced crocheters alike.
The skirt’s beauty lies in its customization—from the color palette to the waist-tightening string or lace edging, making it ideal for casual outings or fun summer days. With its vibrant texture, this lace-inspired crochet skirt matches perfectly with crop tops, blouses, or even swimsuits.
Skill Level & Terminology
- Skill Level: Beginner-friendly with intermediate techniques introduced.
- Terminology: US crochet terms are used throughout this pattern.
Materials & Tools
- Yarn: Fine cotton yarn in brown color.
- Hook: 2.5mm crochet hook.
- Additional Tools:
- Stitch markers
- Measuring tape
- Scissors
- Tapestry needle
Gauge
Not explicitly required, but as a reference:
- 1 Double Crochet (DC): Approximately 0.4 cm.
Abbreviations List
- ch: Chain
- dc: Double Crochet
- sc: Single Crochet
- sl st: Slip Stitch
- picot: Ch 3, sl st into stitch base forming a decorative loop.
- st: Stitch
Special Stitch Instructions
- Double Crochet Decrease (DC Dec):
- Yarn over, insert hook into the first stitch and pull up a loop. Yarn over, pull through the first two loops; leave the stitch unfinished. Yarn over, repeat the process in the next stitch, and then yarn over to pull through all loops on the hook.
- Picot Stitch:
- After working the base stitch, ch 3, insert hook into two loops of the base stitch, sl st, and return to work.
Finished Size
- Hip circumference: Based on your measurement. Example: 94 cm for the tutorial using 204 chains.
- Total length of the skirt: Approximately 26 cm (adjustable).
How to Start & Stitches Used
To begin this project, measure the circumference of your hips, and create a chain in multiples of 12. The DC stitch forms the main body of the skirt, while decrease stitches and picots add shape and decoration. The project combines simplicity and flair, perfect for gifts or matching sets.
The Pattern
Foundation Chain and First Round
- Create a foundation chain:
- Measure your hips and crochet a chain in multiples of 12. For example, ch 204 for 94 cm hips.
- Rnd 1:
- Ch 2 (does not count as a stitch).
- Starting from the third chain from the hook, work 1 dc in each ch.
- Join the end to the first dc with a sl st to form a round.
These rounds build the foundation of the skirt, ensuring it fits snugly around your hips. Take care to create even stitches and check measurements before proceeding.
Rounds 2–3: Building the Body
- Rnd 2:
- Ch 2 (does not count as a stitch).
- Work 1 dc in each dc from the previous round.
- Finish with a sl st on the first dc to complete the round.
- Rnd 3:
- Ch 2 and repeat 1 dc in each st from the previous round.
- Continue working dc rounds for your desired length. Example: 26 cm without edge.
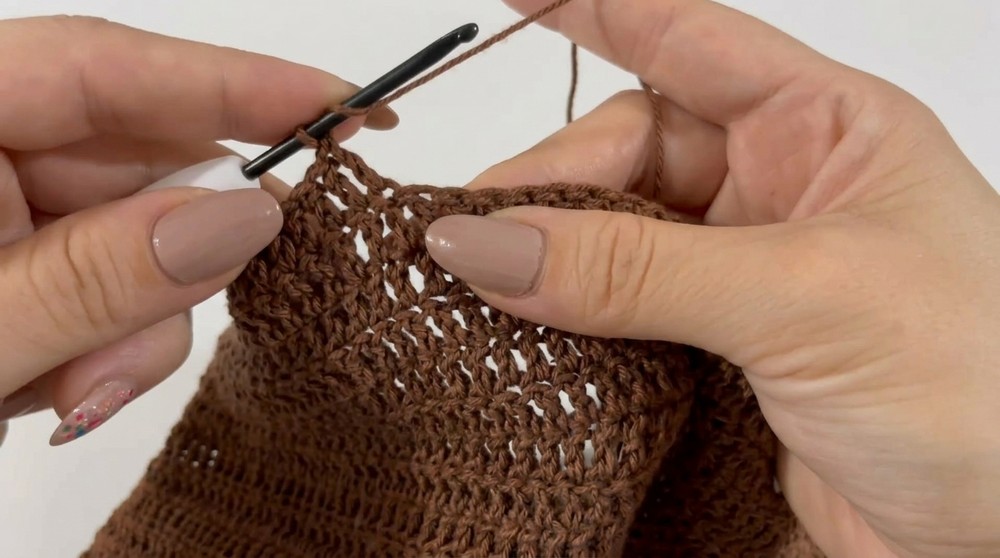
If you prefer a longer or shorter skirt, experiment with the number of rounds to suit your style. Mark your progress with stitch markers.
Decreasing the Waist
- Mark the halves:
- Fold the body in half and place stitch markers at each side to evenly identify stitch points for decreases.
- Rnd 4:
- Ch 2 and work dc in each st until the first marker.
- At the marker, perform a dc decrease using the marked stitch and the next stitch (see Special Stitch Instructions).
- Replace stitch marker in the decreased stitch.
- Continue with dc stitches to the second marker. Repeat the decrease.
- Repeat decreasing rounds:
- Repeat decreases in the marked points until the skirt measures 10 cm more than the waist size. Example: 7 decrease rounds for a waist measuring 74 cm wide.
These decreases create a fitted waistline, ideal for accentuating the body while maintaining comfort. Be sure to measure frequently for perfect accuracy!
Last Round for Waist
- Row Design:
- Ch 2, skip 2 stitches, and dc in the next st. Repeat this pattern throughout:
- Ch 2, skip 2 stitches, 1 dc into the next stitch.
- Finish with sl st in the first dc.
- Ch 2, skip 2 stitches, and dc in the next st. Repeat this pattern throughout:
This round adds subtle texture to the waistband while prepping for the string or elastic attachment.
Adding the Drawstring
- Create the string:
- Work a chain long enough to tighten the waist, e.g., ch 200 for 90 cm length.
- Weave through the stitches of the last round to create an adjustable waistband.
The string enhances customization, allowing you to tighten or loosen the fit for added flexibility.
Crochet Lace Bottom Edge
Set-Up Round:
- Join Yarn:
- Close the first round with a needle at the hem. Add sc stitches around the hem edge (working into foundation chains).
Rnd 1 – Picot Lace:
- Picot Row:
- Ch 1, make 1 sc into the first st, followed by a picot:
- Ch 3, insert hook into two loops of the base st, sl st.
- Ch 5, skip next 3 stitches and repeat (1 sc and picot) in the next stitch.
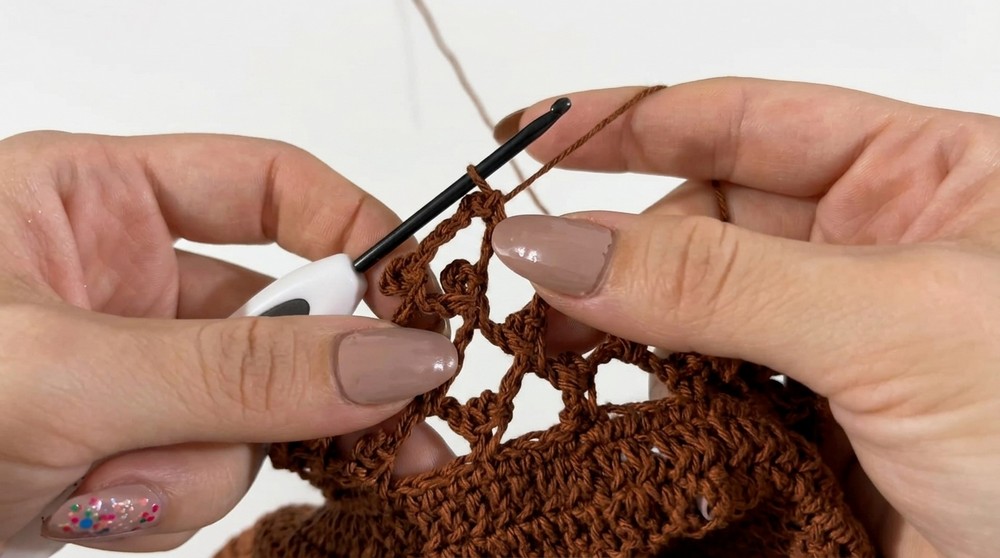
Rnd 2 – Repeat:
- Repeat the same Rnd 1 process using sc + picot in each Ch 5 space.
Final Rounds:
- Add decorative detail: Work sc and picot stitches alternately. For the last rounds, work 3 dc together with picot in Ch 5 spaces.
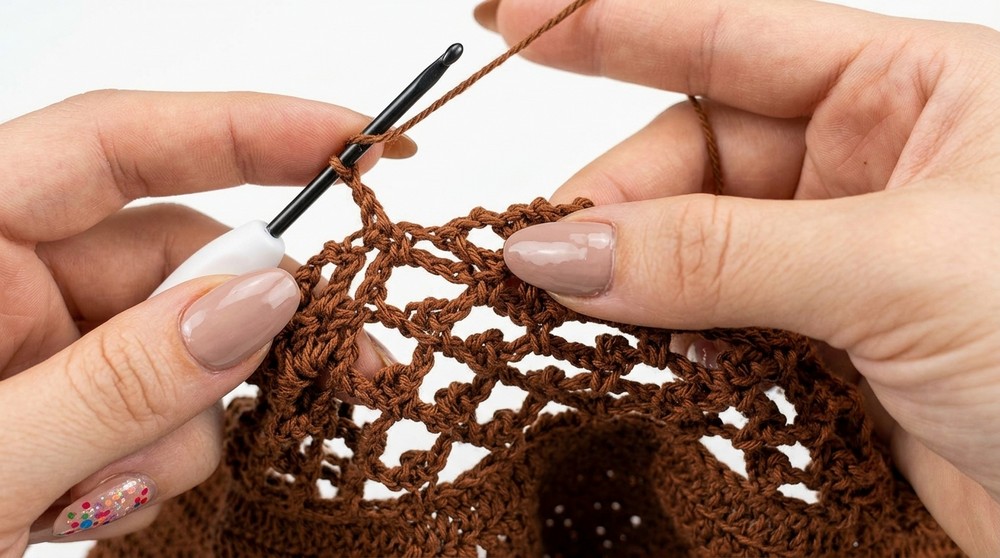
The lace edging gives your skirt a polished, elegant touch, making it suitable for formal or casual settings.
Assembly & Finishing
- Weave in loose ends using a tapestry needle.
- Use the string to secure the waistband or attach an elastic band for a clean finish.
- Match the skirt with a crocheted top or accessories for a perfect set.