Easy Crochet Shorts with Free Pattern & Step By Step Detail

Personalize your warm-weather wardrobe effortlessly through the Free Crochet Shorts Pattern, bringing chic flair and cozy fit.
Ever thought about crocheting your own stylish and comfortable piece with a personal touch? Crochet shorts are the perfect way to combine creativity with functional fashion. This pattern offers a playful blend of comfort and beauty, complete with texture that feels lightweight and looks effortlessly chic.
Versatile free crochet shorts pattern for fun days outdoors
Whether you opt for soft pastel shades for a calming look, bold colors for a striking summer vibe, or even dual tones to match your mood, the beauty of this pattern lies in its endless customization. Not only are these shorts great for casual wear, but they also make fantastic gifts for loved ones, showcasing your handmade talent.
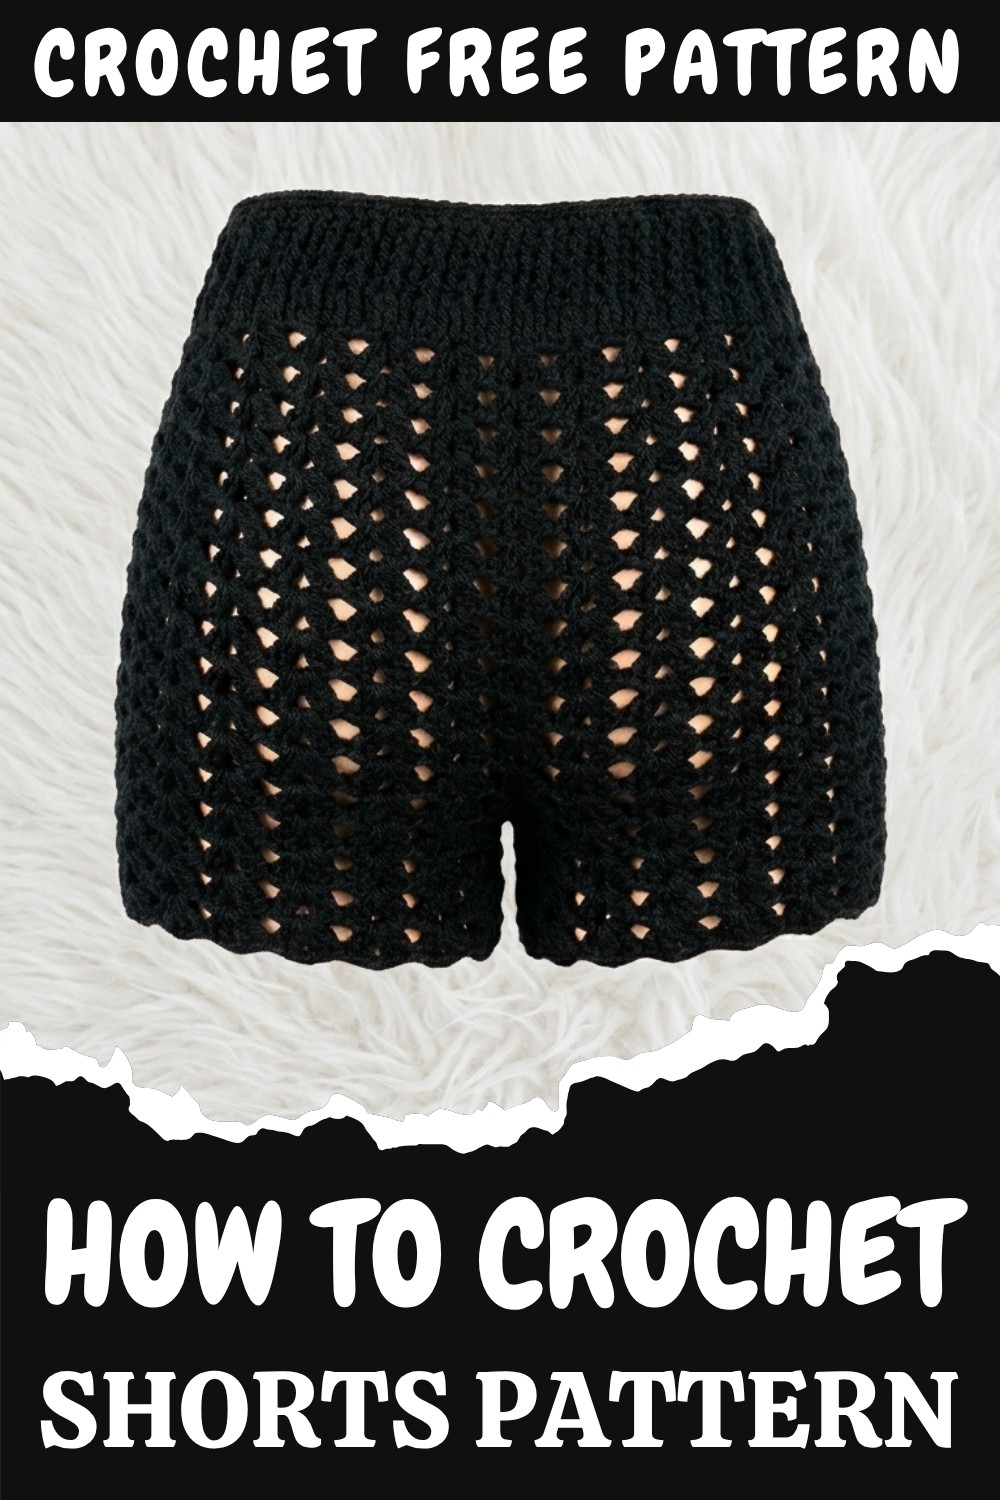
The standout feature of this pattern is the double V-stitch, a simple yet elegant stitch that creates a breathable and textured design. This stitch does more than just elevate the shorts—it can also be used to crochet other pieces like skirts, cozy scarves, flowy tops, or even decorative home items. The shorts come with options for either a drawstring waistband or an elastic band, so you can tailor them to your preferred fit. The pattern includes thoughtful details, such as crotch shaping and adjustable sizing, making it suitable for crocheters of all levels.
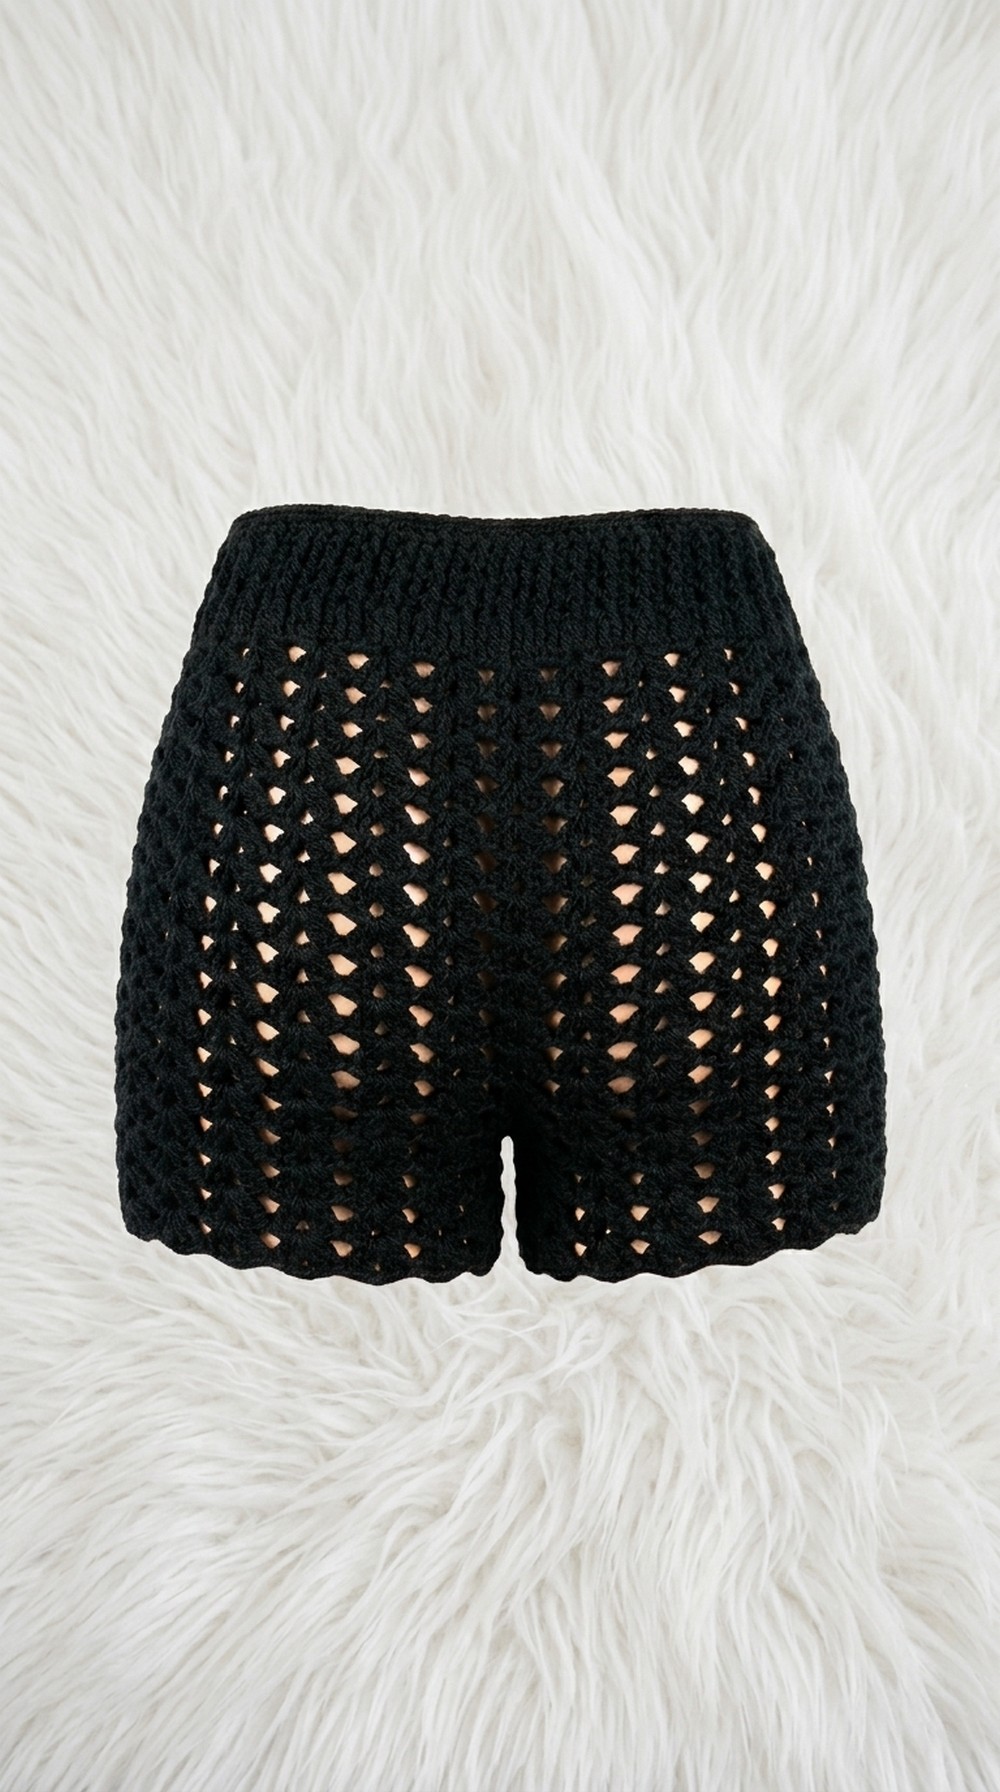
Crochet Shorts Step-by-Step Pattern with Band Option
If you’ve ever dreamed of creating something comfortable yet stylish, these crochet shorts are the perfect project for you! Designed by T of the FTK Crochet Brand, this pattern feature the double V-stitch, which adds an elegant and textured pattern to the body of the piece.
What’s even better is that this project is completely beginner-friendly, making it ideal for anyone taking their first steps into the world of crochet. You can customize the shorts with various colors, add an elastic waistband, or use a drawstring for a personalized touch.
Skill Level & Terminology
- Skill Level: Beginner
- Terminology: US crochet terms
Materials & Tools
- Yarn: Approximately 4-ply acrylic yarn (Note: 2 strands of 2-ply yarn were held together in the tutorial to create a 4-ply equivalent. Use any yarn you’re comfortable with) Yarn used in black color.
- Hook: 4.5 mm hook.
- Tools Needed:
- Measuring tape
- Scissors
- Stitch markers
- Tapestry needle for weaving in ends
- Optional: Elastic band if you choose to add one
Gauge
While gauge is not critical for this project due to its adjustable nature, an approximate gauge is:
- 4 double crochets = 1 inch
Abbreviations List
- ch: Chain
- st: Stitch
- dc: Double Crochet
- sl st: Slip Stitch
- sp: Space
Special Stitch Instructions
- Double V-Stitch:
- Work 2 double crochets (dc), chain 2, then 2 more dc into the same stitch or space.
Finished Size
This pattern is based on custom measurements, starting with the hip circumference. The size demonstrated fits hip circumference of 23 inches. Adjust based on your specific measurements.
How to Start & Stitches Used
The shorts begin with a foundation chain based on your hip circumference, worked in multiples of 5 + 1. The primary stitch used throughout is the double V-stitch, which creates a textured and breathable design. These stitches can be repurposed for other projects like skirts, hats, or decorative panels.
The Detailed Pattern
Foundation Chain and First Row
- Start with the foundation chain:
- Measure your hip circumference. Create a chain in multiples of 5, plus 1 extra stitch for the foundation. Example: ch 141 (multiples of 5 + 1).
- Join the chain into a circle:
- Ensure the chain isn’t twisted, and join the last chain to the first chain with a sl st.
- Row 1 (Foundation Row):
- Ch 3 (counts as the first dc).
- Work 1 dc in each chain around.
- Join with a sl st to the third chain of the starting ch-3.
- This creates the base for the shorts.
Tip: This row provides stability for the body of the shorts. Move carefully and keep your stitches even to avoid twisting the work.
Row 2: The Double V-Stitch Pattern
- Begin Row 2:
- Ch 3 (counts as the first dc).
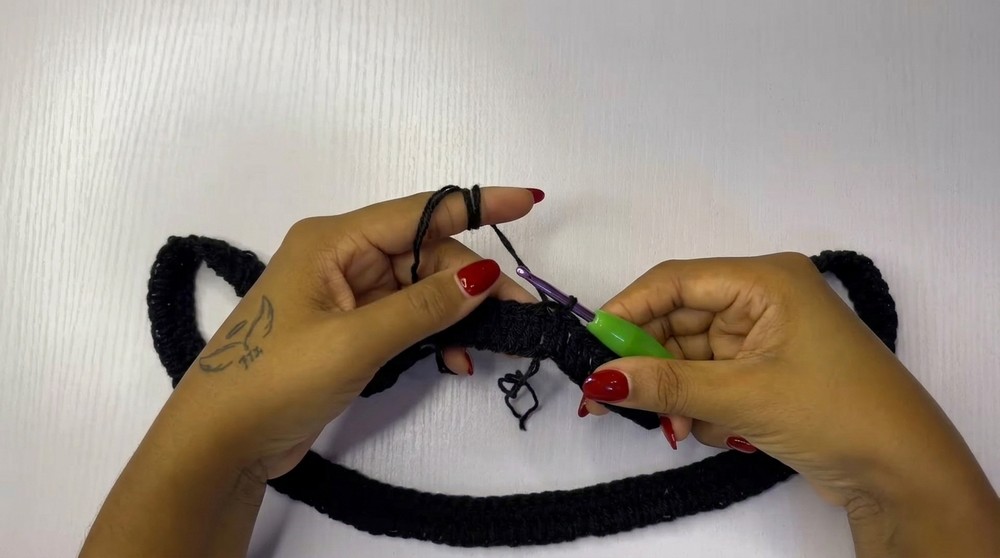
- Work 1 dc into the same st, ch 2, and 2 dc into the same st to create the first double V stitch.
- Ch 3 (counts as the first dc).
- Continue the row:
- Skip 4 stitches, and on the 5th stitch, work:
- 2 dc, ch 2, 2 dc (double V-stitch).
- Repeat this pattern around the row.
- Skip 4 stitches, and on the 5th stitch, work:
- End Row 2:
- Join with a sl st to the third chain of the starting ch-3.
By now, the double V-stitch pattern begins to show its charm. This creates slight texture and structure that will give the shorts a signature look.
Rows 3 – 4: Increase Rows (Optional)
- Increase for curvier figures:
- On each corner of the shorts, where needed, add a third V-stitch (making it a triple V-stitch) in the corners.
- Mark these corners using stitch markers to align the increases.
- Repeat the double V-stitch pattern:
- Work the regular pattern all around, adding increases only in the corners if necessary.
- Standard Rows (No Increases):
- From Row 5 onward, work double V-stitches in every chain-2 space around without further increases.
- Continue until the desired body length is reached (e.g., 12 rows for 8 inches).
This step shapes the body of the shorts and adjusts for curves if needed. Use a tape measure and test the fit frequently.
Creating the Band
- Work the Waistband:
- Reattach the yarn at the starting edge of the shorts. Ch 3 (counts as a dc).
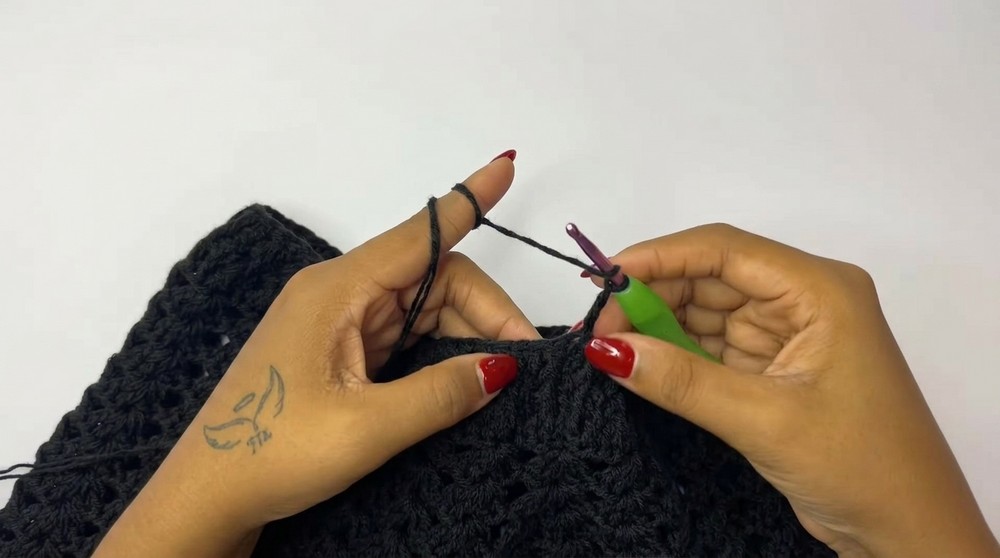
- Alternate front post double crochet and regular double crochet stitches around the row to create a ribbed band look.
- Continue working until the band measures approximately 2 inches or your desired width.
The ribbed waistband adds a comfortable and stretchy finish. You can modify this with elastic, but the ribbing alone often provides sufficient hold.
Dividing for the Legs (Crotch Formation)
- Locate the center (crotch):
- Count and mark the center points of the shorts using stitch markers.
- Bridge the crotch:
- Starting at one marker, ch the required number based on thigh circumference (e.g., 21 chains for 23-inch thighs).
Legs (Repeat for Both Sides):
- Begin the first leg:
- Start at one chain marker. Work double V-stitches in the chain-2 spaces all around.
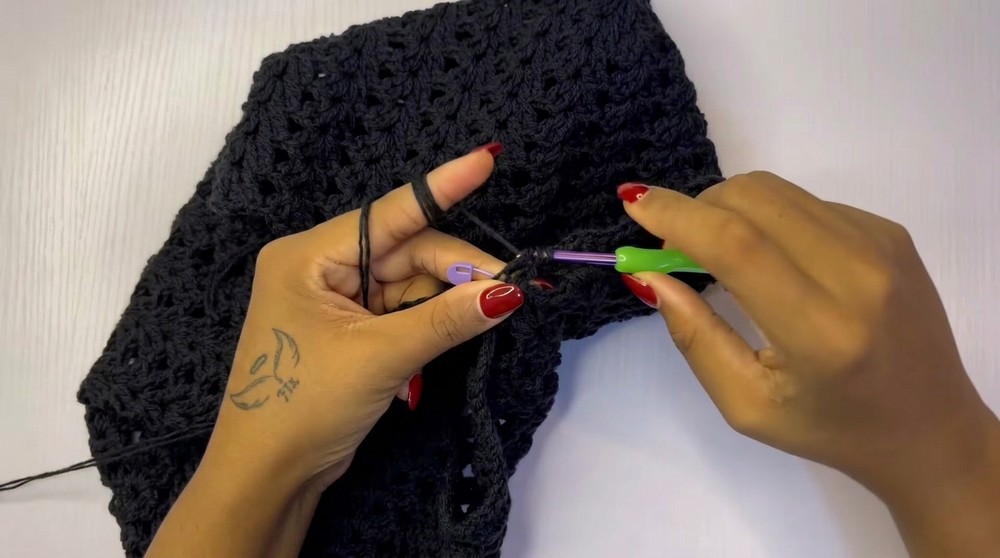
- Join with sl st at the end of each round.
- Start at one chain marker. Work double V-stitches in the chain-2 spaces all around.
- Continue for the desired leg length:
- Example: 5 rounds for each leg to achieve tidy shorts.
- Repeat steps 12–14 for the second leg.
Finishing Touches
- Optional: Add a band:
- Attach an elastic band to the waistband for a snug fit. Follow a video tutorial for accurate elastic placement.
- Weave in Loose Ends:
- Use a tapestry needle to weave in and secure leftover yarn.
- Check for Fit:
- Ensure the waist and leg openings fit perfectly.
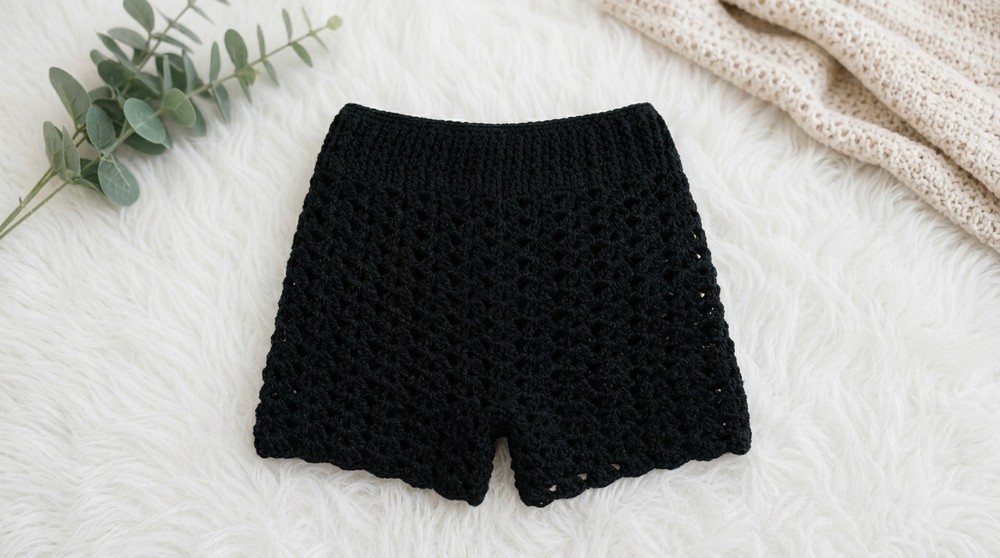
- Ensure the waist and leg openings fit perfectly.
Assembly & Finishing
- Elastic Band Tutorial: Use the band for extra waist-snatching support!
- Alternate Option: Skip the band and crochet a long chain tie to serve as a drawstring, weaving it through every other stitch for adjustability.