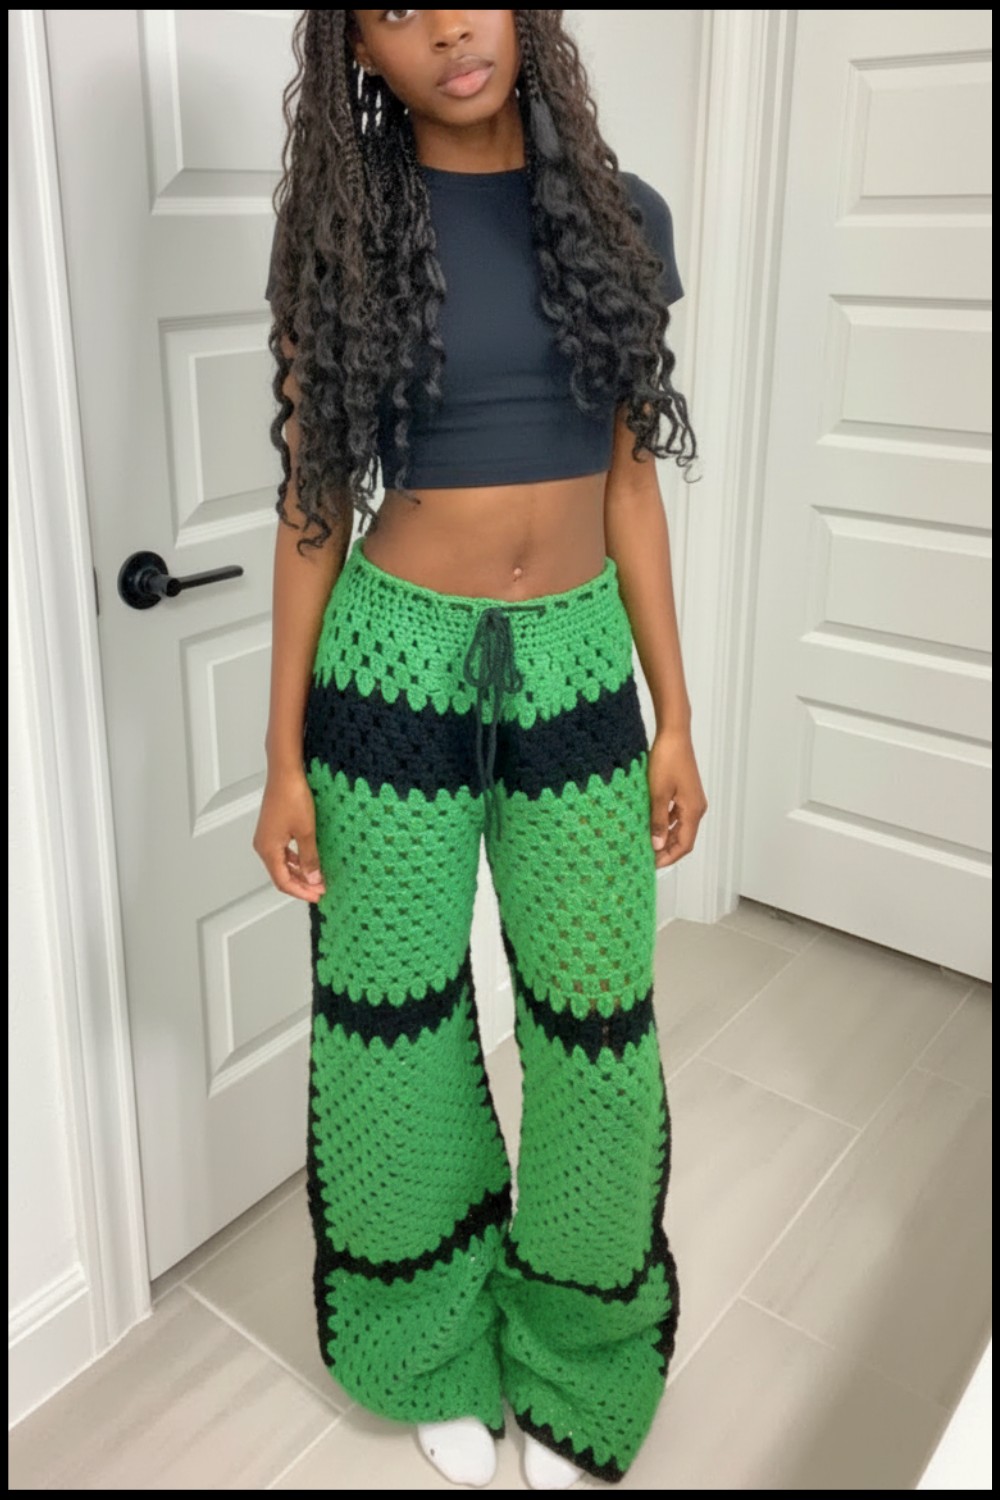
How to Crochet Granny Square Pant — Free Pattern Guide
Colorful comfort awaits with this free crochet granny square pant pattern that’s effortlessly add fun and warmth to your everyday look.
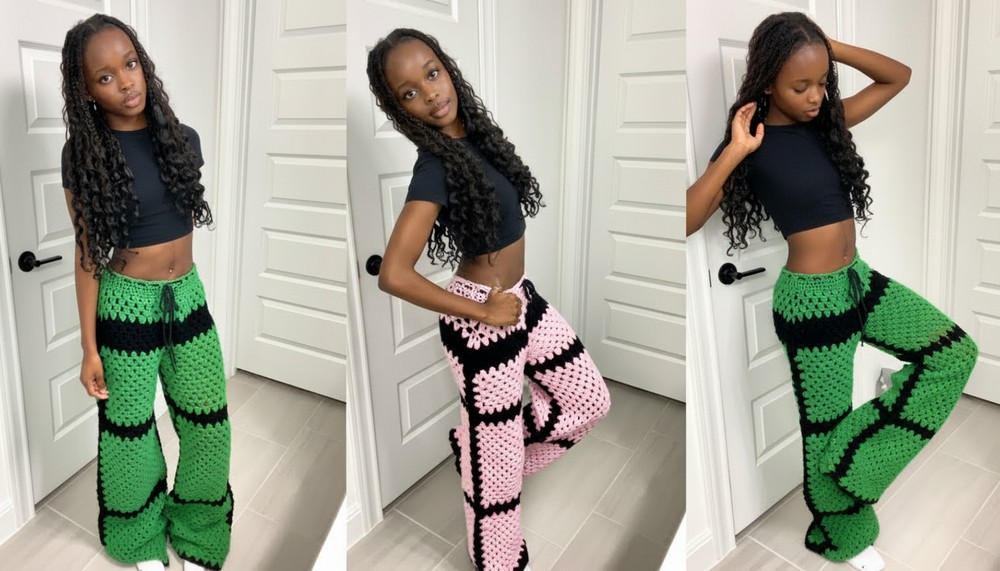
Ever wished for clothing that brings happiness and color to your days? A crochet granny square pant pattern offers a playful design made up of bright patches and gentle shapes that stand out in any crowd. This pant feels cozy and warm—just right for relaxing at home or showing off at a special event. Each piece allows your favorite colors to blend together, making every pant one-of-a-kind just for you.
Free Granny Square Pant Crochet Pattern for Cozy Style
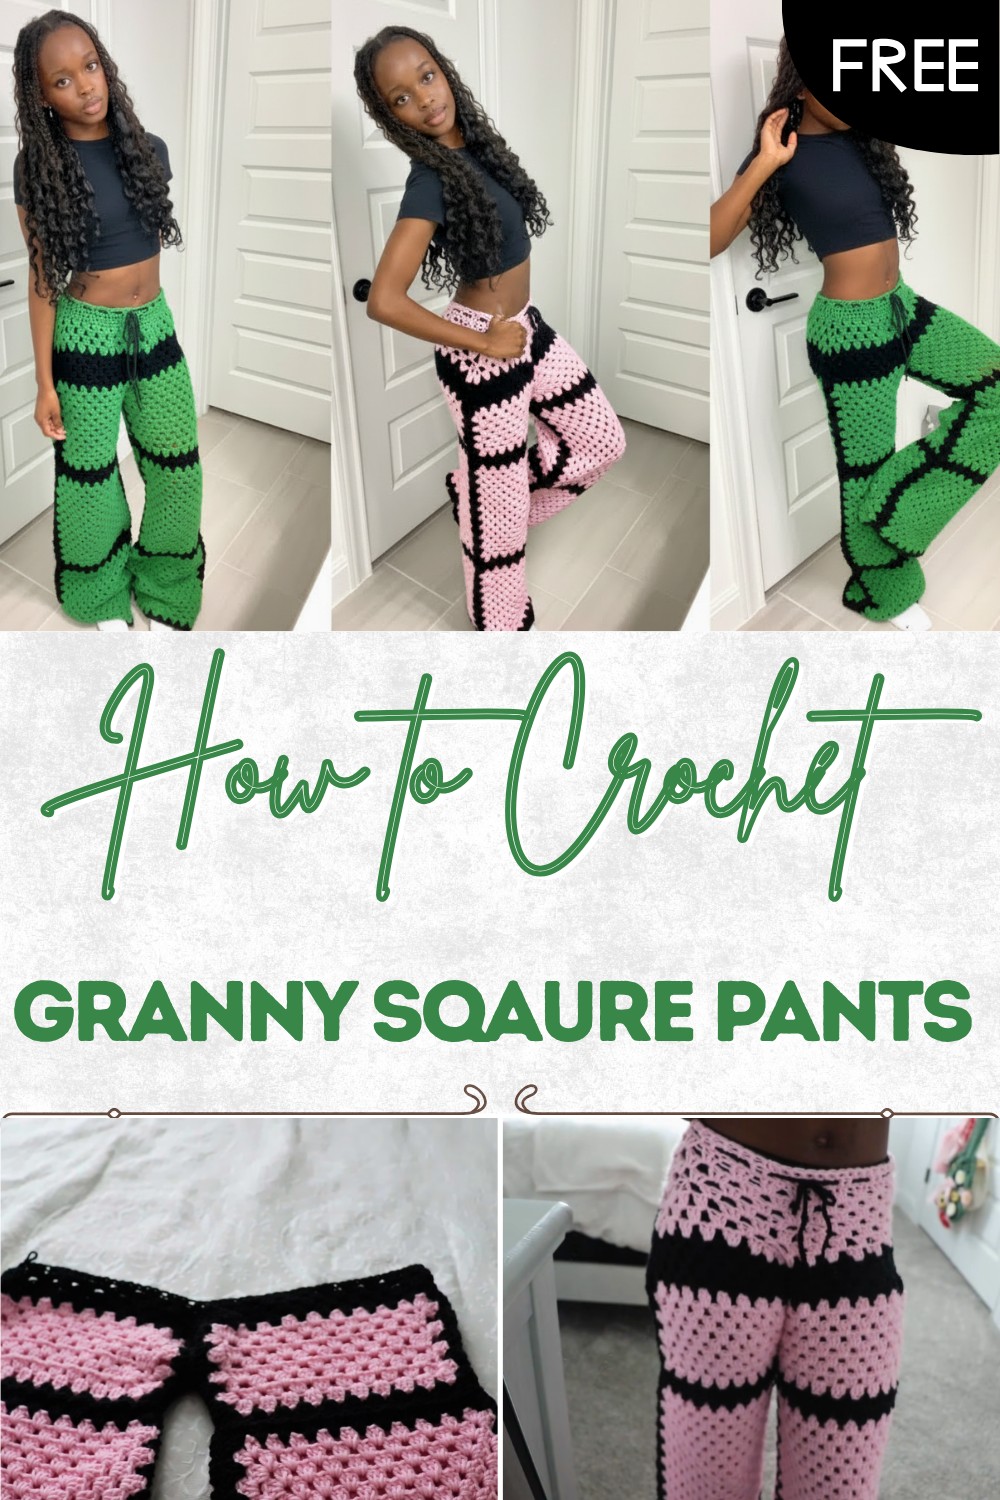
The cheerful patchwork look is both stylish and practical, using leftover yarn to make something beautiful and budget-friendly. The simple design means anyone can follow along, step by step, and enjoy making something unique. With a crochet granny square pant pattern, personal style becomes easy, comfortable, and always fun, turning everyday moments into opportunities to shine.
Granny Square Crochet Pants: Detailed Step-by-Step Pattern
Materials
- Yarn: Weight 4 (Medium) Acrylic Yarn (e.g., I Love This Yarn from Hobby Lobby)
- Main Color: 400–800 g (exact amount depends on size; for reference, the sample used about 520 g for 5’4″ height)
- Accent Color: Approximately 198–199 g
- Crochet Hook: 5 mm (US Size H/8)
- Darning Needle: For weaving in ends
- Scissors
- Optional: Measuring tape (to ensure sizing), Stitch markers
Key Abbreviations (US Terminology)
- ch: chain
- ch-sp: chain space
- dc: double crochet
- sc: single crochet
- sl st: slip stitch
- sk: skip
- st: stitch
- rep: repeat
Special Notes
- Sizing: This pattern is adaptable for all heights and body types. Measure the granny square and panel against your leg throughout construction to achieve your preferred fit (tight or baggy).
- Join-As-You-Go: Parts of the squares and panels are joined using slip stitches for a seamless look.
- Repetitiveness: The pattern uses repetitive motifs (granny squares and clusters); always check your work for consistency.
- Try-On: Frequently try on your work (or measure against your body) at significant steps to ensure best fit.
- Customization: Adjust the number of rows for more length, bagginess, or a tight fit as desired.
Pattern
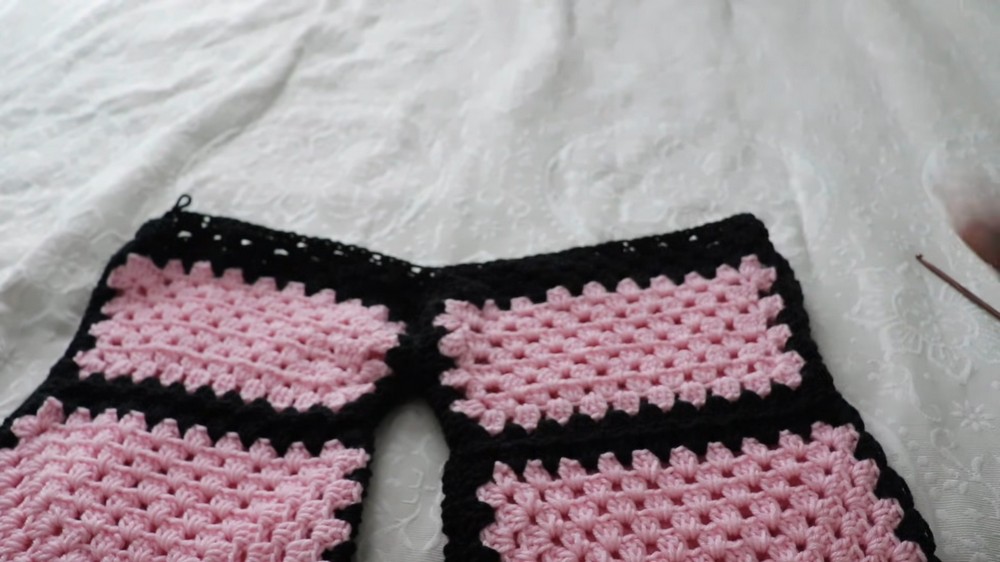
1. Granny Squares
Make 4 granny squares per leg (total of 8 for both legs).
First Square:
- Magic Ring: Form a magic ring (or ch 4, sl st to first ch to form ring).
- Round 1: Ch 3 (counts as dc here and throughout), 2 dc in ring, [ch 2, 3 dc in ring] x3, ch 2, sl st to top of first ch-3. (4 clusters)
- Round 2: Sl st into next ch-2 sp, ch 3, 2 dc in same sp, ch 2, 3 dc in same sp (corner made), [3 dc in next ch-2 sp, ch 2, 3 dc in same sp] x3, join with sl st to top of ch-3.
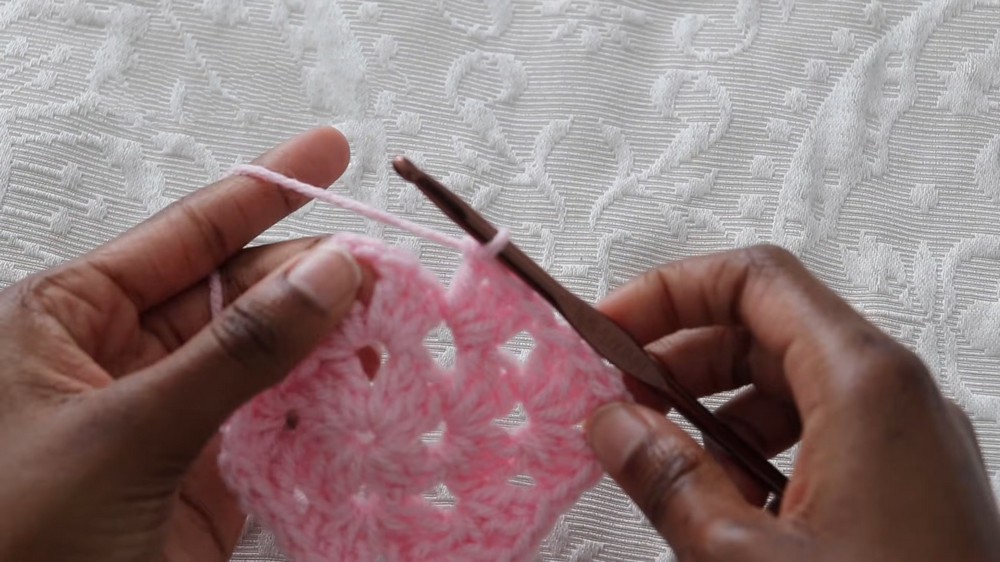
- Rounds 3–10: Continue in pattern:
- Corners: [3 dc, ch 2, 3 dc] in each ch-2 corner space.
- Sides: 3 dc in each space between clusters (“shells”).
- Join with sl st to top of ch-3 at end of each round.
- Repeat until you have a total of 10 rounds (or to your desired size, measuring as you go).
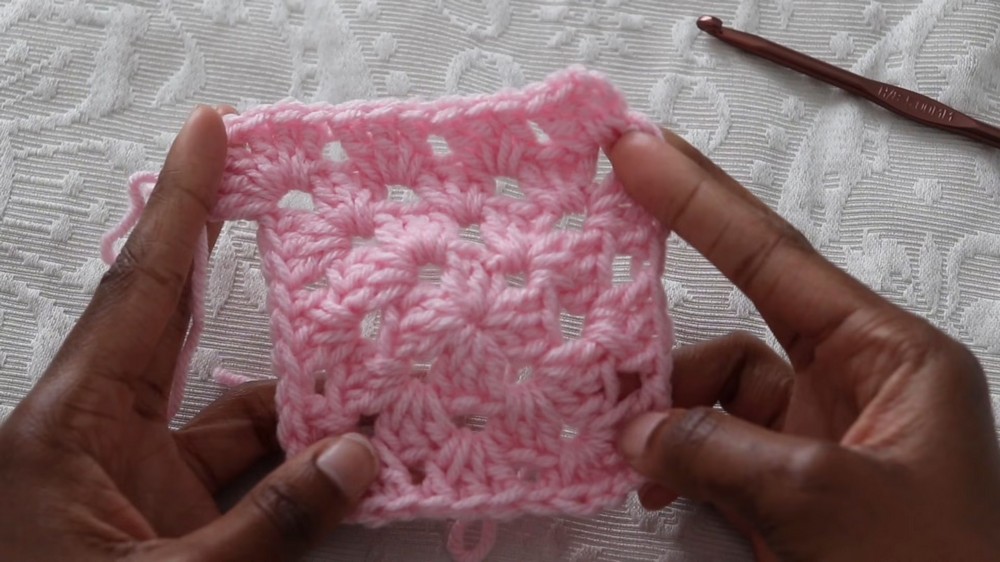
TIP: For a baggier fit, work more rounds per square.
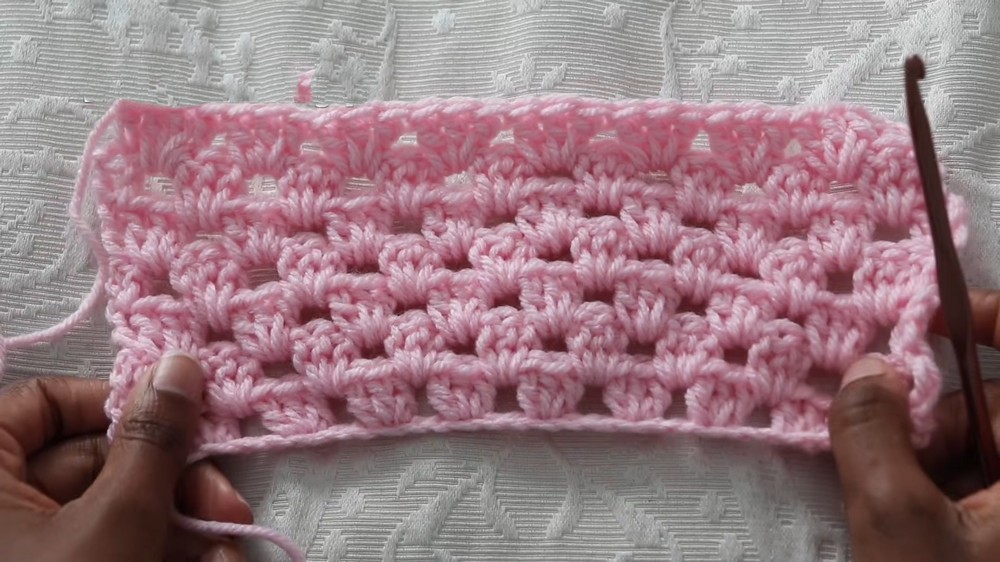
2. Granny Stitch Cluster Panel
Make 2 panels per leg (total of 4 for both legs, to alternate with granny squares for each leg panel).
Panel Length Formula:
- Count the number of clusters (groups of 3 dc) on one side (between two corners) of your finished granny square.
- Multiply this number by 3, then add 6.
- [Number of clusters between corners] × 3 + 6 = Foundation chain.
Example: If you have 8 clusters between corners, 8 × 3 + 6 = 30 chains.
Panel:
- Foundation: Ch (determined by formula above).
- Row 1: Sk 3 ch (counts as dc), 3 dc in fourth ch from hook, sk 2 ch, 3 dc in next ch; rep from * to last 2 ch, sk 1 ch, 1 dc in last ch. Turn.
- Row 2: Ch 3, 1 dc in top of previous row’s last dc, 3 dc in next space between clusters; rep across, end with 1 dc in top of ch-3 from previous row. Turn.
- Continue: Repeat Row 2 until panel matches the length of two granny squares when held against your leg (~7 rows, with 8th row forming a border; adjust as needed).
Bordered Edge for Panel (Final Row):
- With panel RS facing, work along the long edge:
- (3 dc, ch 2, 3 dc) in the corner (to mimic a granny square’s corner),
- Work 3 dc in each gap along the side,
- At the next corner, (3 dc, ch 2, 3 dc).
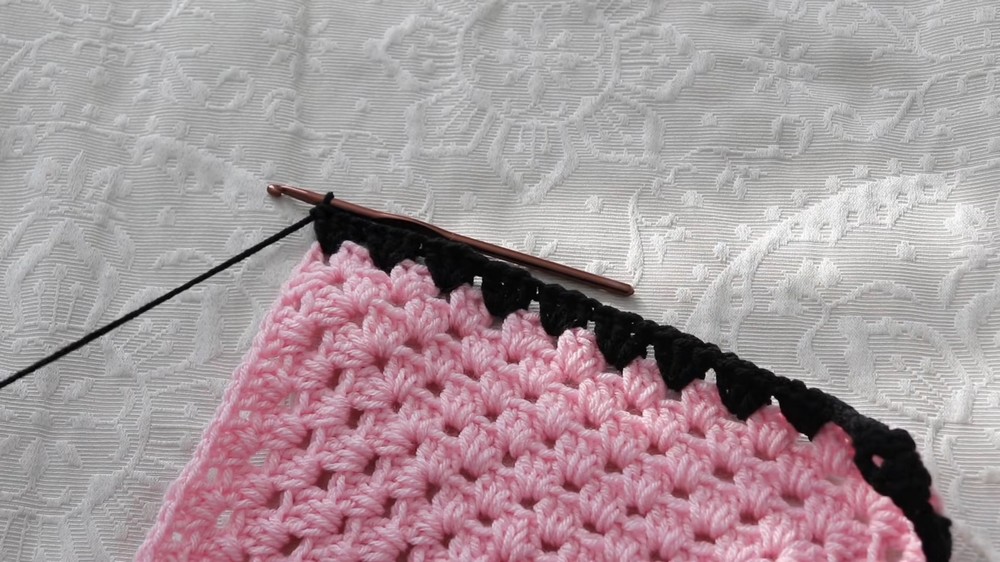
- Repeat for all edges to create a border with granny shell clusters AND corners.
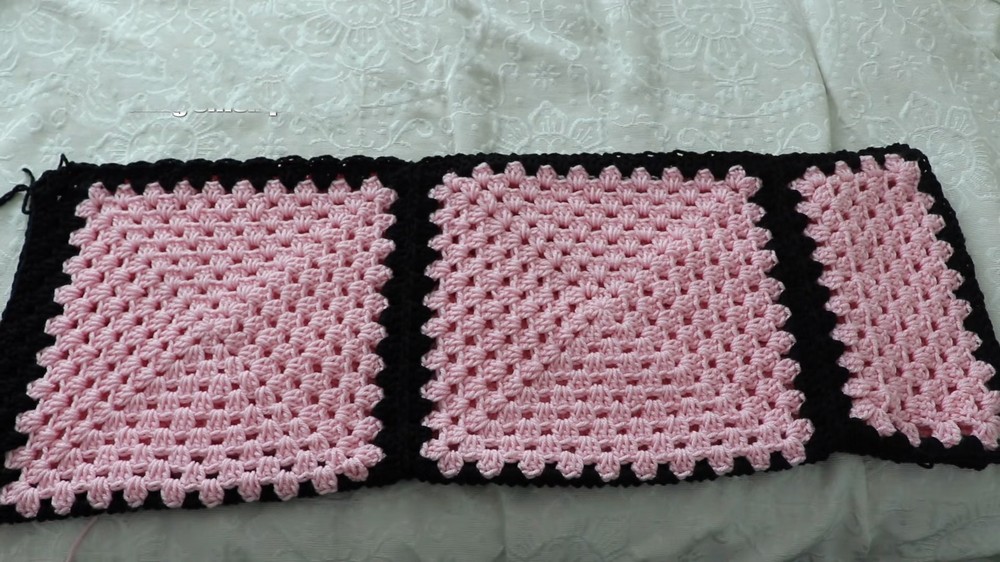
3. Assembly of Leg Panels
For ONE leg:
- Arrange as: Granny Square – Panel – Granny Square – Panel – join to form a strip.
- Line up the pieces RS facing out.
- With accent color or MC, join via “join-as-you-go granny method” (shell = 3 dc, join each cluster via slip stitch into adjacent panel’s gap, as described in video).
- Seam around the outer border for added cohesion.
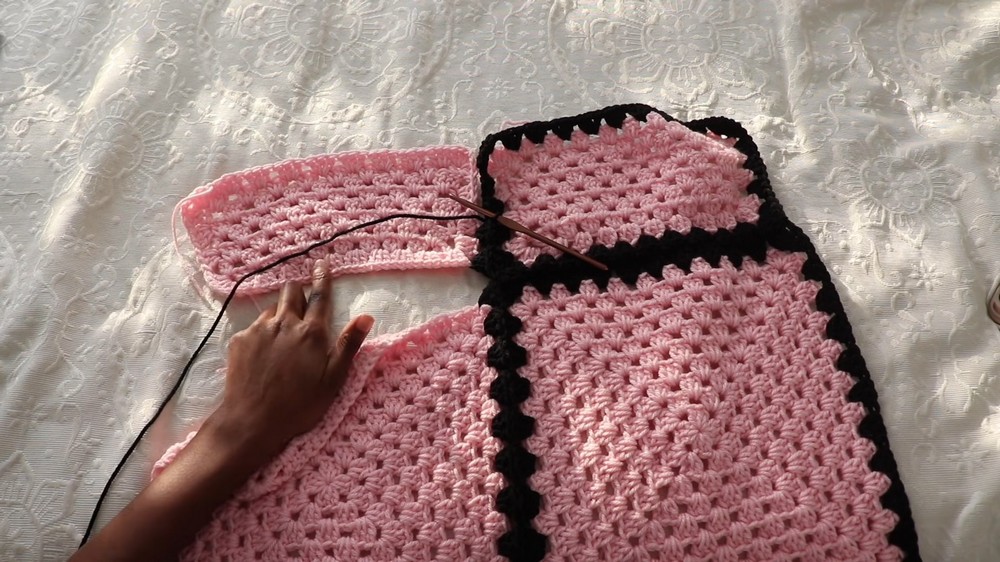
- After attachment, fold the strip in half vertically to form a tube.
- Wrong Side facing out (WS):
- Use sc or sl st to seam the two open vertical edges together, stopping about 9 stitches from the crotch to leave space for assembly.
- Wrong Side facing out (WS):
- Repeat entire process for the second leg.
4. Lengthening the Legs (Optional)
- Join yarn at the bottom edge (ankle) with a sl st.
- Ch 3, work 3 dc in each gap around the circumference, skipping ch-2 spaces at corners so the bottom remains straight.
- Sl st to first ch-3 to close, ch 3, repeat round for desired length extension.
- Make the same number of additional rows on both legs for uniformity.
5. Joining the Legs
- Turn one leg inside out (WS facing), other leg remains RS out. Place RS leg inside the inside-out leg, aligning raw crotch edges.
- Using sc, join crotch curve (from front to back through the crotch).
- Fasten off and weave in ends.
- Turn pants RS out.
6. Waistband Construction & Decrease
- Rejoin yarn at the waist edge (gap or corner).
- Work round: Ch 3, 2 dc in same gap as ch-3, 3 dc in each gap around, sl st to join.
- Decrease Row: At each side seam (or four evenly spaced spots), work [dc3tog across three adjacent spaces].
- dc3tog across three gaps:
- Yarn over, insert into gap, yo, pull through (3 loops), yo, pull through 2 (2 loops remain),
- Repeat for next two gaps (each time stopping with 1 more loop), then yos, pull through all 4 loops.
- dc3tog across three gaps:
- Stable Row: Ch 3, 2 dc in same gap, then 3 dc in each gap around (no decreases), sl st to join.
- Alternate: Repeat Decrease Row/Stable Row until waistband fits snugly at your waist/hips.
- Try on after each repeat to assess fit.
- Final Single Crochet Row:
- Sc in each st around, working [sc2tog (decrease), sc, sc, sc2tog, sc, sc] etc., as needed to snug up the top.
- Add Drawstring (optional):
- Chain a length long enough to tie around waist, weave through sc row.
- Chain a length long enough to tie around waist, weave through sc row.
7. Finishing
- Weave in all loose ends with darning needle (ensure the needle does not punch through to the RS for a clean finish).
- Block gently if desired for shape.
- Try on and celebrate your new granny pants!

Conclusion
You have now created a custom pair of granny square crochet pants, designed for flexibility of fit and highly customizable. The strategic placement of decreases and stable rows ensures a secure, flattering waistband, while the modular construction allows adaptation for size and style.
Pattern Correction & Tips
Corrections
- In classic granny square rounds, always remember: [3 dc, ch 2, 3 dc] in corners; 3 dc in between clusters.
- When forming the panels, check your counts frequently to avoid misalignment with the squares. The foundation chain for the panel is crucial for seamless assembly.
- Waistband decreases should be evenly spaced for an even gather.
Tips
- Measure and try on as you go, especially the panel and waistband sections.
- For beginners struggling with the pace, consult basic tutorials on granny squares and dc3tog for clarity.
- To prevent leg “highwaters,” err on the side of longer legs — the waistband may cause a drop in final fit.
- If you desire a “baggy” versus “fitted” look, adjust the number of granny square rounds and panels.