Free Crochet Elephant Pattern for Gifts and Nursery
Delight in charming companion with this free crochet elephant pattern that brings playful personality sparks joy & perfect gift for all ages.
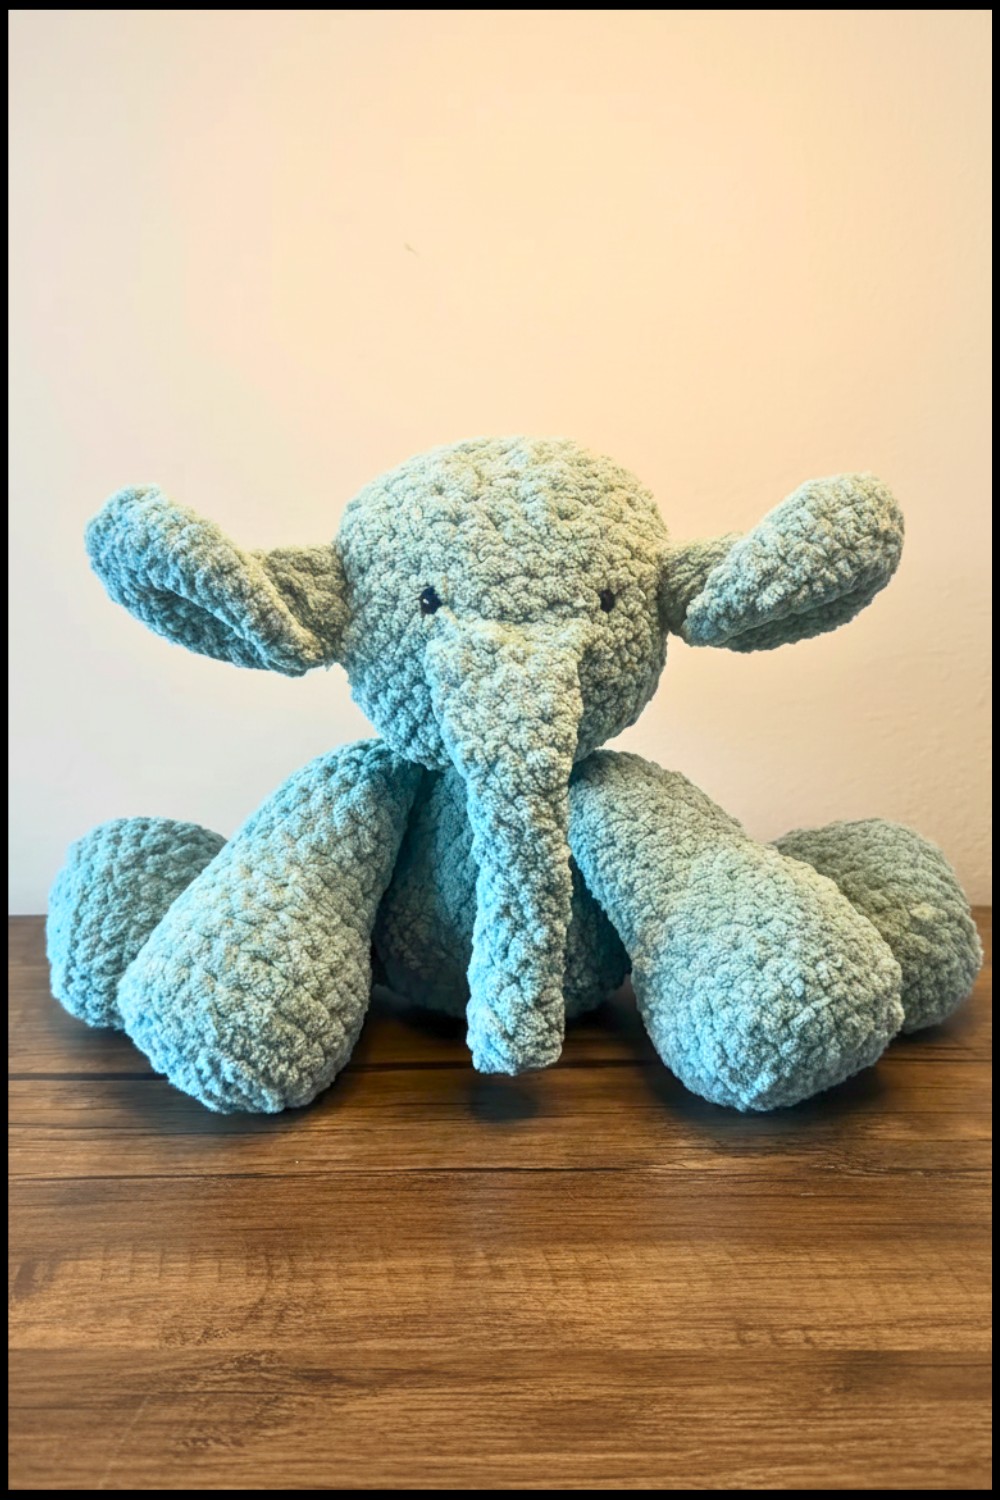
A tiny soft animal with big floppy ears and a gentle trunk waits to bring happiness to any home. Its peaceful face and round body make it the perfect gift for children or even adults looking for a comforting friend. Using the crochet elephant pattern you can make this cute little companion to add a touch of joy wherever you need it. With simple shapes and easy steps anyone can create their very own elephant in whatever colors they love making each one unique and special.
Crochet Elephant – Free Pattern for Beginners
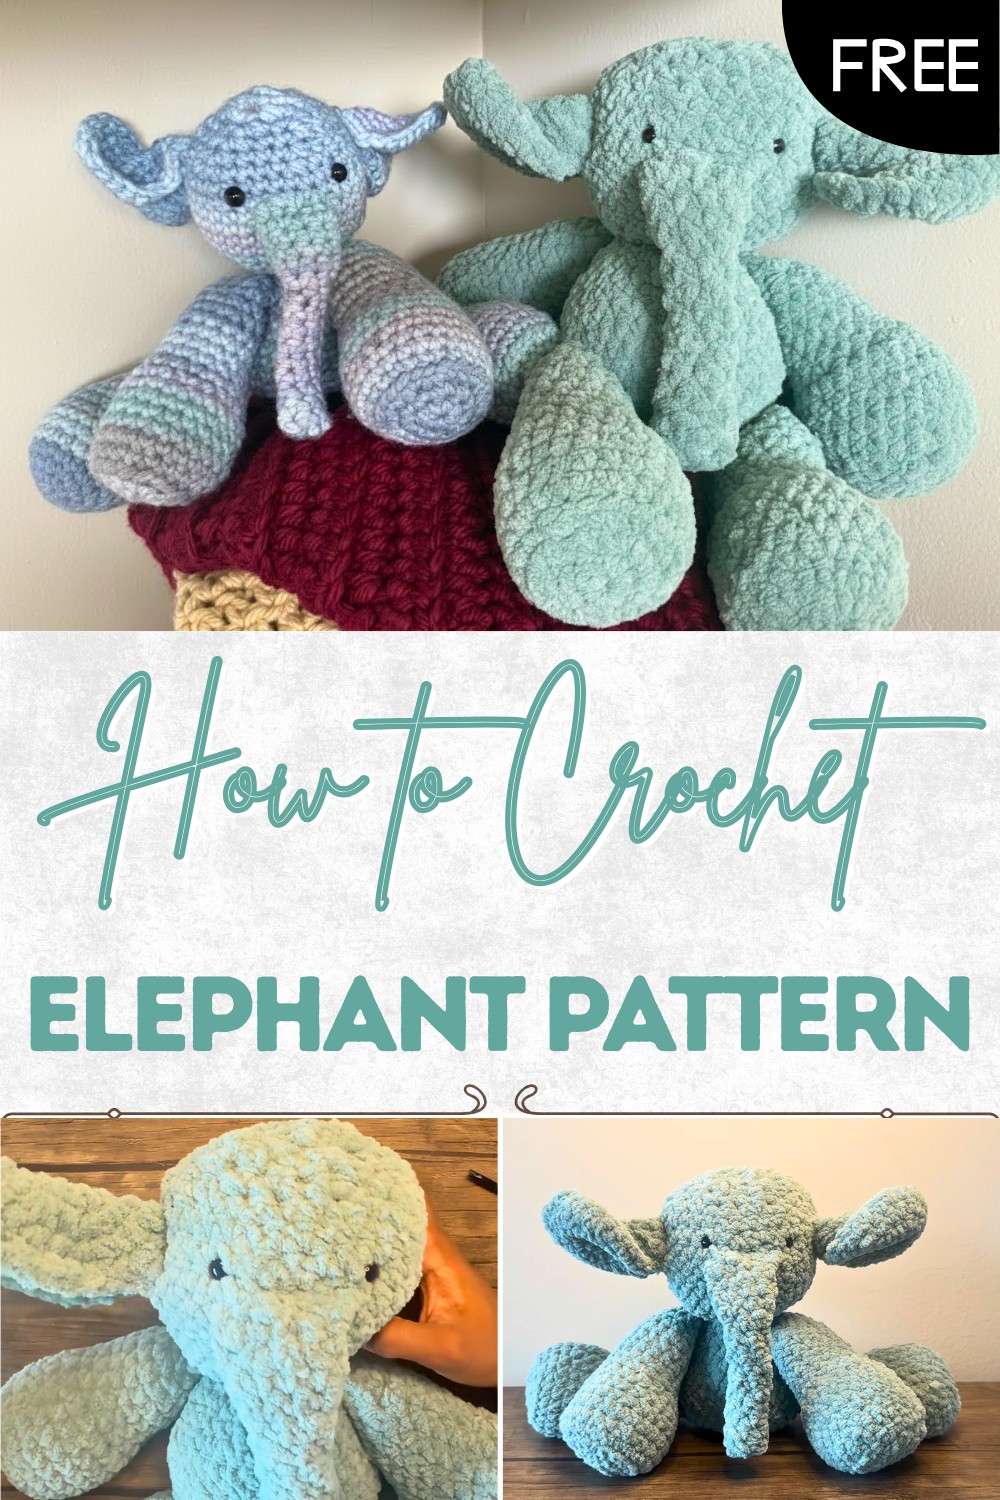
Place it on a shelf use it as a toy or even carry it in your pocket for cheerful company. The friendly style and soft feel bring smiles while teaching patience and creativity as you work on every stitch. Making this elephant transforms plain yarn into a happy buddy that fills your space with warmth friendship and a homemade spirit.
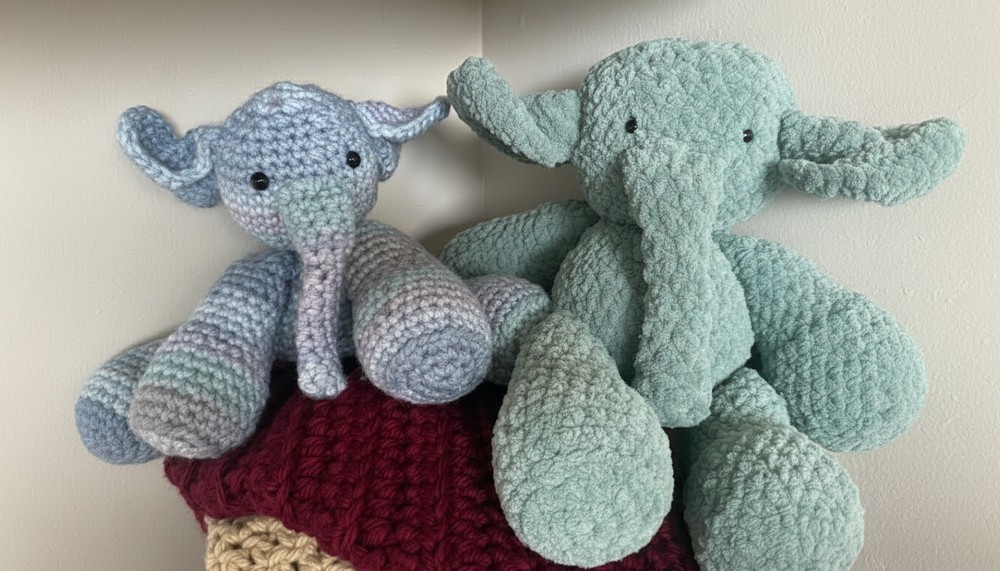
Amigurumi Elephant Crochet Pattern
Materials List
- Yarn: Super bulky weight (weight 6) polyester yarn
- Example: Bernat Blanket in Misty Green (approx. 100–150g)
- Hook: 5.5mm crochet hook
- Polyester fiberfill or yarn scraps (for stuffing)
- Yarn needle (for assembly and sewing parts)
- Scissors
- Stitch marker
- Safety eyes (Recommended: 12mm size or preferred)
- Optional: Sewing pins for positioning parts before sewing
Key Abbreviations (US Terms)
- ch = chain
- sl st = slip stitch
- sc = single crochet
- inc = increase (2 sc in same st)
- dec = decrease (single crochet two stitches together)
- st(s) = stitch(es)
- BLO = back loop only
Special Notes
- Pattern is worked in continuous rounds. Use a stitch marker to keep track of the first stitch in each round.
- Adjust safety eye size and yarn to personal preference.
- For best shape, stuff limbs and body firmly and evenly.
- Do not join rounds unless specified. Continue in a spiral.
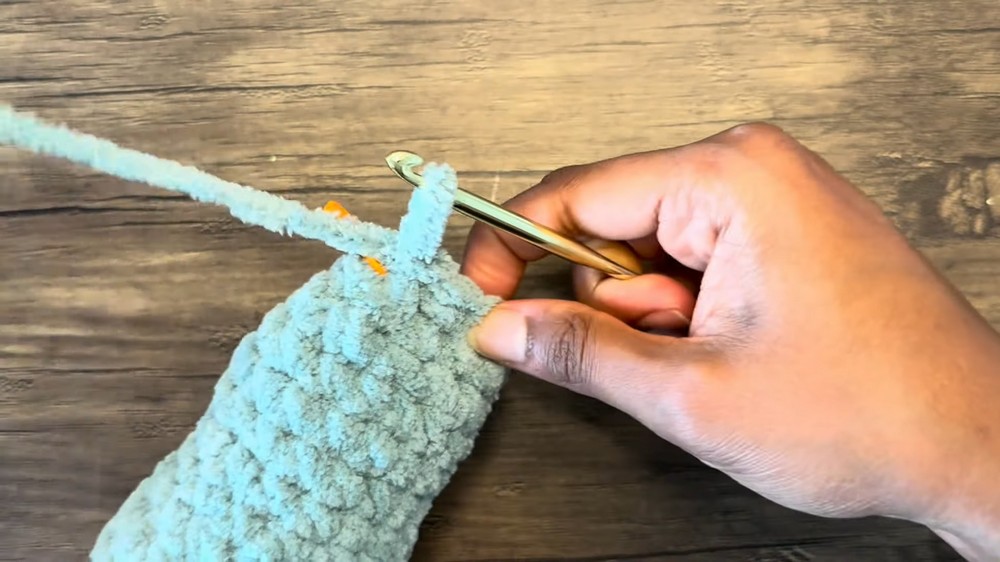
Pattern
Legs (Make 4)
- Begin with slip knot.
- Ch 2.
- Work 8 sc in 2nd ch from hook. (8 sts)

- Inc in each st around ([2 sc] in each st) (16 sts)
- [Sc in next st, inc in next st] repeat around (24 sts)
- BLO: Sc in each st around. (24 sts)
- Sc in each st around for 4 more rounds (Rounds 5–8). (24 sts per round)
- [Sc, dec] repeat around (16 sts)
- Dec: Insert hook in next st, pull up loop, insert in following st, pull up loop (3 loops on hook), yarn over, pull through all.
- Sc in each st around for 5 more rounds (Rounds 10–14). (16 sts per round)
- [Sc in next 2 sts, dec] repeat around (12 sts)
- Sc in each st around (12 sts)
- [Sc, dec] repeat around (8 sts)
- Sl st to next st, fasten off, and leave a long tail for sewing or weaving in.
- Stuff the leg with fiberfill or yarn scraps.
Tip: Make all four legs before starting the body.
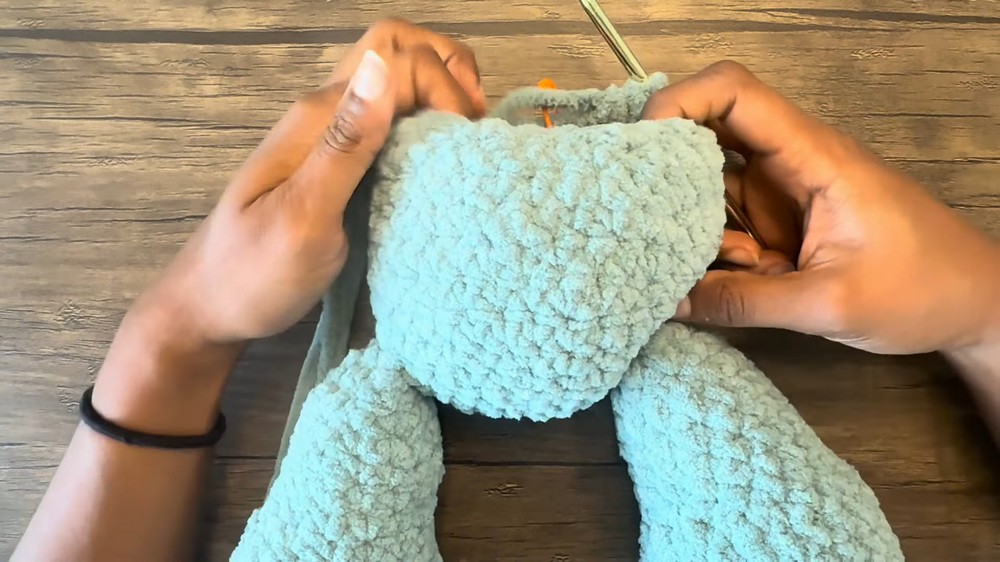
Body
- Slip knot, ch 2.
- Work 6 sc in 2nd ch from hook. (6 sts)
- Inc in each st around ([2 sc] in each st) (12 sts)
- [Sc, inc] repeat around (18 sts)
- [Sc, inc, sc] repeat around (24 sts)
- [Sc in next 3 sts, inc] repeat around (30 sts)
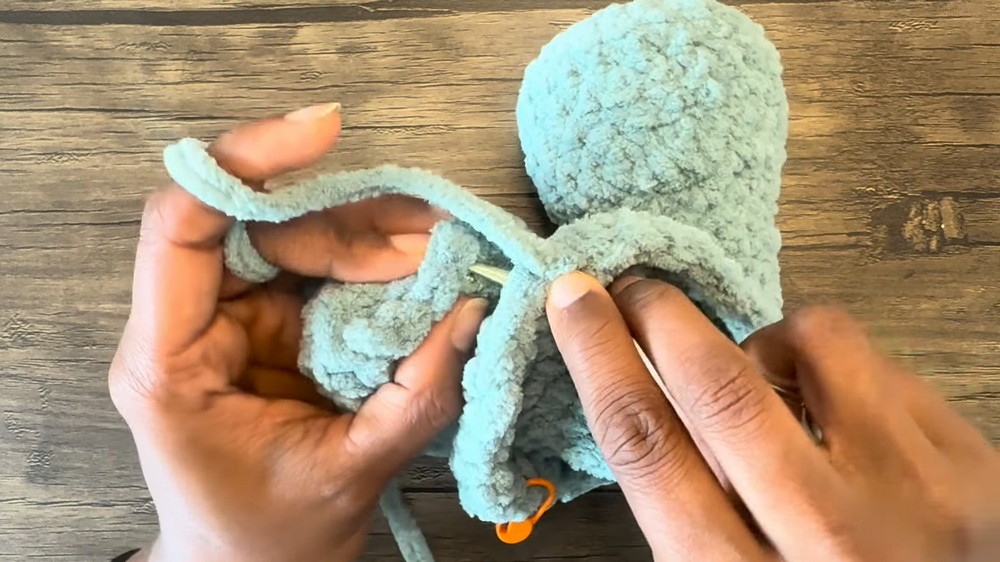
Attaching Legs (On Round 6)
- Sc in next 6 sts.
- Join first leg to next 4 sts: For each joined st, insert through both the body and the leg, work 1 sc.
- Sc in next 11 sts.
- Join second leg to next 4 sts as above.
- Sc in remaining 5 sts (Make sure you have 30 sts at end of round).
- [Sc in next 4 sts, inc] repeat around (36 sts)
8–10. Sc in each st around (36 sts per round)
Shaping
11. [Sc in next 4 sts, dec] repeat around (30 sts)
- Sc in each st around (30 sts)
- [Sc in next 3 sts, dec] repeat around (24 sts)
- [Sc in next 2 sts, dec] repeat around (18 sts)
Attaching Arms (Round 15)
- Sc in next 4 sts.
- Join first arm to next 4 sts (as with legs).
- Sc in next 5 sts.
- Join second arm to next 4 sts (as with legs).
- Sc in last st. (18 sts)
- Stuff the body at this point.
- [Dec] around (9 sts)
- Do not fasten off. Continue directly to head.
Head
- Inc in each st around ([2 sc] in each st) (18 sts)
- [Sc in next 2 sts, inc] repeat around (24 sts)
- [Sc in next 3 sts, inc] repeat around (30 sts)
- [Sc in next 4 sts, inc] repeat around (36 sts)
5–10. Sc in each st around (36 sts per round)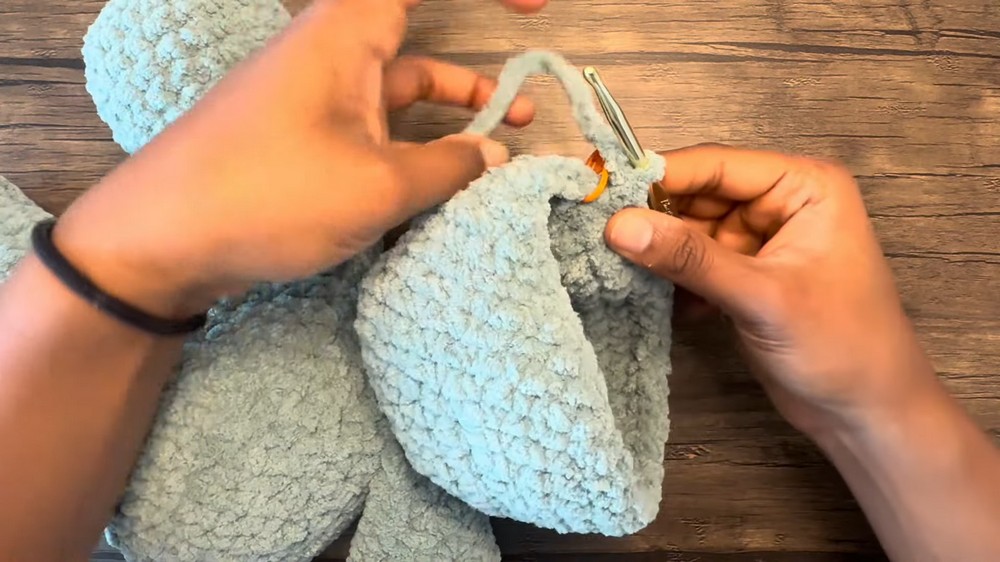
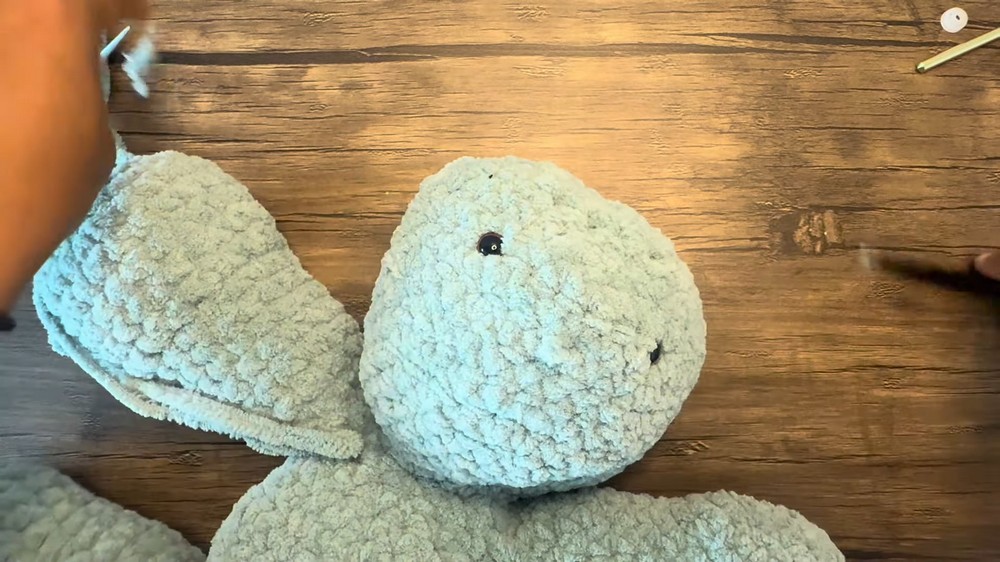
Place Eyes:
- After completing Round 26, insert safety eyes approx. two rows down from the head opening and about 7 sts apart, in line with top of arms.
- [Sc in next 4 sts, dec] repeat around (30 sts)
- [Sc in next 3 sts, dec] repeat around (24 sts)
- [Sc in next 2 sts, dec] repeat around (18 sts)
- Stuff the head here.
- [Sc, dec] repeat around (12 sts)
- Dec around (6 sts)
- Fasten off, thread yarn through remaining sts and pull tight to close hole.
- Weave end into head to secure.
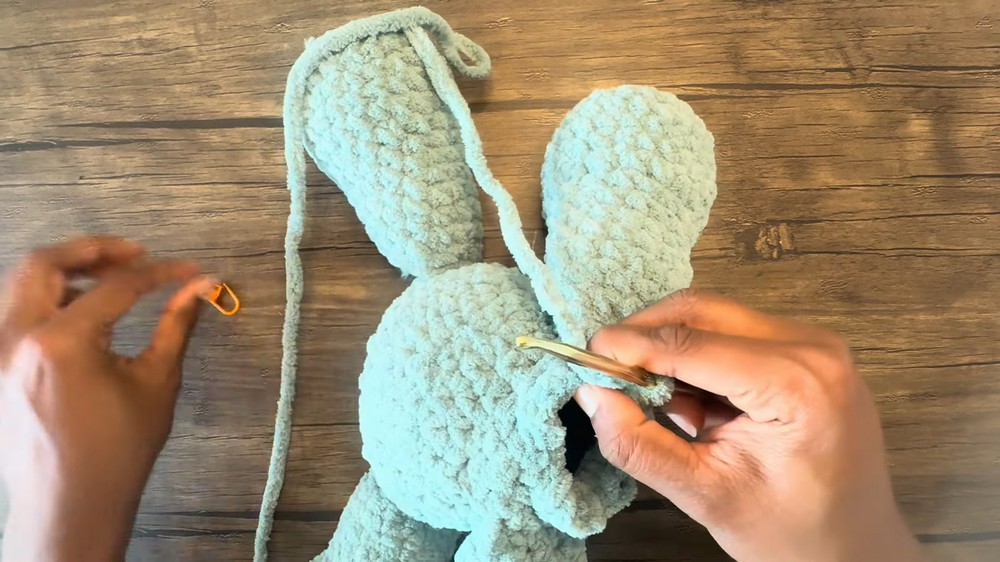
Ears (Make 2)
- Slip knot, ch 2.
- Work 8 sc in 2nd ch from hook.
- Inc in each st around (16 sts)
- [Sc, inc] repeat around (24 sts)
- [Sc in next 3 sts, inc] repeat around (30 sts)
- [Sc in next 2 sts, inc, sc in next 2 sts] repeat around (36 sts)
- Sl st to first st, fasten off, leaving a long tail for sewing.
Fold each ear slightly (about a quarter fold) before sewing for a cupped shape.
Trunk
- Slip knot, ch 2.
- Work 6 sc in 2nd ch from hook. (6 sts)
3–11. Sc in each st around for 9 rounds (6 sts per round) - [Sc, inc] repeat around (9 sts)
13–15. Sc in each st around (9 sts per round) - Flatten the opening and sc across to close (5 sc)
- Fasten off, leaving a length for sewing.
Assembly
- Stuff all limbs and the body as you assemble.
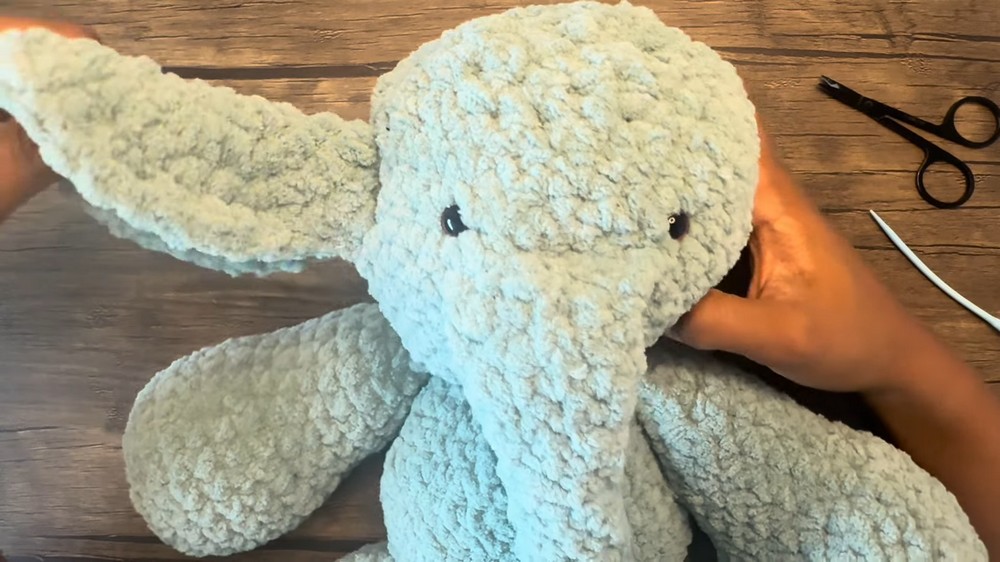
- Sew the trunk to head, positioning just below and between the eyes.
- Fold and sew ears to head, about 4–5 sts out from the eyes, as described.
- Secure and weave in all loose yarn tails.
- (Optional): Shape the trunk into a curl and stitch in place.
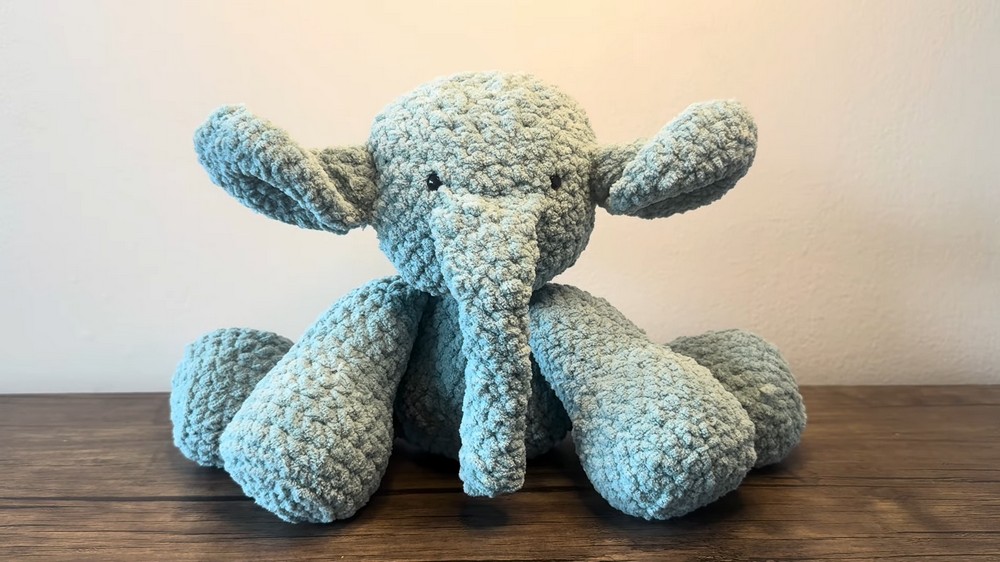
Conclusion
You now have a huggable handmade elephant! Adjust yarn and hook size for different finishes, add fun accessories, or embroider extra details for a custom look.
Pattern Corrections & Tips
Correction:
- For joining legs and arms, always make sure to stitch through BOTH body and limb stitches for a sturdy join.
- If rounds do not align perfectly after leg/arm joins, adjust by having an extra sc before/after joining for symmetry.
Tips:
- Use locking stitch markers to make tracking rounds easier.
- Stuff limbs and body firmly but not overstuffed, to maintain soft shape.
- Safety eyes are best added before closing the head, aligning for a friendly expression.
- Use invisible fasten-off and careful seaming for a polished finish.