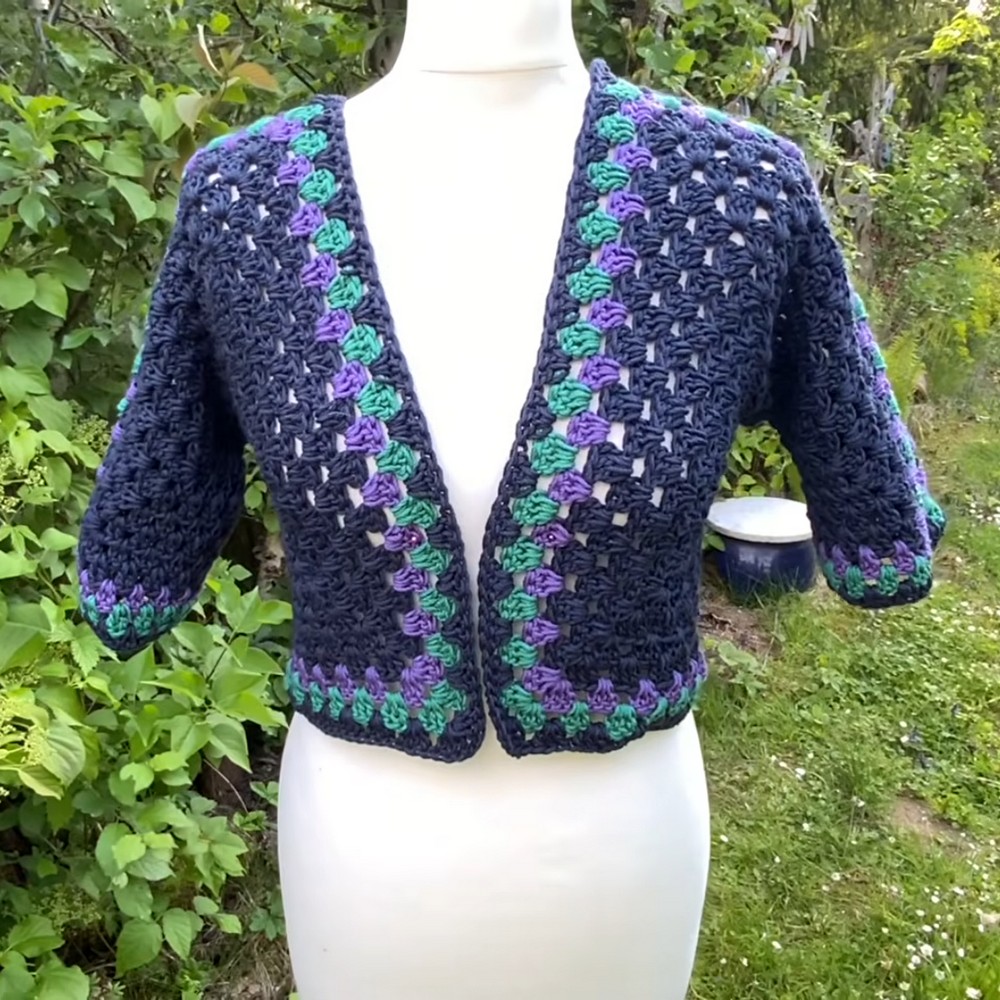
Comfy Free Crochet Cardigan Pattern with Full Tutorial

Upgrade your wardrobe with a Free Crochet Cardigan Pattern that adds stylish layering, cozy warmth, and a timeless look to your outfits effortlessly.
There’s something truly special about adding a handmade layer to your wardrobe that combines comfort and style. The free crochet cardigan pattern from Petra Perle beautifully captures that balance with its elegant yet cozy design. I found this pattern to be both enjoyable and rewarding, thanks to its flattering fit and adaptable look.
Free Crochet Cardigan Pattern + Video Tutorial
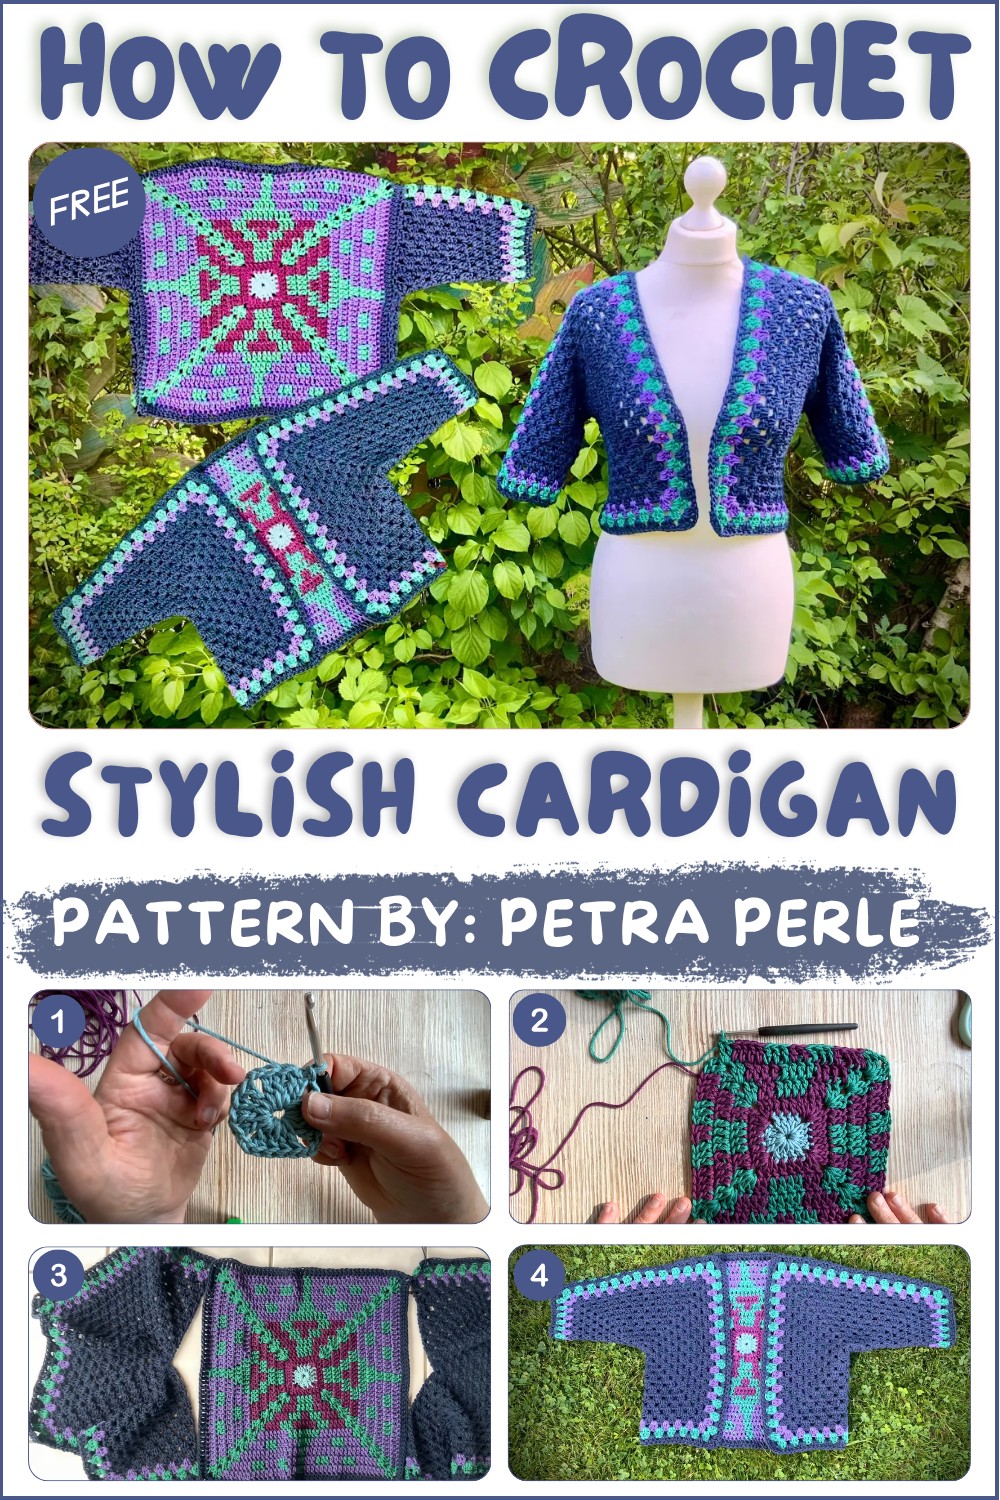
This cardigan feels light but provides just the right amount of warmth, making it a versatile choice for various seasons. Its subtle texture adds a touch of charm, enhancing any outfit without overwhelming it. Whether paired with casual everyday pieces or worn for a relaxed get-together, this crochet cardigan fits effortlessly into many situations.
In addition to being a fantastic piece for yourself, it makes a meaningful gift. A handmade cardigan shows care and attention, and can easily be customized in size and color to match the recipient’s preferences. Giving a personal, hand-created garment is a wonderful way to share warmth and affection.
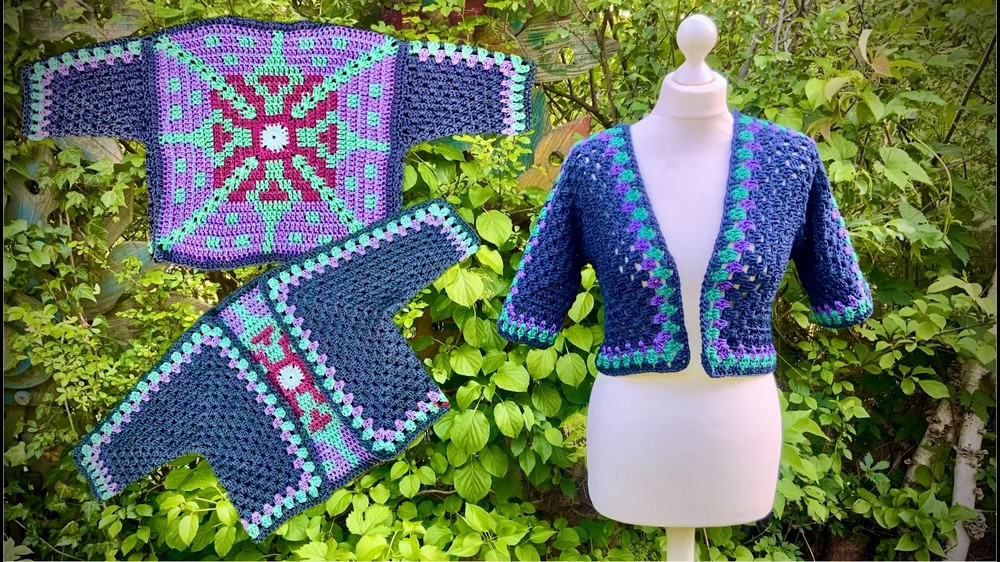
Petra Perle’s tutorial is clear and inviting, suitable for crocheters at different experience levels who want to create something both beautiful and useful. If you’re searching for a project that offers a stylish, comfortable addition to your closet, don’t miss out on exploring this free crochet cardigan pattern. It’s a delightful way to bring both personality and coziness into your wardrobe.
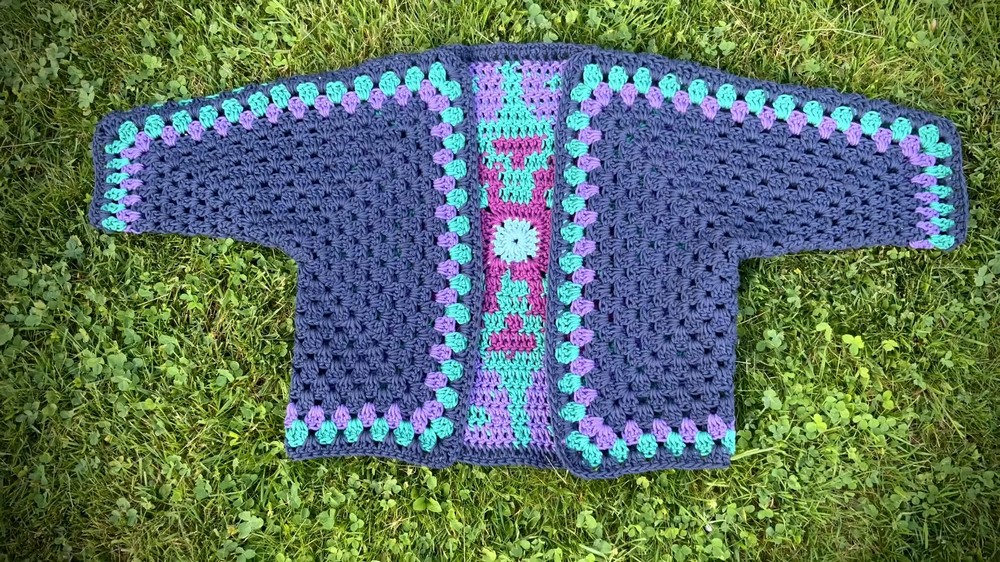
Crochet Granny Square Jacket Pattern
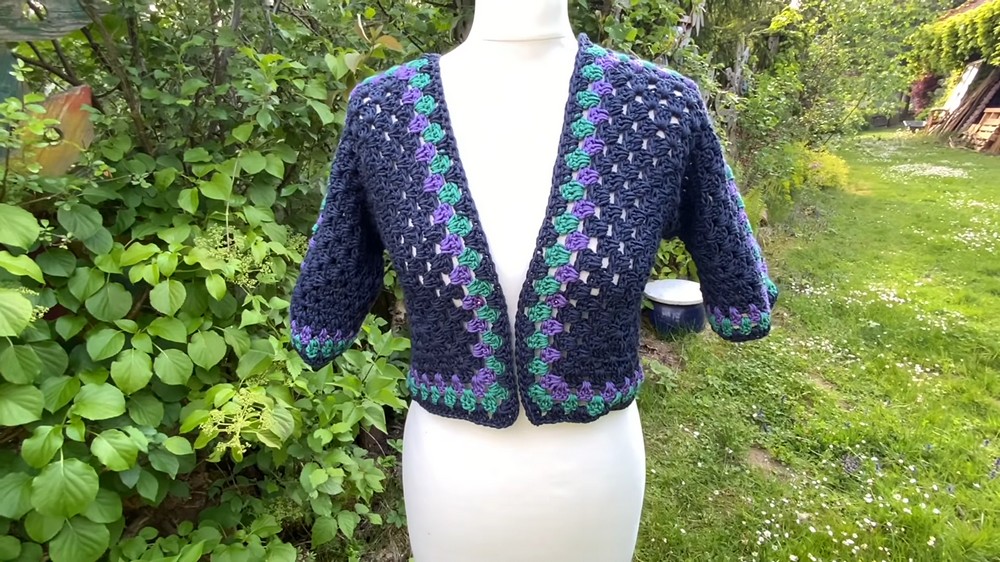
This pattern describes how to create a vibrant and cozy crochet jacket using a large central granny square for the body and two separate granny square sleeves, in a style reminiscent of the popular hexagon jacket. You’ll use yarn with a length of 65 meters per 50 grams and a 4.5mm crochet hook. The design builds upon color changes and traditional granny square techniques, resulting in a striking, comfortable garment.
Quick Overview of Pattern
- Central granny square forms the body of the jacket.
- Color changes in every round for bold stripes and accents.
- Granny square sleeves, worked in rows for shaping.
- Assembly involves strategic seaming and folding for the armholes.
- Final finishing ensures structured edges and clean seams.
Notes
- Color changes are key to both the visual appeal and the structure.
- Each round increases the size of the granny square and adds more color placement options.
- Sleeve shaping uses fewer stitches in the narrowing sections to create a fitted sleeve.
- The jacket is constructed from squares, assembled together with single crochet seams for strength and neatness.
Skill Level
Advanced Beginner / Intermediate
You should be comfortable with:
- Basic granny squares
- Changing colors while working
- Working in the round and in rows
- Crocheting post stitches for clean seams
Materials
- Yarn: 65m per 50g skein, multiple colors as desired (wine red, green, purple, dark blue)
- Crochet hook: 4.5mm
- Scissors
- Yarn needle for weaving ends
- Optional stitch markers for placement and assembly
Measurements / Sizing
- Central granny square should be sized to fit from armpit to armpit across your back/chest.
- Sleeve length matches the side edge of the completed central granny square.
Schematic (description):
- The central square forms the body.
- Sleeve length is equal to the side edge of the central square.
- Corners are folded to create armholes and shoulder sections.
Gauge
- One round of the granny square should yield consistent stitch size and structure.
- Gauge is not critical but match rounds and sizing to your body for fit.
Stitch Abbreviations
- ch = chain
- sl st = slip stitch
- dc = double crochet
- sc = single crochet
Special Stitches
- Granny Corner: [3 dc, 2 ch, 3 dc] worked into corner space.
- Color Change: On last yarn over of previous stitch, switch to new color.
The Crochet Pattern
The Central Granny Square (Body)
Round 1:
- Begin with 5 chain stitches, join with a slip stitch to form a circle.
- Chain 3 (counts as the first double crochet).
- In the ring: work 3 double crochets, 2 chain stitches (corner).
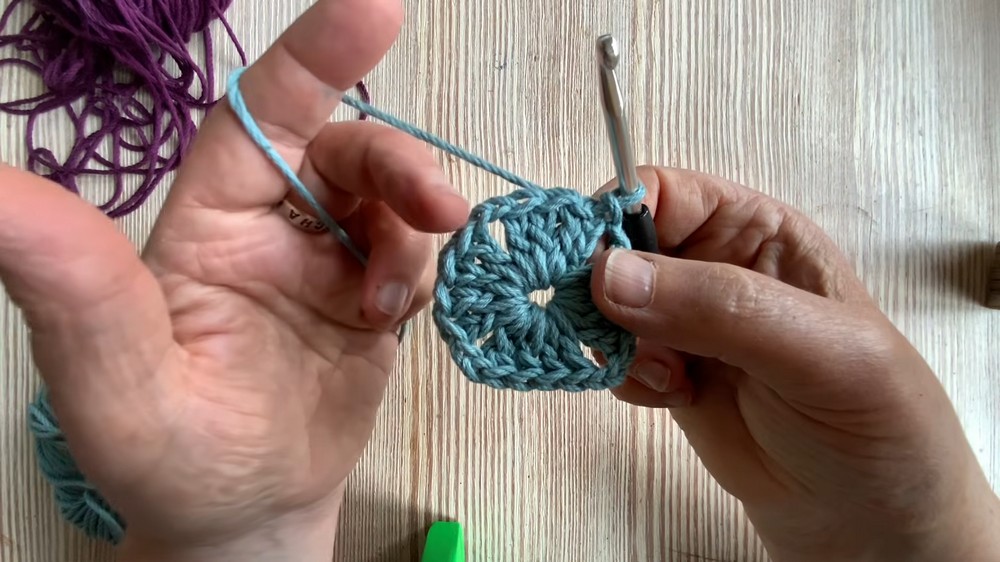
- Repeat [3 dc, 2 ch] for four corners total.
- Join with a slip stitch in the top turning chain.
Round 2:
- Join a new color in any corner.
- Chain 3, work 1 dc, 2 ch, 2 dc into the corner space.
- Work double crochets across the sides, including stitches into the turning chain spaces as you go.
- In each corner: [2 dc, 2 ch, 2 dc].
- Work around, switching colors (wine red, green) as shown.
- Join with a slip stitch in top turning chain.
Rounds 3-6:
- Continue increasing by working into every corner: [2 dc, 2 ch, 2 dc].
- The number of stitches between corners will increase each round.
- Use color patterns as specified:
- Round 3: 4 stitches (green/wine red) per side.
- Round 4: 4 stitches red, 4 stitches green, 4 stitches red per side.
- Round 5: 4 stitches red, 3 green, 2 red, 3 green, 4 red per side.
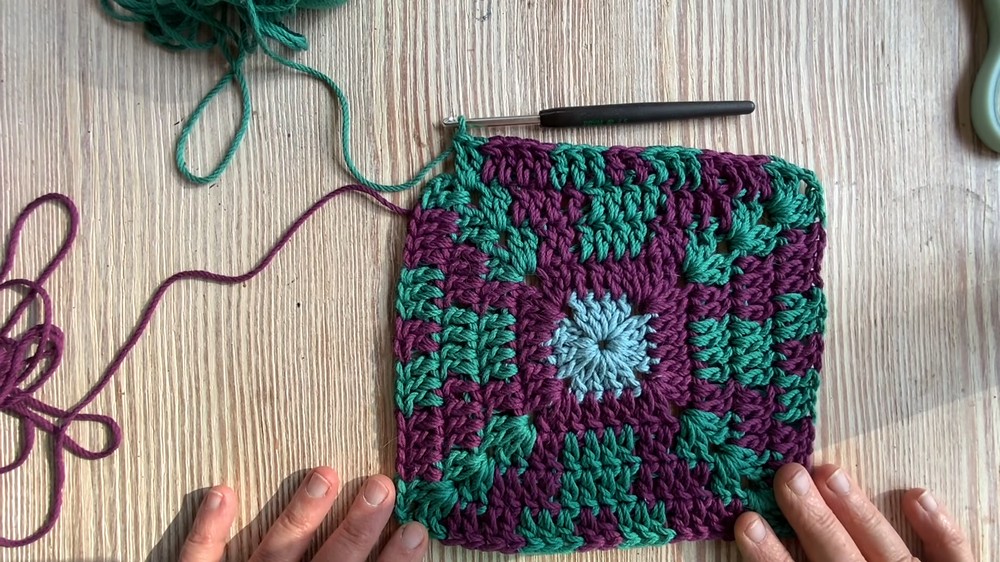
- Round 6: 4 stitches red, 3 green, 6 red, 3 green, 4 red per side.
- Start each round in a corner. Continue increasing and maintain color placements.
Rounds 7-10:
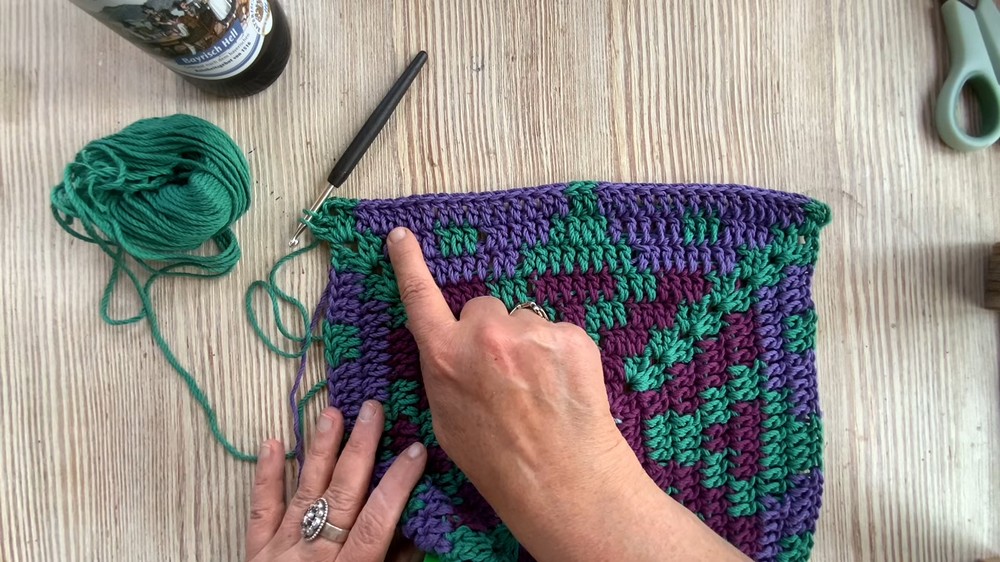
- Switch to purple and continue granny square increases ([2 dc, 2 ch, 2 dc] in corners).
- Maintain color patterns to create green “dots” or accents along the sides.
- Use purple for the majority of the square so the “dot” effect is visible.
- Continue working each round until the square spans armpit to armpit for your body size.
Final Round:
- Use dark blue yarn for a final round.
- Work 1 double crochet in every stitch around, including corners.
- This creates a solid base for sleeve attachment and a finished edge.
The Sleeves
Foundation:
- Chain 5, join with a slip stitch to make a ring.
- Chain 3, work 2 dc, 2 ch.
- Repeat [3 dc, 2 ch] for four corners total.
- Join with slip stitch to top chain.
Rows 1-X:
- Sleeves are worked back and forth in rows.
- Each corner: [3 dc, 2 ch, 3 dc].
- To narrow sleeve: in “triangle” area, work only 2 dc instead of 3 dc.
- Build up sleeve rows, always maintaining corners for structure.
- Add double crochet groups (3 dc) between corners as the sleeve grows and widens.
- Continue until sleeve length matches the side edge of the central granny square.
Finalizing Sleeves:
- Add rows until the sleeve is as long as needed.
- Make final adjustments for symmetry and fit.
Assembly & Finished Size
Placement:
- Position sleeve pieces against the straight edges of the main granny square.
- Ensure corners align for armhole formation.
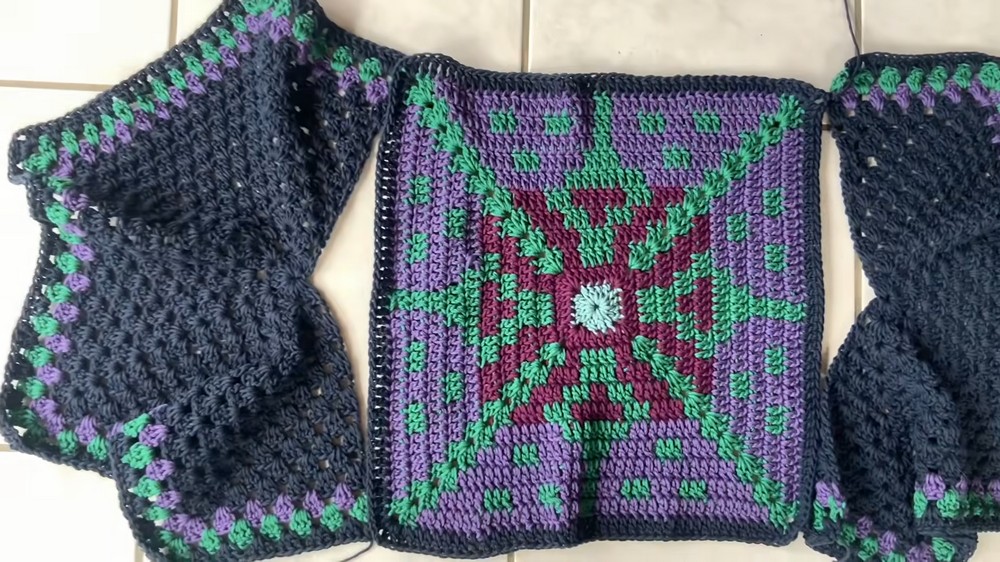
Seaming:
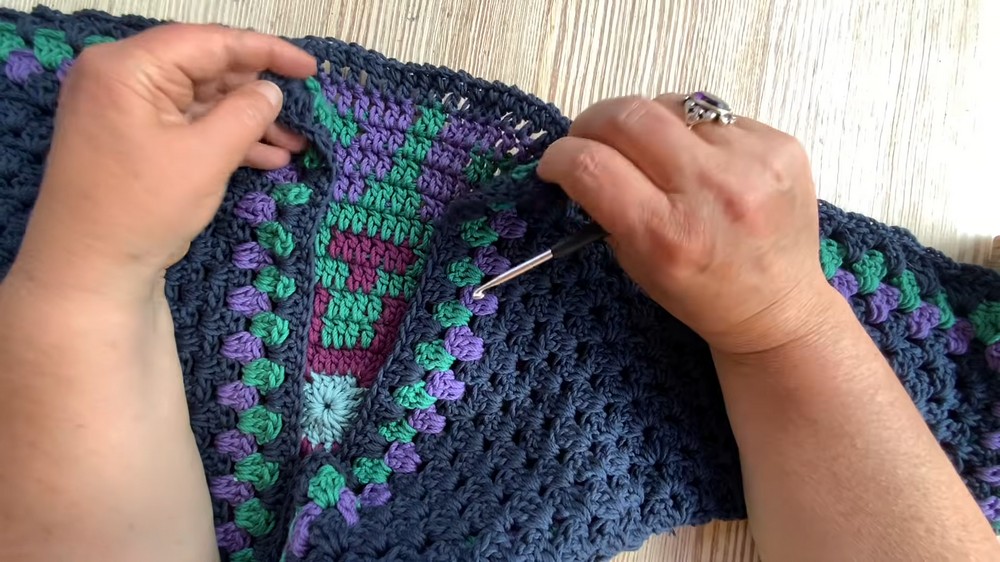
- Join edges using single crochet, grabbing every second stitch from the front and the back pieces.
- This produces a clean, strong seam.
Final Shape:
- Fold corners to create armholes.
- Close the shoulder and sleeve top seam:
- Use single crochets, chain stitches, and groups (2 sc, 3 ch, 2 sc) as needed to match pattern sections.
- Secure all seams and weave in yarn ends neatly.
Conclusion
You’ve completed a colorful, structured granny square jacket! This pattern uses classic, easy granny techniques with a modern twist, layered colors, creative construction, and practical shaping. The jacket is designed for playful colorwork and comfortable fit, with the sleeves and body seamlessly joined for a polished look.