Free Crochet Pattern: Bunny With Carrot For Spring Decor

Create playful joy with this Free Crochet Bunny With Carrot Pattern that’s perfect for adding a whimsical touch to your next adorable and heartwarming project.
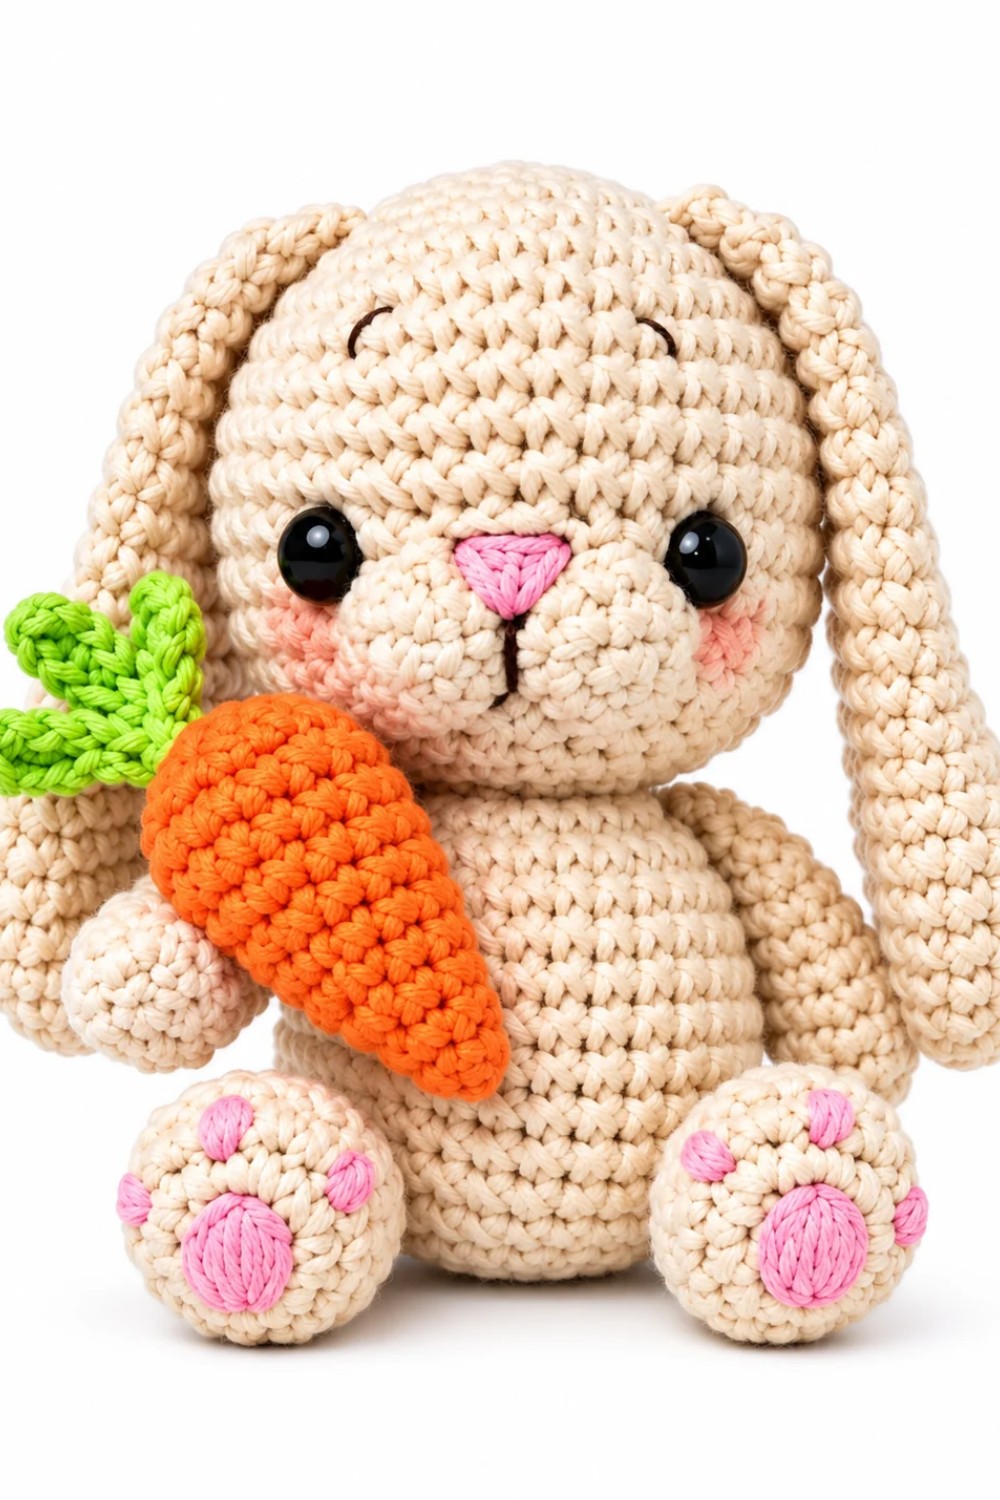
A tiny bunny holding a carrot makes a delightful handmade toy for spring and Easter. The Free Crochet Bunny With Carrot Pattern is a sweet project that brings together a cute animal and a fun little accessory. Its soft body, long ears, and cheerful face give it a lovely look that can brighten any space.
The bunny has a charming shape that makes it easy to display on a shelf, desk, or bedside table. The small carrot adds a playful touch and makes the toy even more special. Together, these details create a cute design that children and amigurumi fans can enjoy. It can also be used as an Easter decoration, a small gift, or a lovely addition to a handmade toy collection.
Adorable Free Bunny With Carrot Crochet Pattern
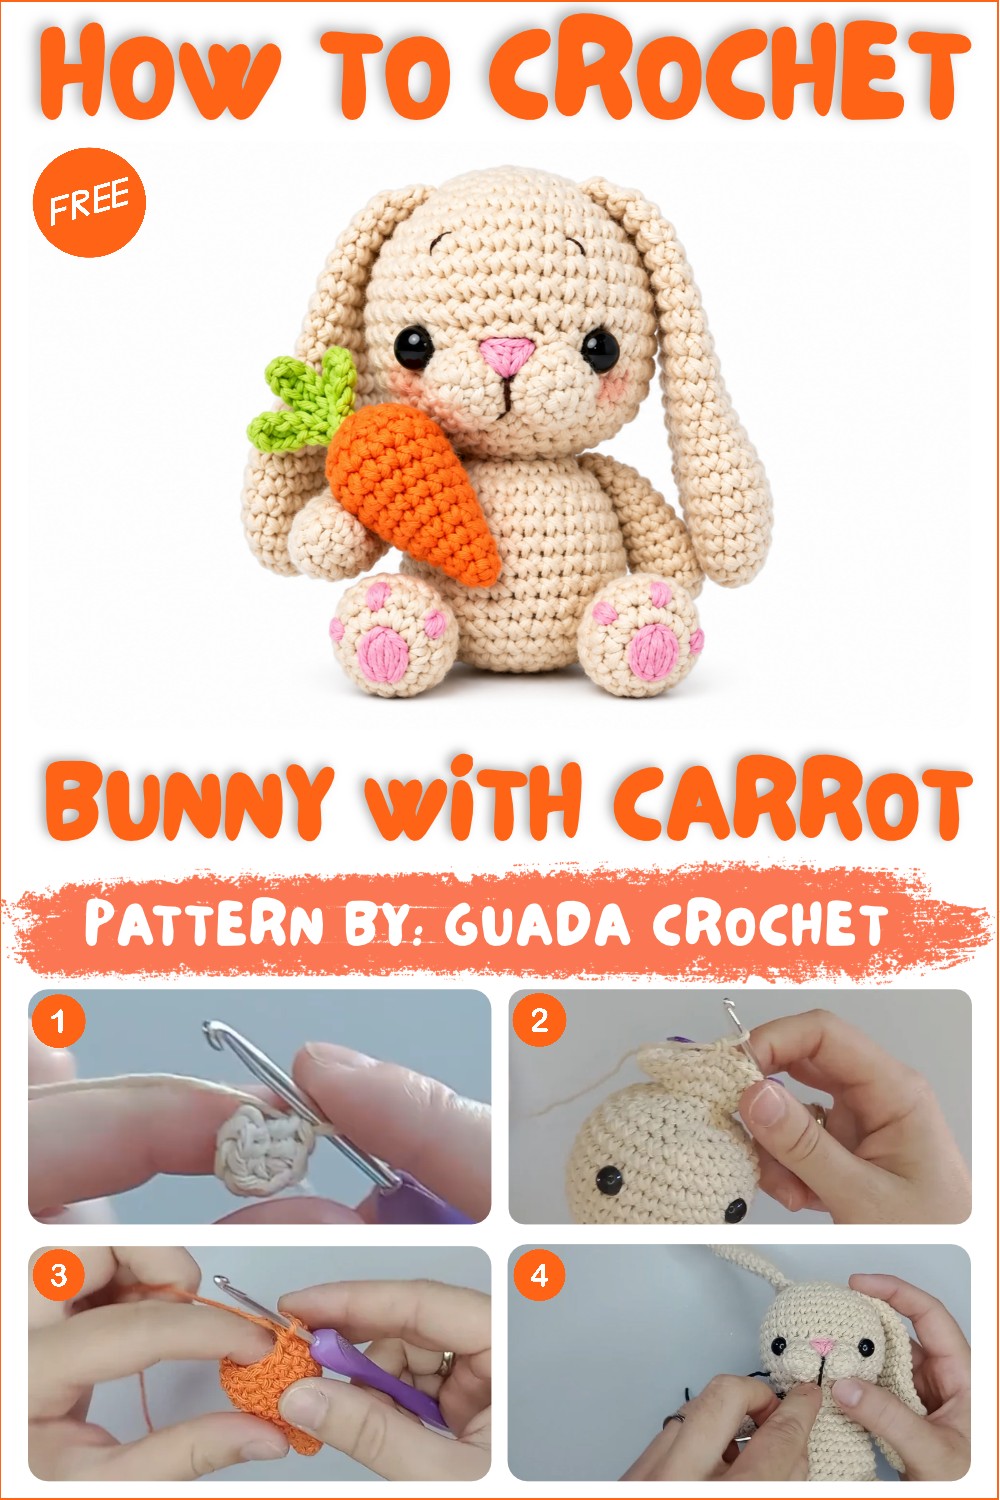
You can make the bunny in soft white, cream, grey, or light brown shades to give it a gentle look. A bright orange carrot adds a nice pop of color and makes the little figure stand out. Its compact size is also useful when you want to create a decoration that does not take up much room. You can even choose different colors to make a whole group of bunnies with their own style.
About The Channel:
For those who enjoy making cute crochet animals, this design from the YouTube channel Guada crochet is a lovely project to explore. It brings the bunny and its carrot together in one sweet amigurumi creation.
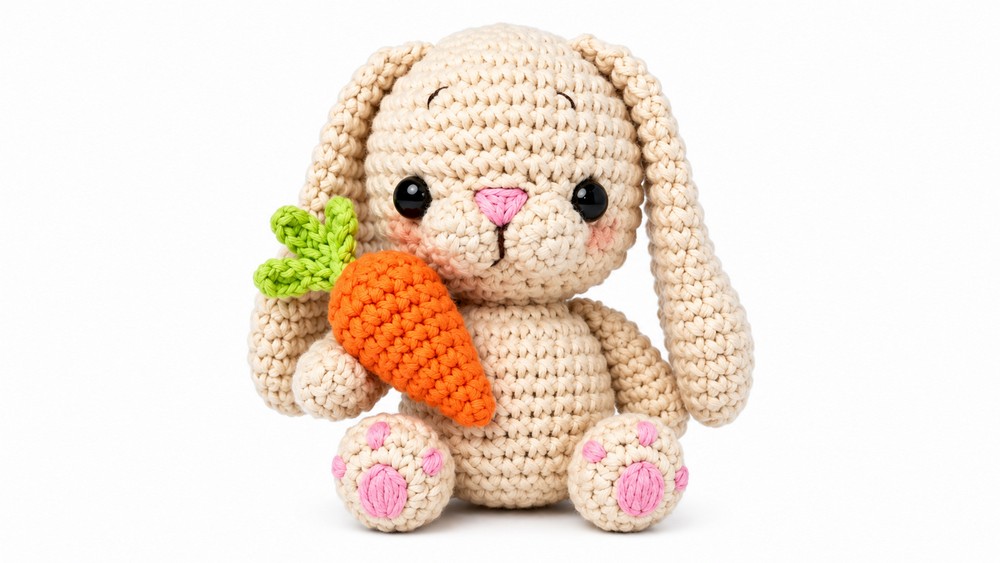
This project may suit beginners who are familiar with basic crochet skills, as well as experienced makers who enjoy small character toys. It is a fun way to practice making simple shapes and adding small details. The finished bunny can become a special handmade keepsake for Easter, birthdays, or any day that needs a little extra charm.
Medium-Sized Amigurumi Bunny and Small Carrot Crochet Pattern
This comprehensive tutorial guides you through crocheting a charming medium-sized amigurumi bunny accompanied by a small carrot. Using basic amigurumi techniques with cotton yarn and a 3 mm hook, you will create each part—the bunny’s head, body, ears, arms, legs, muzzle, and nose—as well as the carrot with its leaves. This adorable project is perfect for gifting or display, combining simple stitches with shaping techniques to bring your creations to life.
Quick Overview of the Pattern
- The bunny and carrot are crocheted in the round using single crochet stitches.
- Shaping is achieved using increases and decreases.
- The bunny is made with beige cotton yarn, while the carrot uses orange and green yarn.
- Embroidery threads are used to add subtle facial details.
- Safety eyes are incorporated for expressive features.
Notes
- Maintain a tight gauge to prevent stuffing from showing through.
- Use a stitch marker to keep track of rounds, especially when increasing and decreasing.
- Insert safety eyes carefully—between rounds 12 and 13 for the bunny head with appropriate spacing (eight stitches apart).
- Crochet parts are worked mostly continuously — do not join rounds unless specified.
- Embroidery is done at the end, allowing for precision in facial features.
Skill Level
Intermediate crocheters who are comfortable with:
- Creating a Magic Ring (MR).
- Working continuous rounds with single crochet (sc).
- Performing increases (inc) and decreases (dec).
- Counting stitches accurately.
- Basic assembly and simple embroidery.
Materials
- Cotton Yarn: Approximately 2mm thickness; beige for the bunny, orange and green for the carrot.
- Embroidery Thread: Pink and black for facial details.
- Safety Eyes: 8mm or 10mm size.
- Crochet Hook: 3 mm.
- Stitch marker, scissors, yarn needle.
- Siliconized fiberfill stuffing.
Measurements / Sizing
- Bunny is medium-sized, approximately 15-20 cm tall depending on tension.
- Carrot is small, approx. 5-7 cm in length.
- Final dimensions depend on yarn choice and personal tension.
Gauge and Stitch Pattern
- The project is worked using single crochet stitches in continuous rounds.
- Gauge is not critical, but tightness influences the final look and durability.
- Stitch pattern involves basic sc, with increases and decreases to shape the forms.
Stitch Abbreviations
| Abbreviation | Meaning |
|---|---|
| MR | Magic Ring (adjustable loop start) |
| sc | Single crochet |
| inc | Increase — two single crochets in one stitch |
| dec | Decrease — single crochet two stitches together |
| sl st | Slip stitch |
| ch | Chain stitch |
| hdc | Half double crochet |
Special Stitches
- Magic Ring (MR): Creates a tight closed center, essential for amigurumi round starts.
- Increase (inc): Two sc in one stitch to widen the piece.
- Decrease (dec): Crochet two stitches together to taper or shrink the piece, providing shaping.
The Crochet Pattern!
Rabbit Pattern
Head & Body
- R1: Create MR, crochet 6 sc into ring (6 sts).
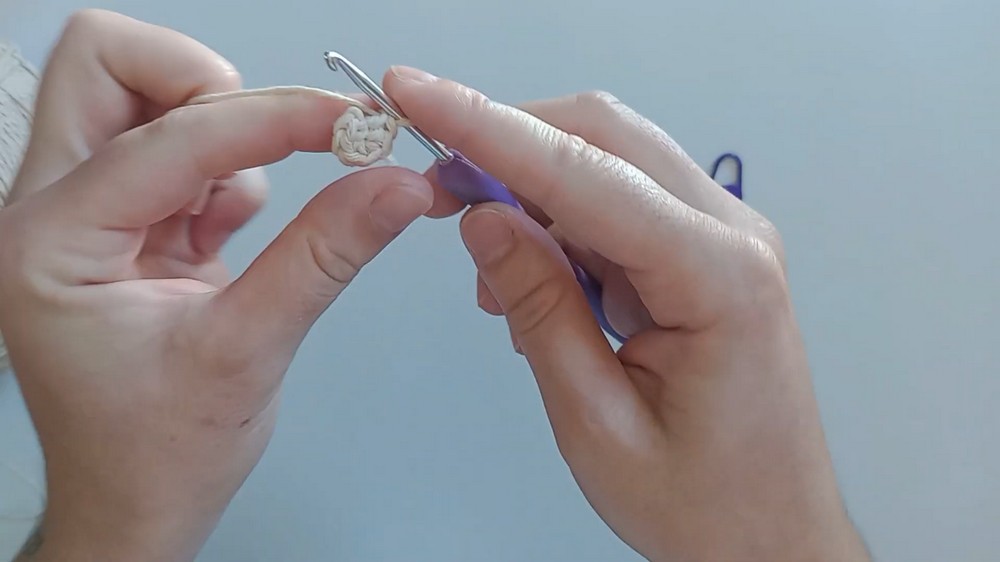
- R2: Increase (inc) in each stitch—crochet 2 sc in each stitch around (12 sts).
- R3: (1 sc, inc) repeat 6 times (18 sts).
- R4: (2 sc, inc) repeat 6 times (24 sts).
- R5: (3 sc, inc) repeat 6 times (30 sts).
- R6: (4 sc, inc) repeat 6 times (36 sts).
- R7–R15: Crochet 1 sc in each stitch (36 sts).
- R16: (4 sc, dec) repeat 6 times (30 sts).
- R17: (3 sc, dec) repeat 6 times (24 sts).
- Insert safety eyes: Between rounds 12 and 13, space 8 stitches apart.
- R18: (2 sc, dec) repeat 6 times (12 sts). (Note: Transcript specifies 12 decreases here)
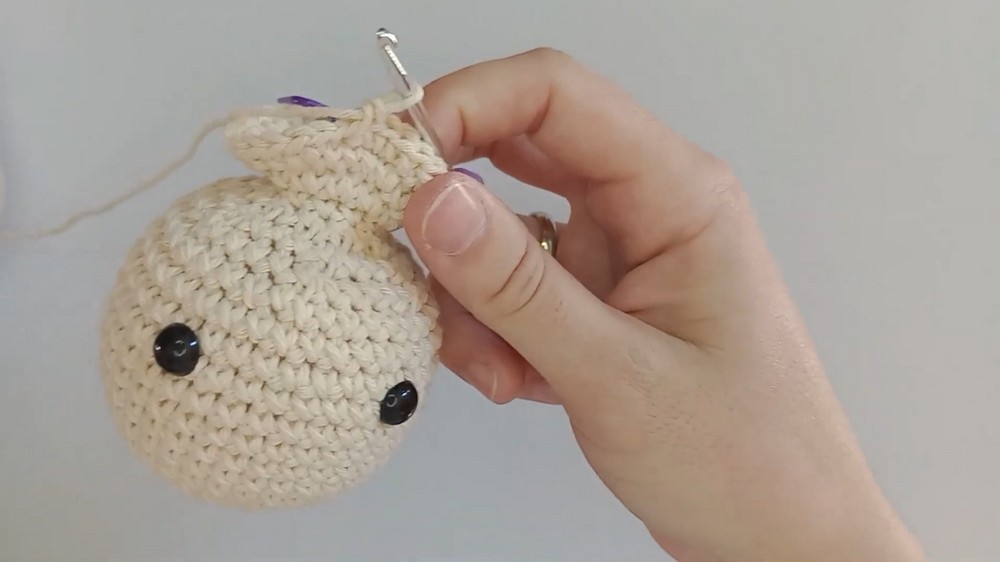
- R19: Crochet 1 sc in each stitch (12 sts).
- R20: Increase in each stitch (24 sts).
- R21: (3 sc, inc) repeat 6 times (30 sts).
- R22–R29: Crochet 1 sc in each stitch (30 sts).
- R30: (3 sc, dec) repeat 6 times (24 sts).
- R31: (2 sc, dec) repeat 6 times (18 sts).
- R32: 9 decreases evenly around (9 sts).
Ears (Make 2)
- R1: MR, 6 sc into ring.
- R2: Increase in each stitch (12 sts).
- R3: (1 sc, inc) repeat 6 times (18 sts).
- R4–R8: Crochet 1 sc in each stitch (18 sts).
- R9: (1 sc, dec) repeat 6 times (12 sts).
- R10–R22: Crochet 1 sc in each stitch (12 sts).
- R23: Fold ear flat and slip stitch (sc) across both layers to close, ending with 6 sc.
Arms (Make 2)
- R1: MR, crochet 8 sc into ring.
- R2–R9: Crochet 1 sc in each stitch (8 sts).
Legs (Make 2)
- R1: MR, 6 sc.
- R2: Increase in each stitch (12 sts).
- R3: 4 sc, 4 inc, 4 sc (16 sts).
- R4: Crochet 1 sc in each stitch (16 sts).
- R5: 4 sc, 4 dec, 4 sc (12 sts).
- R6: 4 sc, 2 dec, 4 sc (10 sts).
- R7–R10: Crochet 1 sc in each stitch (10 sts).
- R11: 5 decreases evenly around (5 sts).
Muzzle/Nose (Make 2)
- R1: MR, 5 sc.
- R2: Increase in each stitch (10 sts).
- R3: Crochet 1 sc in each stitch (10 sts).
Carrot Pattern
Carrot Body
- R1: MR, 6 sc into ring.
- R2: Crochet 1 sc in each stitch (6 sts).
- R3: (1 sc, inc) repeat 3 times (9 sts).
- R4: Crochet 1 sc in each stitch (9 sts).
- R5: (2 sc, inc) repeat 3 times (12 sts). Note: Video shows slight variation—follow count of 13 sts if preferred.
- R6–R7: Crochet 1 sc in each stitch (13 sts).
- R8: (2 sc, inc) repeat 4 times, 1 sc (17 sts).
- R9–R10: Crochet 1 sc in each stitch (17 sts).
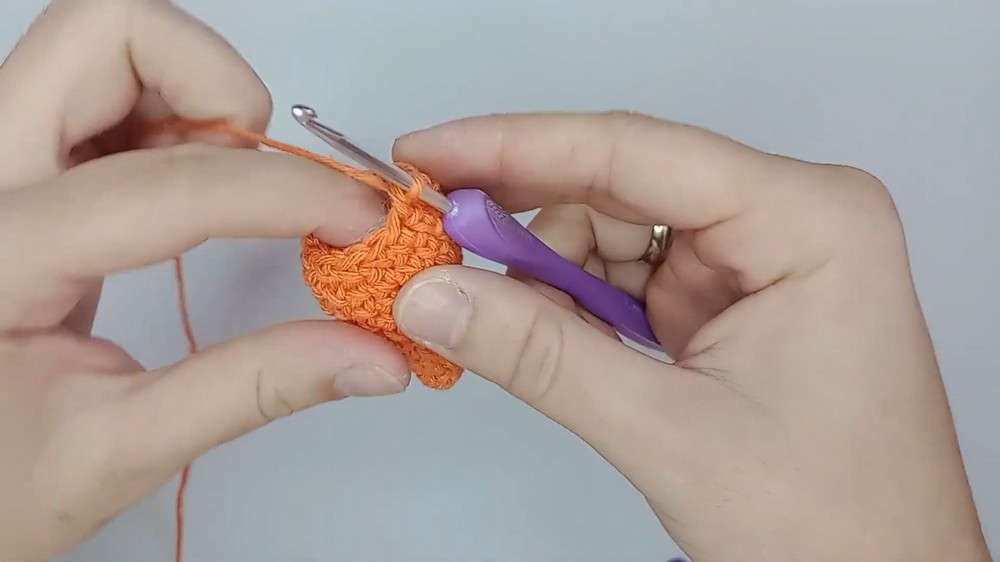
- R11: (2 sc, dec) repeat 4 times, 1 sc (13 sts).
- R12: (1 sc, dec) repeat 4 times, 1 sc (9 sts).
Carrot Leaves
- Chain 5.
- Slip stitch to 2nd chain from hook.
- Crochet 1 sc, 1 half double crochet (hdc), 1 sc.
- Slip stitch back into the base of the leaf.
- Repeat the leaf pattern once more on the opposite side.
- Join leaves together at base.
Assembly & Finished Size
- Stuff all parts firmly with siliconized fiberfill prior to closing.
- Attach eyes between rounds 12 and 13 on the head, spacing them 8 stitches apart.
- Sew ears, arms, legs, muzzle, and nose securely to the body using matching yarn and a yarn needle.
- Attach the carved carrot leaves to the carrot body.
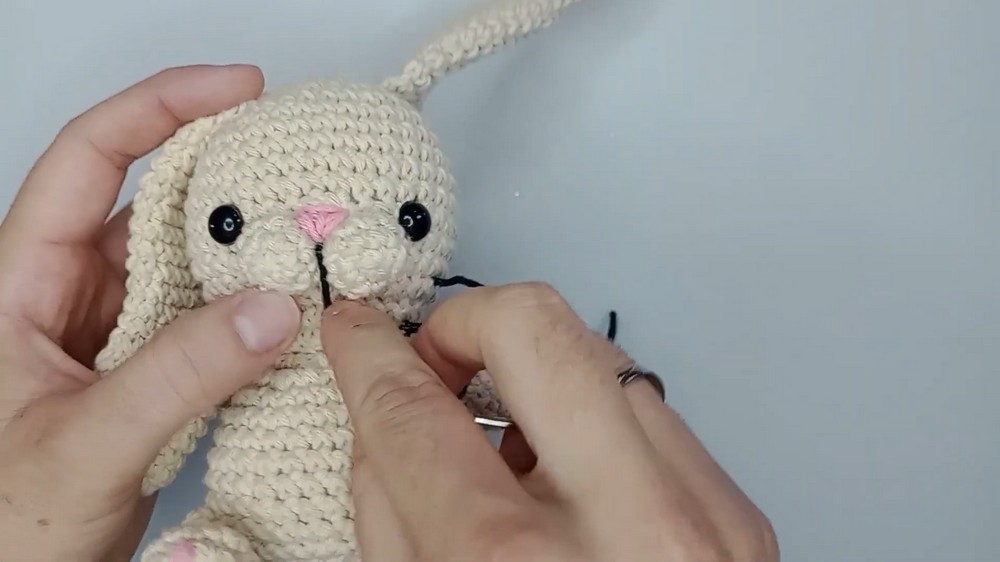
- Embroider facial features (nose and mouth) with pink and black embroidery threads for detail.
- Finished bunny stands approximately 15–20 cm tall; carrot measures about 5–7 cm.
Conclusion
Congratulations on completing your lovely amigurumi bunny and carrot! This pattern blends basic stitches with shaping techniques, making it accessible for intermediate crocheters while providing an enjoyable project for those growing their skills. Your attention to detail—from tight tension to precise embroidery—will make your bunny truly special as a gift or cuddly companion. Feel free to customize colors or add accessories to personalize your creation.