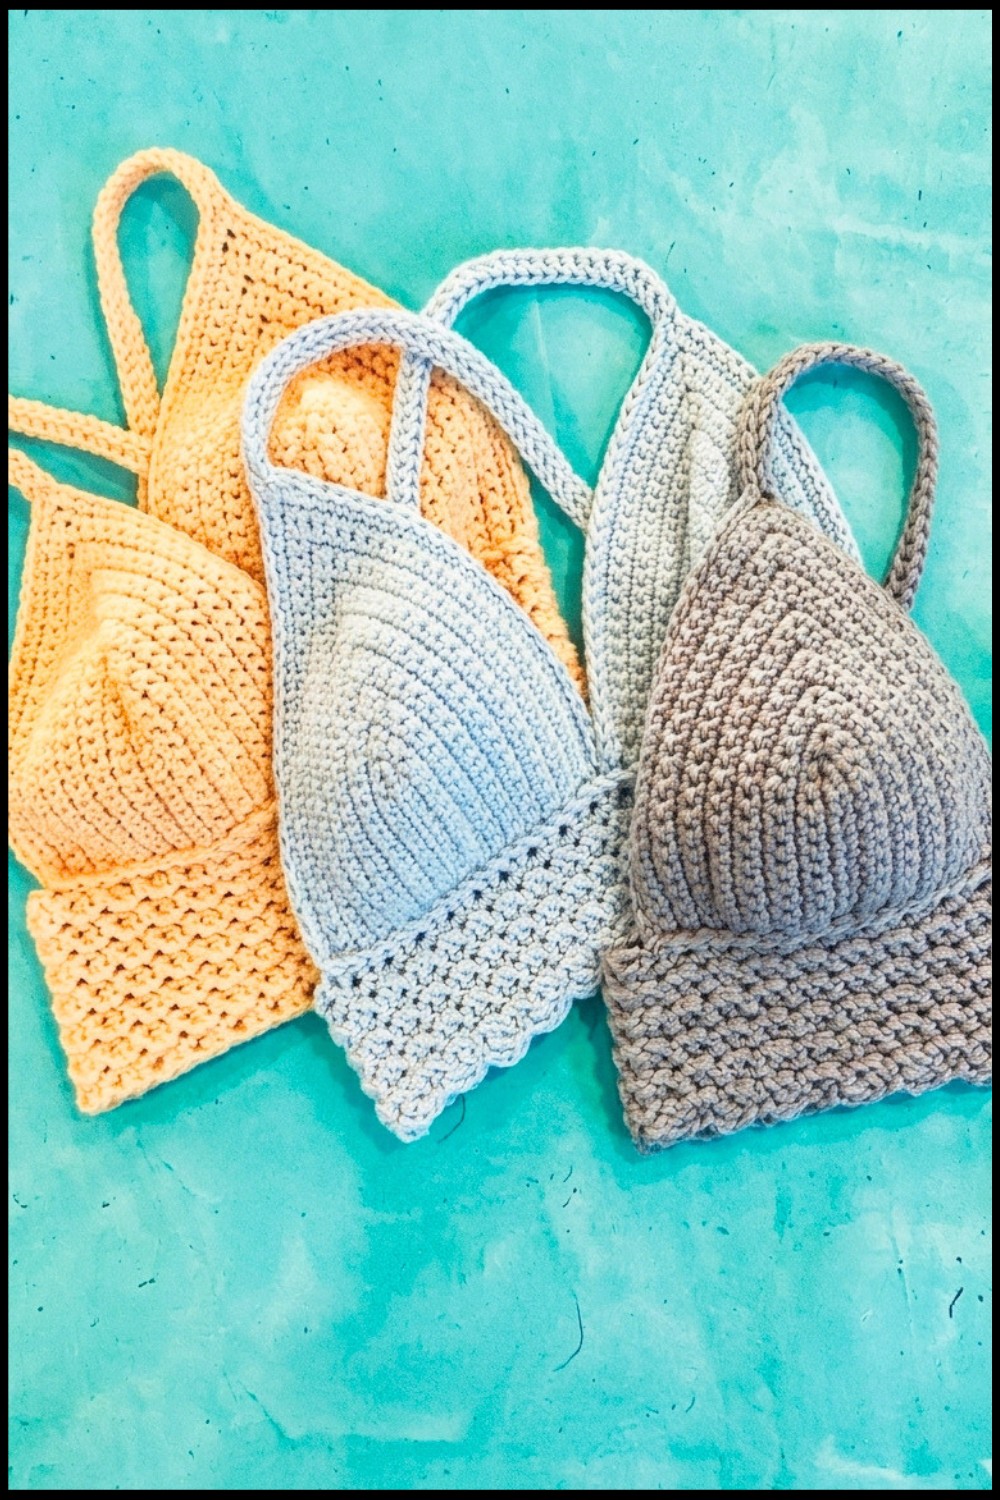
Fashionable Free Crochet Bralette Pattern for Women
Feel confident and stylish with free crochet bralette pattern offering simple instructions for a comfy fit & charming handmade look for all.
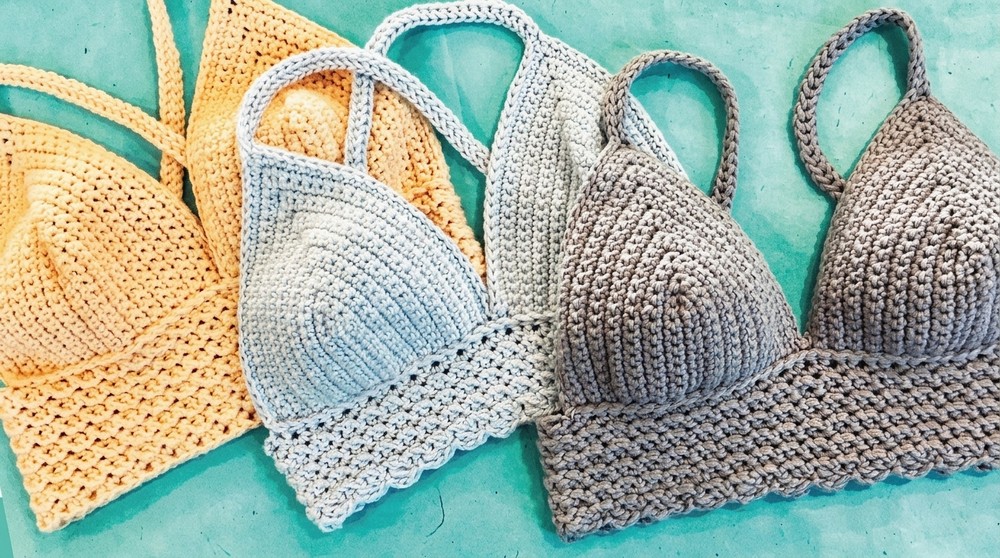
Imagine holding something soft and delicate that you made with your own hands using just yarn and a hook. This beautiful top is light and airy perfect for hot days or layering under your favorite shirt or jacket. Every Crochet Bralette pattern brings a unique touch to your wardrobe letting you express your personal style with different colors and designs. The gentle stitches create a charming look that fits comfortably and adds a lovely handmade detail to any outfit.
Step-by-Step Free Crochet Bralette Pattern Guide
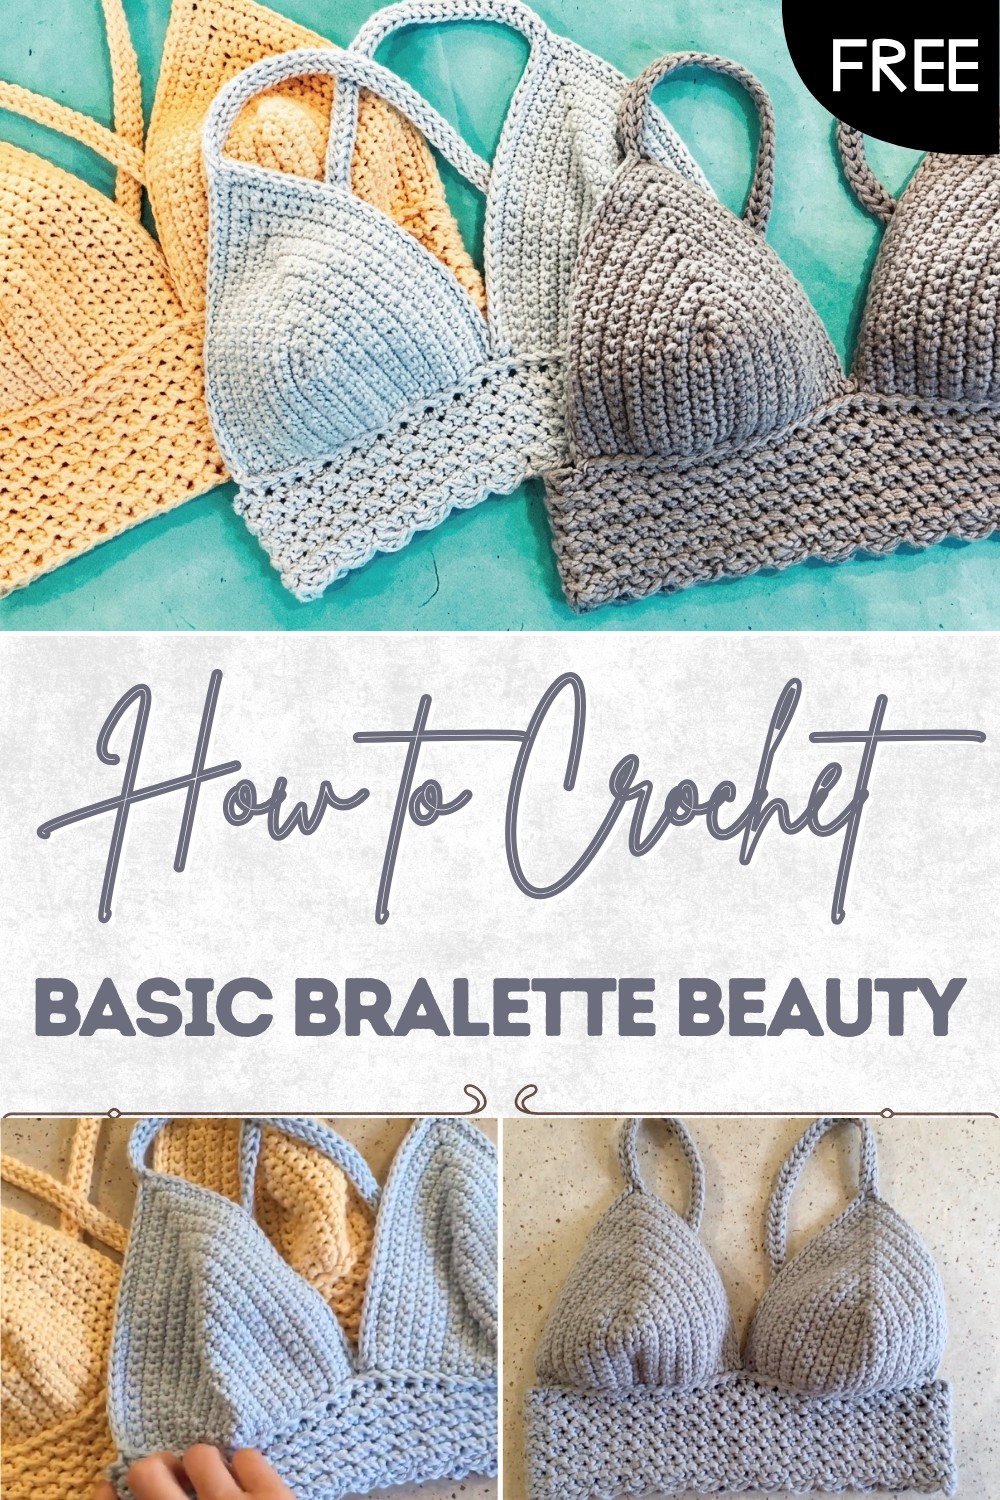
Many people love wearing these for lounging at home or even for yoga and light exercise because they are so flexible and soft against the skin. The openwork design means it stays cool and breathable while giving gentle support where you need it. With each stitch you can feel proud of your growing creative skills and enjoy the joy of making something truly special. Anyone can create this cozy piece and feel confident and beautiful wearing their handmade treasure.
Basic Crochet Bralette
Materials
- Yarn: Size 4 (medium/worsted weight) cotton or cotton blend yarn
- Hooks:
- 5.0 mm (H) crochet hook
- 5.5 mm (I) crochet hook
- Notions:
- Yarn needle (for weaving in ends and seaming gaps)
- Stitch markers (optional, for strap placement)
- Scissors
Key Abbreviations (US Terms)
| Abbreviation | Meaning |
|---|---|
| ch | chain |
| sc | single crochet |
| fsc | foundation single crochet |
| dc | double crochet |
| sl st | slip stitch |
| st(s) | stitch(es) |
| rep | repeat |
Special Notes
- Fit: All instructions are customizable. Measure directly on your body for the best fit.
- Gauge: Adjust hook sizes or tension as needed for your fit.
- Band Stitch: Raspberry stitch is used for band texture; comprised of alternating sc and sc around post.
- Band Width: Make band as wide or narrow as you prefer before starting cups.
Pattern
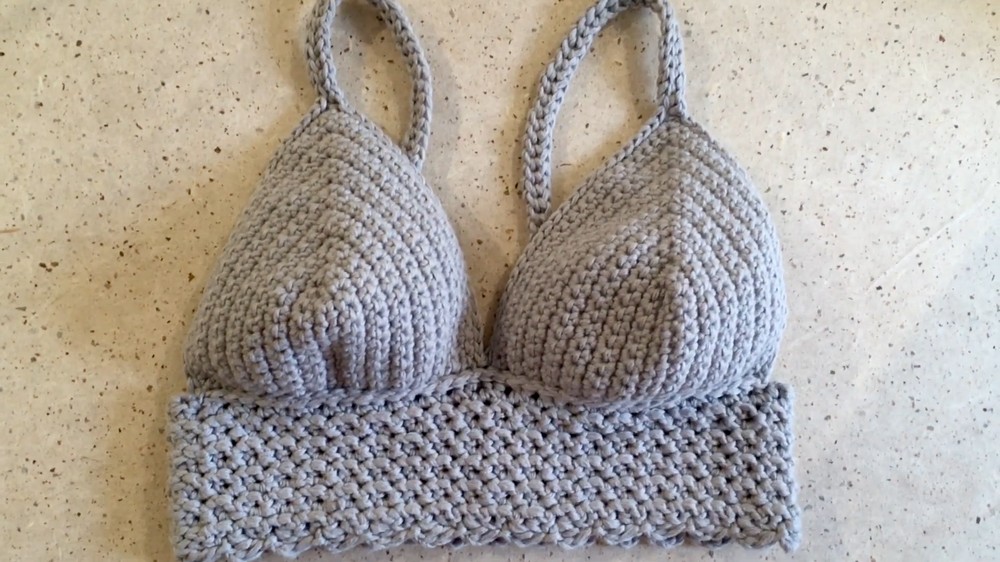
1. Bralette Band (Worked in the Round)
Foundation Row (With Larger Hook – 5.5 mm / I hook)
- Foundation sc:
- Start with a slip knot and ch 2.
- Work first fsc: Turn chain, insert hook through both side loops of 2nd ch, yarn over, pull up a loop (2 loops on hook), yarn over, pull through first loop, yarn over, pull through both loops.

- Continue: Insert hook into side of previous st, yarn over, pull up loop, yarn over, pull through first loop, yarn over, pull through both loops.
- Repeat until you have a row that fits comfortably (but not snug) around your chest just under the bust—ensure an even number of stitches.
- Join:
- Being careful not to twist, bring ends together and sl st to the first st to form a round.
- Ch 1, turn work.
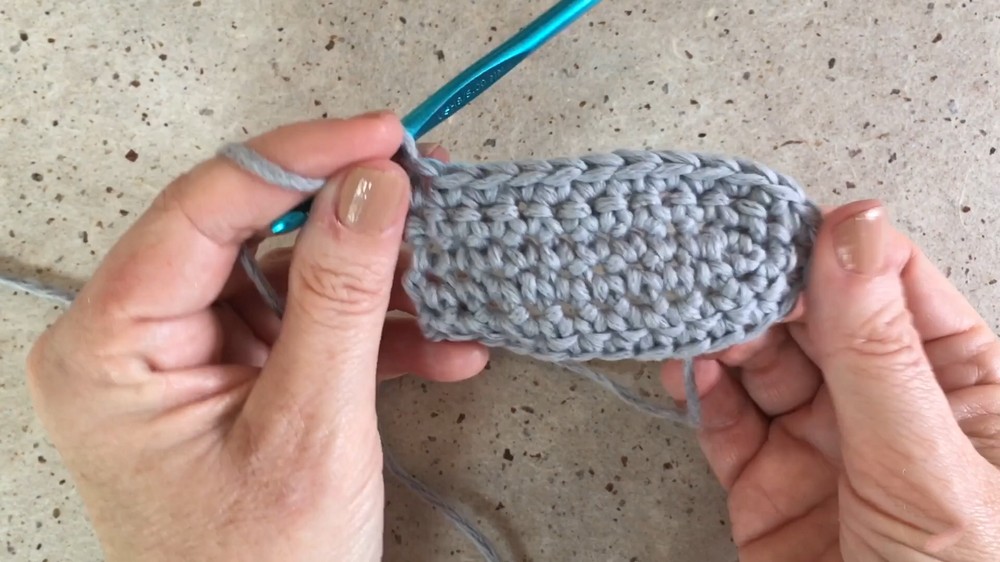
Row 2: Raspberry Stitch Band
- Pattern:
- Skipping joining st and turning ch, sc in first st, sc around the post (from front to back) of next st; rep * to end.
- Finish with a post sc around the last st.
- Sl st to first sc to join round.
- Ch 1, turn work.
Rows 3+: Band Repeats
- Repeat Row 2: For each new round, sc in top of sc, sc around post of previous round’s post sc; rep to end.
- Continue for desired band width.
Scalloped Edge
- Optional:
- Ch 2, turn, dc in same st.
- Skip 2 sts, sl st in next st. Ch 2, dc in same st. Rep * to end.
- Join last scallop to base of first with a sl st.

2. Cups (Make 2 Separately – Using Smaller Hook, 5.0 mm/H)
Cup Base
- With 5.0 mm (H) hook, ch 11.
- Sc in 2nd ch from hook and across (10 sc).
- In last ch, work 3 sc into same ch (creates the rounded corner for top of cup).
Cup Sides/Rows
- Turn, work along opposite side of foundation ch:
- Sc in each ch across the reverse side.
- Turn (do not ch):
- Sc in each st across to center (3-sc group at top).
- In center st of the 3-sc group, work 3 sc.
- Continue sc across to end.
- Repeat row for desired cup size, always increasing 3-sc at the center of each top.
- Make the 2nd cup in the same way.
- Do not fasten off at end of 2nd cup.
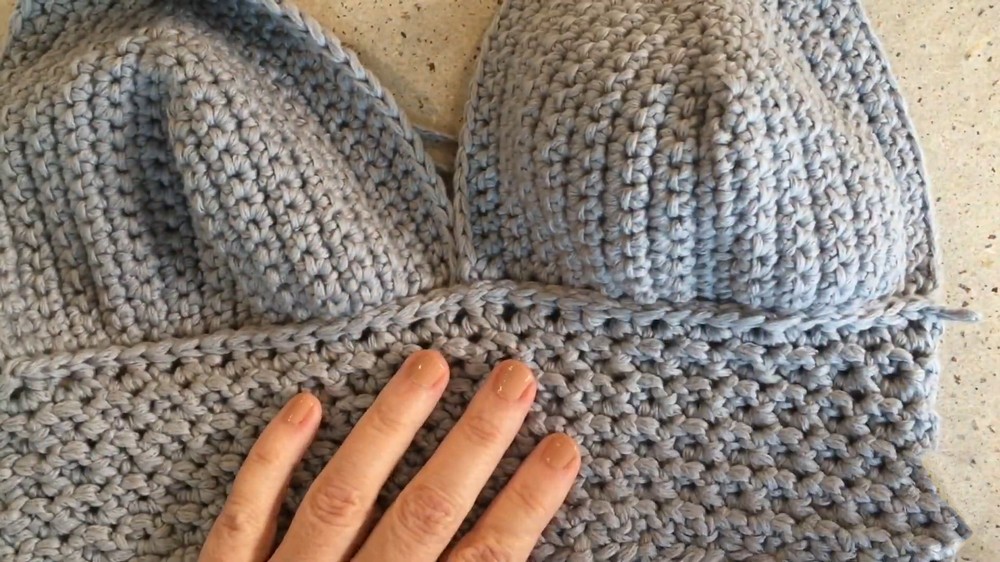
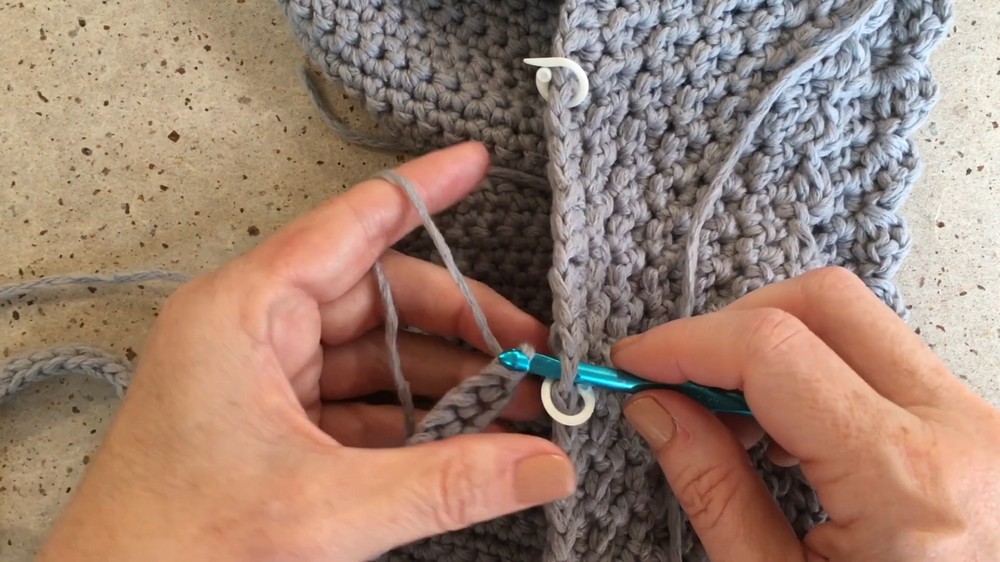
3. Attach Cups to Band
- Align cups side-by-side, working yarn at left of the left cup.
- With larger hook (5.5 mm/I), hold cups just behind the top edge of the band.
- Slip Stitch Join:
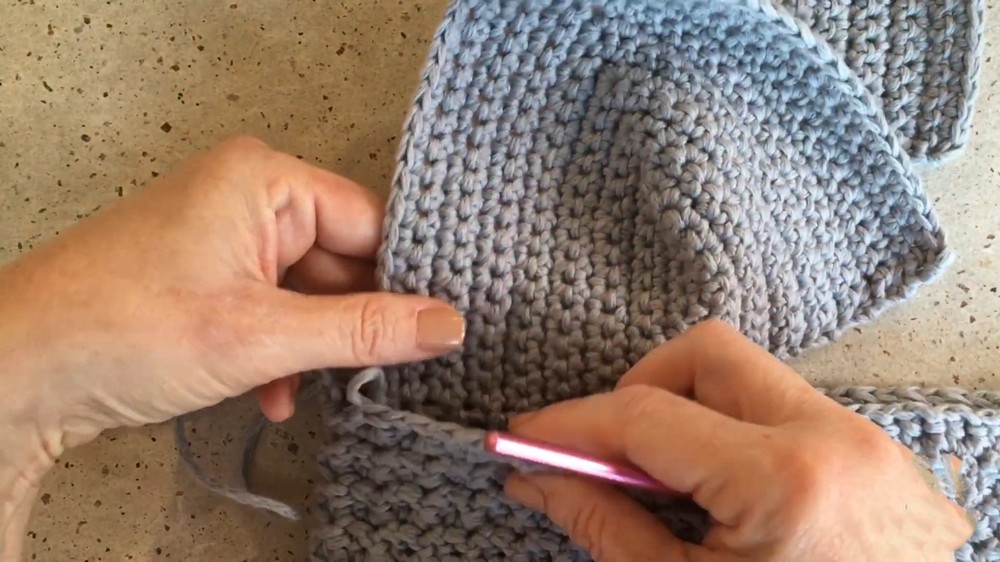
- Insert hook into next st of band, then into next space/row end of cup. Yarn over and pull up a loop through both, then pull through all loops on hook for a sl st.
- Continue slip stitching across the bottom of both cups, joining to the band.
- Proceed across the bottom of the first cup, then immediately continue joining second cup.
4. Straps & Edging
Strap Setup
- Switch back to 5.0 mm hook.
- Turn bralette to back side.
- Identify and mark strap attachment points with stitch markers.
Edging and Strap
- Slip stitch along the cup’s edge to the top center.
- From the cup peak: Foundation single crochet (fsc) to make the strap, measuring as you go to fit comfortably over your shoulder/back to the marked point on the band.
- When reaching desired length (test fit!), fold the strap down without twisting.
- Attach to the band at stitch marker with several sl sts for security.
- Continue to sl st down remainder of cup for edge finish.
- Repeat for second strap.
Alternate closure options:
- Slip stitch straps to band, or
- Fasten off at cup, feed strap through band and tie (halter/tie-back option).
5. Final Touches
- Weave in all ends securely.
- Use the yarn tail to close any small gap between first and last fsc on the initial foundation.
Conclusion
This basic crochet bralette pattern affords a customizable fit, comfortable coverage, and visual interest through textured stitches. Practical options for finishing and creative strap styles give you flexibility to personalize your bralette.
Pattern Corrections & Tips
- Correction: Always double-check that foundation rows are not twisted when joining in the round.
- Tips:
- For extra support, make band slightly wider or do an additional reinforcing row at the cup/band join.
- Try your project on as you go for the best fit at each stage.
- For non-scalloped look, omit final decorative border before attaching cups.
- Adjust cup depth by working additional rows with increases only at the top center.
- Use foundation single crochet for stretchy, neat, and uniform straps and bands.