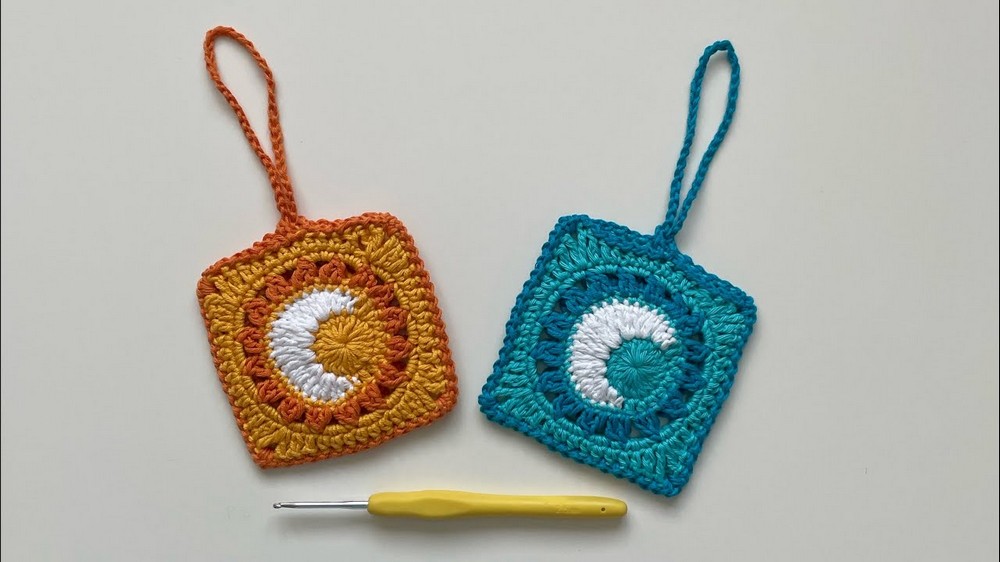
Sun & Moon Granny Square Mini Pouch Pattern For Small Items

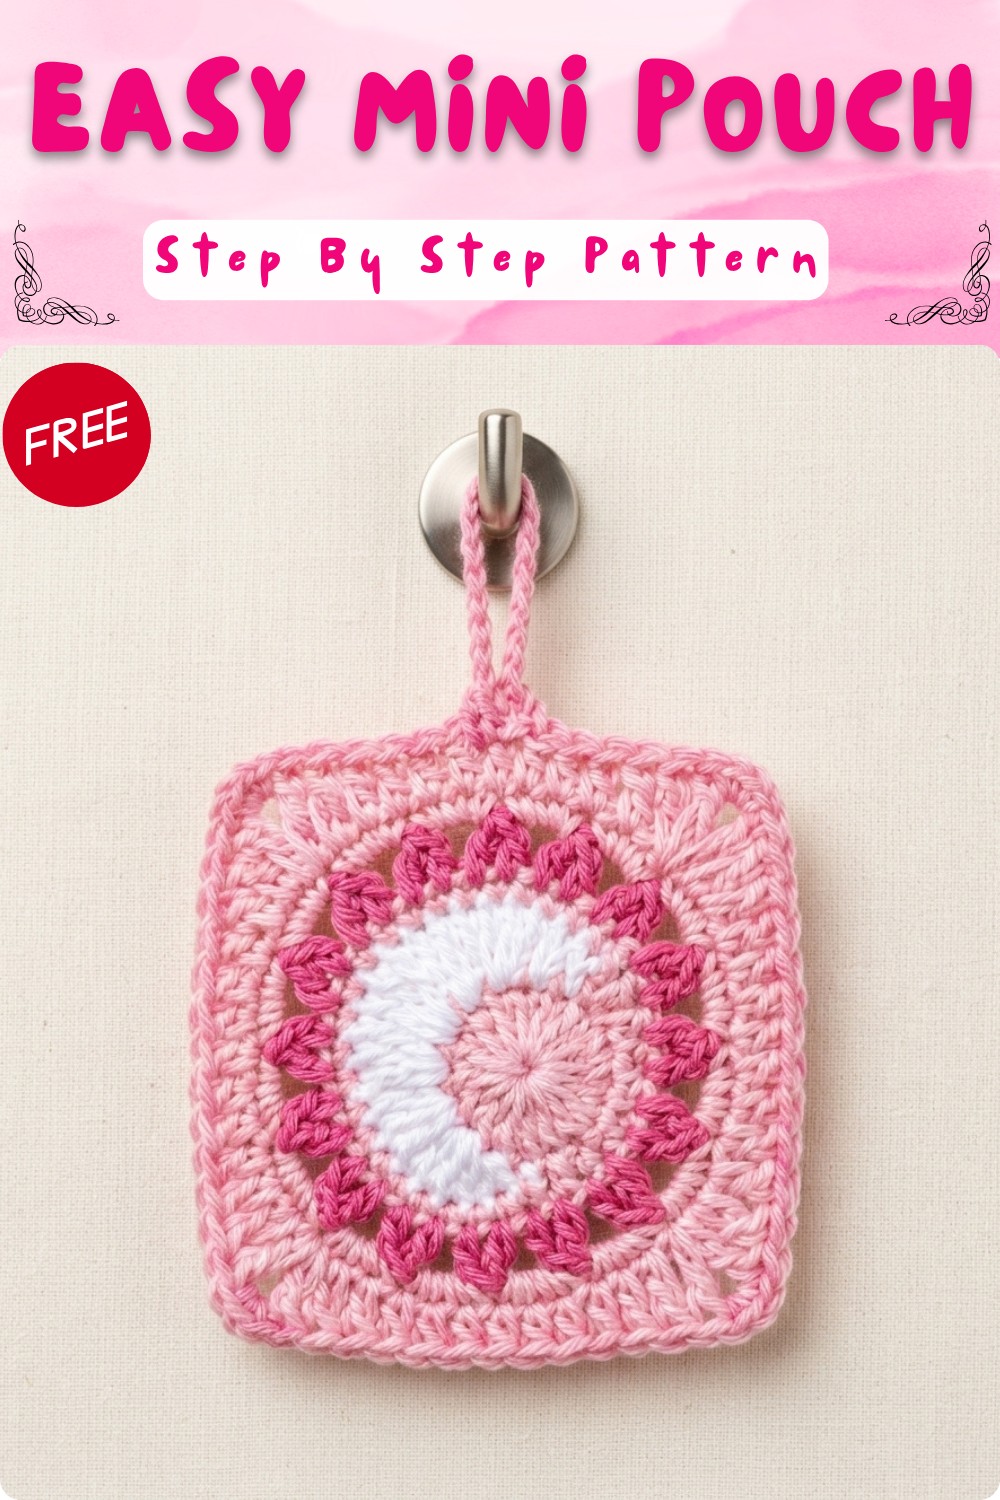
Transform your crochet skills with the enchanting Sun & Moon Granny Square Mini Pouch. This delightful little pouch is perfect for storing small items like AirPods, keys, or loose change. Featuring a stunning sun and moon design, it’s made with 100% cotton yarn and a hook, showcasing intricate stitches like double crochets and treble crochets. Its cozy, round shape opens easily and closes securely. Vibrant colors add a touch of style, making this mini pouch both functional and fashionable. Ideal for crochet enthusiasts, this project promises quick results and satisfying craftsmanship.
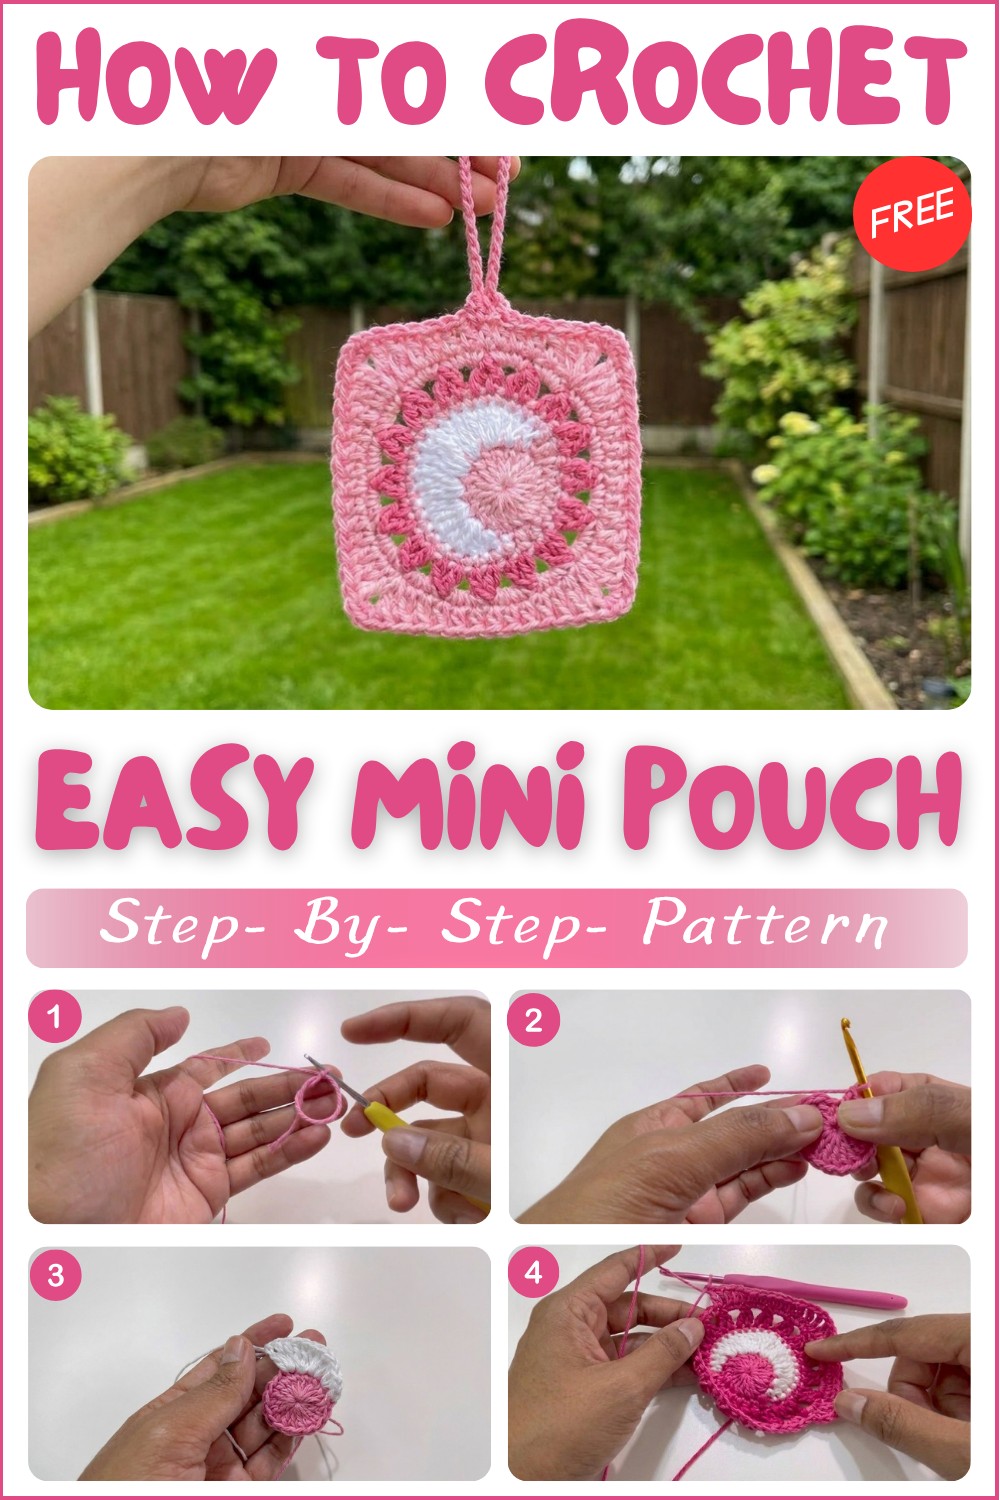
This charming, colorful mini pouch is the perfect size for carrying AirPods, coins, or small treasures. Crocheted using double crochet, clusters, and simple seaming, this pouch is beginner-friendly and highly customizable. The two contrasting sections and floral-inspired clusters add visual interest, and the closing loop ensures your belongings are secure. Follow this step-by-step pattern to create your own beautiful and practical accessory.
Why Love This Pattern?
- Practical Use: This small pouch pattern is perfect for storing small items like AirPods or loose change. It’s not only beautiful but also highly practical.
- Simple Materials: The pattern utilizes 100% cotton yarn and a 2.5mm crochet hook, making it accessible for most crafters without needing special materials.
- Skill Expansion: The project incorporates various crochet techniques, such as making a magic circle, double crochets, half double crochets, extended double crochets, and even treble crochets. It’s a great way to practice and improve your skills.
- Customization: You can switch colors in the middle of the project, giving you creative freedom to make the pouch unique and personalized.
- Versatile Design: The pouch has a beautiful and versatile design that can easily be adapted for different uses or occasions.
Small Crochet Pouch / AirPods Case Pattern
Pattern Notes
- The pouch is worked flat as two identical panels, each featuring decorative increases and color changes.
- Stitches include: single crochet (sc), half double crochet (hdc), double crochet (dc), extended double crochet (edc), treble crochet (tr), clusters, and slip stitches.
- Work in continuous rounds unless specified to join/seam.
- Color changes are essential for the final design and can be adjusted to your preference.
- Gauge is not crucial as long as the two sides match. A firm fabric helps maintain pouch structure.
- The finishing slip stitch and chain edge closes three sides and creates button/closure loops.
- Seam ends should be woven in neatly for a professional look.
Skill Level
Advanced Beginner / Intermediate
You’ll use a variety of common crochet stitches and basic colorwork.
Materials
- 100% cotton yarn in 3 contrasting colors (here: Color 1 & Color 2)
- 2.5 mm crochet hook
- Scissors
- Tapestry/yarn needle
- Stitch marker (optional)
Measurements / Sizing
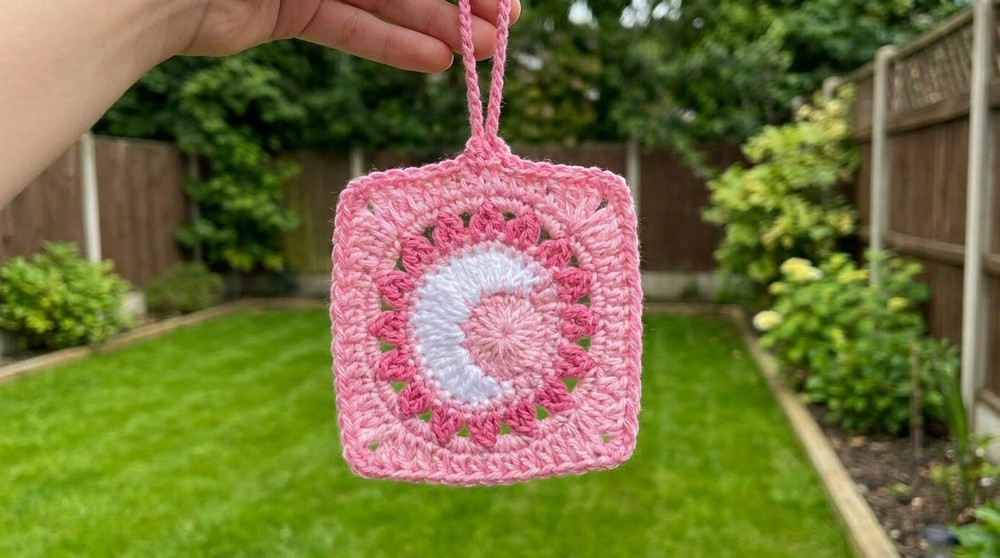
- Finished size: approx. 2.5–3” (6–7.5 cm) wide x 3–3.5” (7.5–9 cm) high (without closure)
- Loop flap: 0.25–0.5” (1–1.5 cm) extra
- Fits AirPods, earbuds, coins, or small personal items
Gauge
- Not critical, but aim for a tight, even gauge to ensure a sturdy pouch.
- Panels should match in size for seaming.
Stitch Abbreviations
| Abbreviation | Meaning |
|---|---|
| ch | chain |
| sc | single crochet |
| hdc | half double crochet |
| dc | double crochet |
| edc | extended double crochet (see below) |
| tr | treble crochet (US terms) |
| sl st | slip stitch |
| st(s) | stitch(es) |
| rep | repeat |
| sp | space |
| cluster | cluster (see notes) |
Special Stitches
Magic Ring:
Form a loop, work initial stitches into ring, pull tail to tighten.
Extended Double Crochet (edc):
Yarn over, insert hook, yarn over, pull up loop (3 loops on hook), yarn over, pull through 1 loop (like a chain), yarn over, pull through 2, yarn over, pull through last 2 loops.
Cluster (dc2-cluster):
(Yarn over, insert hook in next stitch, yarn over, pull up loop, yarn over, pull through 2 loops) twice (you have 3 loops on hook), yarn over, pull through all loops.
The Crochet Pattern
PANEL (make 2)
Center Circle (Panel 1):
- Magic Circle:
Make a magic ring, ch 1.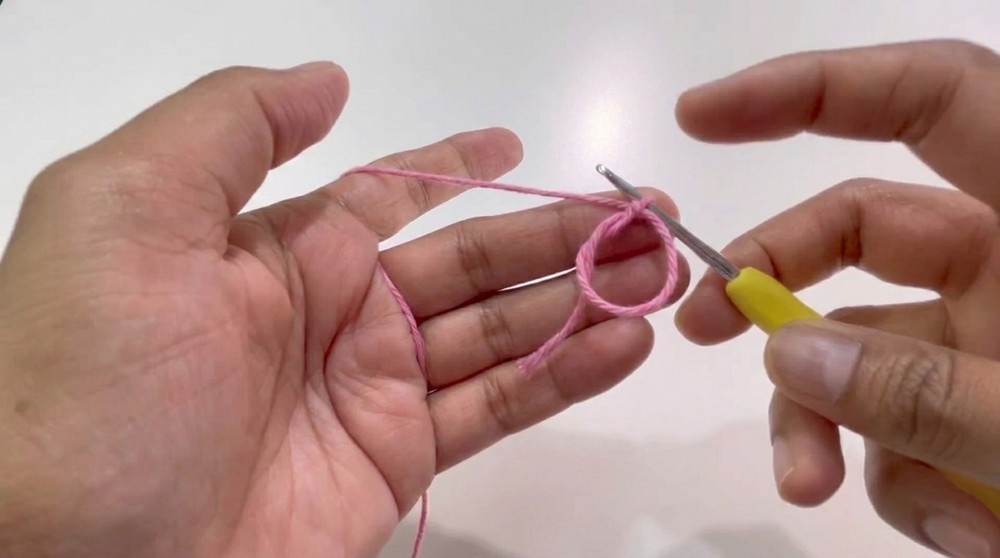
- Round 1:
- Into ring: sc, ch 1 (counts as first dc), then work 17 dc (for 18 total dc, including sc+ch1 as first dc).
- Pull tail to close.
- Join: Skip sc+ch1, sl st to the second dc.
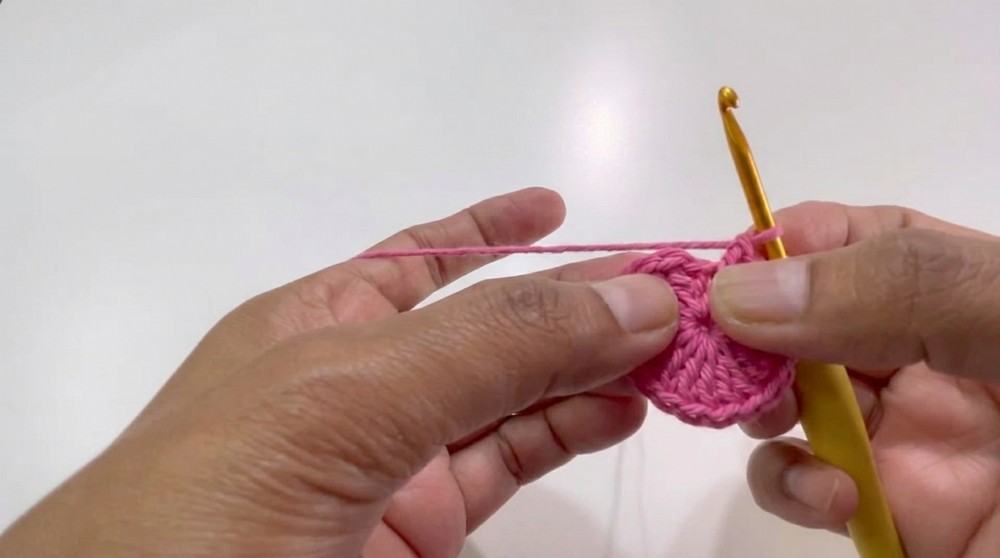
- Do not cut yarn unless changing color.
- Round 2 (Contrast Color):
- Join Color 2 or continue.
- Into same st, sc.
- In next st: 2 hdc.
- In next st: 3 dc.
- In next st: 3 edc.
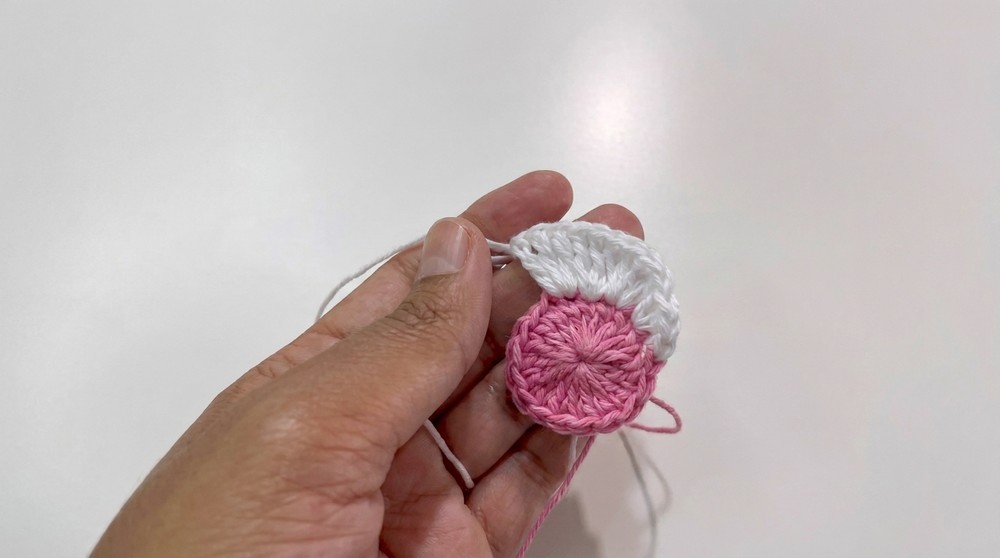
- In next st: 3 tr.
- Repeat reverse order as follows:
- Next st: 3 tr.
- Next st: 3 edc.
- Next st: 3 dc.
- Next st: 2 hdc.
- Next st: sc.
- Continue pattern around the circle as established (if more stitches remain: repeat sc, 2 hdc, 3 dc, 3 edc, 3 tr, 3 tr, 3 edc, 3 dc, 2 hdc, sc until all 18 base dc are filled).
- Cut yarn, fasten off, weave in.
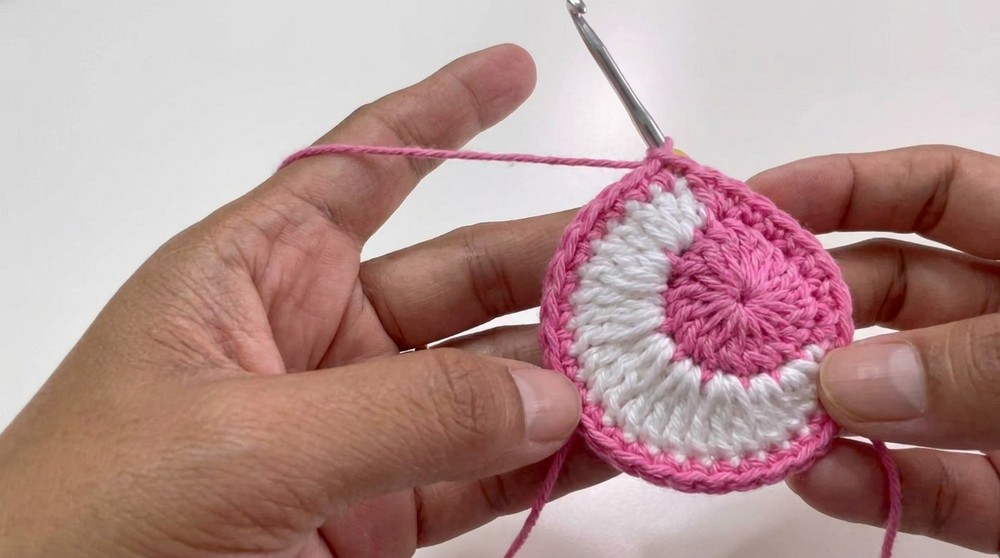
- Round 3 (Outline Row, Color 1):
- Join Color 1 in first sc.
- Sc evenly around (24 sc total).
- Sl st to first sc to join, do not fasten off.
Building the Flat Edges (Forming Top/Bottom):
- Row 1 (Top edge):
- Ch 1, sc in first st.
- Dc in next st.
- Hdc in next 6 sts.
- Dc in next st.
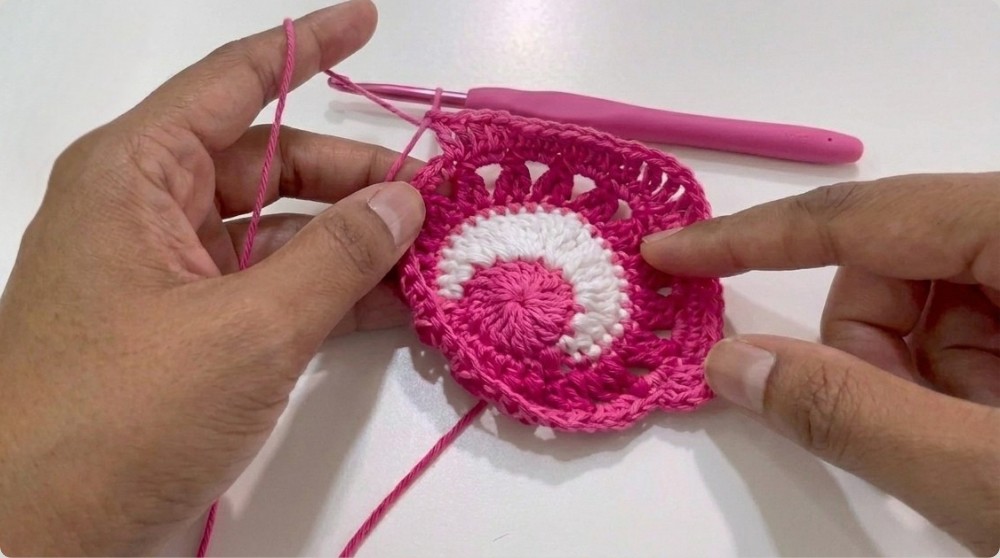
- Sc in last st.
- Skip joining; turn (or sl st to secure).
- Count: 1 sc, 1 dc, 6 hdc, 1 dc, 1 sc = 10 sts.
PANEL 2:
- Repeat all three rounds and top edge as for Panel 1.
Cluster/Corner Edges (Color 3):
- Round 4 (Color 3):
- Join Color 3 in the top corner st after the flat edge.
- (Ch 1, sc, ch 1) in the same st (corner base).
- Beginning at this st:
- [Dc2-cluster, ch 2] in each pair of sts, repeat 16x around (16 dc2-clusters, with ch-2 spaces between).
- Join last cluster to first with sl st.
- Round 5 (Color 1):
- Join Color 1 in chain space after corner.
- Sc 3 times in each chain space around (total: 48 sc).
- Do NOT cut yarn if you plan to use the same color for seaming.
Panel Assembly (Joining Panels & Pouch Construction):
- With right sides facing out, hold two panels together.
- Joining Border (Color 3 or preferred):
- Working through both panels’ corresponding sc sts, sl st through both sides, ch 1 in each st to make a decorative edge.
- In each corner, work 3 sl st, each separated by ch 1, for a rounded corner.
- For each straight edge, work 1 sl st & ch 1 in each stitch, joining panels as you go.
- Work 13 pairs for straight edges; 3 into each chain-1 sp at corners.
- Join three sides, leaving one flat side open for the closure flap.
Flap & Loops
- On the front (open straight edge):
- Work in next 6 sts: [sl st, ch 1] x6.
- In the seventh st:
- Sl st, then chain 5 (this forms the small button/closure loop).
- Sl st again in the same st to anchor loop.
- In next 6 sts: [sl st, ch 1] x6.
- Turn, repeat for back edge:
- [sl st, ch 1] x6,
- In seventh st: sl st, then chain 40 (this creates the longer closure loop for the back).
- Sl st to same st in panel to secure.
- [sl st, ch 1] across remaining 6 sts.
- Fasten off, weave in ends.
Assembly & Finished Size
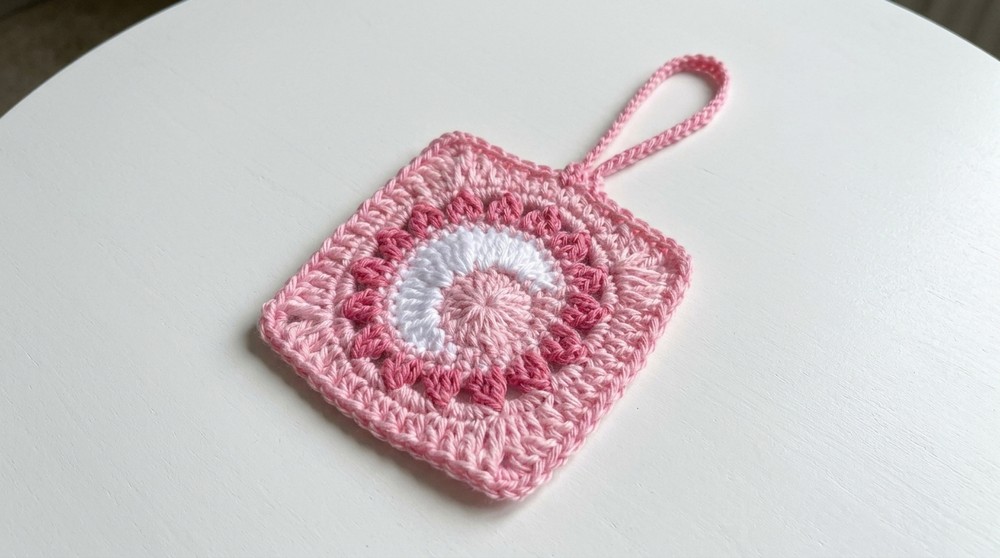
- Neatly weave in all yarn ends inside the pouch.
- Make sure the seamed edges are aligned; loops positioned for secure closure.
- Finished size fits AirPods, earbuds, or loose change perfectly.
- On one opening, there is a small front loop; on the other, a longer back loop to wrap over.
- Add a button or bead to front center if desired for a classic look.
- Use as a keychain by attaching a ring to the back loop.
Finishing/Customization
- Block gently to shape if desired.
- Embellish with embroidery, applique, or small buttons for extra charm.
- Choose high-contrast or gradient colors for visual interest.
- Adjust loop lengths to fit your closure style or add snaps inside for added security.