Crochet Coin Purse Keychain Free Pattern To Carry Little Treasures
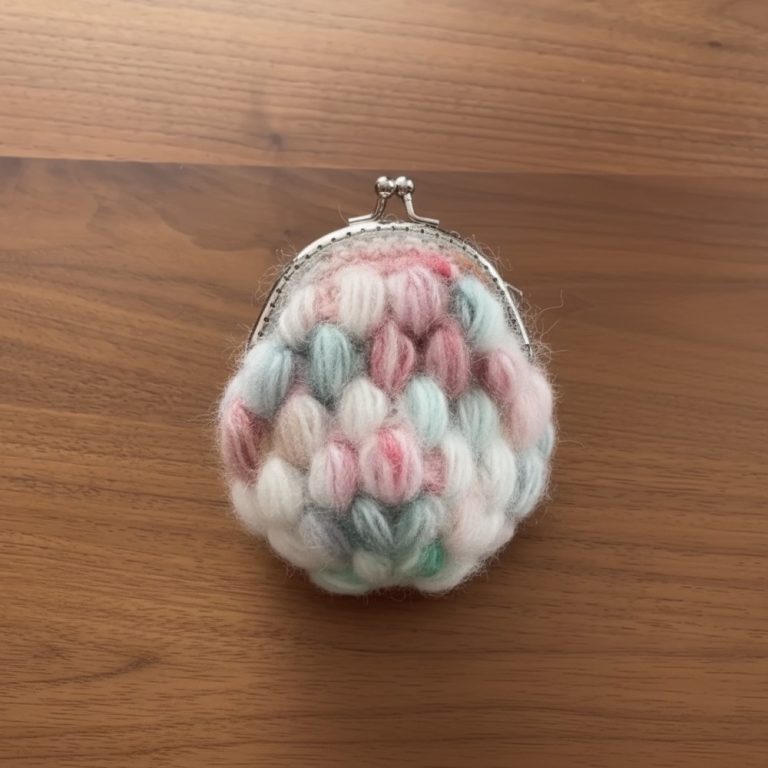
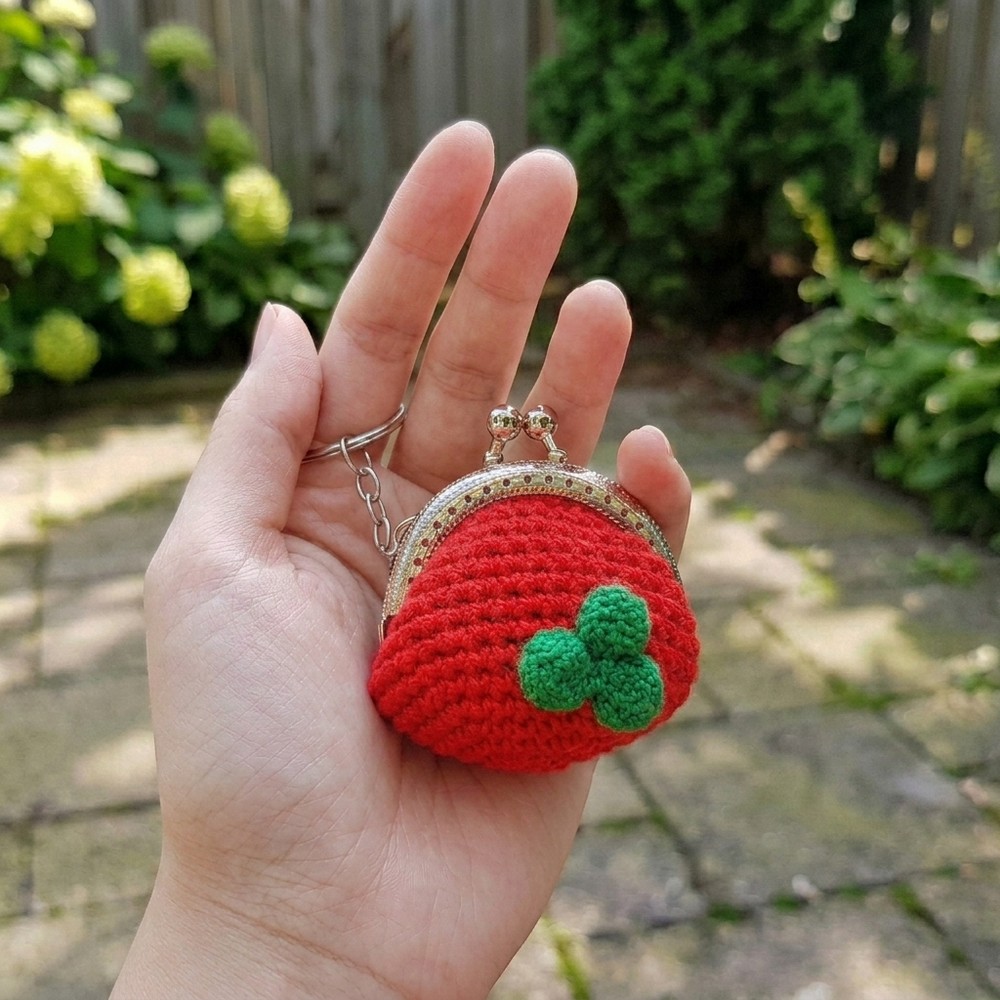
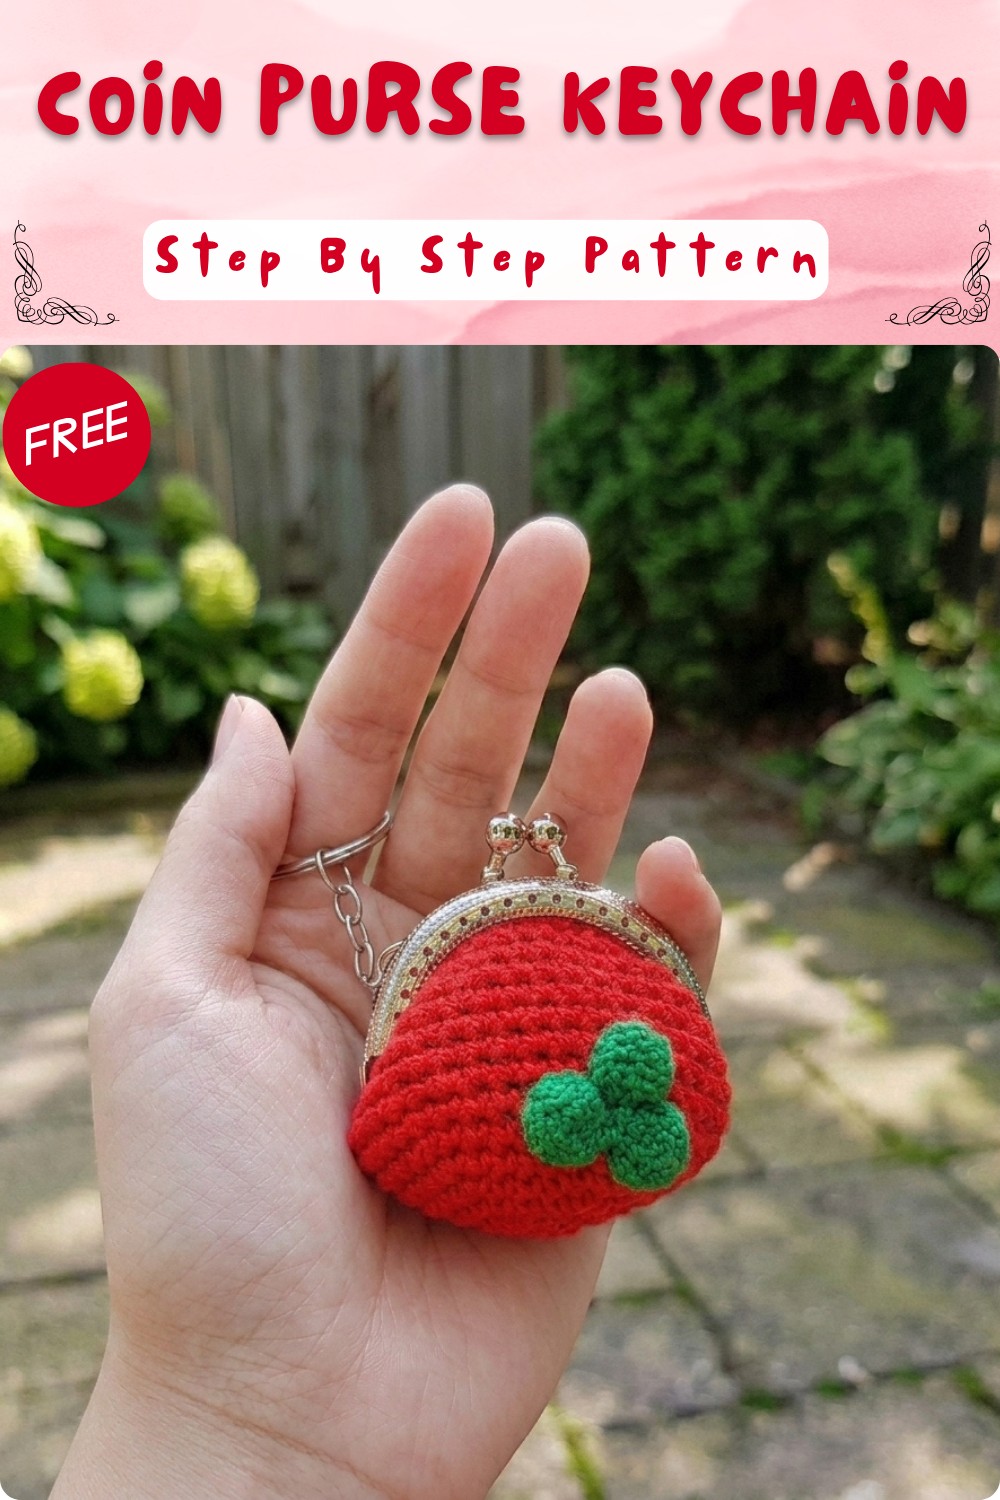
Inspired by the bright and cheerful look of strawberries, I wanted to create a fun and easy accessory, a coin purse that doubles as a keychain. The free crochet coin purse keychain pattern helps you make this small, handy item that’s perfect for holding coins, earbuds, or other tiny essentials. With just a few simple changes in size, shape, or color, you can also turn this pattern into mini wallets, small pouches, or charming bag decorations.
Free Crochet Coin Purse Keychain Pattern For Fun
This coin purse keychain is both practical and cute. Usually shaped like a little strawberry or a simple pouch, it has a soft yet sturdy texture thanks to tight, neat stitches. The vibrant colors and seed-like details give it a playful style that stands out. Its compact size fits easily on your keyring or handbag, combining usefulness with a handmade charm that brightens your everyday items.
The project is great for beginners because it mainly uses the single crochet stitch, which is easy to learn and practice. The clear instructions guide you through crocheting in rounds and creating neat edges, making it an ideal way to improve your skills while crocheting something small and fun.
Whether you’re looking for a thoughtful handmade gift, a cute and practical accessory, or a collectible piece to personalize your keys, this free crochet coin purse keychain pattern is a fantastic choice. It’s quick, enjoyable, and useful. If you love simple projects that add personality and charm to your daily life, this pattern will suit your interests and skill level perfectly. Give it a try—you’ll have a sweet, strawberry-inspired treasure in no time.
Crochet Coin Purse Keychain Pattern
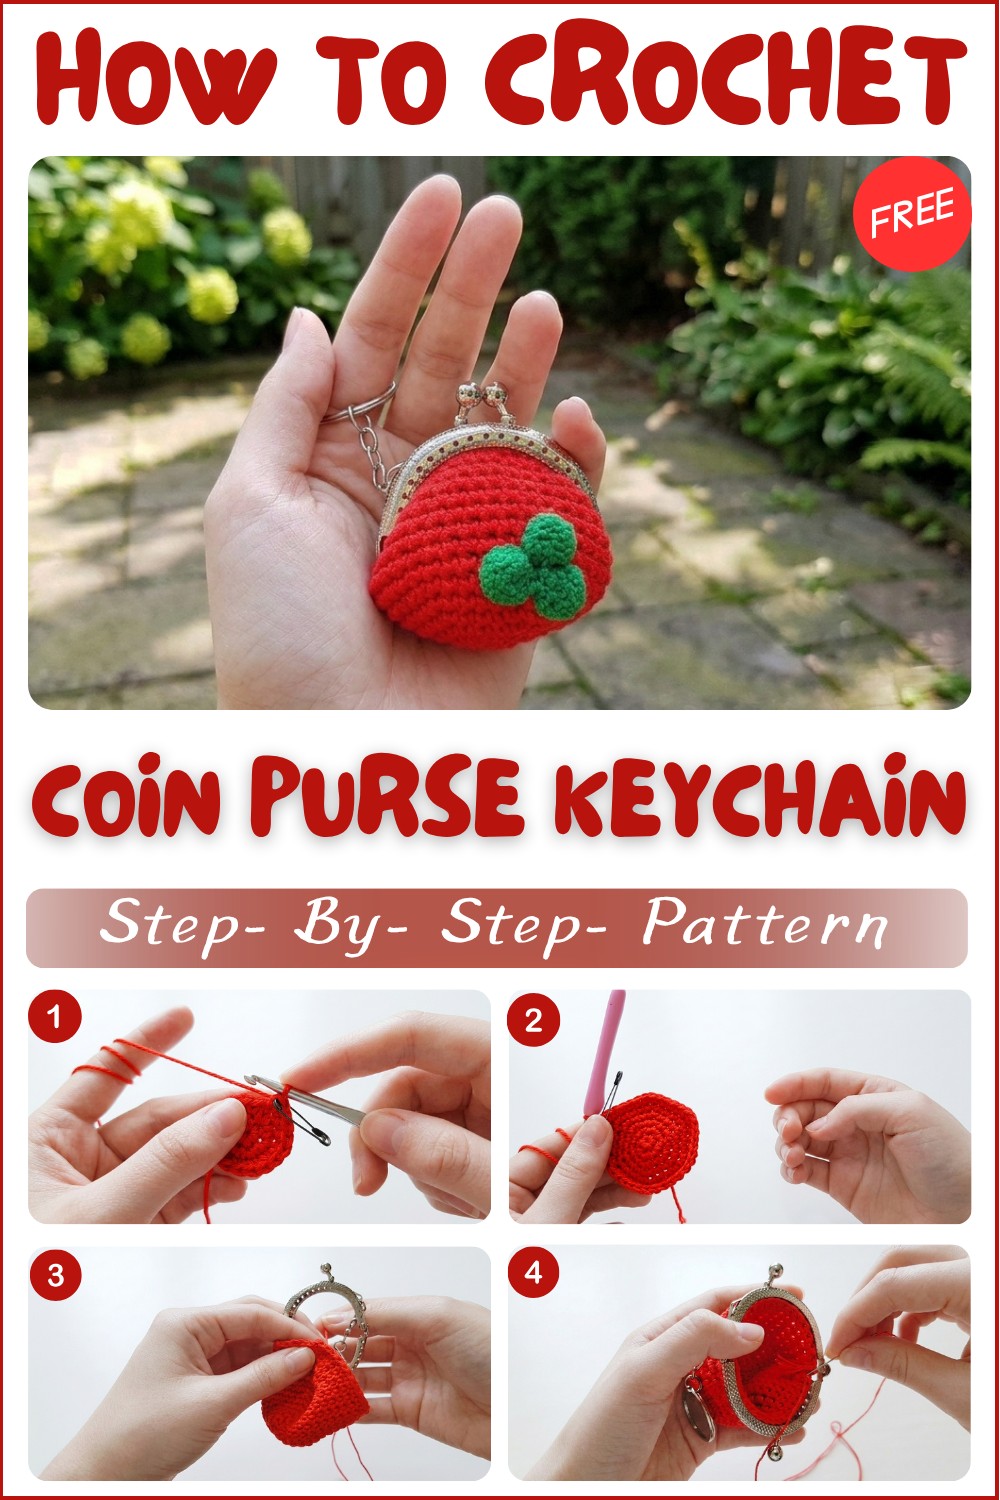
Create a practical and adorable crochet coin purse keychain with this easy-to-follow pattern! Using just basic stitches and a few simple materials, you’ll make a cozy pouch perfect for coins or tiny treasures. The base is crocheted in the round, then attached to a metal coin clasp for a secure, classic finish. You can further personalize with pom-poms, crochet flowers, or any embellishments of your choice. Both functional and stylish, this project is ideal for handmade gifting or keeping your essentials close.
Pattern Notes
- The coin purse is crocheted in continuous, seamless rounds (do not join unless noted).
- Use a stitch marker or safety pin to mark the first stitch of each round and move it up as you go.
- This pattern increases to form a flat circle and then works straight for the depth of the purse.
- Choose sturdy cotton yarn for better shape and durability, though acrylic can be used.
- The top edge is sewn to a 5cm metal coin clasp using sewing thread for a neat finish.
- You can add optional details like pom-poms or flowers after assembly.
- The purse can be stuffed for presentation or used as a keychain with a clasp ring.
Skill Level
Beginner – Familiarity with the magic ring, single crochet stitch, increasing, and hand-sewing is helpful. No complex stitches are used.
Materials
- Cotton or acrylic yarn (sample uses red ; approximately 25g)
- 3.0mm crochet hook
- 5cm metal coin clasp
- Sewing thread (to match yarn)
- Sewing needle
- Scissors
- Safety pin or stitch marker
- Optional: hot glue and small pom-poms, toy stuffing, keychain ring
Measurements / Sizing
- Finished width: approx. 2″ (5 cm) across (fitted to 5cm metal clasp)
- Height before clasp: approx. 2.5″ (6–7 cm)
- Depth: approx. 1–1.25” (2.5–3cm) when unstuffed
Gauge
- Not critical, but aim for firm, fairly dense stitches to hold the purse’s shape.
- After round 6, your work should measure about 2″ (5 cm) in diameter.
Stitch Abbreviations
| Abbr. | Meaning |
|---|---|
| ch | chain |
| sc | single crochet |
| st(s) | stitch(es) |
| inc | increase (2 sc in same st) |
| sl st | slip stitch |
| rep | repeat |
Special Stitches
Magic Ring:
Form a loop with the yarn, crochet stitches inside the ring, then pull tail to close.
The Crochet Pattern
Base & Body (Work in Continuous Rounds)
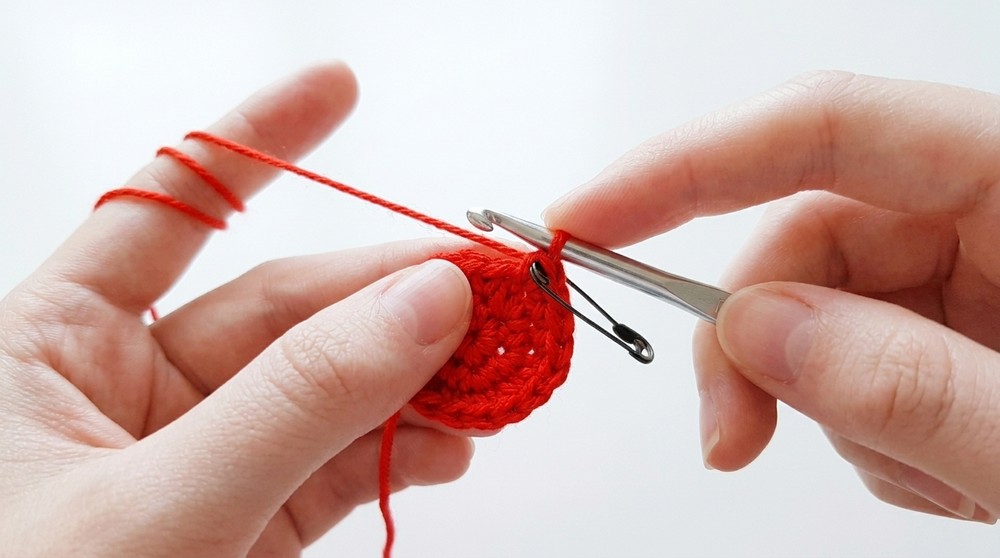
Tip: Place a stitch marker at the last st of each round and move it up each round for accuracy.
Round 1:
- Using a magic ring, ch 1 (does not count as a stitch).
- Work 6 sc into the ring. (6 sts)
- Pull the tail to close the center tightly.
Round 2:
- Work 2 sc in each st around (increase all the way around). (12 sts)
Round 3:
- [1 sc in next st, 2 sc in next st] – rep around (pattern: 1 sc, inc) (18 sts)
Round 4:
- [1 sc in each of next 2 sts, 2 sc in next st] – rep around (pattern: 2 sc, inc) (24 sts)
Round 5:
- [1 sc in each of next 3 sts, 2 sc in next st] – rep around (pattern: 3 sc, inc) (30 sts)
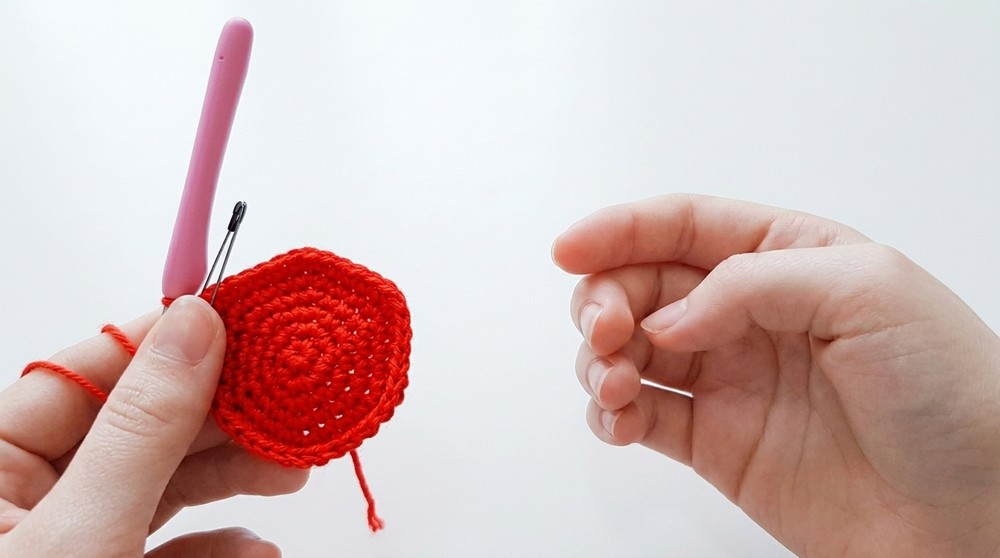
Round 6:
- [1 sc in each of next 4 sts, 2 sc in next st] – rep around (pattern: 4 sc, inc) (36 sts)
At this point, your flat circle should fit nicely within the 5cm coin clasp.
Rounds 7–16 (Body Rows):
- Sc in each st around (36 sts in each round, work 10 rounds).
- Continue in continuous spiral; no joins or turning.
- After Round 16, ch 1 and fasten off. Cut yarn. No long tail necessary.
Assembly
- Attach to Coin Clasp:
- With work right side out, fold the top edge evenly to fit the metal clasp opening.
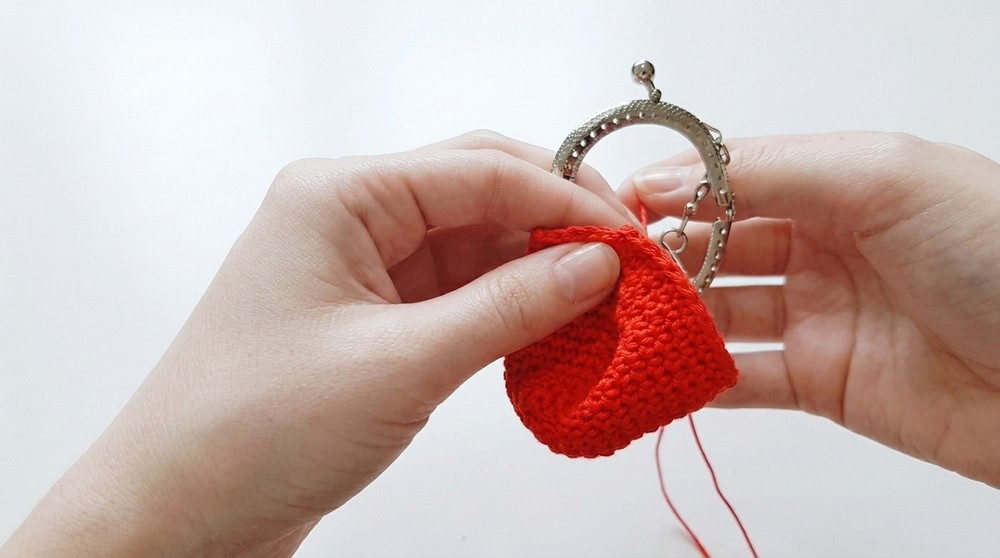
- Thread a sewing needle with strong sewing thread.
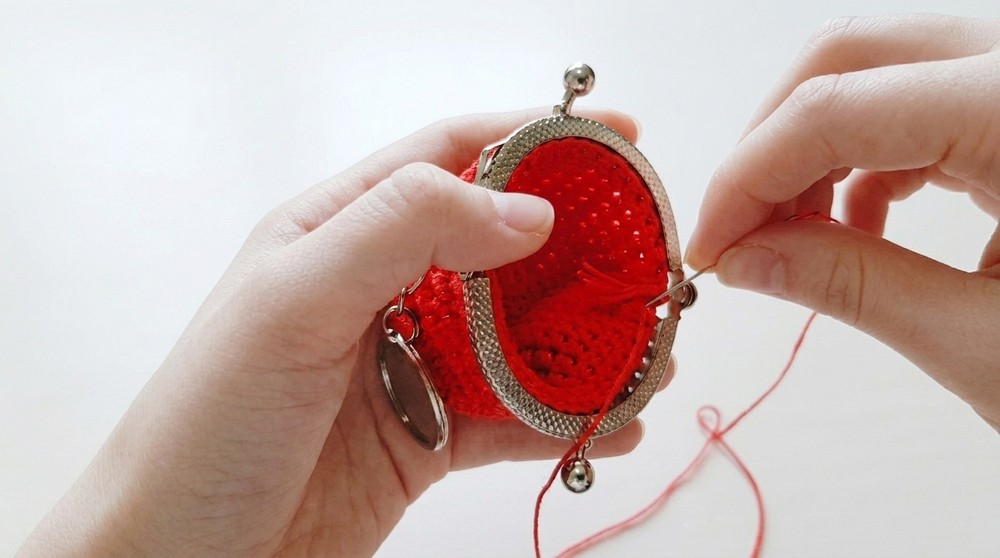
- Starting at one end, insert needle through clasp holes, then through the crocheted edge (catching a stitch), and bring back out. Pull snugly.
- Repeat for every clasp hole, sewing the top edge of the purse evenly around the entire clasp.
- Secure last stitch and hide thread end inside the work.
- With work right side out, fold the top edge evenly to fit the metal clasp opening.
- Finishing Touches:
- Weave in any loose yarn ends on the inside with your yarn needle.
- Stuff gently with toy stuffing for shape, if desired.
- Using hot glue, attach pom-poms, crochet flowers, or other embellishments as you like.
- Attach a keychain ring through the clasp, if desired.
Finished Size & Customization
- Finished width: Fits standard 5cm coin clasps.
- Height: Approx. 2.5″ not including clasp.
- Holds small coins, trinkets, or earphones.
- Add optional toy stuffing for a display piece, or leave empty for daily use.
- Decorate with pom-poms, applique, or embroidery for more character.
- Easily adjust size by increasing or decreasing rounds before the body section for smaller or larger clasps.

Assembly & Final Look (Checklist)
- Coin purse body worked to 36 sts (10 straight rounds).
- Securely sewn to 5cm coin clasp—neat stitching around every clasp hole.
- All yarn and thread ends woven in and hidden.
- Pom-poms or optional decor attached only after assembly and gluing.
- Add a keychain ring to the top for practical use.
- Finished purse holds its shape and opens smoothly.
Gift it, keep it, or make a bunch for friends. Personalize with your favorite colors, patterns, or character faces for extra fun. If you enjoyed this project, share your finished purses and show off your creativity.