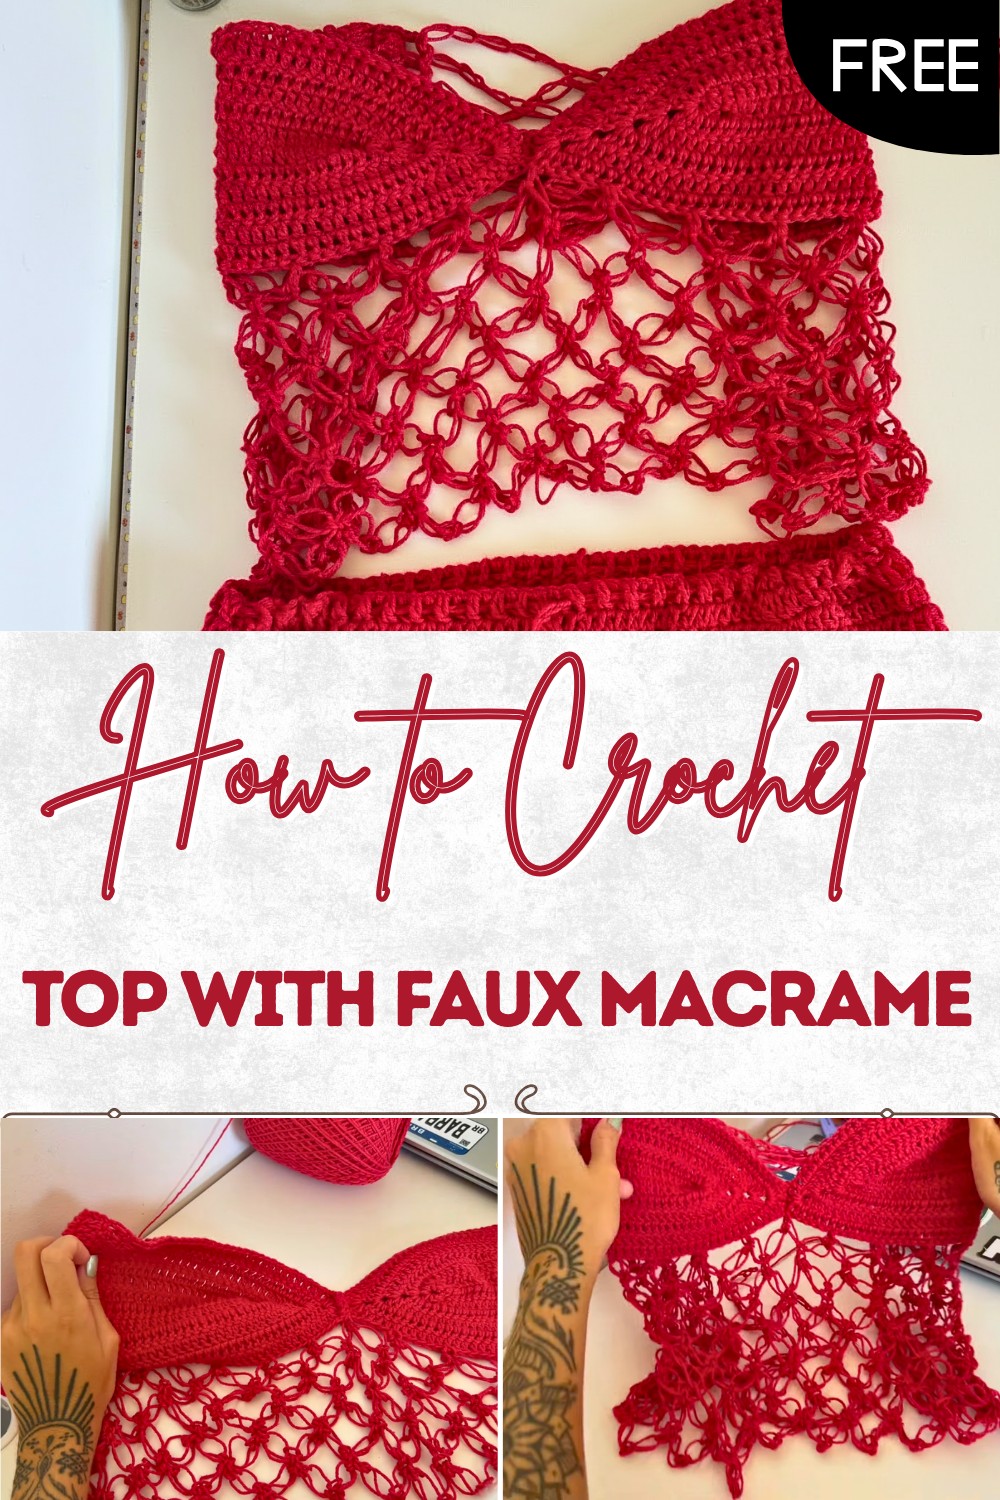
Crochet Top with Faux Macrame Free Step by Step Pattern
Wear effortless style with this free crochet top with faux macrame pattern that adds comfortable elegance unique texture and suits any outfit.
Beauty shines through simple things that catch the eye and bring comfort at the same time. A Crochet Top With Faux Macrame pattern offers the delicate look of knotted strings but uses easy crochet stitches, making the process quick and joyful. This garment features gentle openwork, allowing air to flow freely and keeping you cool wherever you go. Its flexible design fits many body shapes and lets movements stay relaxed, making you feel confident and special.
Free Pattern – Crochet Top with Faux Macrame for Any Occasion
Match it with skirts, jeans, or dresses—its elegant touch suits both everyday moments and special events. Even those new to crochet will find the pattern easy to follow, as the stitches repeat and flow naturally, making it less stressful for everyone. Add your own colors or adjust the length, and you’ll enjoy a stylish piece that makes your wardrobe bright, comfortable, and full of personal charm.
Faux Macramé Crochet Top Pattern
Materials
- Yarn: Barroco or similar DK/light worsted (recommended for 2.5–3.5 mm hooks)
- Hook size: 3 mm (used for sample; adjust for gauge and drape as needed)
- Larger hook (for ties, optional)
- Scissors
- Tape measure (for customizing fit)
- Yarn needle (for weaving in ends)
Key Abbreviations
- ch – chain
- sc – single crochet
- hdc – half double crochet
- dc – double crochet
- sl st – slip stitch
- st(s) – stitch(es)
- sp(s) – space(s)
- RS/WS – right side/wrong side
US Crochet terminology is used throughout.
Special Notes
- The top is constructed from two triangle cups worked sideways (“lying down”).
- The faux-macramé band mimics the look of macramé using elongated chains and single crochets.
- Customization: Increase start chains or rounds for a larger size—follow “Try on as you go” for the best fit.
- All “fan” locations = (2 dc, ch 2, 2 dc) into the same space.
Instructions
CUP (make 2)
Foundation:
- Ch 19 (for size S; increase for larger busts).
- Row 1: Ch 3 more (counts as turning & starting dc).
Starting in 4th ch from hook, dc in back loop only of each ch across (19 dc).
Leave a few chains at the end for turning (for the “fan” corner).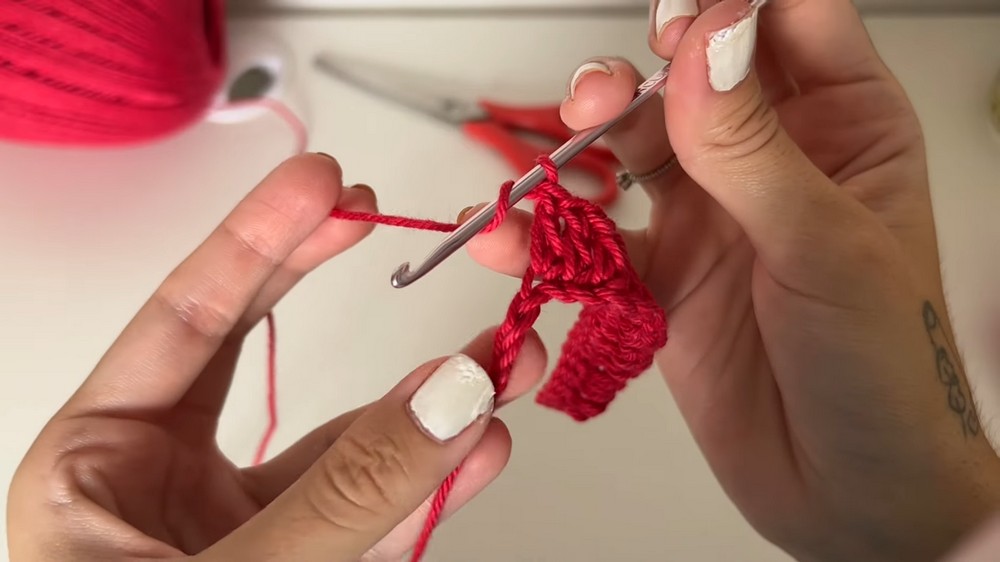
Fan Corner (at the end of the foundation row):
3. Into the last ch, work 4 dc (all in the same ch).
This is your “fan” that forms the cup tip.
Continue along the other side of the chain (foundation):
4. Dc in back loop only across (using the free loop of each starting ch).
Do not miss the last ch (should be 19 dc).
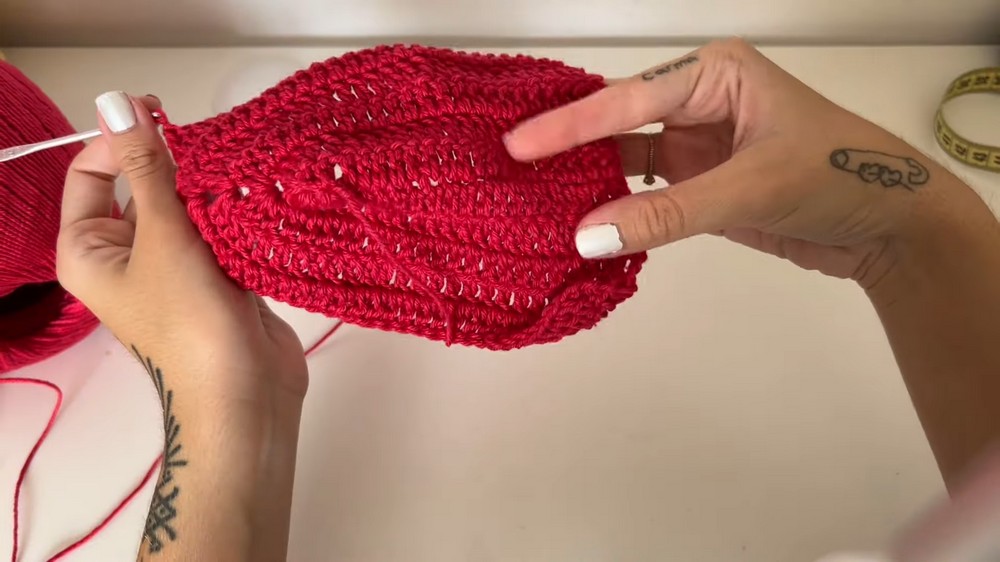
Body of Cup
Rows 2–7 (or until desired size):
- Ch 3, turn.
- Dc in each st across to the fan (corner).
- When you reach the fan space (the “hole” at the tip):
Work (2 dc, ch 2, 2 dc) all inside that ch-2 space. - Dc in each st down the opposite side.
Critical Tip:
For every row:
- Always count 19 dc on each side, between edges and before/after the fan.
- At the ends, include a dc into the top of the previous row’s ch-3 turning chain.
- This helps the cup lie flat and symmetrical.
For size S: 6–7 rows in total. For larger cups, continue working more rows in this pattern.
Side “Extension” Rows (for Underbust Length)
Once your cup is tall enough:
- Ch 3, turn.
- Dc in the side of previous dc, then dc in the “hole” formed between rows (the gap along the edge).
- Continue: dc in dc, dc in hole, until you reach the end.
- Repeat for 4 rows or until desired underbust coverage is reached.
- Repeat for 4 rows or until desired underbust coverage is reached.
Base Lattice for Ties (Repeat for Both Cups)
- Ch 5, turn.
- Skip 2 sts, hdc in next st.
- Ch 2, skip 1 st, hdc in next st.
- Repeat across base of the cup, creating an open, lacy “grid” for threading the back ties.
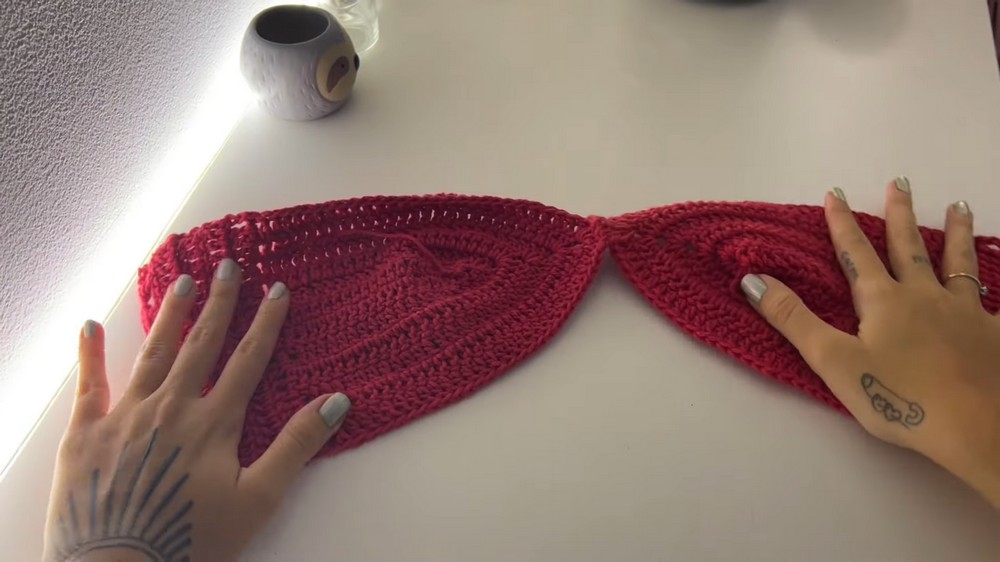
JOINING THE CUPS
- With WS facing, align the points (fans) of both cups (the tips/bust points).
- On last row at fan position, after first dc, insert hook through fan ch-2 sp on the other cup,
sl st to join,
then continue as follows:- dc in next st, sl st in matching st on the other cup.
- Continue joining fans with sl sts, making sure points are centered.
- Leave a neat join at the center; turn cups RS out.
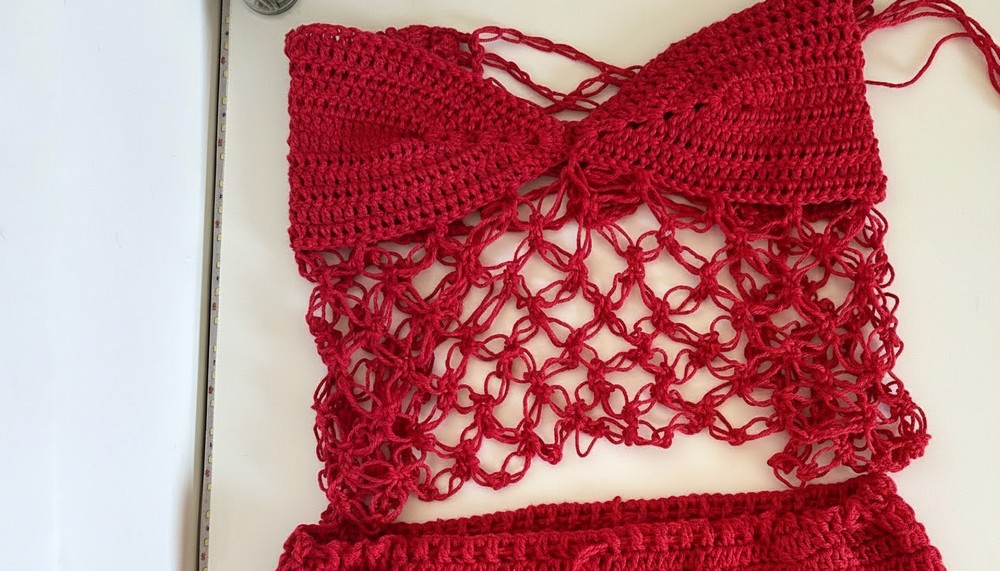
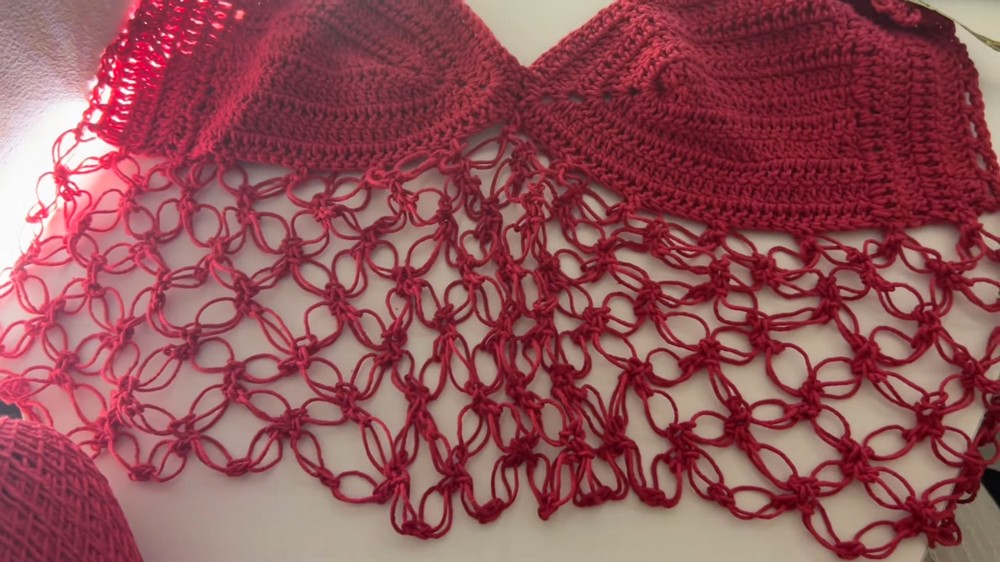
Faux Macramé Lattice Band
With RS facing and starting at one side of the underbust:
- Insert hook through the side, pull up very long loop (the “giant braid”).
- Insert hook through the back part of the long ch, sl st/sc to secure.
- Repeat for desired width, making each braid the same length each time (practice for even tension).
- After two “giant braid” loops, sl st/sc to base ch, spacing about 3–6 sts apart for forming diamond “macrame” shapes.
- On subsequent rows, make 3 “braids” at row start, then work your pattern, inserting sc into previous row’s sc/joins.
- Continue for desired band width (recommend ~19 cm).
Back Ties
- With larger hook (optional for looser ties), ch a long cord (recommend 100+ ch, or enough for a back-cross lacing).
- Make 2 cords for both sides.
- Weave the cords through your grid, criss-cross style, skipping a space each time so the pattern is not too tight.
Finishing
- Weave in all yarn ends with tapestry needle.
- Try on and adjust the back ties for fit.
- Block gently if desired for an even finish.
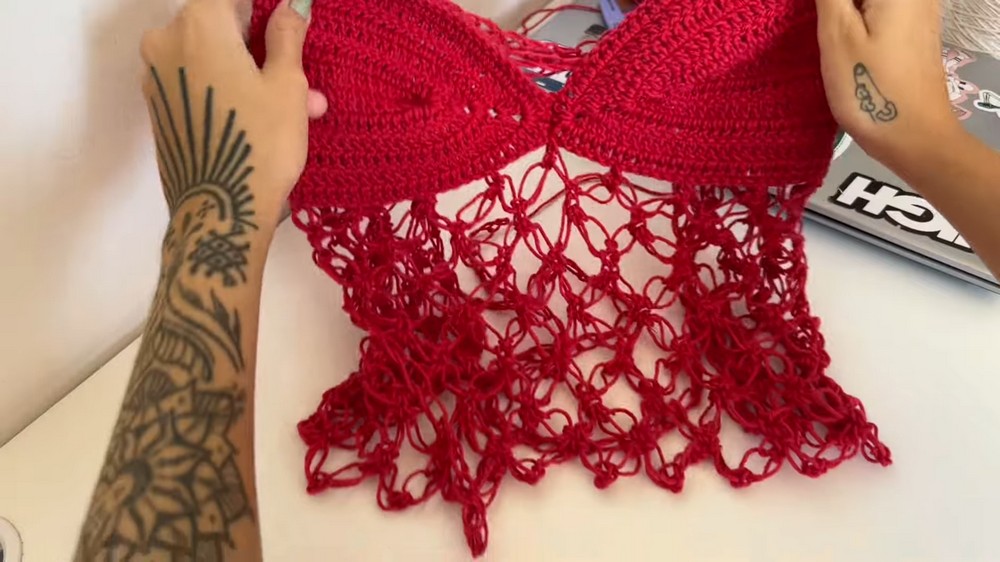
Conclusion
This modern “faux macramé” crochet top combines a classic cup construction with a dramatic, textural underbust band for a beautiful and trendy look. With a bit of attention to stitch placement and tension for the faux macramé lattice, this top achieves a real knotted effect, perfect for festivals, summer, or beachwear.
Pattern Correction
- Stitch Counts: Always ensure each cup has the same number of stitches per side and same number of rows.
- Corners: Don’t miss dcs into the tops of ch-3s—this keeps the sides even.
- Symmetry: When joining cups, align fans precisely so the center join is smooth and cups are even.
Tips
- Even Tension: For the “macramé” band, keep braid length consistent for a neat look.
- Sizing Up/Down:
- XS: Start with fewer chains (~15–16).
- M/L: Start with more (~22–24), and/or add more rows after the fan.
- Back Ties: Longer chains mean a more adjustable top; err on the side of more, you can always cut and sew down excess.
- Try on as you go: For best fit, especially if modifying size.
- Blocking: After finishing, wet block or steam to open up the lattice for a pro finish.