Crochet Star Sweater Pattern – Stunning and Free
Find your next project with this Free Crochet Star Sweater Pattern, and enjoy making a comfy sweater that shines bright with starry style.
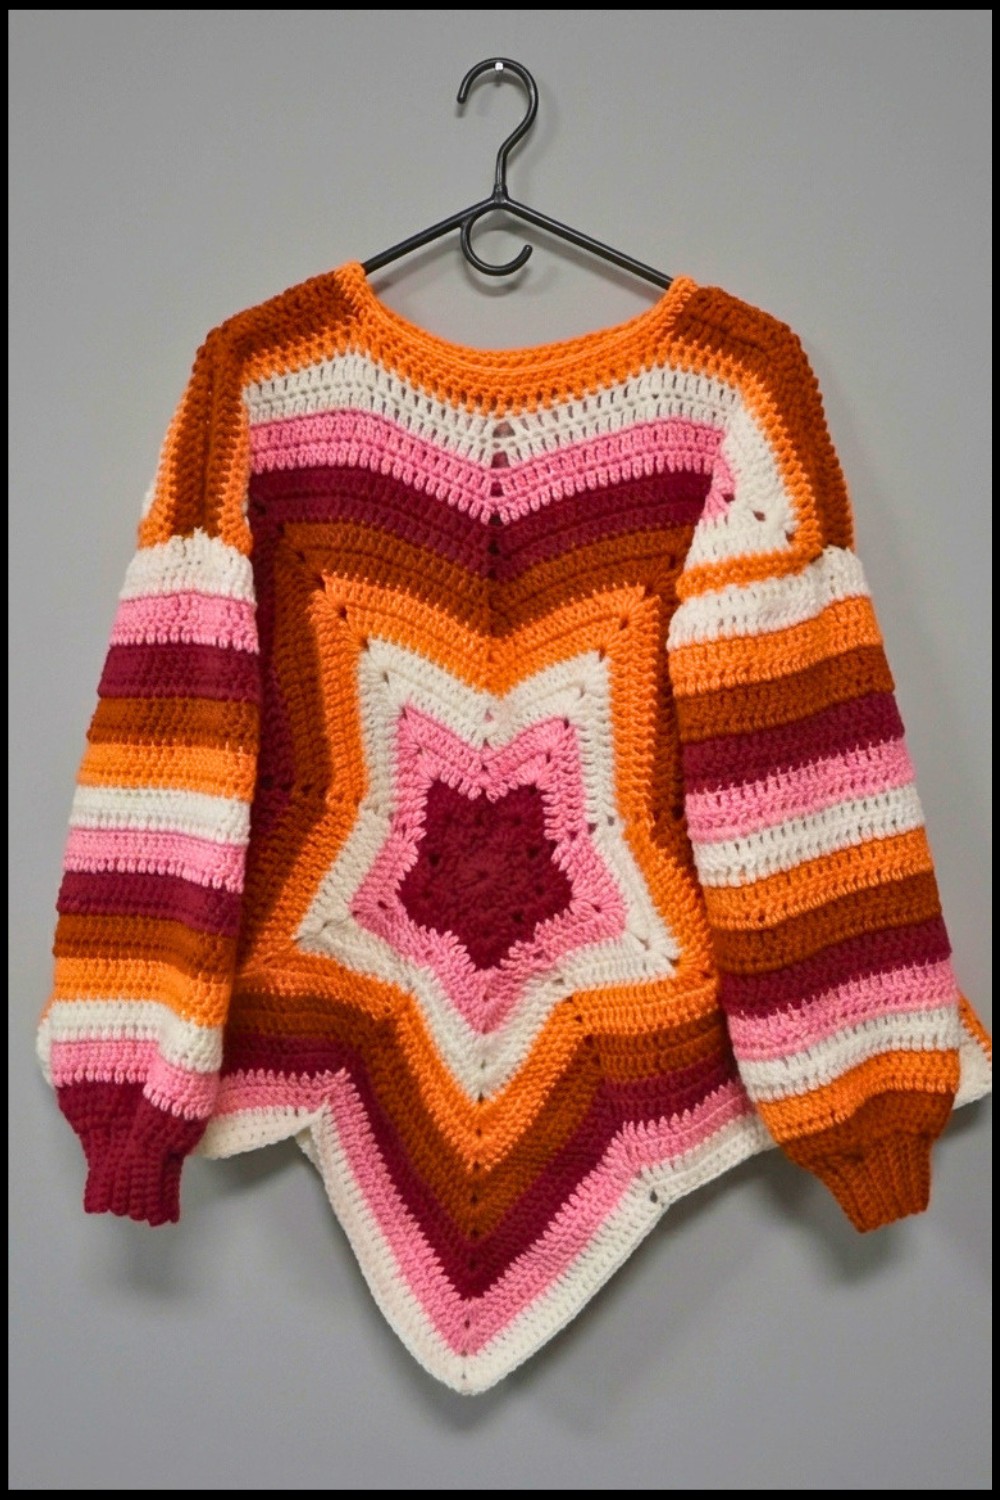
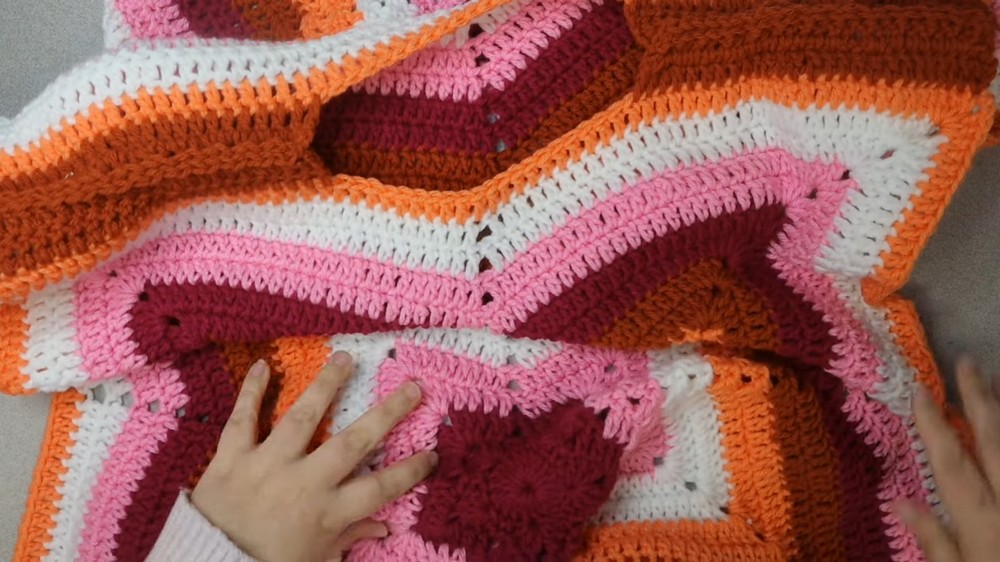
A sweater that looks like a shining star brings happiness to anyone who sees or wears it. Bright colors or soft shades can be used to make each point of the star pop and the shape always feels lively and youthful. The Crochet Star Sweater pattern lets you crochet simple stitches in rows that bloom out into a five-point shape and this style gives your body extra comfort and room to move.
Easy Crochet Star Sweater Pattern You’ll Love

Feeling the soft yarn on your skin and seeing the eye-catching design helps you feel confident wherever you go. Wear it when you want to stand out at a gathering or just stay cozy at home—its warmth makes every day better. The pattern is easy to keep track of and you can change the colors and even size as you like so beginners and experienced hands both enjoy making and wearing it. Add a bit of sparkle to your wardrobe with this creative design.

Free Crochet Star Sweater Pattern
Materials
- Yarn: Medium weight (#4, worsted) acrylic yarn
- Yardage estimate: ~2 skeins per color if using 2 colors, or 1 skein each for 5 color stripes for most sizes.
- Hook: 5.25 mm crochet hook (5.0 mm or 5.5 mm also usable if not available)
- Tapestry needle (for sewing panels and weaving in ends)
- Stitch markers (suggested for shoulder/neck shaping and width-expansion rows)
- Scissors
- Measuring tape
Key Abbreviations
| Abbreviation | Stitch/Meaning |
|---|---|
| ch | chain |
| sc | single crochet |
| dc | double crochet |
| sl st | slip stitch |
| st(s) | stitch(es) |
| rep | repeat |
| BLO | back loop only |
Special Notes
- Pattern is sized by rows, not inches: Refer to the chart for guidance. Try on the panel or compare to a favorite sweater for best fit.
- Panel construction: Two identical star panels (front and back), two sleeves; minimal sewing at seams.
- Panel and sleeve color sequence: Can be adjusted; sample switches colors every 2 rows.
- The “first row” (foundation circle of 20 dc) is NOT counted in row totals; begin row counts after joining circle.
- Increase widths without adding length: An optional extra width-building row is provided for larger sizes.
- You can add a shoulder/neckline extension for a fitted neckline, or skip for an off-the-shoulder look.
Pattern Instructions
A. Star Panel (Make 2)
Foundation
- Ch 5 (or make a magic ring).
Sl st to first ch to form a ring, or tighten ring if using magic loop. - Ch 3 (counts as first dc).
- 19 dc into the ring (20 dc total).
- Sl st to top of beg ch-3 to join.
Do not count this as Row 1 in your row count.
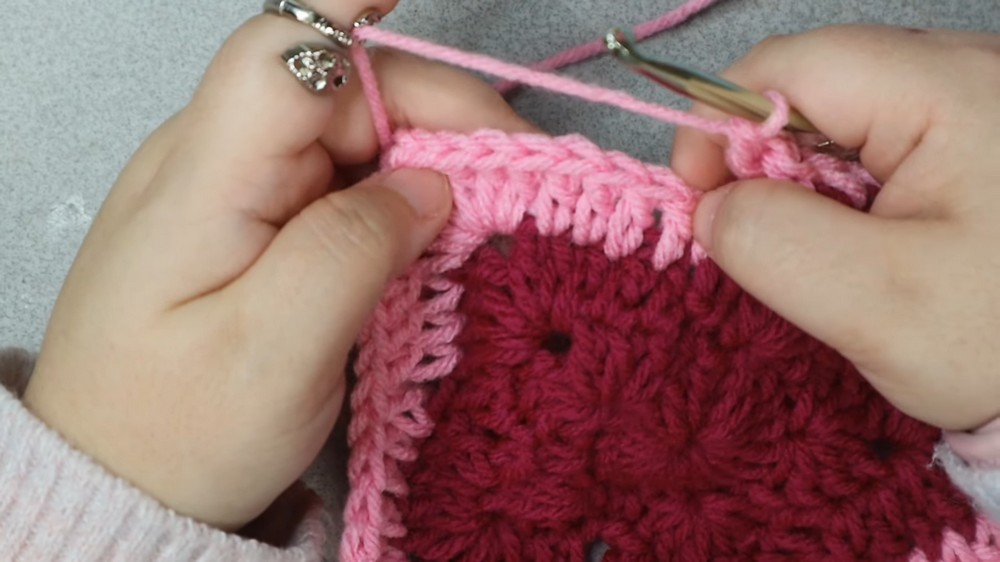
Row 1 (Star Points Setup)
- Sc in the next st (not where you sl st, but the next real dc).
- Skip 1 st. In next st:
- (3 dc, ch 2, 3 dc) all in same st (this forms the first point).
- Skip 1 st, sc in next st. Skip 1 st, cluster in next st (3 dc, ch 2, 3 dc) in same st.*
- Rep * around (for 5 points in total).
- Sl st into st after final cluster, then sl st into next st (for a smooth start to next round).
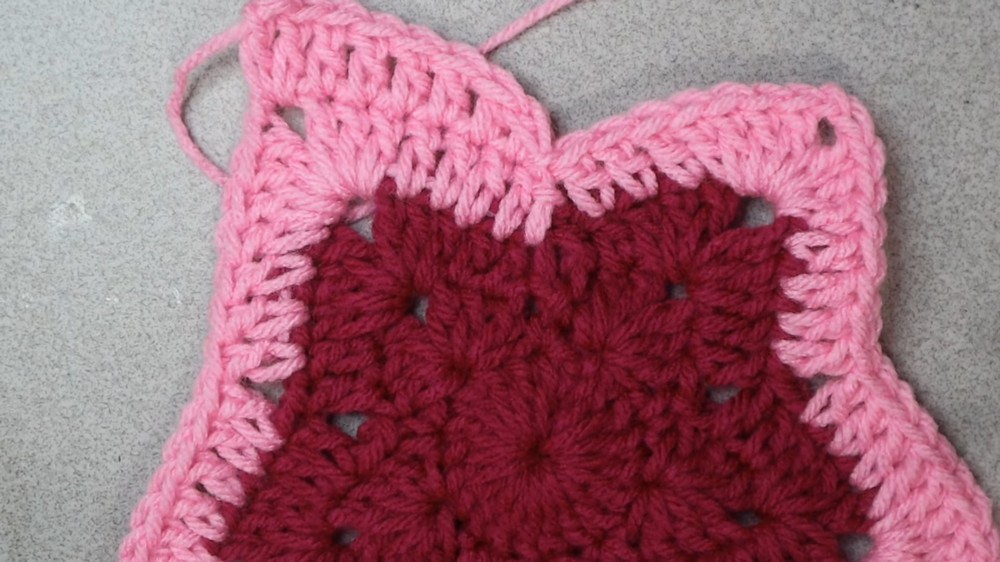
Row 2 and Beyond (Building Star)
- Repeat the following for each row:
- Work dc in each st across up to a point. At each “point” (ch-2 space):
- (3 dc, ch 2, 3 dc) in point space.
- Between points: Skip the 2 inner “valley” stitches (creates inner notches of star).
- Start row: Sl st to first working position if needed, then proceed.
- Color change (optional): Always change color at the end of a row as described below.
- Work dc in each st across up to a point. At each “point” (ch-2 space):
Row count guideline:
- For each size, total rows (excluding foundation round) are approximately:
- S: 13 rows
- M: 14 rows
- L: 15 rows
- XL: 16 rows
- 2X/3X: Work to Row 16 and see Width-Only Expansion below
Changing Colors
To change color at the end of a row:
- On the last dc, insert hook, y o, pull up loop, y o, pull through 2, before final y o/pull through, attach new color to finish the stitch.
- Fasten off previous color, leaving tail. Continue with new color and crochet over tails as you work next row.
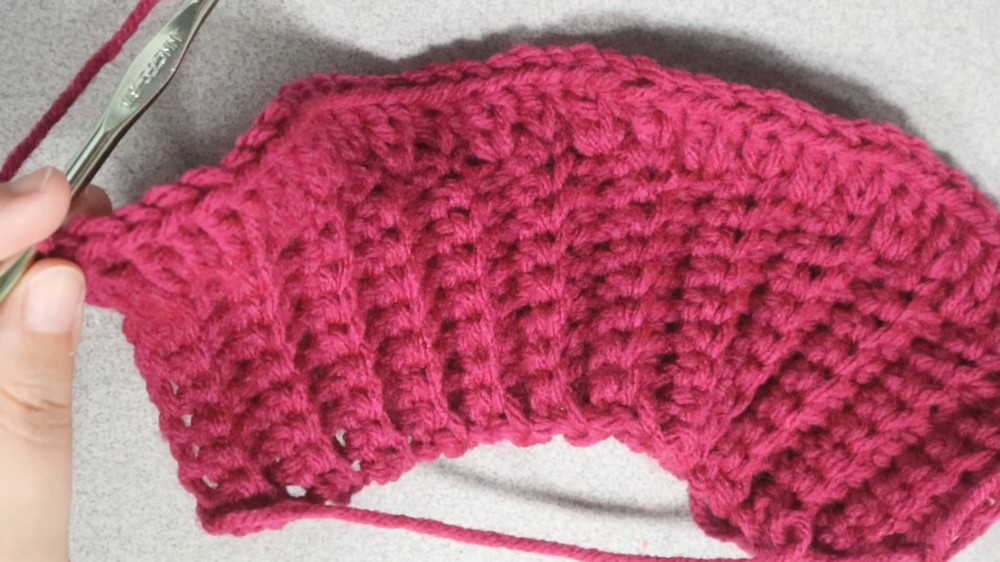
B. Optional Width-Only Expansion Rows (For 2X, 3X, or Custom Fit)
After completing your final size row:
- Identify which star point will be the lower hem (use seam as a guide—place at bottom).
- Starting at one of the points next to the bottom, attach yarn, ch 2 or 3 to begin row.
- Dc in each st (do NOT skip inner “valley” stitches this time) all the way around four of the star points only, ending just before the bottom point.
- Place a marker at your end point.
- Fasten off if only making one row, or ch 2/3, turn, dc across same sts if adding more “width-only” rows.
- This will widen (not lengthen) the sweaters on the sides and shoulders for better fit for larger bust or upper arms.
C. (Optional) Shoulder/Neckline Extension
- With the star panel flat, use stitch markers to mark out a section along the top edge:
- For most: about 24–27 sts wide (approx. 7–9″).
- Attach yarn at one stitch marker.
- Work 1–4 rows of dc across, turning at each end, for shoulder extension/neckline depth.
- Fasten off, leaving a long tail for sewing.
D. Second Star Panel
- Repeat sections A, B, C as above for the back piece.
E. Sleeves (Make 2)
- With very long yarn tail, ch 10.
- Row 1: Sc in 2nd ch from hook and each across (9 sc).
- Row 2: Ch 1, turn, sc BLO across.
- Rep Row 2 for 24 rows total (or desired wrist fit; count raised rows to check).
- Do not sew ends closed yet.
- Turn ribbing: Ch 2, now work along the side of ribbing.
- 2 dc in the side of each sc row pair. You should have approx. 48 dc (double the number of ribbing rows).
- Row 2: Ch 2, turn. Dc in each dc across. Increase by working 2 dc into the last st (sleeve increases).
- Work 2 rows of same color, changing color as desired.
- Repeat sleeve increase row (2 dc in last st) for next two colors (6 rows total with increases at end).
- After 6 rows, just work plain dc across for a total of 26 rows (or as desired for your arm length).
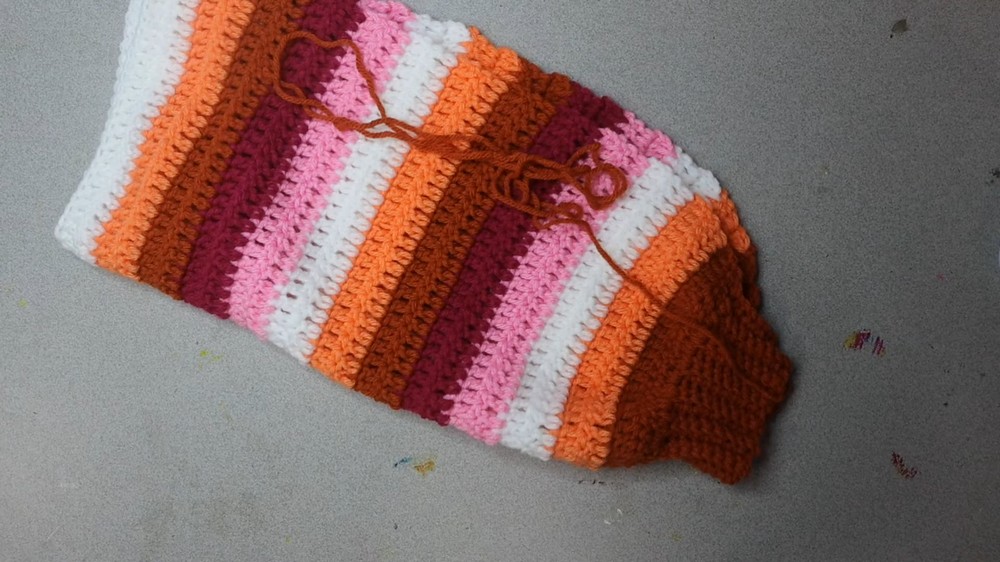
- End with a long tail for sewing.
F. Assembly & Sewing
- With panels RS together, sew shoulder sections (if done) using tails and a tapestry needle.
- If omitting neckline, sew top 1–2″ for a wide neck.
- Sew sleeves into tubes along the long side if not already done.
- Attach sleeve to body:
- Place marker at center of sleeve cap; match with shoulder seam.
- Sew sleeve top around star arm opening, centering if possible.
- Sew sleeve and side seam at once: Starting at sleeve cuff, sew up to underarm, then down side of body panel, stopping at the final valley (point) before the front hem point (leave bottom point open as sweater hem).
- Repeat for other sleeve and side.
- Turn sweater RS out.

G. Neckline (Optional Border)
- Attach yarn at any point of the neck opening.
- Ch 1, sc all around the neckline, spacing evenly on sideways edges.
- Aim for about 6 sc per 4 dc rows.
- Join with sl st, ch 1, and repeat for a 2nd row if a tighter neckline is preferred.
- Fasten off, weave in ends.
Size/Row Chart (excluding foundation circle)
| Size | Rows to Work |
|---|---|
| S | 13 rows |
| M | 14 rows |
| L | 15 rows |
| XL | 16 rows |
| 2X/3X | 16 + width expansion rows |
For custom fit, try on or measure as you go.
Conclusion
You now have a beautiful, customizable Star Sweater, perfect for color blocking, stripes, or solids. This project showcases a clever star motif, with minimal seams and a striking silhouette. Adjust width, arm/sleeve length, and neckline as you desire for the perfect fit.
Pattern Corrections & Tips
- Pattern Correction: The foundation row of 20 dc is not included in row counts.
- Tip: To keep seams as invisible as possible, always sew with WS facing and use mattress stitch or slip stitches (if using your hook).
- Tip: If you prefer a looser neck, skip the neckline extension and only sew 1–2″ at the shoulders.
- Tip: Always leave long tails at sleeve and body panel starts for easy seaming.
- Tip: For cleaner sewing, block panels gently after completing.
- Tip: If in doubt, compare your panel/sleeve with a sweater you like for sizing.