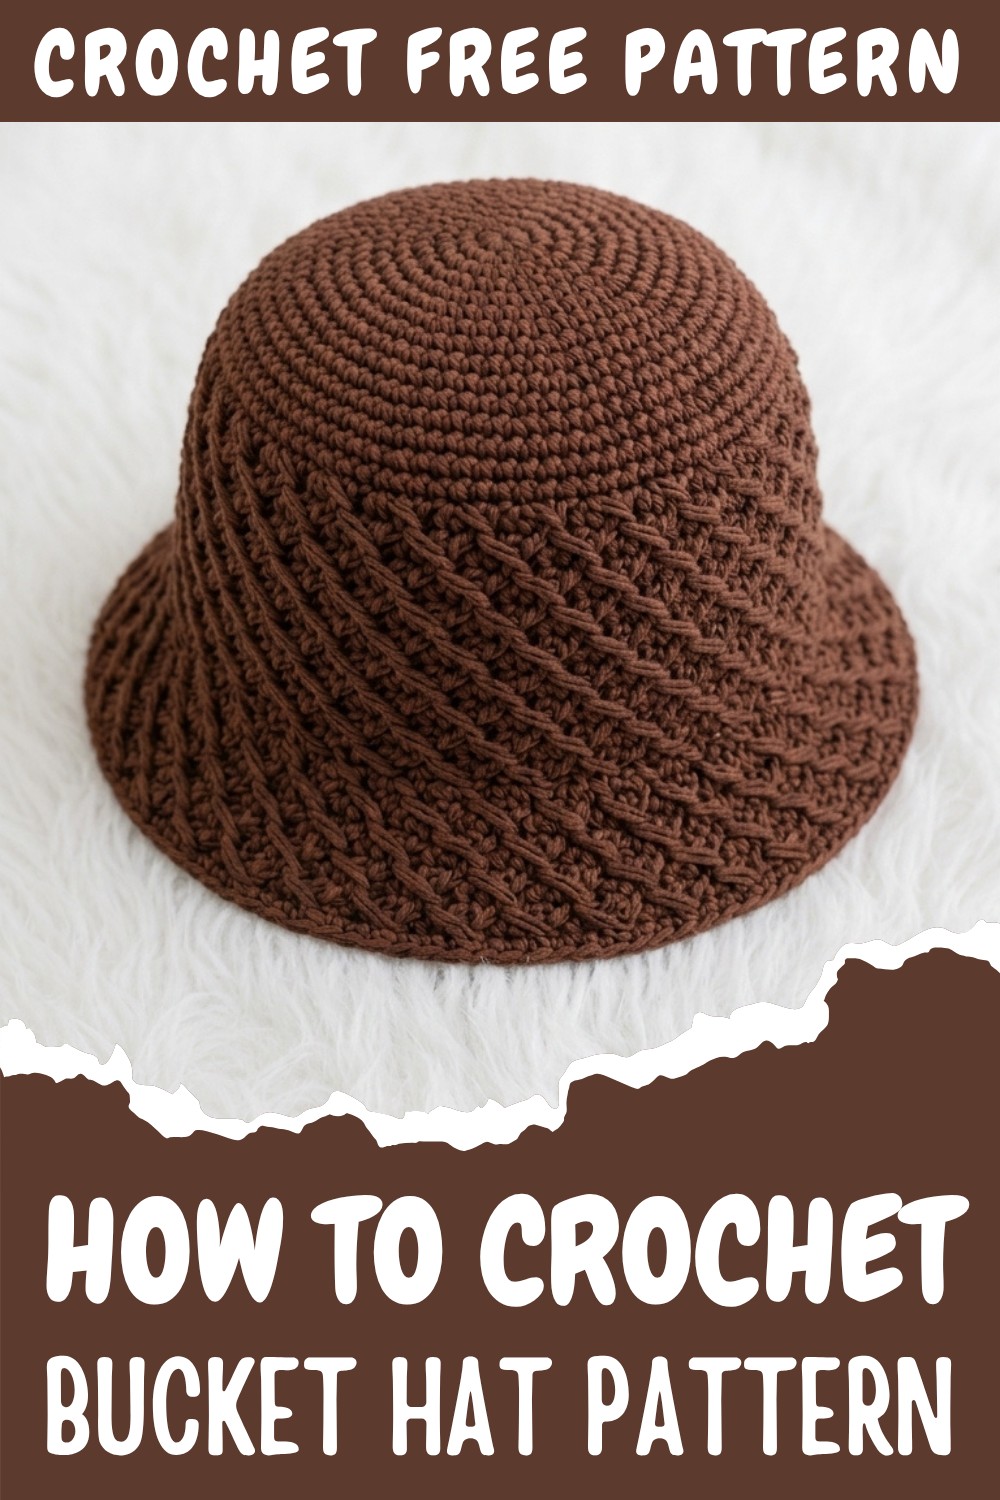
Free Crochet Bucket Hat Pattern for Sunny Days
Crochet bucket hat pattern for sun-filled days; craft a stylish, lightweight hat offering comfort, sun protection, and a trendy summer look.
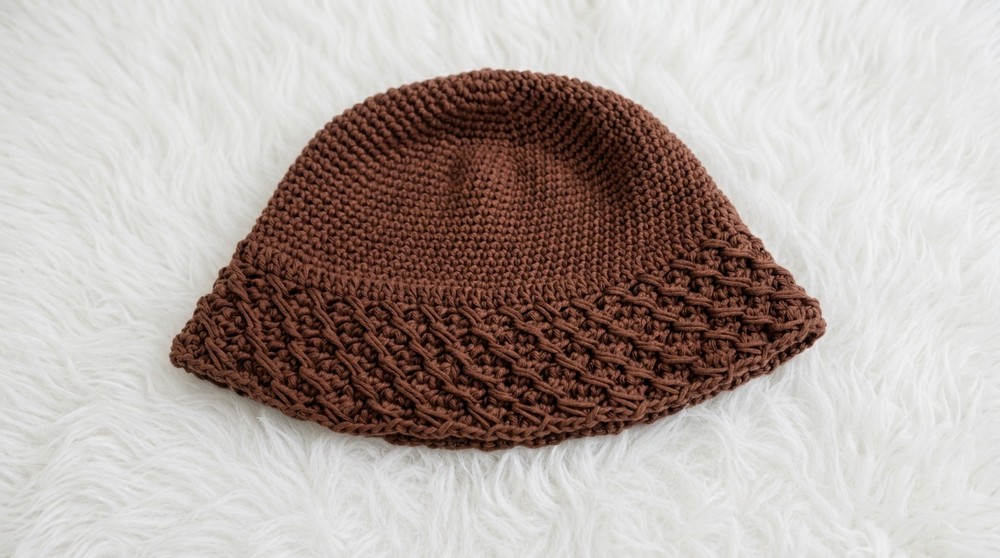
It’s always satisfying to make something useful with your hands, and trying out a free crochet bucket hat pattern is a great way to do just that. I picked up this pattern because I wanted a hat that would actually fit me, look cool, and feel comfortable for both summer and winter. The thing I like most about this design is its clean and classic look with a sturdy, all-cotton feel. There is a certain beauty in the simplicity of the bucket shape, where the crown sits smoothly on the head and the brim offers just the right amount of shade.
Crochet Bucket Hat Pattern – Free
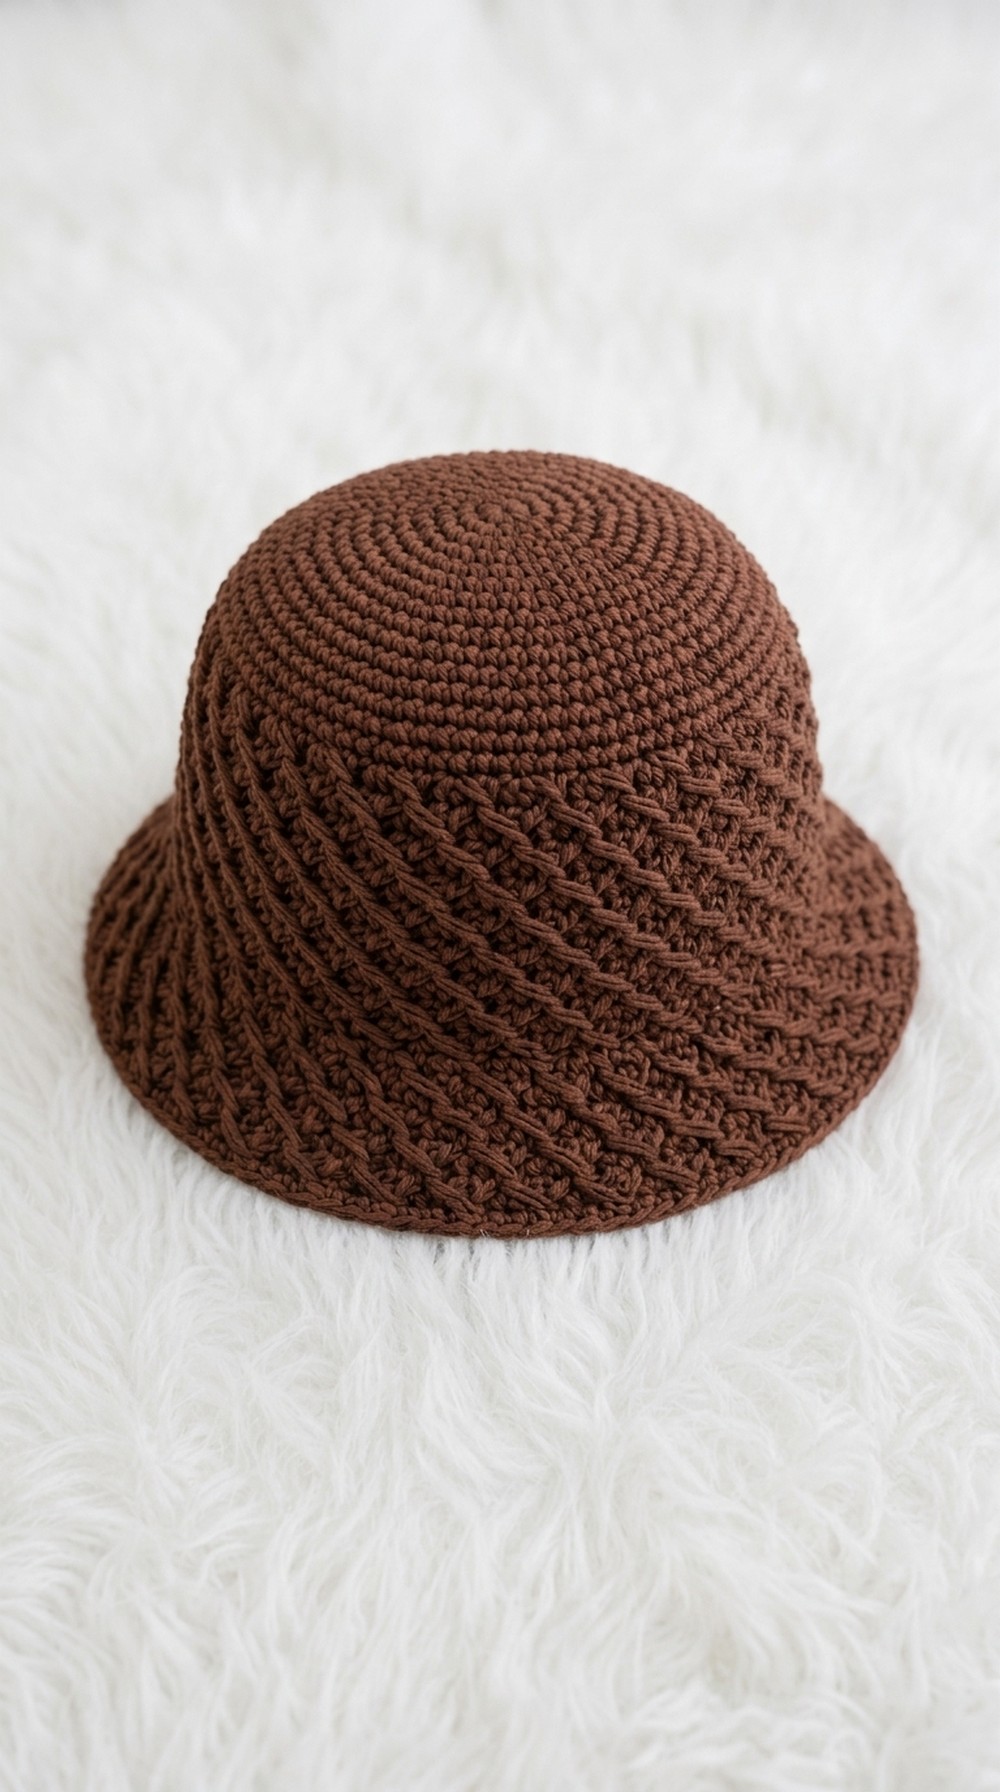
This hat works for sunny days outside or even as a casual statement piece when the weather gets chilly. I noticed that the all-cotton yarn makes the hat breathable and soft, so it’s easy to wear wherever you go, whether it’s the park, a festival, or just heading out for errands. The finished hat also has a nice structure—nothing floppy or flimsy—which adds to the overall look and wearability. For this pattern, you’ll want hook number 4 mm and soft cotton yarn to get that crisp finish. After completion, the hat is about 19 cm across the top, fitting comfortably for most adults. The special stitch you’ll practice is the magic circle, which helps make a neat, tight start for your hat.
Anyone can make this hat, even if you’re new to crochet. The pattern begins with a magic circle and simple single crochet rounds, which are easy to pick up after a bit of practice. You get to see steady progress as you work through each round, gradually increasing to shape the crown before moving down the sides. Adding the brim not only gives the hat its unique bucket style but also teaches you how to create sturdy, even edges.
Along the way, you learn important basics such as chaining, increasing, and working in continuous rounds with a stitch marker. As someone who values practical and versatile projects, I know these are skills you can use for more than just hats. Once you finish this pattern, you’ll be ready to try crocheting other accessories like beanies, sun hats, or even adding brims to bags for an extra touch. Making this bucket hat gave me the confidence to tackle more projects and appreciate the creative side of making your own gear.
Classic Textured Bucket Hat Crochet Pattern
Create an elegant and modern bucket hat with this detailed crochet pattern, inspired by Anuta’s video tutorial. Featuring a clean textured crown and a slightly flared brim, this hat is perfect for all seasons—just choose your favorite cotton yarn and make a stylish accessory. This pattern is written in US crochet terminology and is best suited for intermediate to advanced crocheters who are comfortable with increases and working in the round.
Skill Level
- Intermediate to Advanced: This pattern assumes proficiency in working in the round, consistent increases, reading stitch placement, and basic finishing techniques.
Materials
- Yarn: 100% Cotton, Worsted Weight (Sample uses Drops Paris Unicolor)
- Hook: 4.0mm crochet hook (instead of recommended 5.0mm for tighter texture)
- Notions:
- Stitch markers
- Measuring tape
- Yarn needle
- Scissors
Optional: Blocking pins and mat for shaping
Key Abbreviations
- ch: chain
- sc: single crochet
- dc: double crochet
- st(s): stitch(es)
- sl st: slip stitch
- rep: repeat
- beg: beginning
- rnd: round
- sk: skip
- MC: magic circle
Special Notes
- The hat is crocheted in a spiral (continuous rounds) to avoid seam lines.
- Always place a stitch marker in the first stitch of each round to help track stitch counts.
- Chain 1 at the start of the spiral is for securing the magic circle and does not count as a stitch.
- If you want a larger or smaller hat, adjust increases or the number of crown rounds as needed.
Finished Size
- Height: ~8.5 inches (22 cm)
- Brim Circumference: ~17 inches (46 cm)
- Brim Width: ~11.5 inches (30 cm)
- Fit: Adult (easily adjustable by changing increase rounds)
Pattern
Crown
1. Magic Circle & Foundation
- Create a Magic Circle (MC) with your yarn.
- Ch 1 (for securing only, does not count as a stitch).
- Work 6 sc into the MC. Tighten the MC.
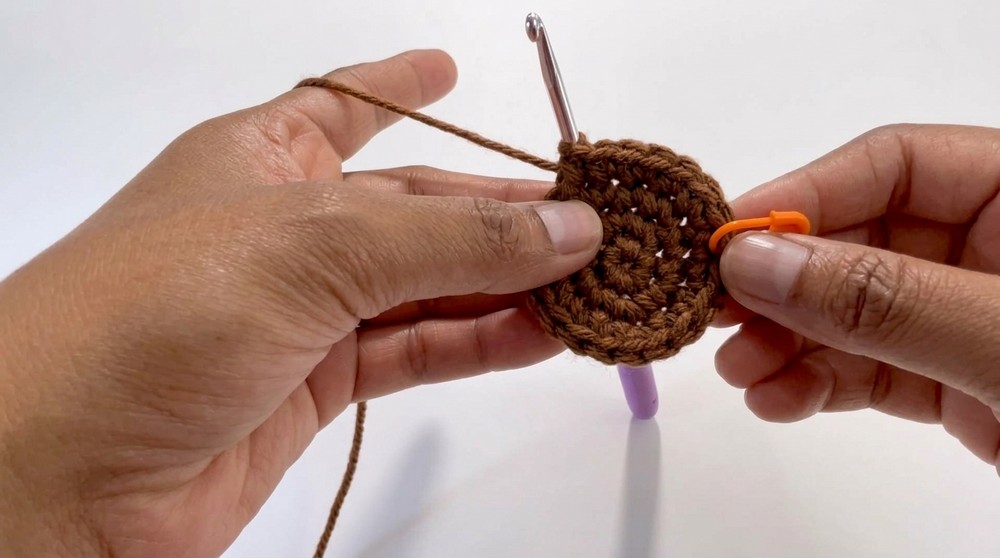
After finishing this round, you should have a neat circle with 6 sc in the center.
If you’re new to the MC, simply wrap the yarn around your fingers and insert your hook through the loop, making six sc as foundation stitches.
2. Crown Expansion – Increasing Rounds
- Place a stitch marker in the first sc of each round for easy tracking.
Rnd 2:
- 2 sc in each st around (12 sc).
Rnd 3:
- (1 sc in next st, 2 sc in next st) around (18 sc).
Rnd 4:
- (1 sc in next st, 1 sc in next st, 2 sc in next st) around (24 sc).
Rnd 5:
- (1 sc in next 3 sts, 2 sc in next st) around (30 sc).
Rnd 6:
- (1 sc in next 2 sts, 2 sc in next st) around (36 sc).
Rnd 7:
- (1 sc in next 5 sts, 2 sc in next st) around (42 sc).
Rnd 8:
- (1 sc in next 3 sts, 2 sc in next st) around (48 sc).
Rnd 9:
- (1 sc in next 7 sts, 2 sc in next st) around (54 sc).
Rnd 10:
- (1 sc in next 4 sts, 2 sc in next st) around (60 sc).
Rnd 11:
- (1 sc in next 9 sts, 2 sc in next st) around (66 sc).
Rnd 12:
- (1 sc in next 5 sts, 2 sc in next st) around (72 sc).
Rnd 13:
- (1 sc in next 11 sts, 2 sc in next st) around (78 sc).
Rnd 14:
- (1 sc in next 6 sts, 2 sc in next st) around (84 sc).
At this stage, you have formed the hat’s crown and begun the sides. Check your stitch marker placement each round to ensure accurate increases.
If you can’t read the pattern: After the first 6 sc stitches, increase your stitch count every round as shown, alternating single crochets and increases.
Body of Hat
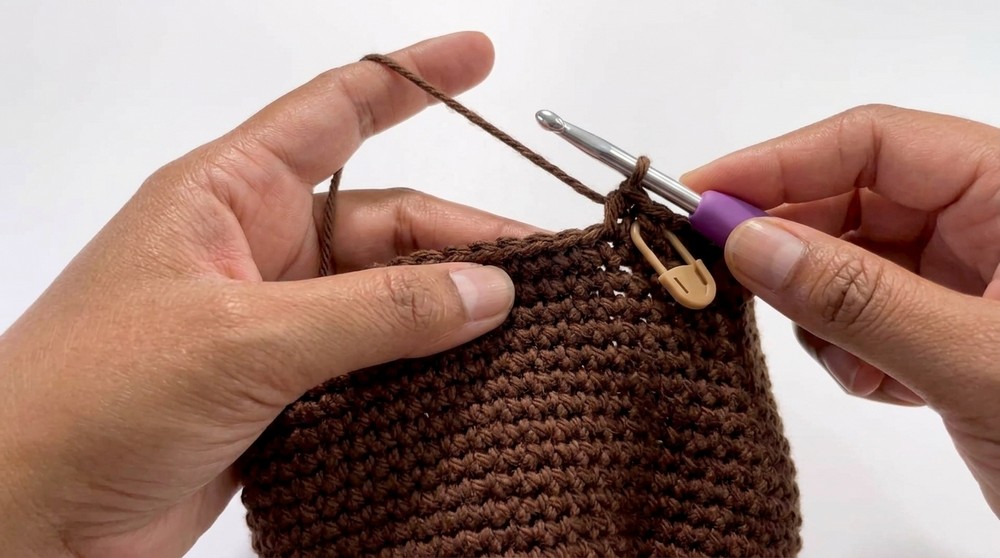
3. Hat Body – No More Increases
Rnds 15–28:
- 1 sc in each st around (84 sc per round).
The sides begin to form, giving shape to the bucket hat. Stitch count stays steady in these rounds.
Now crochet a tube shape by adding single crochets in every stitch for 14 rounds. This is the main body of your bucket hat.
Brim Shaping
4. Brim Setup – First Increase
Rnd 29:
- Switch to dc for a firmer brim.
- (1 dc in next 13 sts, 2 dc in next st) around (90 dc).
The brim is now wider and starts to flare slightly.
For the brim, switch to double crochets. Place two dc into every 14th stitch to make the brim wider.
5. Brim Texture
Rnd 30:
- (Skip next st, dc in next 2 sts, dc in the skipped st behind to create a crossed/long texture stitch) around (maintain 90 dc).
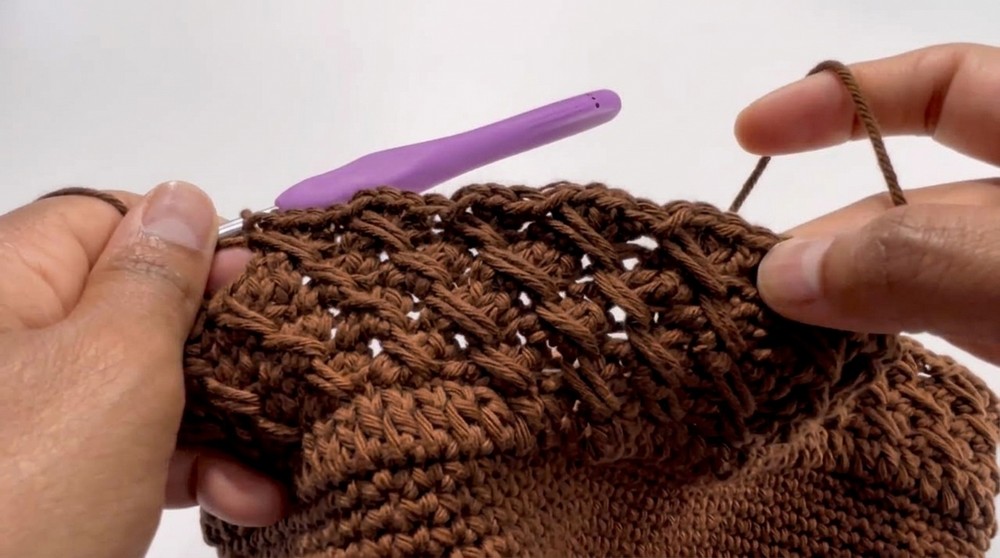
Continue this pattern for a neat, textured effect around the brim. The hat will begin to curve outward.
You will work a sequence of double crochets, then insert your hook into skipped stitches to create a raised, textured pattern. Repeat across.
6. Brim Flare – Optional Increase
Rnd 31:
- Increase brim subtly by adding extra dc in the same stitch every few repeats.
In this round, occasionally add two dc in one stitch to encourage extra flare. If you prefer a more subtle brim, continue as in Rnd 30.
If the brim is not flaring enough for your liking, add an extra double crochet in a stitch every third pattern repeat.
7. Finish Brim & Edge
Rnds 32–35:
- Continue with the textured brim pattern:
- For each repeat, alternate 2 dc and 3 dc in a repeat, then work a crossed dc in the skipped stitch as before.
- Continue until the edge is as wide as desired.
Last round:
- Fasten off. Use a tapestry/yarn needle and weave in all ends neatly, using invisible join techniques if possible for a flawless finish.
After finishing, gently block the hat to flatten the brim and set the structure.
Repeat the textured pattern until the brim is the width you like. Finish off your hat, weave in ends, and shape with steam or blocking pins if needed.
Conclusion
This bucket hat pattern delivers a classic look with a clean crown, sturdy body, and beautiful textured brim. Cotton yarn ensures breathability for summer and warmth for colder seasons. Enjoy wearing your stylish hat, or gift it to someone special!
Pattern Correction & Tips
- Pattern Correction: If you notice the brim is curling inward, add one or two extra increase rounds with more dc in each round. If the crown is too tight, adjust the increasing rounds or use a larger hook.
- Tip: Always count stitches at the completion of each round and use stitch markers as a guide! If you want more structure, spray starch or block your hat.
For All Users
Congratulations! You now have a classic bucket hat. If you’re not comfortable reading patterns, just follow each step round by round—starting with increases for the crown, straight rounds for the body, and textured patterns for the brim. Mark your first stitch each round for counting and use your tape measure to confirm sizing as you go.
Final Thoughts
With careful attention to increases, texture, and round tracking, this bucket hat pattern will ensure a beautiful result. If you need to adjust, simply add or remove rounds as needed.