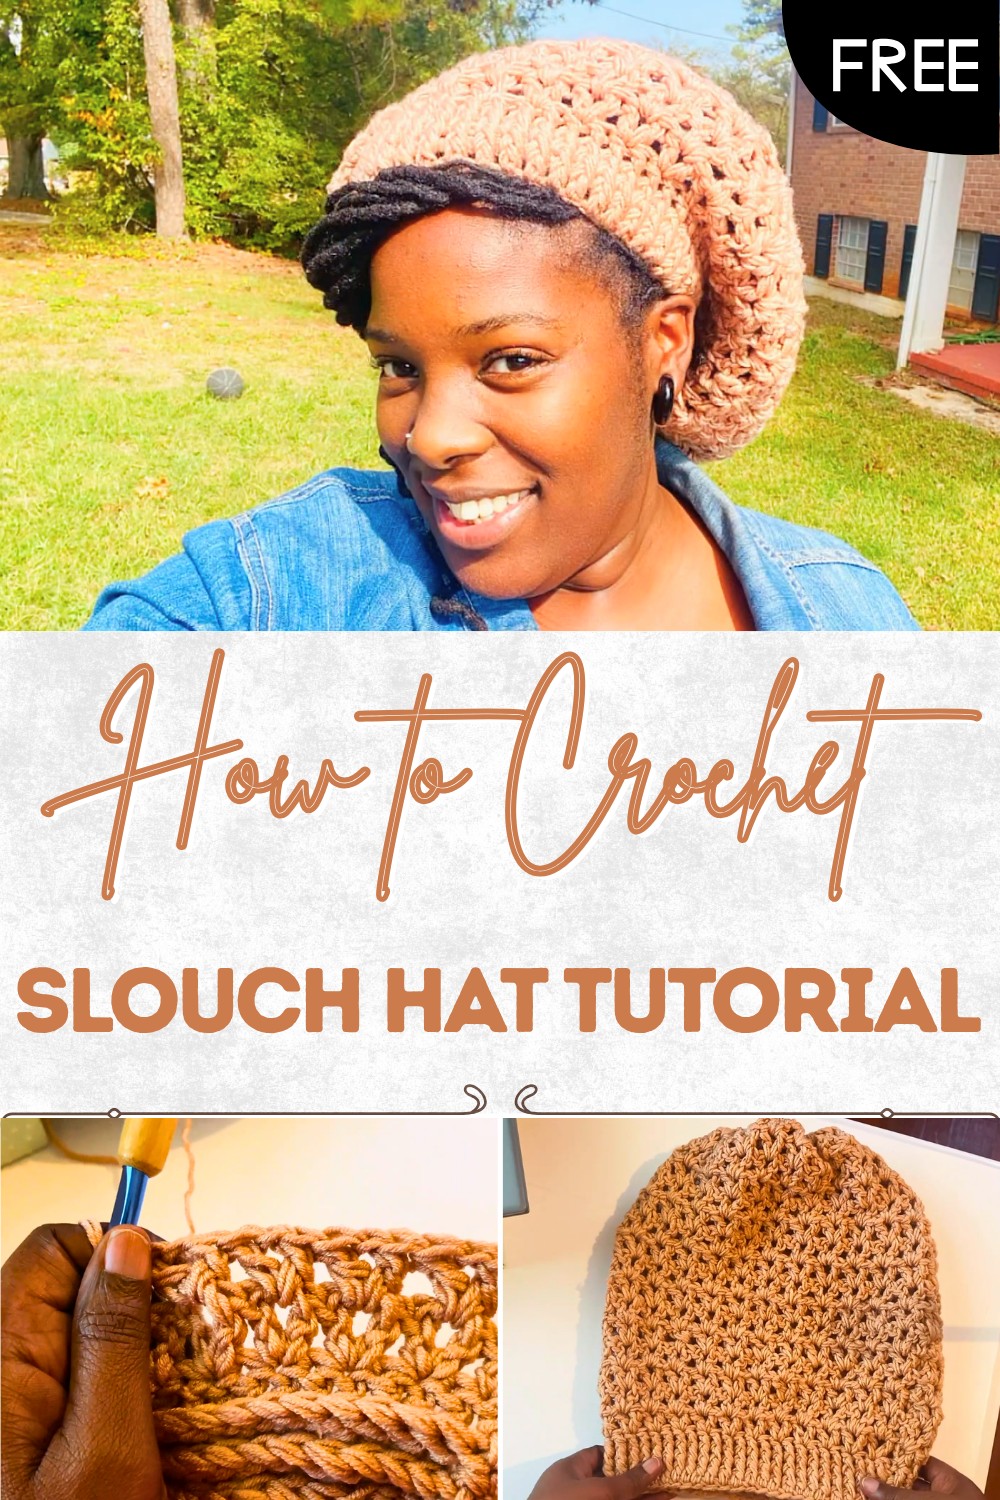
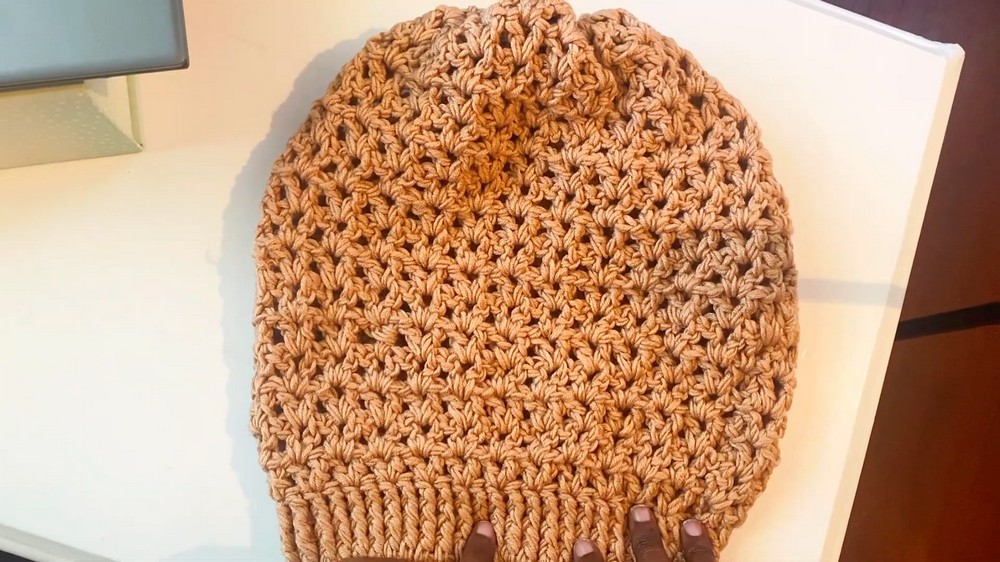
Free Crochet Pattern: Perfect Slouchy Hat
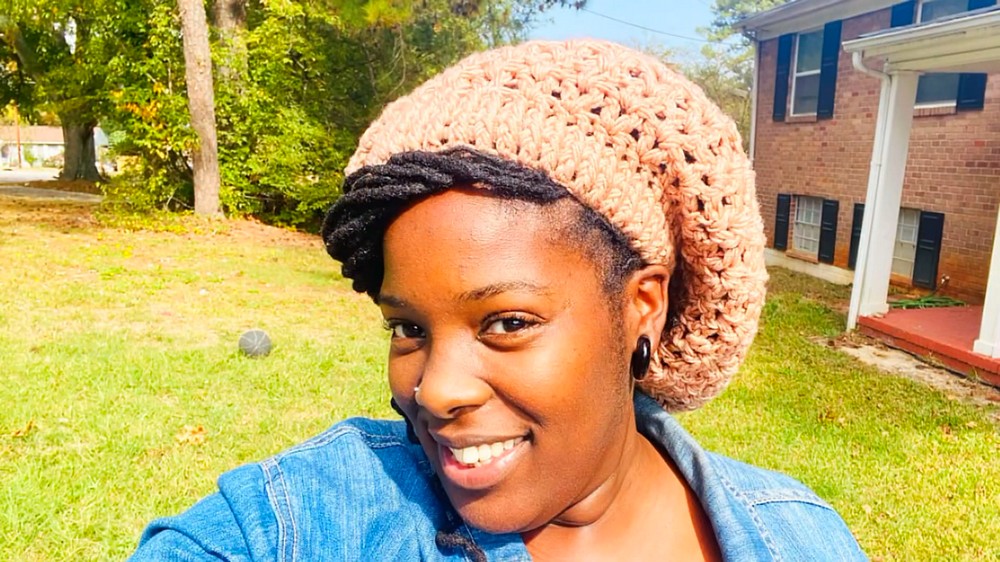
Wrap yourself with this Free Crochet Slouch Hat Pattern that’s perfect for adding modern, stylish flair and warmth to your everyday look.
Soft yarn wrapped gently around your head brings comfort and a gentle style to your everyday look. A piece like this adds a relaxed and cozy touch to your outfit and the crochet slouch hat pattern does just that. The unique design lets the hat sit loosely on your head so you never feel tight or uncomfortable. Its wide and slouchy shape gives a playful and casual look that suits every face and hair type.
Easy Free Crochet Slouch Hat Pattern for Everyday Wear
Light enough to wear in every season yet warm enough for those chilly months a slouch hat is perfect for daily use or a special trip outside. The beauty lies in its simple stitches and soft colors which make each hat unique and eye-catching. With this pattern anyone can make a piece that brings joy confidence and a little flair to their everyday wardrobe. Enjoy the blend of style practicality and handmade charm every time you put it on.
Simple Crochet Slouch Hat Pattern (Beginner-Friendly)
Materials
- Yarn: Worsted weight (#4) or Aran weight yarn
- Designer used two strands of DK/light worsted (#3/8)
- Suggested: Use a single strand if using regular #4 or #5 yarn; use two strands held together if using lighter yarn
- Hook:
- 6.0 mm (*J/*10) crochet hook for brim
- 8.0 mm (*L/*11) crochet hook for hat body
- Notions:
- Tapestry/darning needle (for finishing)
- Scissors
- Stitch marker (optional, for marking rounds)
- Optional: Satin lining or bonnet insert for interior
Abbreviations
- ch: chain
- st(s): stitch(es)
- sl st: slip stitch
- dc: double crochet
- fpdc: front post double crochet
- rnd: round
Special Notes
- Hat is worked bottom up, in joined rounds.
- Brim circumference: Pattern starts with a chain of 50, which can be adjusted for your (or the recipient’s) head size. The count should be an even number.
- Designer recommends 18 rounds of V-stitch for a classic slouch. Adjust for more/less slouch.
- V-stitches are (dc, ch 1, dc) in the same stitch or space.
- Always check the fit after the brim before proceeding; adjust for snug or loose fit as needed.
Instructions
Brim
- With 6.0 mm hook:
- Ch 50 (or the number needed to fit comfortably around head, even number).
- Ensure chain is not twisted, then sl st into first ch to form ring.
- Ch 2 (does not count as dc here & throughout).
- Dc in first ch, dc in each ch around. (Total = your starting chain number).
- Join with sl st to top of first dc.
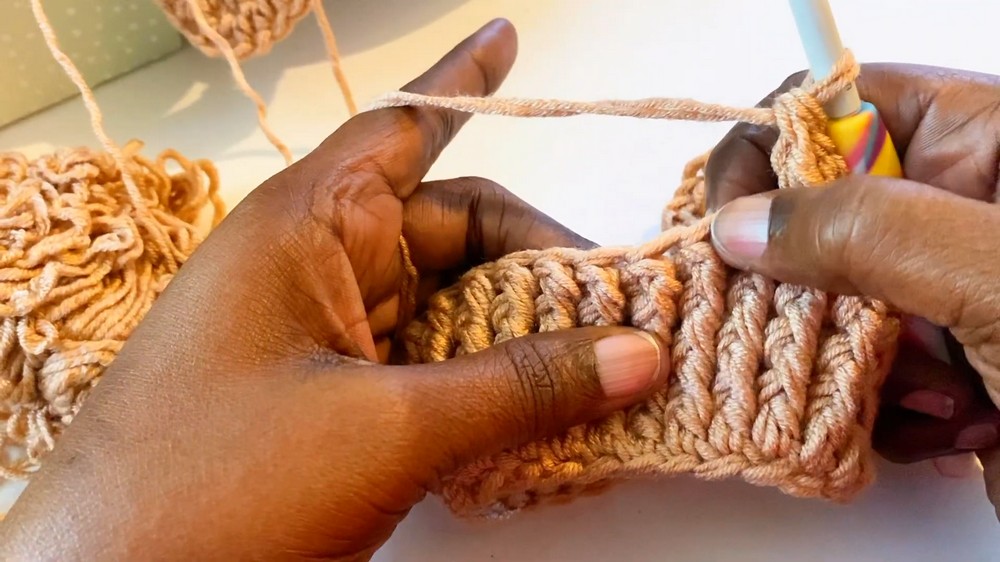
Brim Ribbing
- Ch 2, (still using 6.0 mm hook).
- Fpdc (front post double crochet) around each st around:
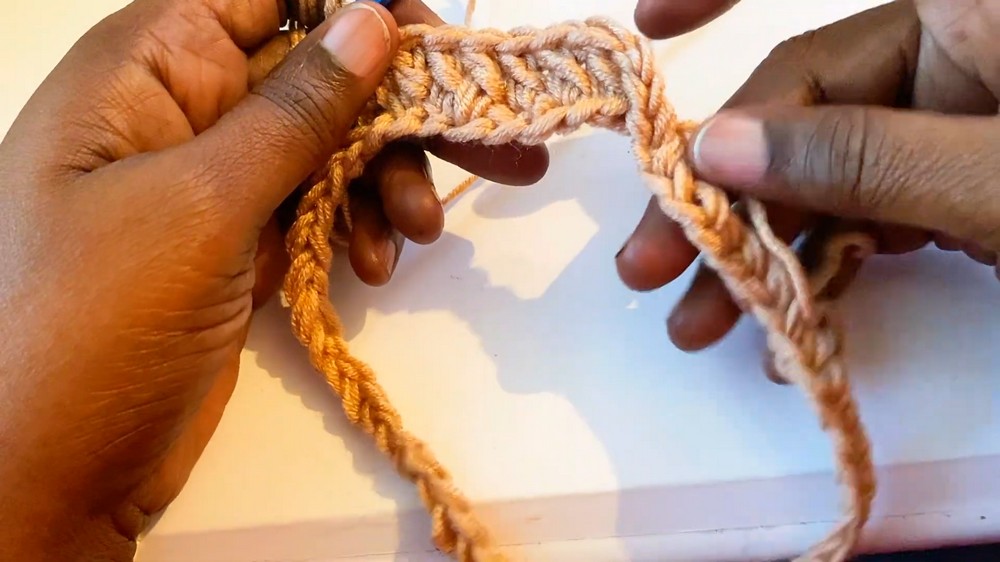
- To work fpdc: Yarn over, insert hook from front to back to front around post of next st (not in top as usual), complete a dc.
- Fpdc around every st to end.
- Join with sl st to top of first fpdc.
- Repeat previous round, working fpdc in every fpdc for a total of 2–3 rounds or until desired brim width is reached.
- (Designer made 3 ribbed brim rounds. Add another round for a wider brim if desired.)
- (Designer made 3 ribbed brim rounds. Add another round for a wider brim if desired.)
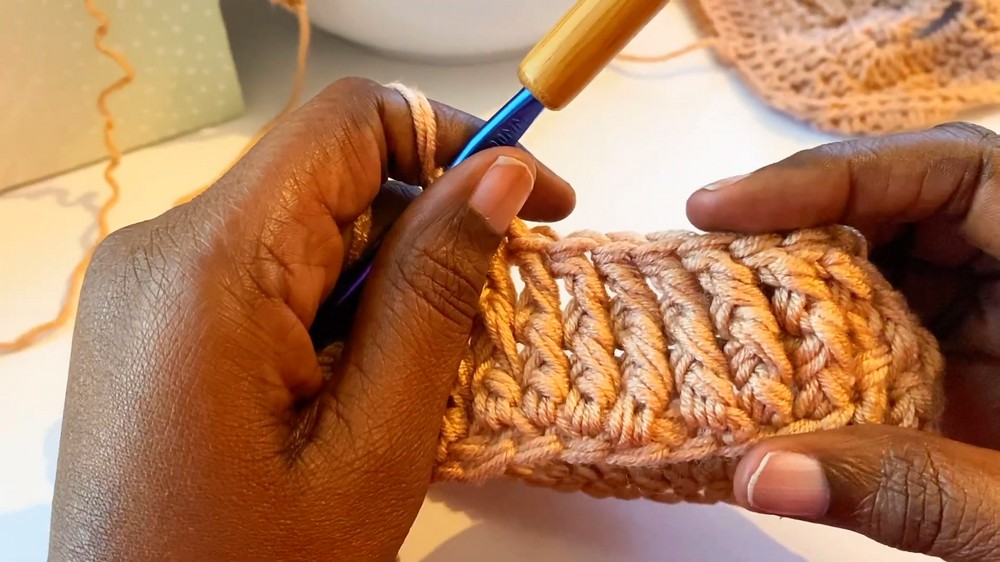
Hat Body (V Stitch Section)
- Switch to 8.0 mm hook (or next size up):
- Ch 2.
- V-stitch round:
- Skip first st, in next st: [dc, ch 1, dc] (V-stitch) all in same st.
- Skip next st, (dc, ch 1, dc) in next.
- Repeat from * to * around.
- End will likely leave one st unworked before joining.
- After last V-stitch, join with sl st to top of first dc.
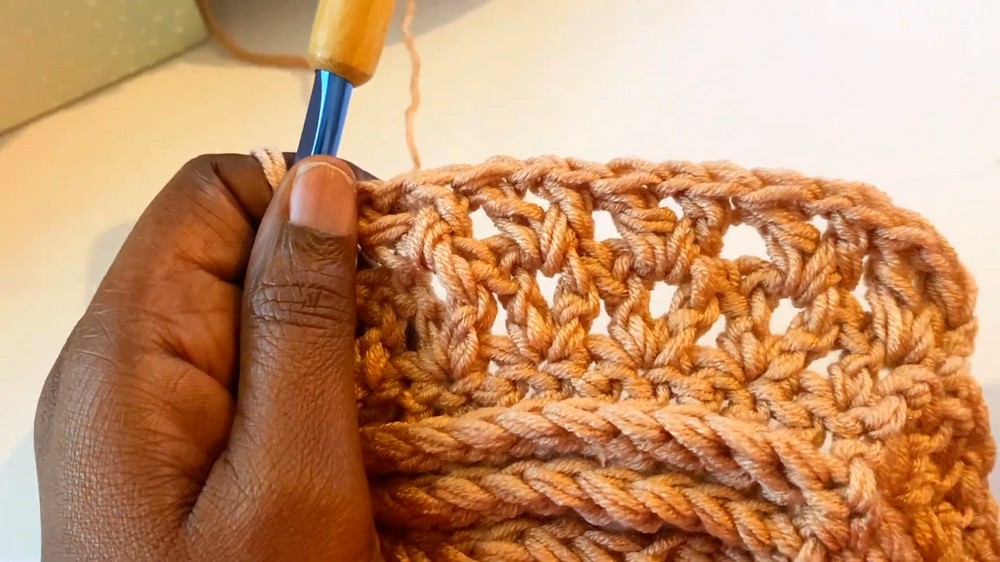
- Ch 2, turn if needed.
- Next rnd and all body rnds:
- Work a V-stitch (dc, ch 1, dc) in each ch-1 space of V-stitch below.
- (You’re always working into the ch-1 space of previous V-stitches.)
- Repeat for 18 total rows (or to desired slouch length).
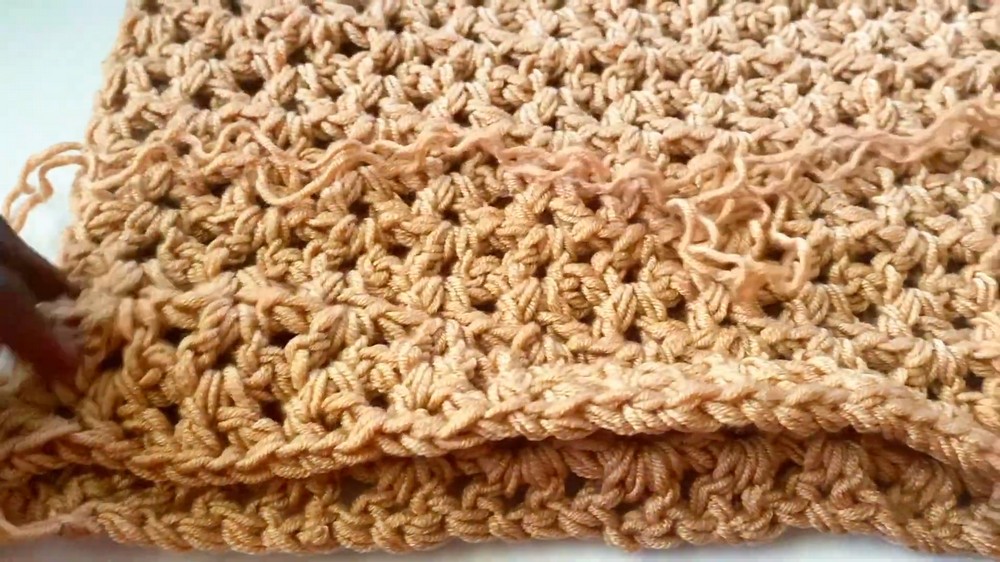
Closing the Top
- Finish the final round of V-stitch.
- Fasten off, leaving a long yarn tail (approx. 12–18″) for sewing.
- Thread the tail onto a tapestry needle.
- With right side out, weave the needle in and out around the top edge, gathering the hat.
- Pull tail tightly to cinch the top closed.
- Make a knot to secure.
- If a small hole remains, use needle/yarn to seam shut with a few stitches.
- Weave in all remaining ends securely on the inside of the hat.
Tip
- For extra slouch or larger hair volume: add more rows to the V-stitch section.
- For a neater look at the crown, cinch carefully and secure well.
- Consider adding a pom-pom or satin lining for a personalized touch.
Corrections & Clarifications
- The “chain 2” at the start of most rounds does not count as a stitch.
- Always join at the top of the first dc of the previous round for even rounds.
- If you use a heavier weight yarn (category #5/bulky), use one strand and size down the hook as needed.
- If hat grows too wide after the brim, consider only sizing up to 7.0 mm for the body, or try swatching first.

Conclusion
This beginner-friendly slouch hat works up quickly using basic stitches and the engaging V-stitch pattern. The ribbed brim ensures the hat fits snugly but comfortably, while the hat body provides relaxed slouch—perfect for all hair types, including locs or braids. Personalize with fun stripes, and gift with pride during the holidays!