Free Kids’ Vest Crochet Pattern for 13-15 Year Olds

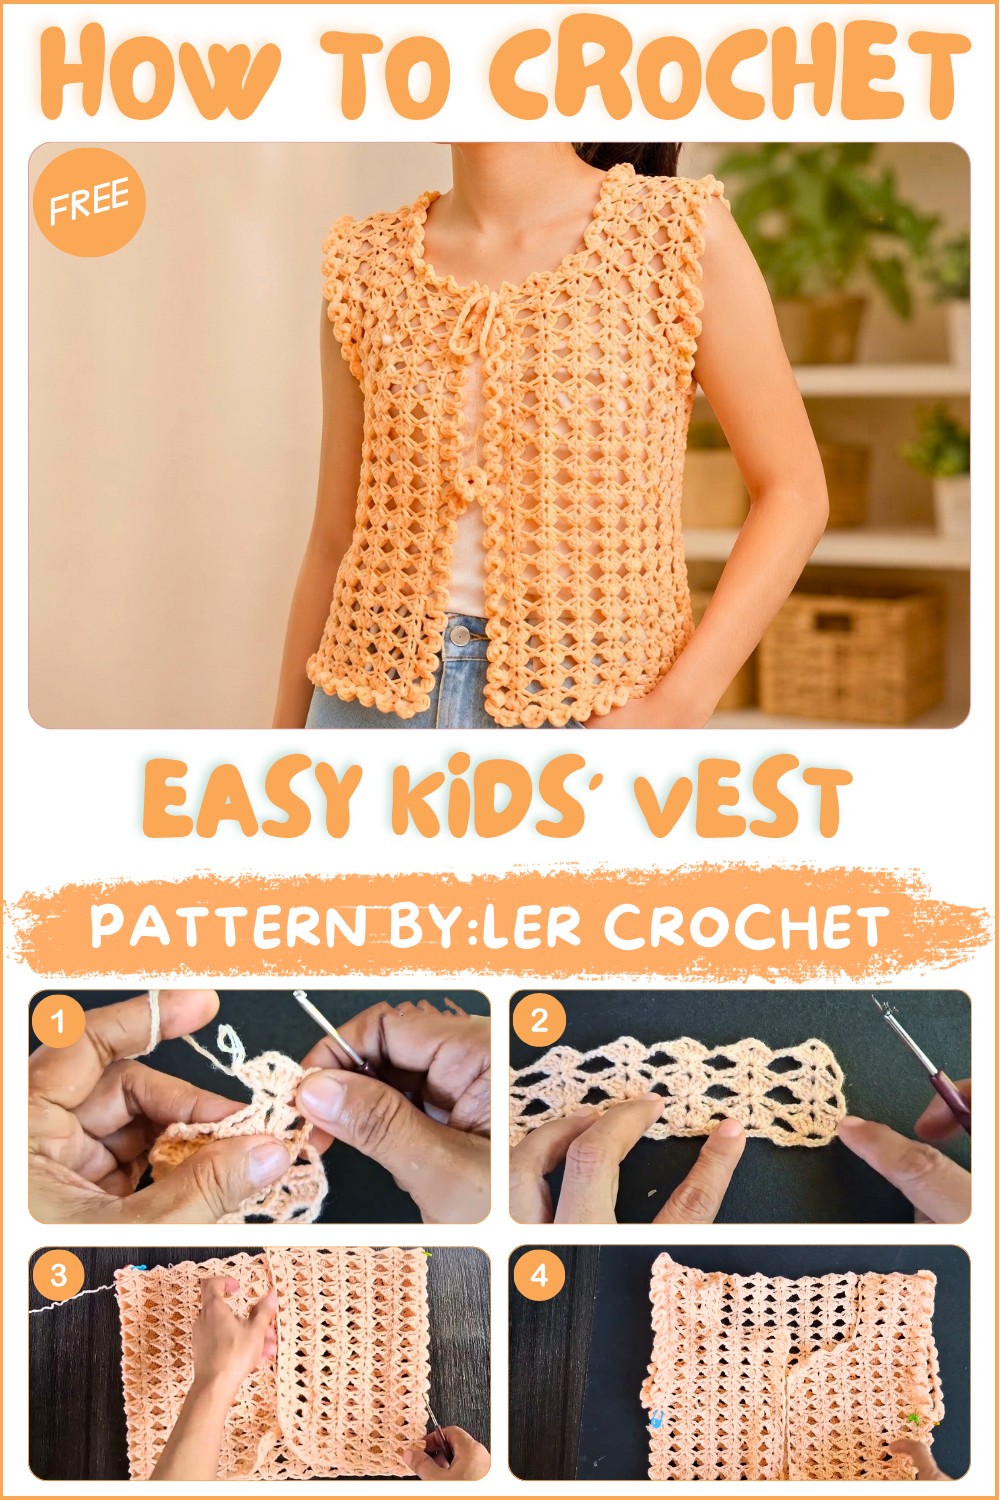
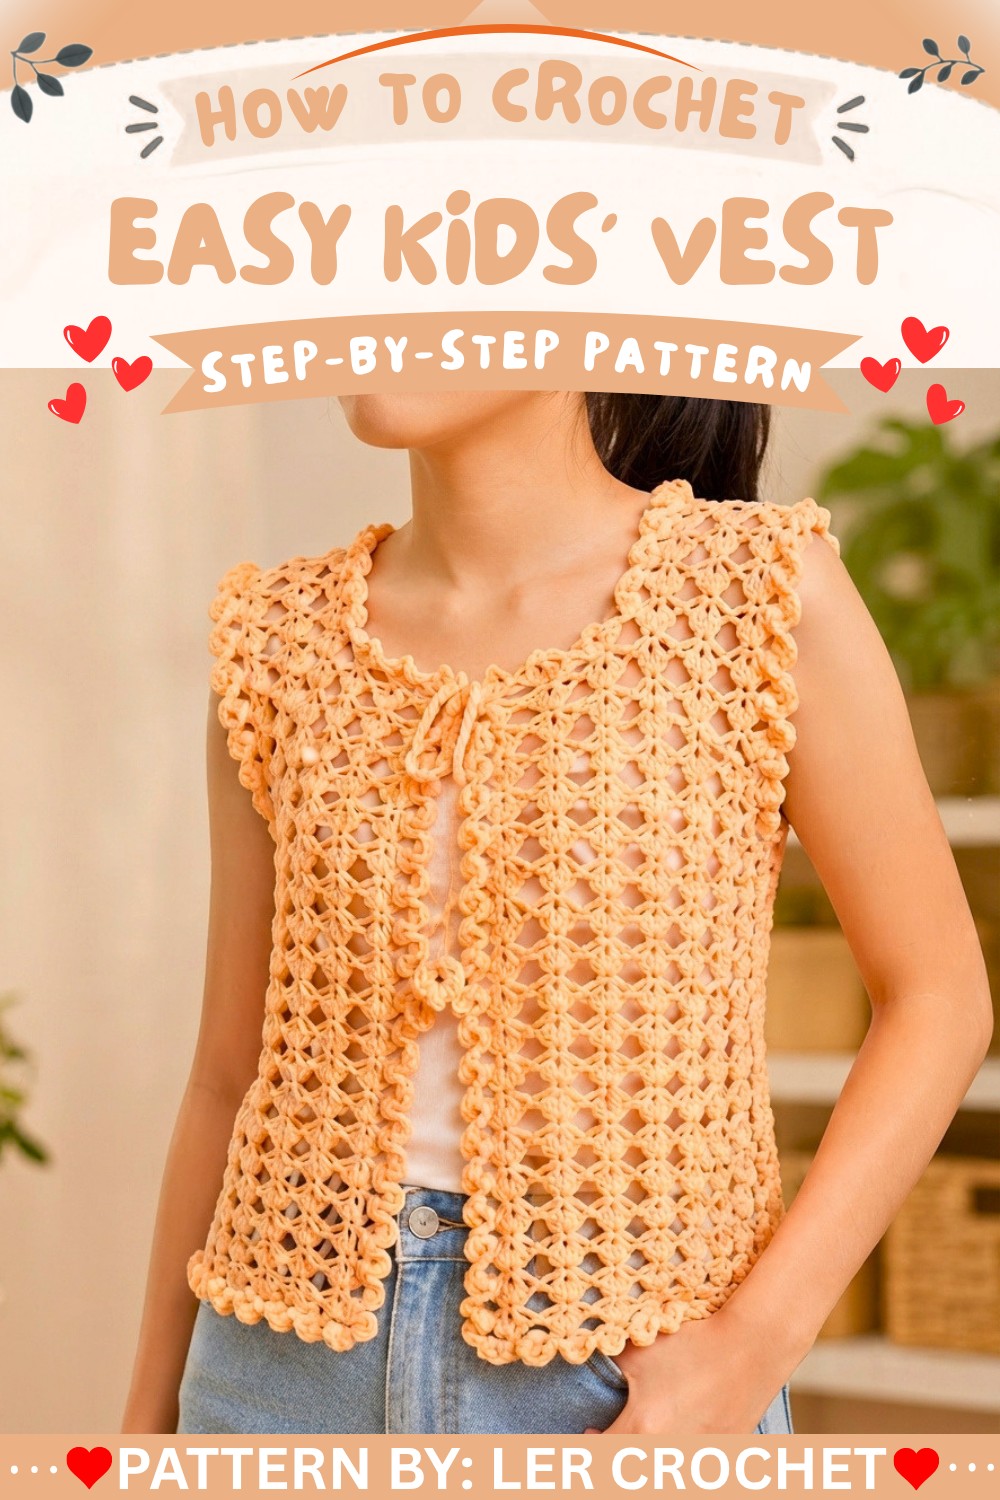
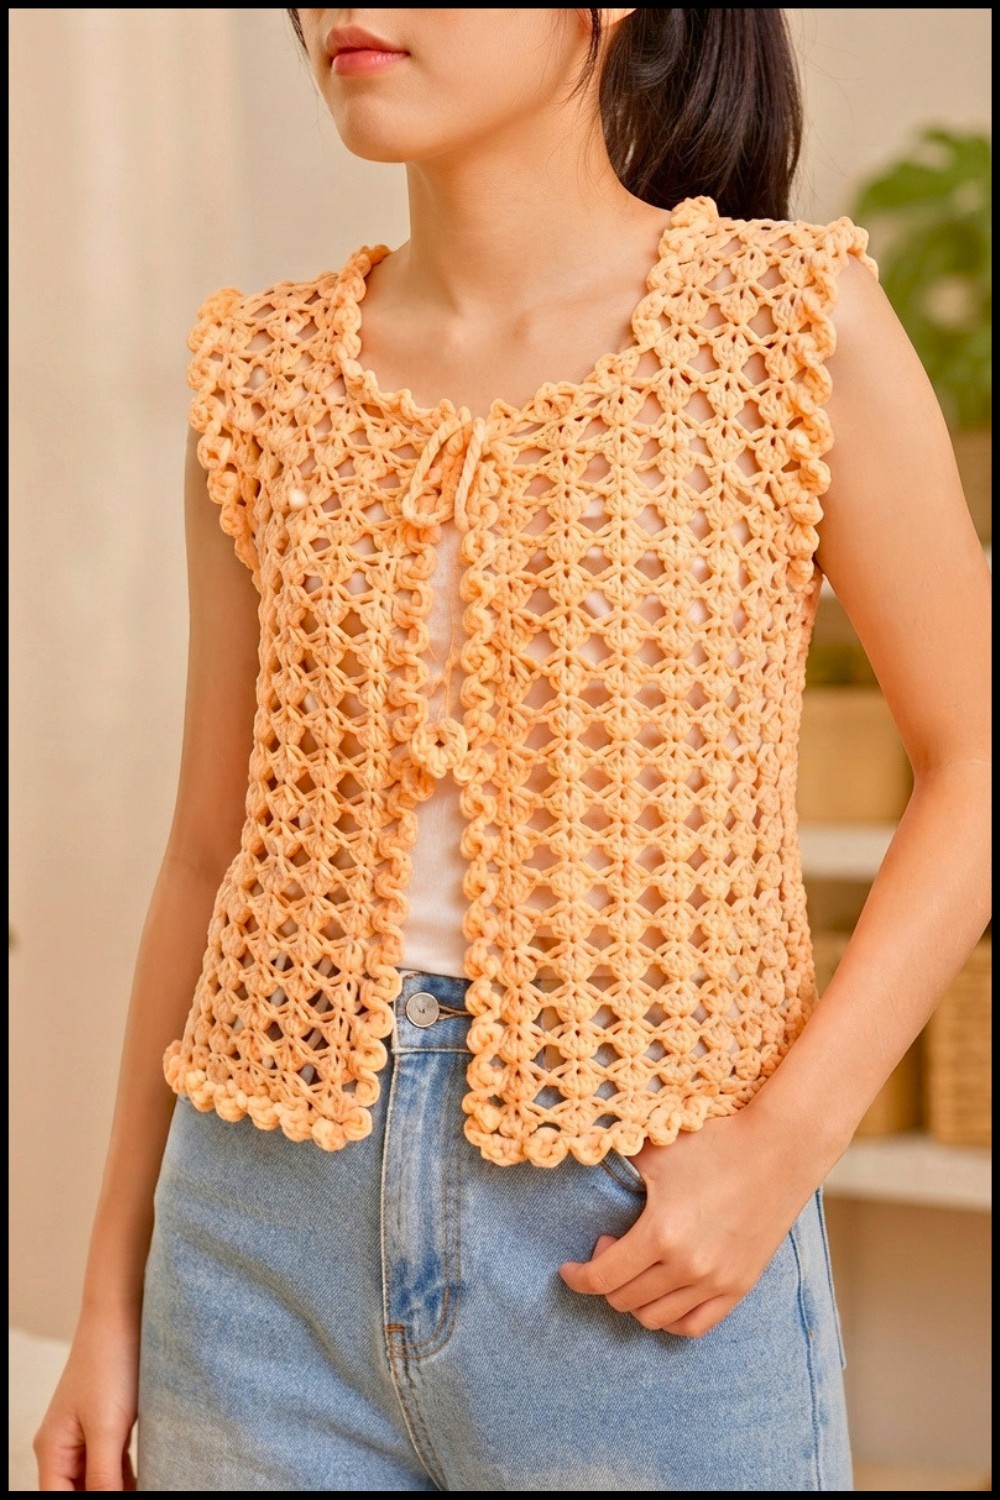
The kids’ vest created from this pattern looks soft and cuddly. It has a simple shape that fits nicely on little bodies, making it perfect for everyday wear. The texture feels gentle on the skin, which is important for kids who like to play and move a lot. The vest is open in the front with a small button or tie option, adding a nice touch that makes it easy to put on and take off. You can choose any color you like, so it can be bright and cheerful or soft and calm. This vest style is timeless and works well with many outfits.
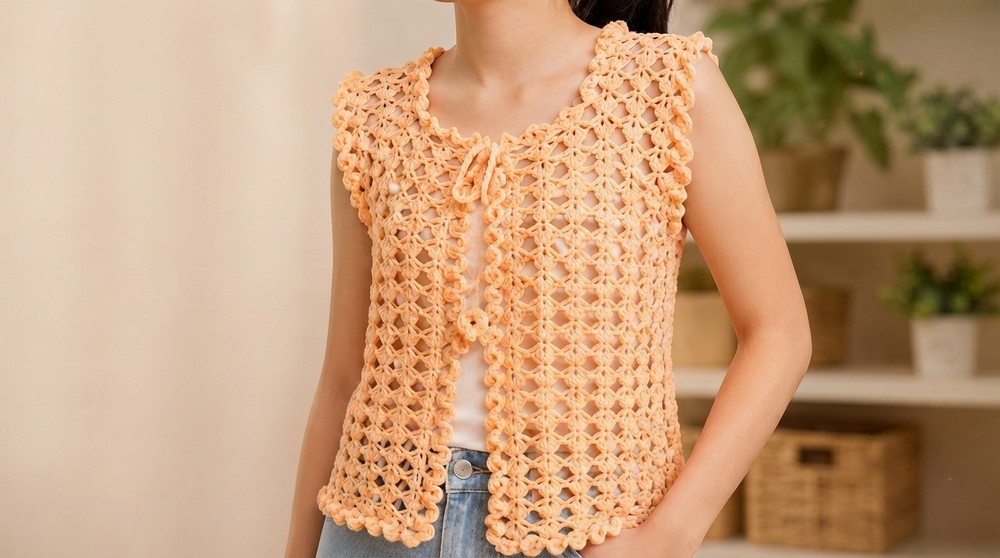
Besides being comfortable and pretty, this kids’ vest is super useful. It warms up chilly days and looks great over shirts or dresses. It’s also a wonderful handmade gift that shows love and care. Parents and kids both will enjoy a unique piece like this. If you enjoy making easy, sweet, and helpful clothes, the Free Crochet Kids’ Vest Pattern is a fantastic choice.
Crochet Vest Pattern for Teens (13–15 Years)
This versatile crochet vest is designed for teens aged 13–15 years, crafted using soft 3-ply yarn and a 2.5 mm crochet hook. The vest combines elegant shell stitches with an openwork eyelet pattern to create a lightweight and breathable garment perfect for layering in any season. The pattern includes detailed instructions for foundation rows, shell stitch body, armhole shaping, panel joins, decorative edgings, and finishing touches such as front ties. Whether for casual wear or a stylish statement, this vest offers a rewarding, intermediate-level crochet project.
Quick Overview of Pattern
- Begin with a foundation chain creating 47 eyelets, laying the groundwork for an open shell pattern.
- Work 15 rows of alternating shell stitches and chains forming the main body with symmetrical sides.
- Shape the armholes by marking and working separate side panels and a back panel.
- Join panels at shoulder seams, then add a decorative ruffled edging around neckline and armholes.
- Finish with front ties featuring a series of eyelets and a robust double crochet border.
Notes
- Pattern uses US crochet terminology.
- Eyelet count foundational to shaping: multiples of 2 plus 1 eyelet (e.g., 47) for symmetry in shell rows.
- Stitch markers essential for marking armhole shaping.
- Consistent tension vital to keep the fabric even and maintain stitch count.
- Adjust eyelet counts for different sizes if needed by keeping the multiple-of-2-plus-1 rule.
- Decorative edging adds elegance and openwork texture to the vest’s openings.
- Front ties are constructed with the same eyelet pattern and edged for durability.
Skill Level
Intermediate
Recommended for crocheters comfortable with:
- Chain (ch), double crochet (dc), triple crochet (tr), and single crochet (sc) stitches
- Reading and repeating stitch pattern sequences in rows
- Working with stitch markers and shape construction techniques
- Joining crochet panels with chain-and-single crochet method
- Creating decorative ruffles and finishing details
Materials
- Soft 3-ply yarn suitable for garments (cotton or a cotton-blend recommended).
- Crochet hook size 2.5 mm.
- Stitch markers (minimum 4).
- Yarn needle for weaving ends and assembly.
- Scissors.
- Measuring tape.
Measurements / Sizing (Optional Schematic)
- Designed for teens approximately 13–15 years old.
- Friendly to adjustments by changing the number of eyelets in foundation chains.
- Approximate finished bust width: 40–45 cm (16–18 inches).
- Length and width adaptable by adding rows or adjusting stitches.
Gauge
- Gauge not strict but recommended to maintain consistent tension throughout.
- Typical gauge in shell stitch pattern: approx. 20 dc + 15 rows = 10 cm (4 inches).
- Adjust hook size if necessary to meet gauge and desired fit.
Stitch Abbreviations
- ch: chain
- dc: double crochet
- tr: triple (treble) crochet
- sc: single crochet
- sl st: slip stitch
- shell: cluster of 3 double crochets, ch 2, 3 double crochets in one space (creates a fan or shell shape)
- eyelet: open space created by chains, forming part of the pattern’s texture
Special Stitches
- Shell Stitch: Work 3 dc, ch 2, 3 dc all into the same eyelet or chain space, forming a shell cluster.
- Triple Crochet (tr): Yarn over twice, insert hook, yarn over pull through, yarn over pull through two loops three times. Used for a taller stitch in the foundation row.
The Crochet Pattern
1. Base Foundation
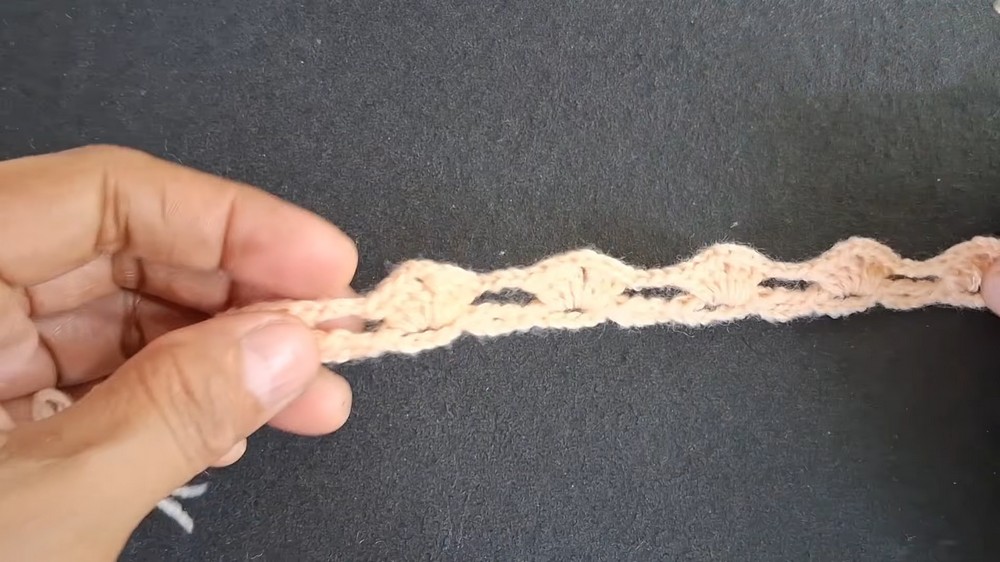
- Step 1: Chain 4.
- Step 2: Work 1 triple crochet (tr) into the first chain.
- Step 3: Continue creating a total of 47 eyelets (this means the foundation is a multiple of 2 plus 1 for symmetry).
- Notes: Adjust the foundation count for different sizes but maintain the “multiple of 2 plus 1” rule. This foundation row builds the eyelet grid for the vest.
2. Main Body Pattern
Work 15 rows as follows:
- Row 1:
- Chain 4 (counts as first triple crochet plus one chain).
- Into each eyelet from the foundation, work a shell:
- 3 double crochets (dc),
- chain 2,
- 3 dc in the same eyelet.
- Alternate with chains as per the pattern to create the mesh effect.
- Repeat this shell and chain pattern across the entire row, keeping fabric symmetrical.
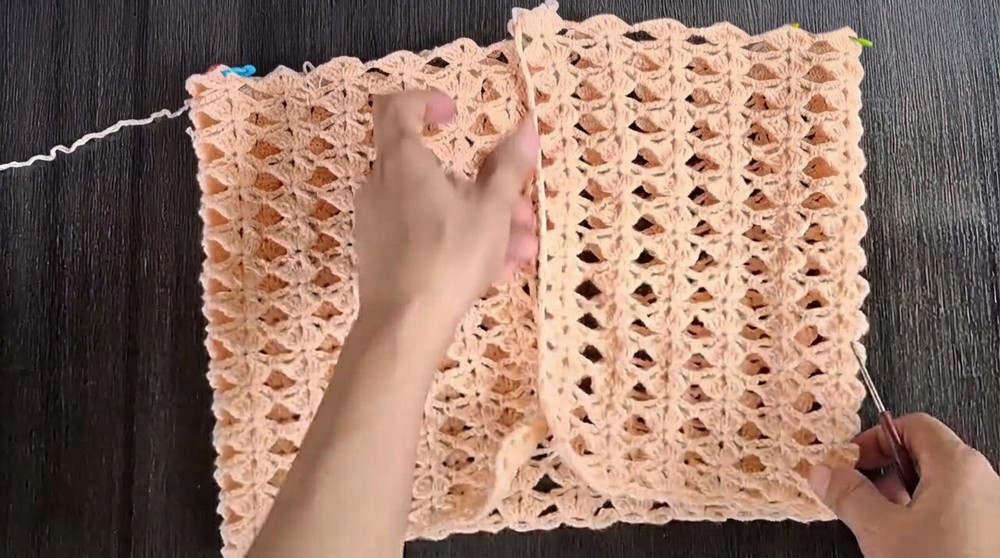
- Rows 2 to 15:
- Repeat Row 1’s shell and mesh pattern over each row, maintaining stitch symmetry on both sides.
- Maintain even edges by continuing pattern consistently.
3. Shaping Armholes
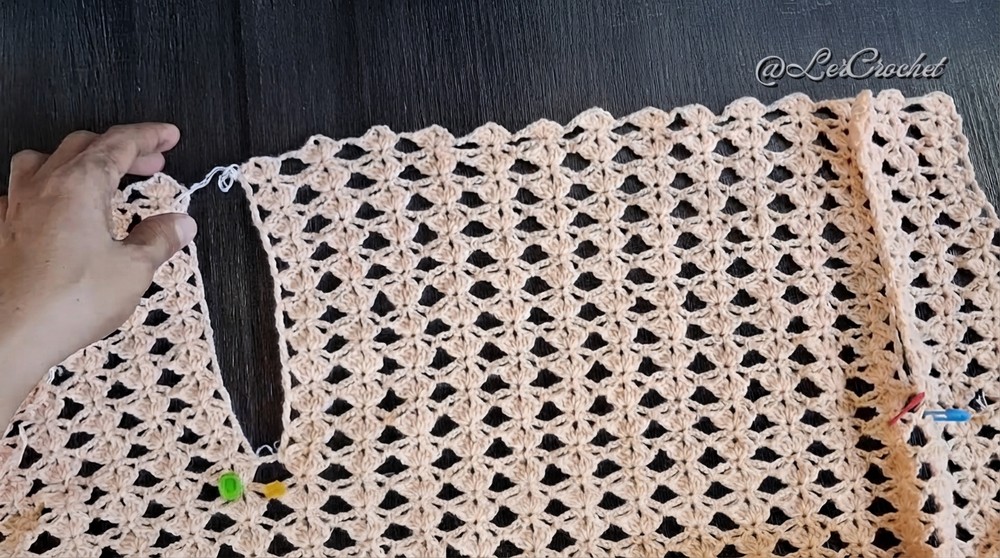
- Step 1: Use stitch markers to mark the armhole areas on both sides.
- Side Panels:
- Work 5 rows on each side up to the markers separately from the back.
- Continue using the shell and mesh patterns for consistency.
- Back Panel:
- Work the back section separately for 10 rows, maintaining same stitch pattern, creating back height for armhole shaping.
4. Joining and Edging
- Join Shoulder Panels:
- Using chain-and-single crochet joins, connect the front and back panels at the shoulders, leaving armholes open.
- Decorative Edging:
- Work around neckline and armhole openings, placing 7 double crochets (dc) into each stitch or space.
- This creates a ruffled, openwork edging that is both decorative and functional, preventing stretching.
5. Finishing Front Ties
- Step 1: Create front ties by working 40 eyelets on each front edge using chains and double crochets.
- Step 2: Finish ties with 15 double crochets (dc) worked around the eyelets on each tie for structure and neat appearance.
- Step 3: Secure all loose ends by weaving with a yarn needle.
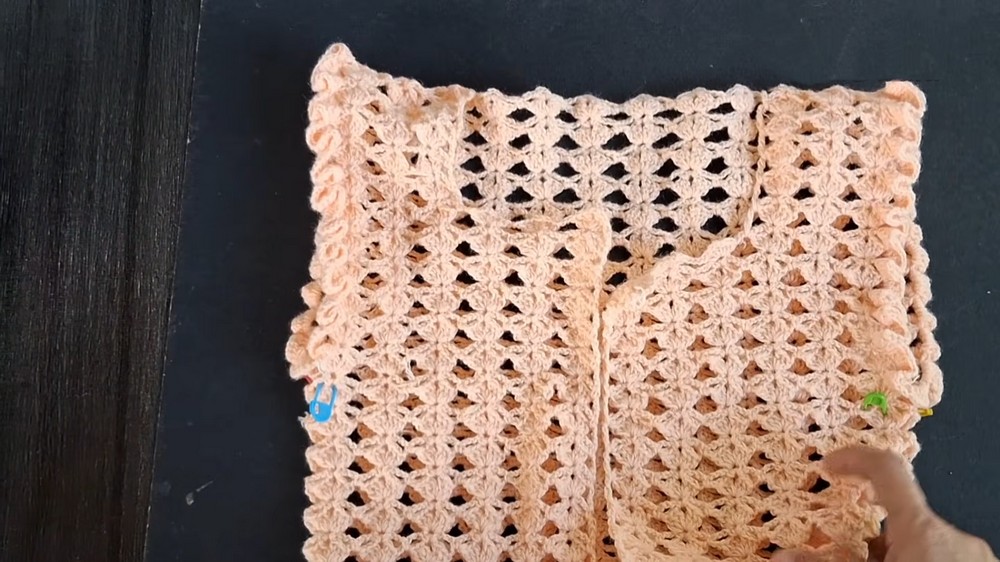
Assembly & Finished Size
- Verify the fit of the vest by periodically measuring width and length during construction. Adjust rows or stitches as necessary.
- After blocking (optional), sew in all loose ends neatly with a yarn needle.
- Attach front ties at appropriate locations ensuring they align correctly when tied.
- The final vest will be lightweight, comfortable, and airy with delicate openwork and an elegant ruffled border.
Conclusion
This crochet vest for teens aged 13–15 combines timeless shell stitch patterns with modern shaping techniques to create a stylish and lightweight garment. The openwork eyelets and ruffled edging offer a refined texture, while the option for front ties adds functionality and style. Perfect for layering over casual or dressy outfits, this vest will become a cherished handmade piece. Whether gifting or personal use, enjoy the process of crafting this beautiful crochet vest and showcase your crochet skills.