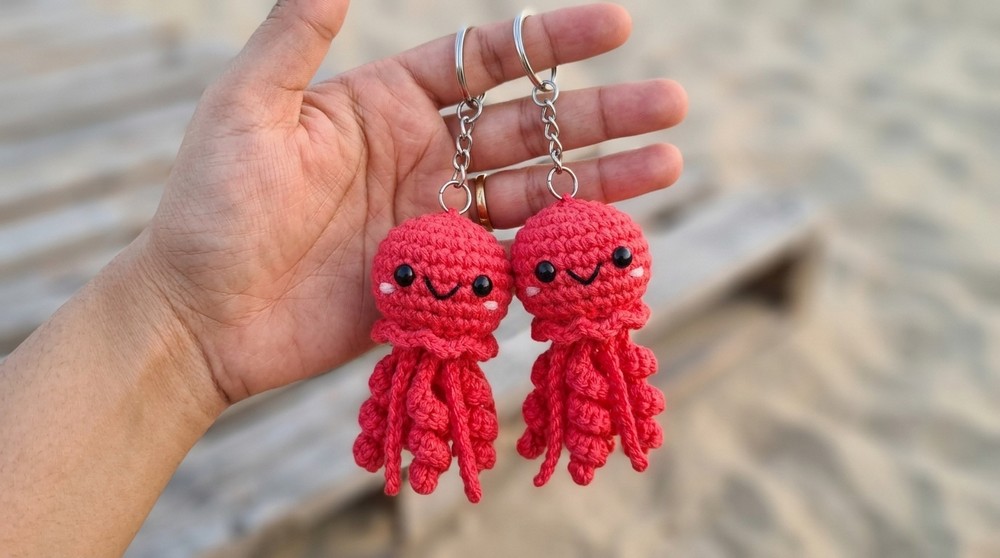
Crochet Baby Jellyfish Amigurumi Free Pattern with Ruffle Details
Jump into creativity with this Free Crochet Baby Jellyfish Amigurumi, helping you make adorable sea-themed toys for kids.
Creating soft, cuddly toys is always a joy, and this delightful project really caught my eye. The Free Crochet Baby Jellyfish Amigurumi pattern offers a charming underwater friend that’s perfect for both beginners and experienced crocheters looking for a quick, satisfying make. This little jellyfish features a round, plush body with gentle tentacles that add playful movement and texture. Its style is cute and whimsical, with a smooth, squishy feel that makes it lovable and squeezable.
Handmade Free Crochet Baby Jellyfish Amigurumi Pattern for Playtime

This amigurumi suits anyone who enjoys making small, adorable creatures, and thanks to simple stitch variations, you can easily adjust the size. Using lighter yarn and a smaller hook results in a daintier jellyfish, while bulkier yarn and bigger hooks produce a chunkier friend, great for customizing the look.
Construction involves basic crochet stitches, working in rounds to shape the spherical head, and creating long stitched tentacles that gently curl. A helpful tip is to keep your stitches tight to ensure the stuffing doesn’t peek through, which helps maintain a neat finish. Choosing a soft cotton blend yarn is ideal since it highlights the stitches clearly and feels pleasant to touch.
This design was inspired by the gentle grace of baby jellyfish drifting through the sea, and it’s a perfect handmade gift for children, ocean lovers, or as a sweet baby shower present.
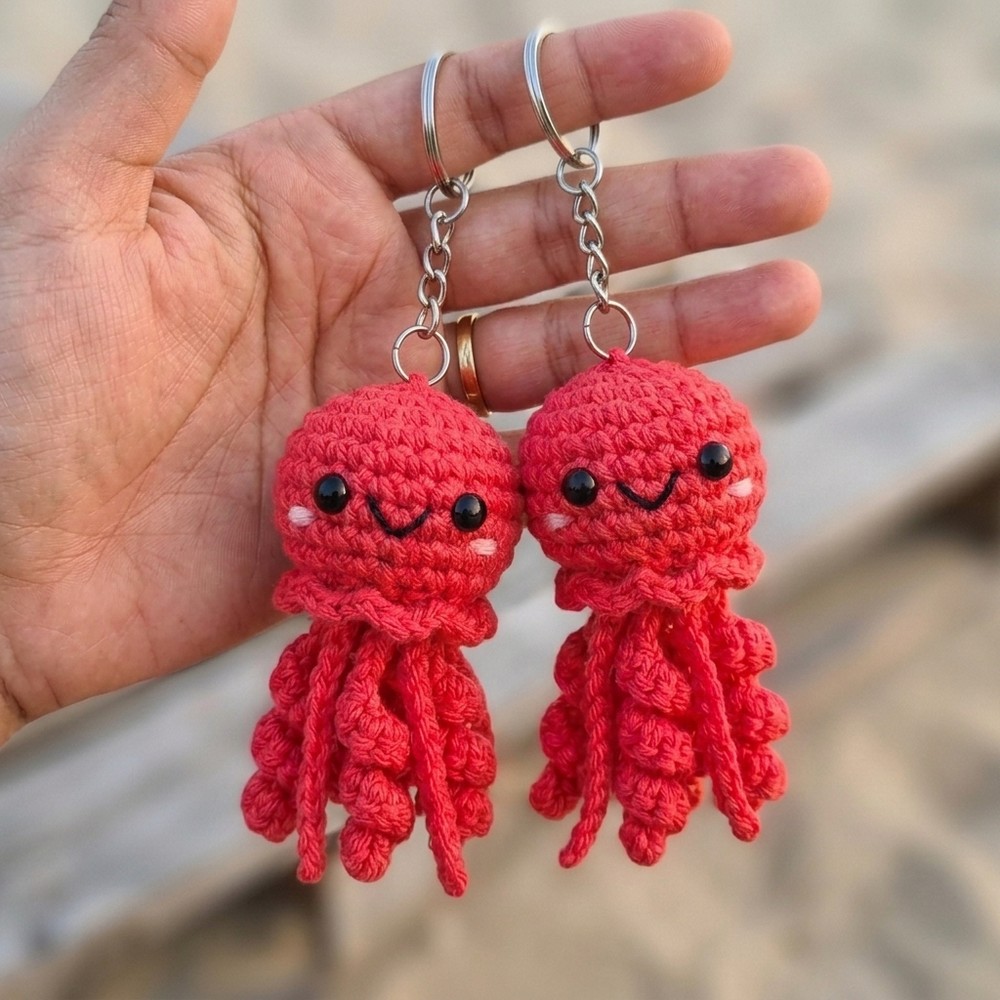
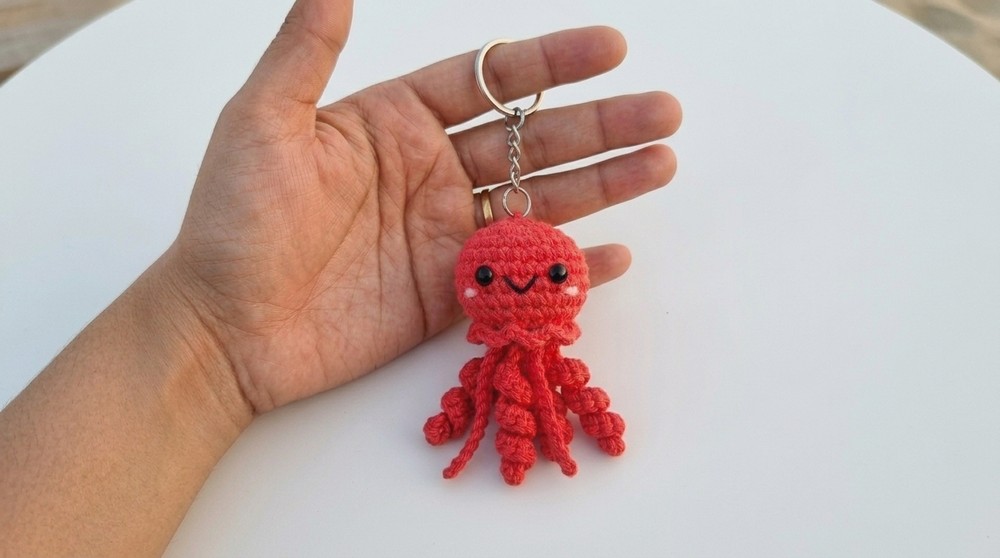
Crochet Jellyfish Amigurumi Keychain Pattern
This cheerful and adorable amigurumi jellyfish makes a perfect keychain, bag charm, or small toy! The pattern is worked in one piece (no sew except for embroidery and attaching the keychain), making it an excellent project for beginners or anyone wanting a quick, satisfying make. Its curly and straight tentacles are crocheted directly onto the head, and the playful ruffle border adds personality and character. Personalize with your favorite yarn colors and add a cute face for extra charm.
Pattern Notes
- The jellyfish is worked in continuous rounds (spiral)—do not join at the end of rounds.
- Use a stitch marker to mark the last stitch of each round—move it up at the end of each round.
- All tentacles and the ruffle border are attached as you go; minimal sewing is required.
- Insert safety eyes before closing the head.
- Use a smaller hook than recommended for your yarn for neat, tight stitches.
- Stuff the jellyfish as you work.
- Embroider the face before assembly if you prefer.
Skill Level
Beginner
You only need to know single crochet, slip stitch, basic increases (inc), invisible decreases (dec), and the magic ring (MR).
Materials
- Worsted or DK weight yarn in:
- Main color (light and dark shades for contrast, or any favorite color)
- Black yarn (face)
- Pink yarn (blush)
- Same shade for straight tentacles
- 3 mm crochet hook (or size smaller than yarn suggests for tight fabric)
- 4 mm safety eyes (1 pair)
- Keychain blank/jump ring
- Stitch marker
- Fiberfill stuffing
- Yarn needle
- Scissors
Measurements / Sizing
- Finished jellyfish approx. 5–7 cm (2–3 in) across the bell, tentacles about 5–7 cm (2–3 in) long (will vary depending on yarn/hook/tension—perfect for keychains!)
Gauge
Gauge is not critical, but ensure fabric is tight so stuffing does not show.
Stitch Abbreviations
- MR = Magic Ring
- ch = chain
- sc = single crochet
- inc = increase (2 sc in same stitch)
- dec = decrease (single crochet 2 stitches together)
- sl st = slip stitch
- FLO = front loop only
- BLO = back loop only
- st(s) = stitch(es)
Special Stitches
Invisible Decrease (used for neat shaping):
Insert hook in front loop of next two stitches, yarn over, pull through both loops (2 loops on hook), yarn over, pull through remaining loops.
Ruffle stitch:
Instructed as “3 sc in the next stitch” to create ruffle effect.
The Crochet Pattern
JELLYFISH HEAD
Using main yarn and 3 mm hook:
Rnd 1: MR, ch 1 (does not count as st), 6 sc in MR. (6 sts)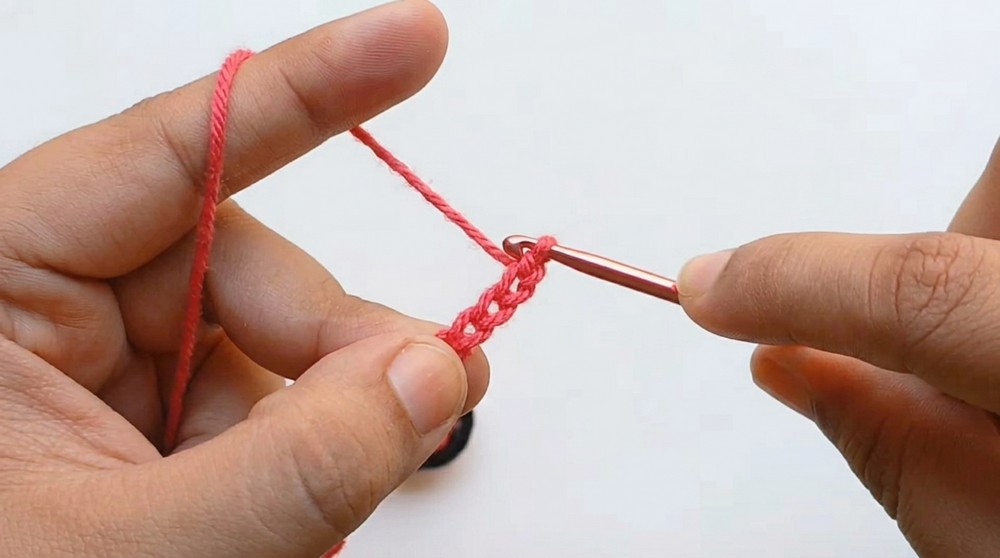
Rnd 2: Inc in each st around. (12 sts)
Rnd 3: (Sc in next st, inc in next st) repeat around. (18 sts)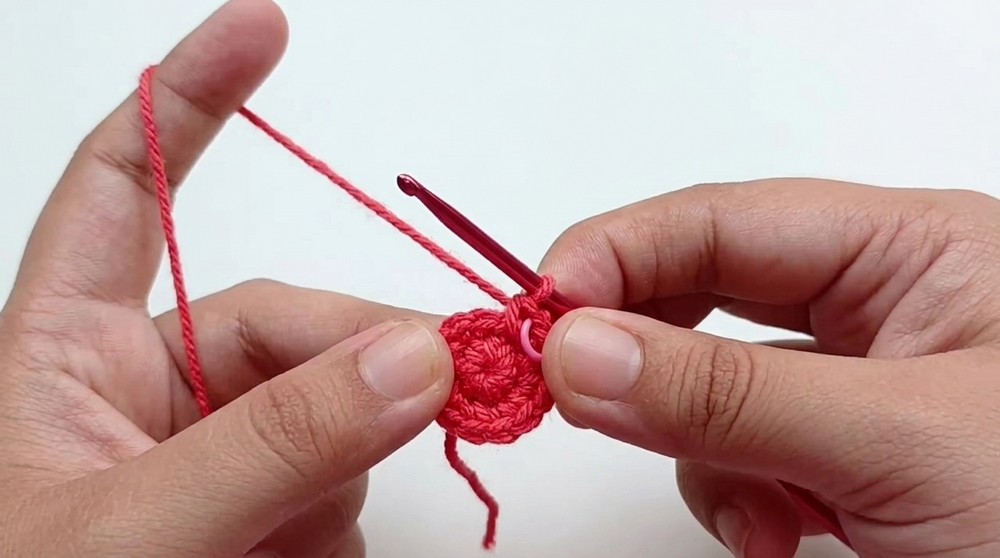
Rnd 4: Sc in next st, inc in next st, (sc in next 2 sts, inc in next st) x5, sc in last st. (24 sts)
Rnd 5: Sc in each st around. (24 sts)
Rnds 6–9: Repeat Rnd 5 (sc in each st). (24 sts each round)
Insert Safety Eyes (between Rnds 6 & 7, spacing 3 sts apart).
Rnd 10: (Sc in next st, invisible dec in next 2 sts) repeat 8 times. (16 sts)
(Sc, dec, sc, dec, …)
Stuff the head firmly with fiberfill.
Rnd 11: Work in BLO only: (dec) around 8 times. (8 sts)
Fasten off, leaving long tail for closing.
CURLY TENTACLES (Make 4, attach as you go)
Start in FLO of next st after finishing Rnd 11 (use contrasting/darker shade if desired):
- Sl st in FLO of next st, ch 12.
- Beginning in 2nd ch from hook, work 2 sc in each ch to the end (22 sc total), creating a curl.
- Sl st in FLO of next st, sl st in FLO of following st.
- Repeat steps 1–3 three more times to make 4 curly tentacles.

After last tentacle, sl st in next FLO to secure.
Cut yarn, weave ends (leave them inside head).
STRAIGHT TENTACLES (Make 4, attach between curly tentacles)
With contrast color:
- Insert hook in the slip stitch between curly tentacles (in a st between tentacle bases), join yarn with sl st.
- Ch 12, fasten off leaving a tiny tail. Tighten last ch to form small knot; trim tail near knot for neat finish.
- Repeat so that you have 4 straight tentacles, evenly spaced between curly tentacles.
- Using yarn needle, pull all remaining yarn tails inside head; knot together, trim, and hide inside.
CLOSE THE BODY
Thread the head’s long tail through remaining 8 back loops (of Rnd 11). Pull tight to close the hole; bring tail out the top of head for attaching the keychain.
RUFFLE BORDER
Join main shade yarn in any FLO of Rnd 10 (just above tentacles):
- Sl st to join in FLO.
- [3 sc in next FLO, sl st in next FLO] repeat around (should get a full circle).
- After last group of 3 sc, sl st to starting st.
- Fasten off, leave a short tail and weave in the end.
EMBROIDERY
- Smile:
Use black yarn or embroidery floss.
Embroider a curved smile two rounds below the eyes.
Bring yarn from back to front, make a straight stitch (about 2 sts wide) between the eyes, tack it down in the middle for a smile, then bring yarn back out to original hole.
Tie off yarn tails at back, trim and hide inside head. - Blush:
Use pink yarn.
Embroider short straight or “tick” lines just below the eyes.
Make one or two stitches for each cheek, fasten off and hide ends in body.
ASSEMBLY & FINISHED SIZE
- Finish hiding all loose yarn tails.
- Close hole at top of head with the main yarn tail.
- Attach keychain: Thread long yarn tail through the keychain/jump ring. Secure firmly with a stitch or two, knot, and hide inside head.
- Finished jellyfish measures approx. 5–7 cm across and 8–10 cm tall, tentacles included.
Quick Beginner Overview
- Crochet jellyfish head in continuous rounds with invisible decreases—stuff as you go.
- Attach safety eyes after round 9.
- Make 4 curly tentacles attaching directly into front loops.
- Make 4 straight tentacles in between each curly tentacle.
- Ruffle border: work in front loops with [3 sc, sl st].
- Embroider smile and cheeks.
- Draw tail through top, attach to keychain ring, knot securely, and hide end.
- All done—enjoy your new jellyfish!
Tips
- Use a stitch marker to never lose your round’s last st.
- Tighten your chains for neat, crisp tentacles.
- Keep stuffing soft and distributed for a nice, round head.
- Vary tentacle length for different characters or sea creatures.
- Make multiple in fun colors for gifts or to sell.
![[NO-SEW] Mini Crochet Duck Keychain Easy Amigurumi Tutorial (9)](https://claireabellemakes.com/wp-content/uploads/2026/07/NO-SEW-Mini-Crochet-Duck-Keychain-Easy-Amigurumi-Tutorial-9-768x768.jpg)