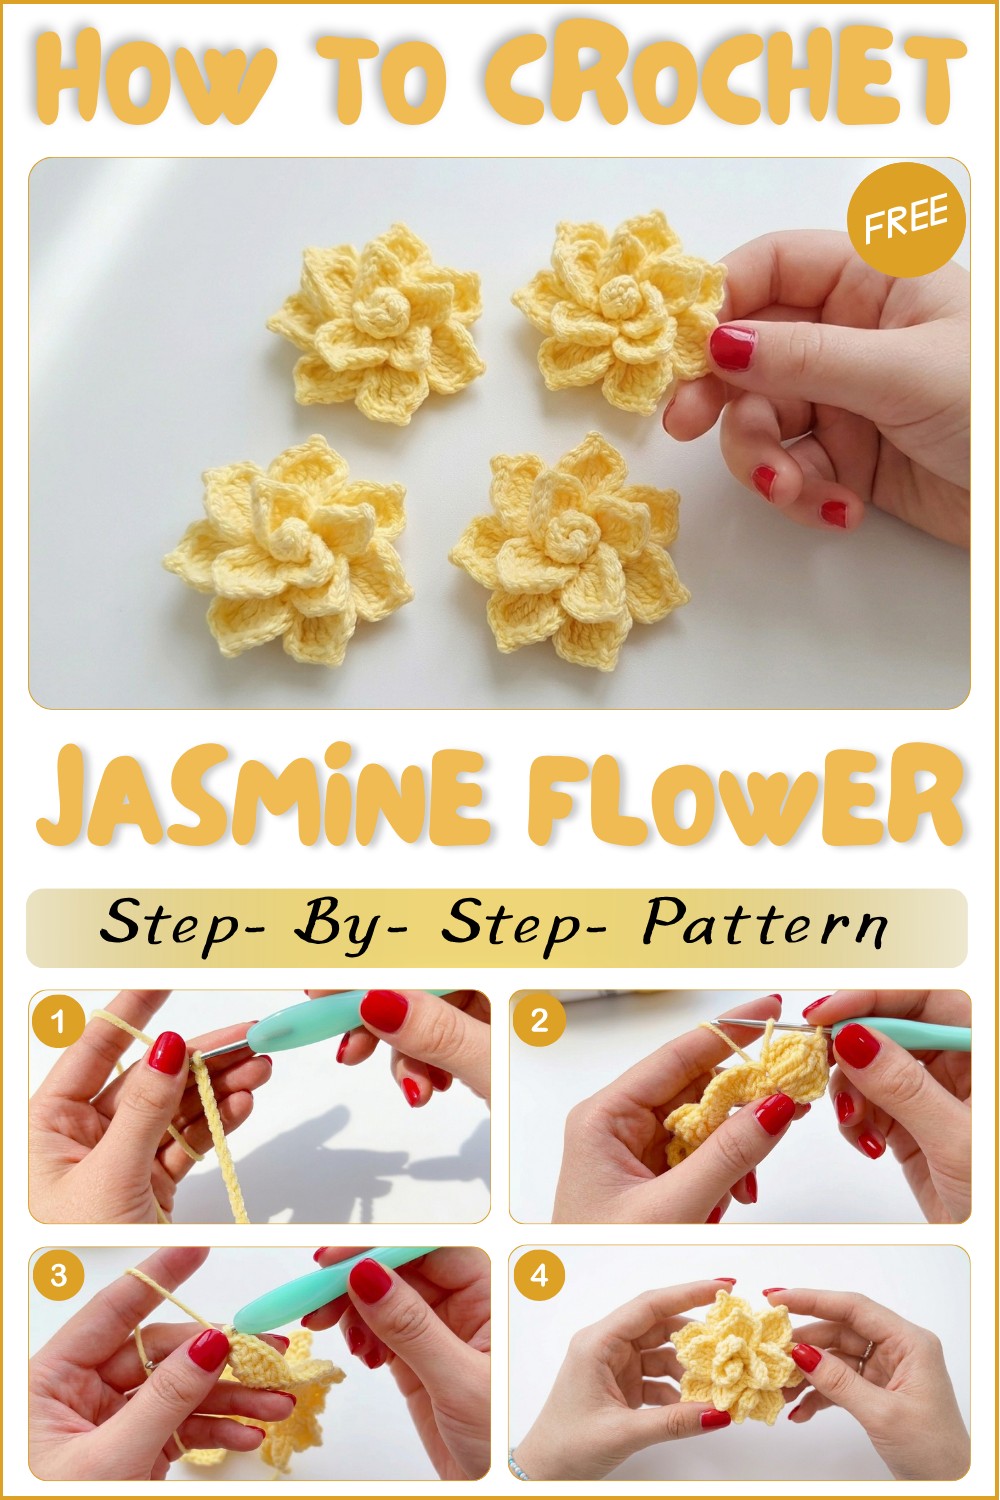
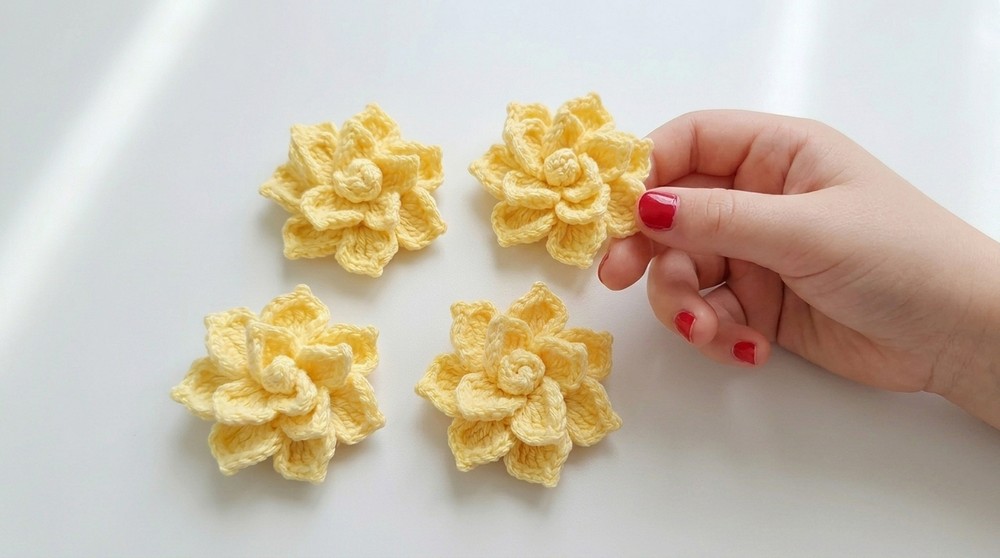
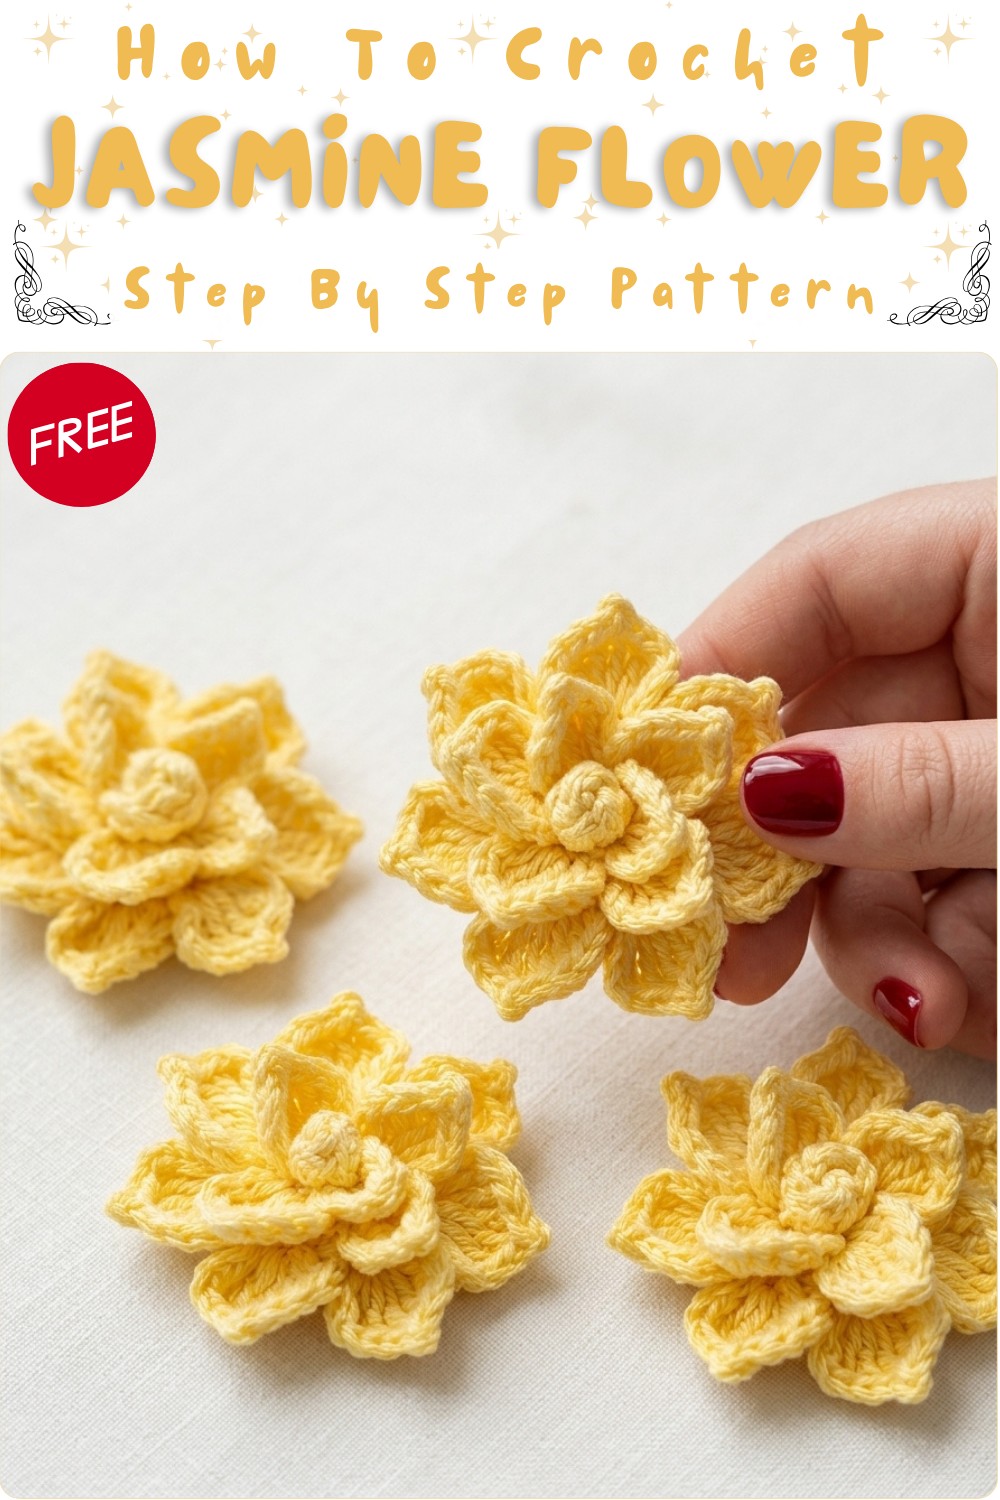
Chic Free Crochet 3D Jasmine Flower Pattern for Bouquets
Bring your projects to life with this Free Crochet 3D Jasmine Flower, letting you create a charming blooms to brighten any space.
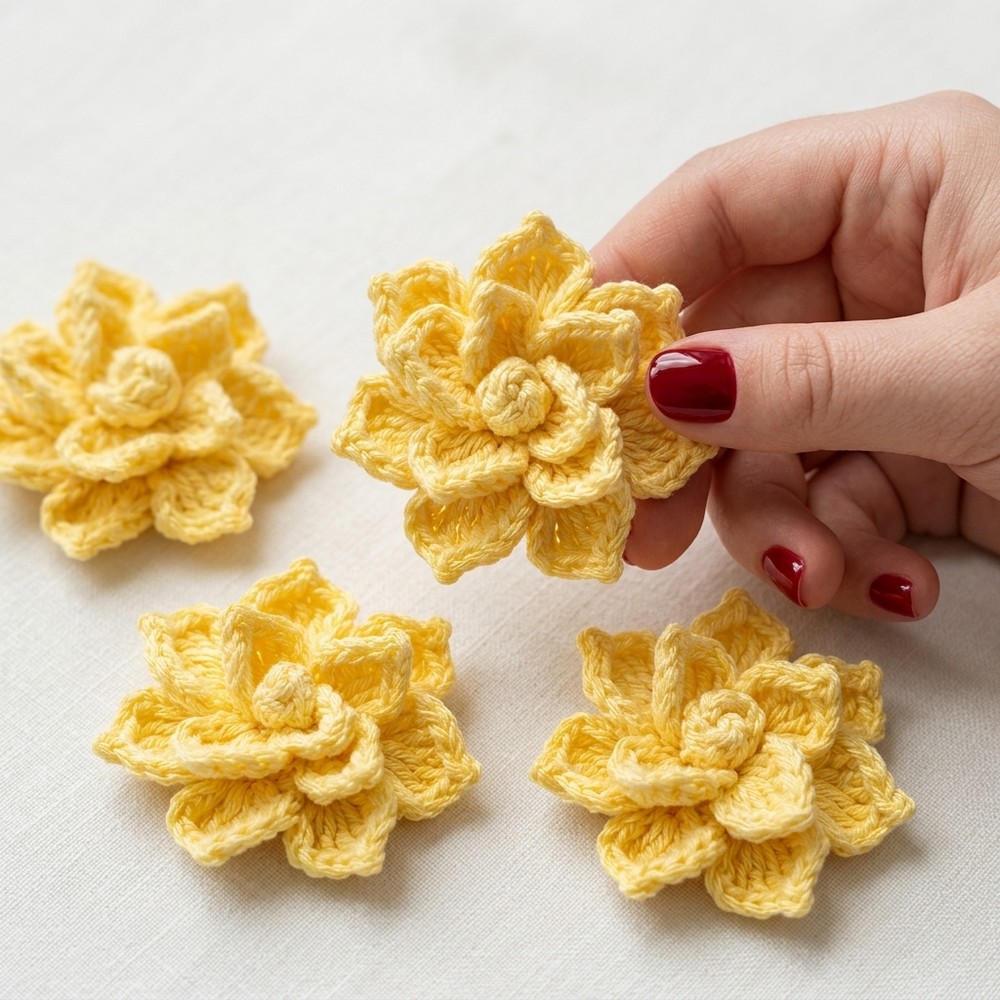
One of my favorite recent projects is creating a delicate and charming accessory that adds a touch of nature’s beauty to any item. The Free Crochet 3D Jasmine Flower pattern is perfect for bringing a three-dimensional floral design to life with soft, layered petals that feel almost silky to the touch. This elegant flower captures the shape and style of real jasmine blooms, making it a lovely addition to brooches, hair clips, or decorative appliqués.
Unique Free Crochet 3D Jasmine Flower Pattern for Accessories
This pattern is ideal for crocheters with some experience who enjoy working with shaping techniques. You can customize the size easily by using different yarn weights or hook sizes, crafting everything from small, subtle flowers for jewelry to larger statement pieces for bags or home décor. The construction involves working petals in rounds and layering stitches to create that charming 3D effect.
For the best results, I recommend using yarns with a slight sheen and good stitch definition, such as cotton blends, which hold the texture well without fuzziness. The design was inspired by fresh jasmine flowers I often see in gardens, aiming to capture their delicate look in yarn form.
It’s a thoughtful handmade gift idea for nature lovers and a beautiful decorative touch for special occasions like weddings and birthdays. Have fun experimenting with colors and styles to make your jasmine flowers truly unique.
Crochet Continuous Jasmine Flower Pattern
This simple and elegant jasmine flower motif is designed for continuous crocheting, making it perfect for embellishing blankets, rugs, or accessories. The flower is worked from a starting chain and built seamlessly, requiring minimal sewing and producing a neat, tidy back. Large and small petals are beautifully shaped using treble crochet and picot stitches, finished with few rounds of double crochet for stability, and finally rolled and sewn into a compact floral form.
Pattern Notes
- The flower is crocheted in a single continuous piece, minimizing the need for joining or weaving in ends.
- Petals are formed using treble (tr) crochet and picot stitches for a realistic effect.
- A starting chain creates the flower’s base, onto which all petals and finishing rounds are built.
- Marking the first and last stitches helps keep track of position, especially for beginners.
- The motif is completed by rolling the strip into a flower and sewing to secure.
- Adjust the chain length for larger or smaller flowers.
- The continuous method ensures a neat finished back.
Skill Level
Beginner
Familiarity with chain, double crochet, treble crochet, picot, slip stitch, and sewing required.
The pattern is highly beginner-friendly, featuring clear stitch instructions and helpful marking techniques. With just one yarn color and a few basic tools, you’ll be able to create a jasmine flower that can be attached to any project for a delicate ornamental touch.
Materials
- Yarn: Light or DK weight (any fiber or color, typically white for jasmine but i can use yellow)
- Crochet hook: 2.5 mm
- Scissors
- Yarn or tapestry needle
- Stitch markers (optional)
Measurements / Sizing
- Finished flower measures approx. 3–4 cm across when rolled and seamed (size will vary based on yarn/hook and tension).
Gauge
Gauge is not critical for this motif. Ensure stitches are firm but not too tight for easy rolling.
Stitch Abbreviations
- ch = chain
- dc = double crochet
- tr = treble crochet (yarn over twice)
- sc = single crochet
- sl st = slip stitch
- st(s) = stitch(es)
- picot = ch 1, insert hook into base loops, sl st
Special Stitches
Treble Crochet (tr):
Yarn over twice, insert hook into stitch, yarn over and pull through (4 loops on hook), yarn over and pull through 2 loops (3 times).
Picot:
Ch 1, insert hook into two loops below (creating a “pico” bud), yarn over and pull through both loops.
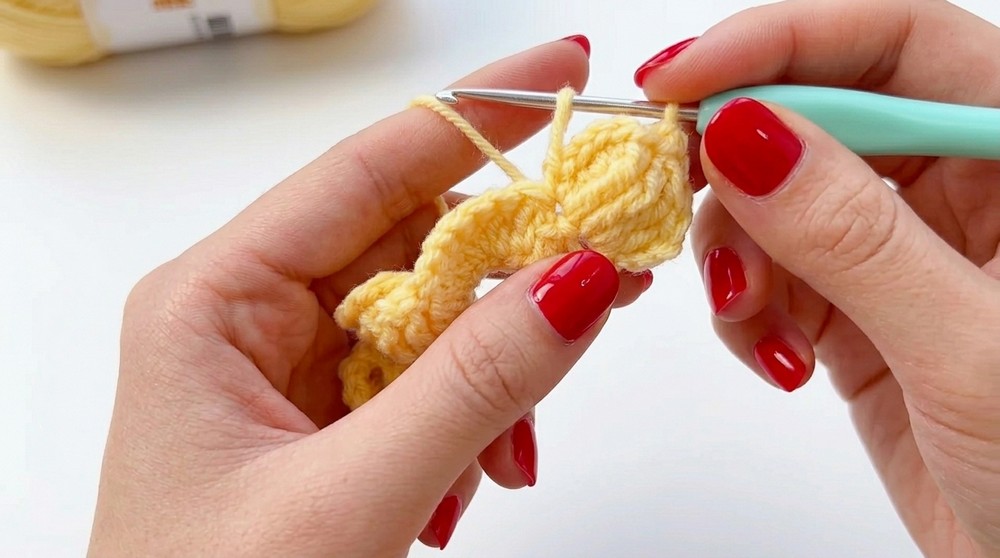
The Crochet Pattern
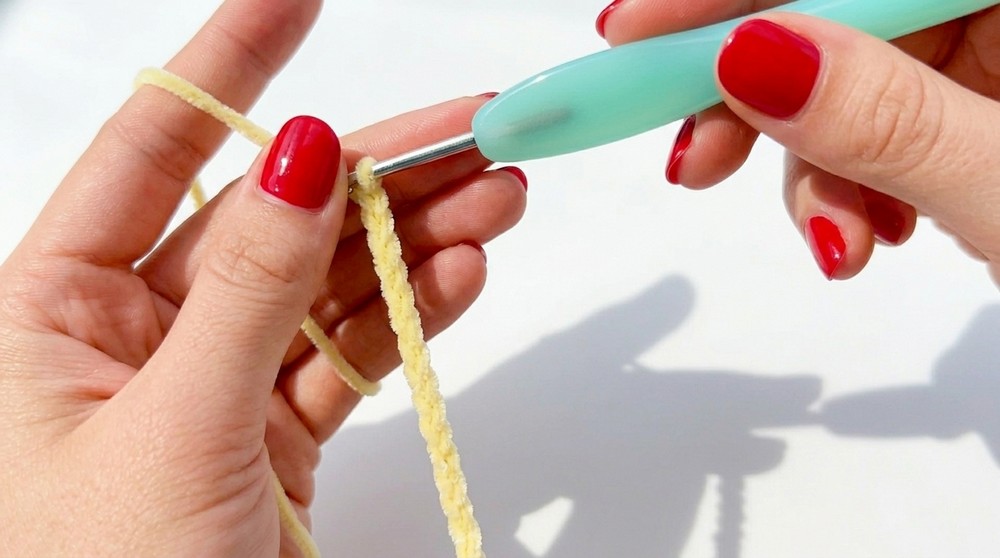
Step 1: Starting Chain
- Make a slip knot, leaving a yarn tail about 10–15 cm long for sewing.
- Chain 32.
Step 2: Foundation Row
- Yarn over, count back three stitches from the hook.
- Insert hook into the back bump of the third stitch.
- Double crochet (dc) across each chain back bump, for a total of 30 dc.
- Mark the first dc and the last dc with stitch markers for easier petal placement.
- At the last dc, mark the stitch; this will be important for turning.
Step 3: Turning for Petals
- Chain 3, turn work.
- Yarn over twice (for treble crochet).
- Work petals as follows:
Step 4: Large Petals (10 total)
Each large petal spans two stitches.
Petal 1 (First Petal):
- Remove the marker from the first stitch.
- In that stitch: Work 3 tr.
- Chain 1.
- Picot: Insert hook into two loops below, yarn over, pull through both loops.
- Yarn over twice, move to the next stitch.
- In the next stitch: Work 2 tr.
- Chain 3.
- Slip stitch into the same stitch.
Repeat:
- Chain 3, yarn over twice, in next stitch work 3 tr, chain 1, picot, yarn over twice, next stitch (work 2 tr), chain 3, sl st into same stitch.
- Repeat for a total of 10 petals (always spanning two stitches per petal).
Step 5: Small Petals (3 total)
After 10 large petals, begin small petals—each spans two stitches.
Small Petal:
- Chain 3.
- In first stitch: tr, chain 1, picot.
- Yarn over twice, next stitch: tr.
- Chain 3, sl st into same stitch.
Repeat for next two petals:
- Chain 3, next stitch: tr, chain 1, picot, next stitch: tr, chain 3, sl st into same stitch.
Step 6: Edge Finish
Double Crochet Row:
- At the end of the small petals, 4 stitches remain.
- Chain 2, turn.
- Double crochet into each of the four stitches across.
Final Row:
- Mark the last stitch as the first dc of the previous round.
- Double crochet into the last (marked) stitch.
Step 7: Ending the Flower
- Chain 2 to turn.
- Slip stitch into the last stitch just worked.
- Leave a long yarn tail, cut yarn, pull the end through.
Assembly & Finished Size
- Roll the flower strip gently from right to left, aligning the bottom straight edge.
- Thread the long yarn tail onto a sewing needle.
- Sew through all layers of the roll at the bottom edge, securing the flower shape.
- Sew randomly through the flower for additional support, finishing by tying the yarn ends at the back.
- If desired, thread both yarn tails to the front, tie a knot, and trim.
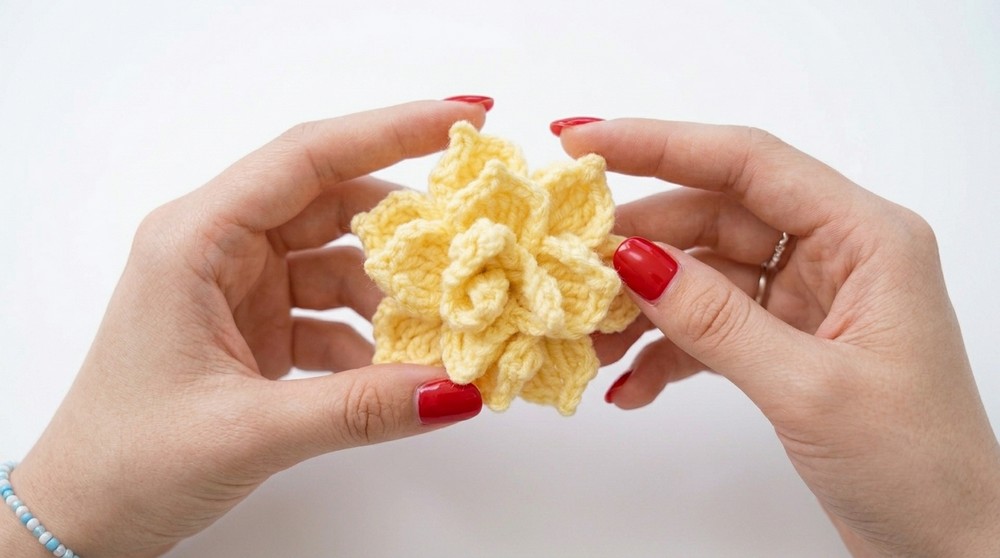
Finished size: Approximately 3–4 cm diameter.
Quick Overview for Beginners
- Chain 32 and dc back across (30 dc).
- Mark the first and last dc.
- Turn, chain 3, and crochet ten large petals (each: 3 tr, picot, 2 tr, chain 3, slip stitch).
- After ten petals, crochet three small petals (tr, picot, tr, chain 3, slip stitch).
- Finish by dc in remaining four stitches.
- Turn, slip stitch, cut yarn leaving tail.
- Roll the strip, sew at the base to secure, tie ends, and trim.
Tips for Success:
- Mark stitches for easier organization and avoid mistakes.
- Picot stitches give the flower a realistic appearance—don’t skip them!
- Roll gently and evenly for a pleasing floral shape.
- Sew at base securely so your flower doesn’t unravel.
- Attach finished flower to your project using the leftover yarn tail.