Beginner-Friendly Free Cat Ear Beanie Crochet Pattern
Whiskers and playful style come together in a free crochet cat ear beanie pattern for a cozy hat everyone will love and want to wear daily.
A playful hat with little pointy ears brings a smile wherever it goes and adds charm to any outfit. This cute beanie is loved by both kids and adults because its design looks just like a friendly kitten, making every day feel lighthearted and fun. The gentle yarn feels comfortable on the head, making it perfect for staying warm on chilly days or showing off some personality with friends.
Free Cat Ear Beanie Pattern for All Skill Levels
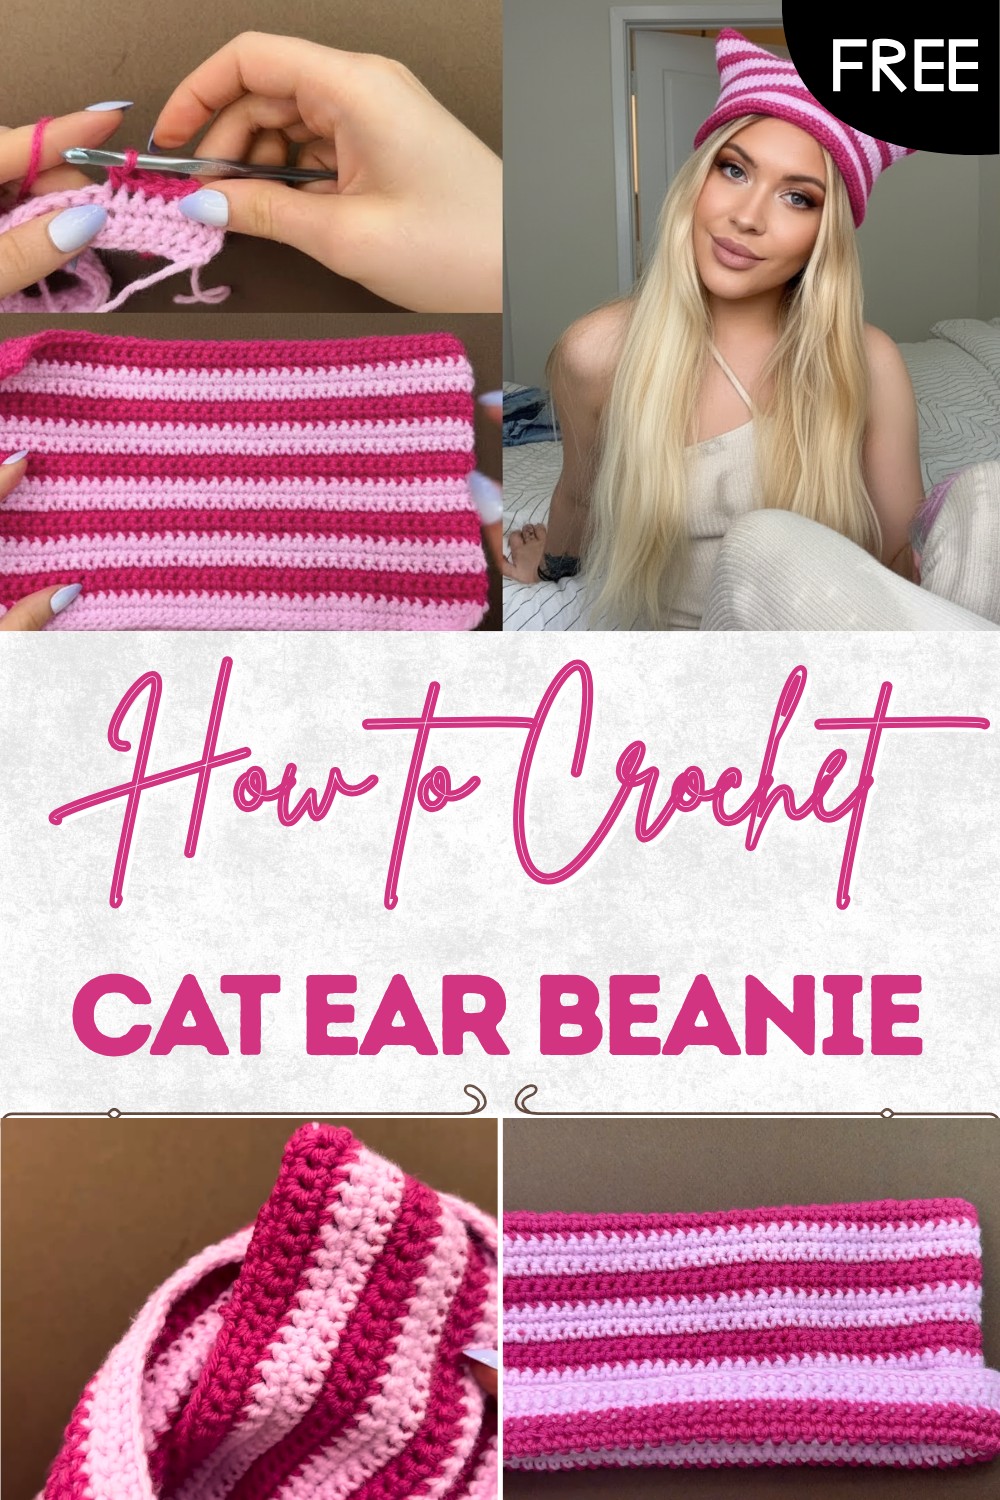
Bright colors and special stripes make it look as cheerful as a rainbow and help anyone feel unique in a crowd. Using a crochet cat ear beanie pattern means anyone can join in the fun—even someone who has never tried a project like this before—because the steps are simple and easy to follow. This hat is not only practical for keeping ears cozy, but also makes a thoughtful gift that can bring lots of joy and giggles to a loved one on any day.
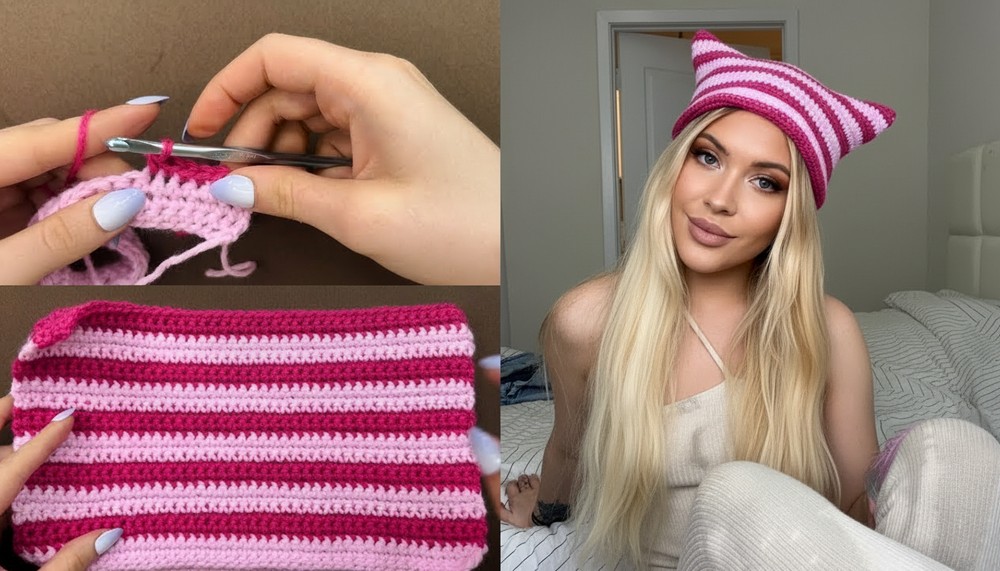
Free Crochet Cat Ear Beanie Pattern
Materials
- Yarn: Any type of yarn, two colors recommended (sample uses 100% acrylic pink and white)
- Hook: US size 5 mm (H-8)
- Measuring Tape: For head measurement
- Scissors
- Tapestry Needle: For sewing and weaving ends
- Optional: Stitch marker
Abbreviations (US Terminology)
- ch – chain
- sc – single crochet
- sl st – slip stitch
- st(s) – stitch(es)
- BLO – back loop only (not used in pattern but helpful for variations)
Special Notes
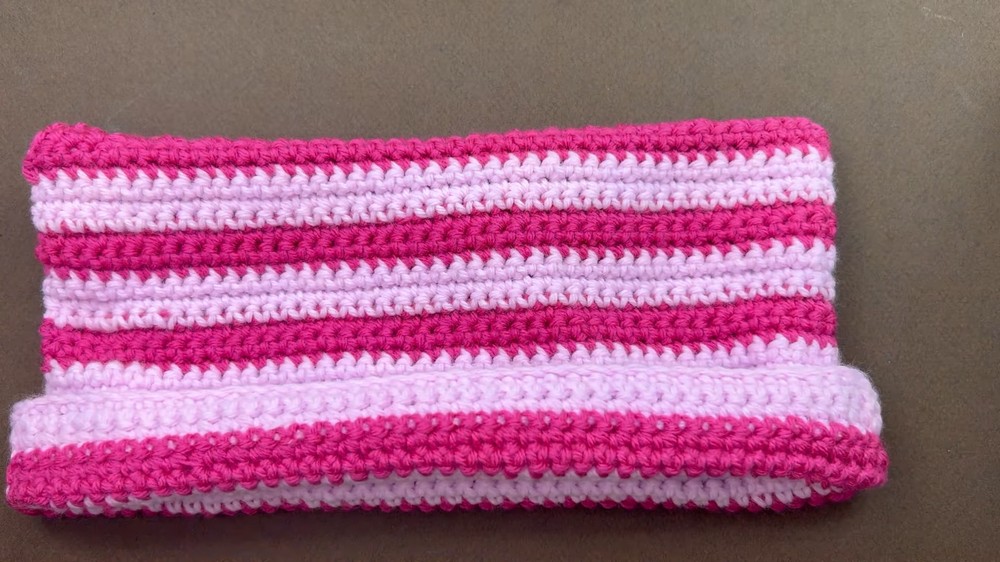
- The hat is made from two identical squares sewn together.
- Finished beanie fits adult average head; adjust measurements for custom fit.
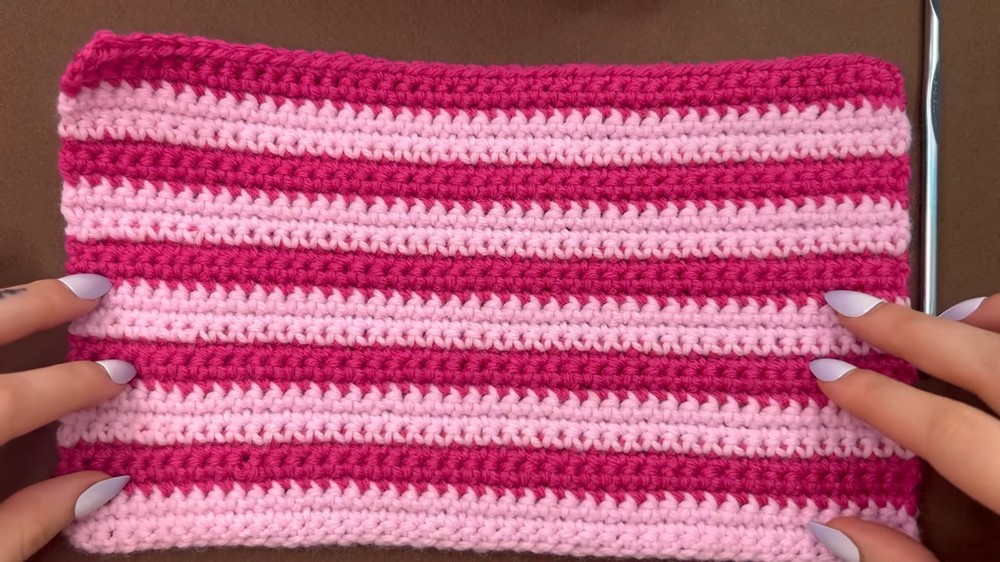
- Color changes are every three rows for a playful, striped look. You can customize as desired.
- Cat ears form automatically from the corners when assembled.
Instructions
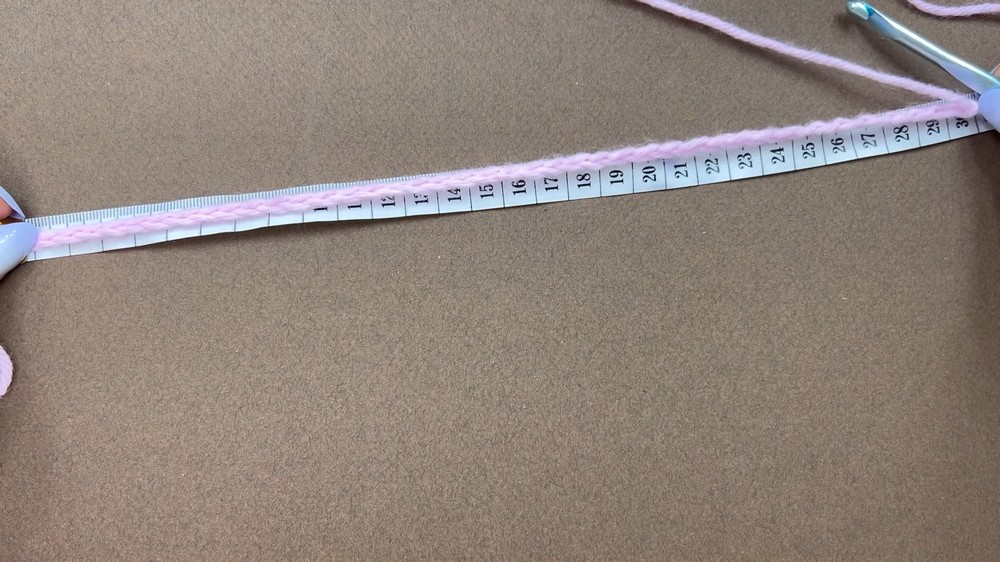
1. Measure and Calculate
- Wrap measuring tape around your head for circumference.
- Divide by 2 to get the side length for your squares (example: head = 23.5 in = 60 cm; half = 11.75 in = 30 cm).
- Note: When measuring chains, gently stretch for a slightly snug fit.
2. First Square
Step 1:
Make a slip knot.
Step 2:
Chain the number to match half your head measurement (cm or in).
- Example: for 30 cm, ch to reach 30 cm, count the chains (e.g., 43).
- Record this number to use for the second square.
Step 3:
Add 1 extra ch for turning.
Row 1:
- Work 1 sc in second ch from hook, then 1 sc in each ch to end.
- Count your stitches and remember for your second square.
Row 2–3:
- Ch 1, turn.
- Work 1 sc in each st across.
- Continue until you have 3 rows in your first color.
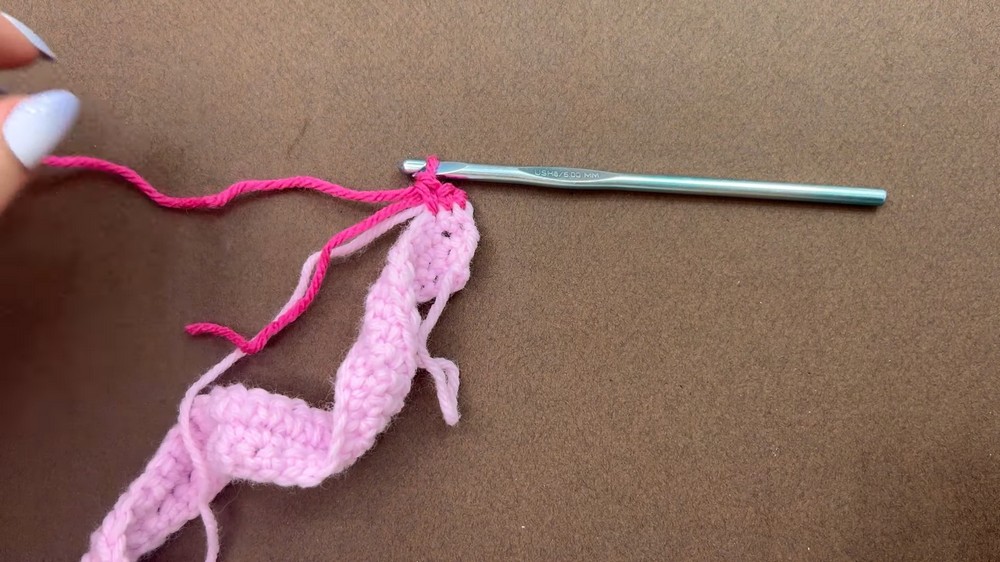
3. Change Color
Switch to your second color using either method:
- Method 1 (Preferred):
- In final st of last row, insert hook, pull up loop, leave two loops on hook.
- Place new color on hook, pull through the two loops to finish the sc.
- Ch 1, turn, continue as normal.
- Crochet over the tails for a few stitches to secure.
- Method 2:
- Finish the row, cut yarn, join new color with a slip knot in the same st.
- Ch 1, turn, continue.
4. Continue Stripe Pattern
- Work 3 rows of sc in your second color.
- Alternate colors every 3 rows.
- Continue until your square measures the required height (about 6.5 in / 16.5 cm, or as preferred).
- Fasten off.
5. Repeat for Second Square
- Make a second identical square using the same number of chains and rows.
6. Assembly
Choose “Front” and “Back”:
- Decide which sides/squares you want to be front-facing.
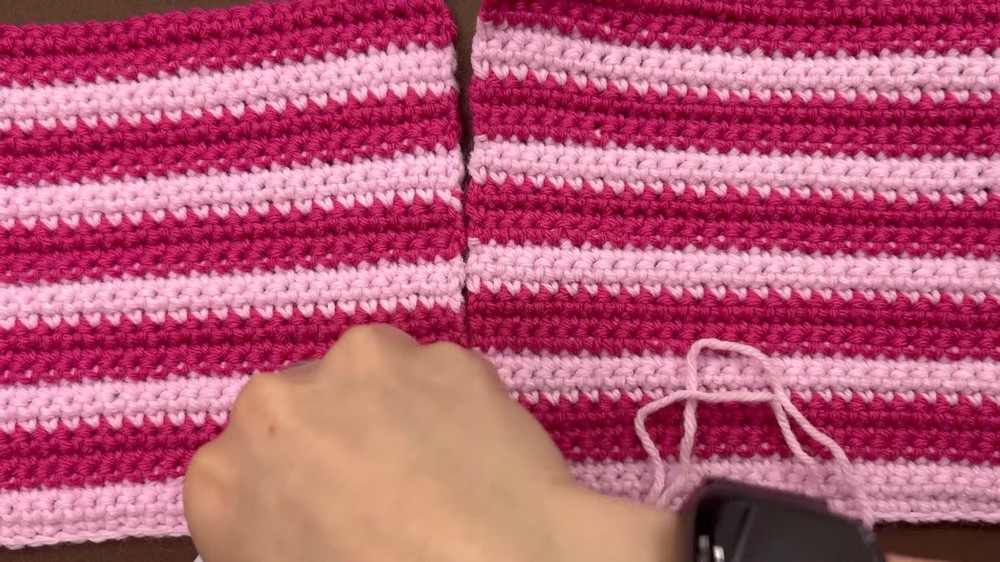
Turn Squares Inside Out:
- Place the two squares together, with right sides facing out.
- Make sure stripes and rows line up.
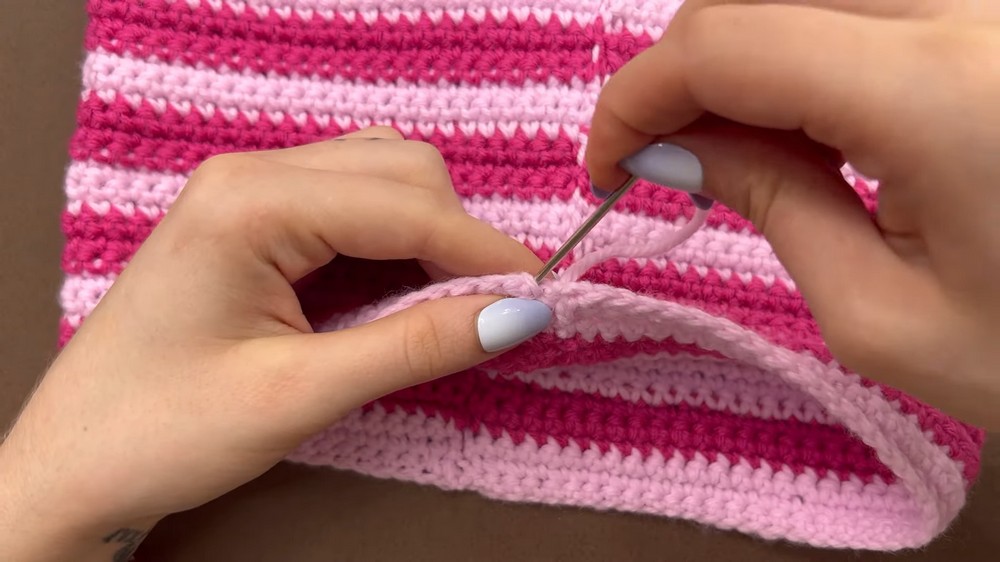
Seam Sides Using Mattress Stitch:
- Use tapestry needle and yarn (color of your choice).
- Thread needle, start at corner, leave a tail to weave in.
- Pick up one loop from each piece, alternating right-to-left and left-to-right.
- Continue along one edge, keeping rows matched.
- Repeat for other edge.
- Sew top edge in the same manner.
- Note: You may also use slip stitch seam if preferred.
Weave in Ends:
- Use tapestry needle to sew yarn tails through several stitches, securing.
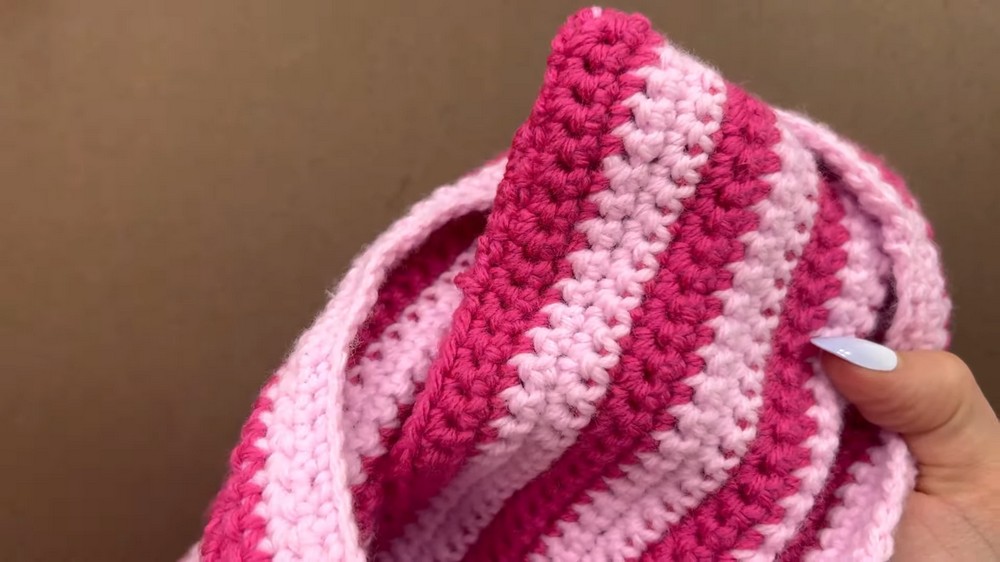
7. Shape Cat Ears
- Turn hat right side out.
- Push corners outward for the cat ears. Shape with your fingers.
- Fold the bottom edge upwards for a cute brim.
Conclusion
This Cat Ear Beanie is a charming, beginner-friendly take on the classic beanie, easily customized for any size or color scheme. The two-square construction is quick and approachable, and the mattress stitch offers a nearly invisible seam. The ear shape forms naturally for a playful finish!
Pattern Correction
- Count chain and row numbers carefully to ensure squares match.
- When sewing, double check row alignment for neat stripes and ears.
- For best fit, measure chains stretched to desired snugness.
- If hat fits too loosely or tightly, adjust square size accordingly.
- Mattress stitch or slip stitch seam can be used based on comfort/appearance.
Tips
- Secure color changes by crocheting over tails, or sew them in securely.
- Try different color patterns or add embroidery for customization.
- For a chunkier hat, use thicker yarn and larger hooks.
- Adjust square size for child or adult fit—just halve head circumference.
- For sharper ears, pinch the corners and tack them with a few stitches.