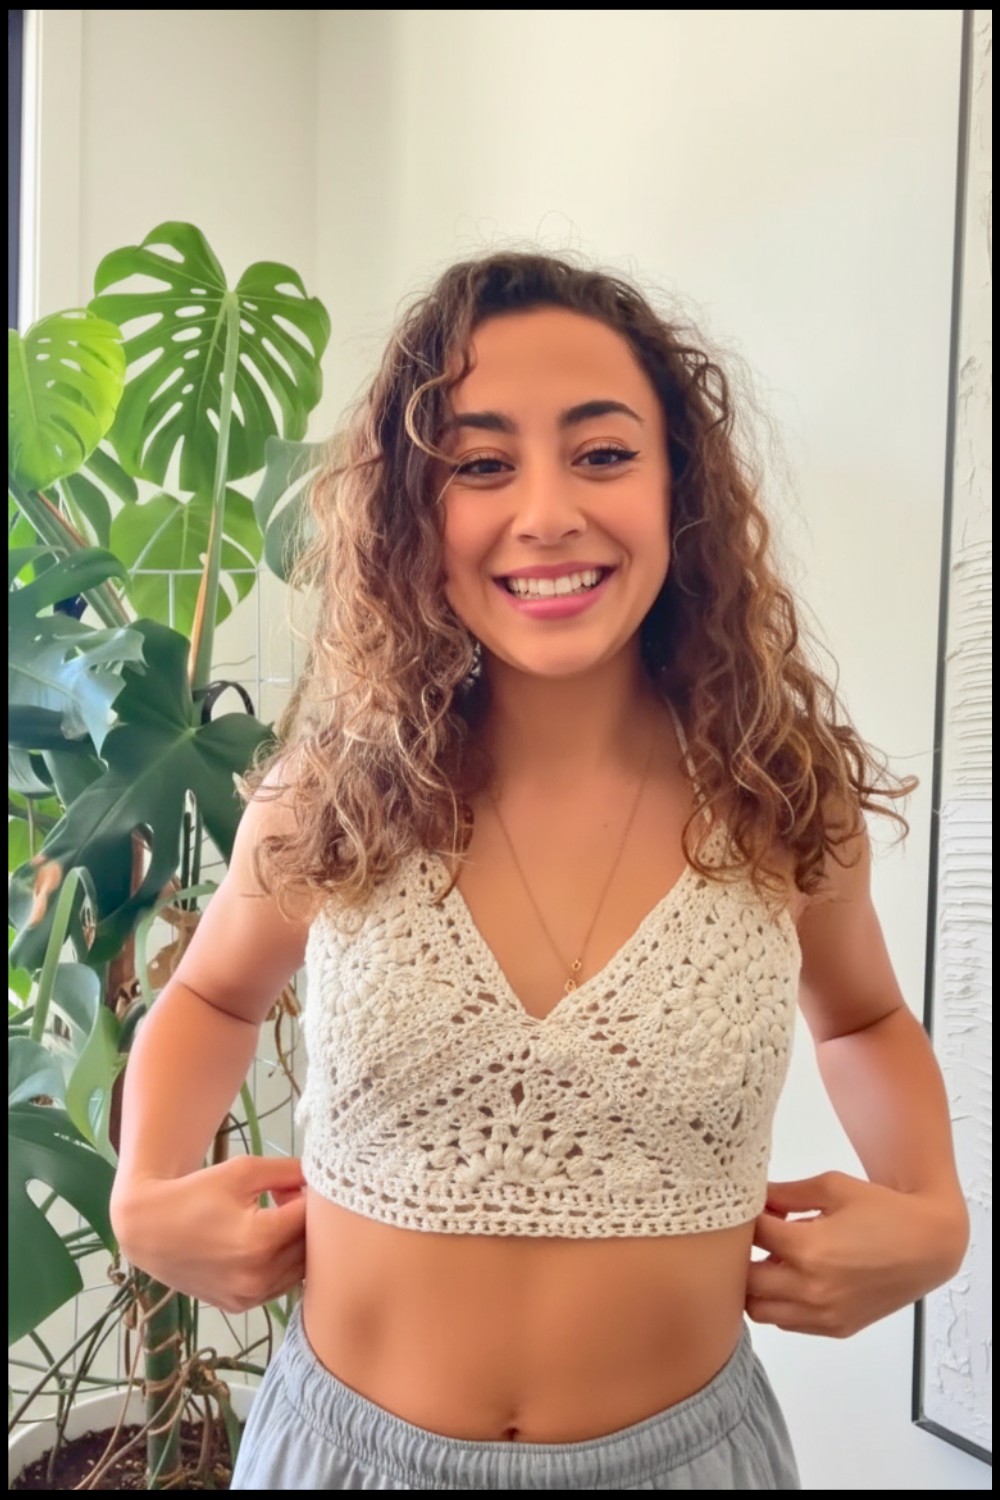
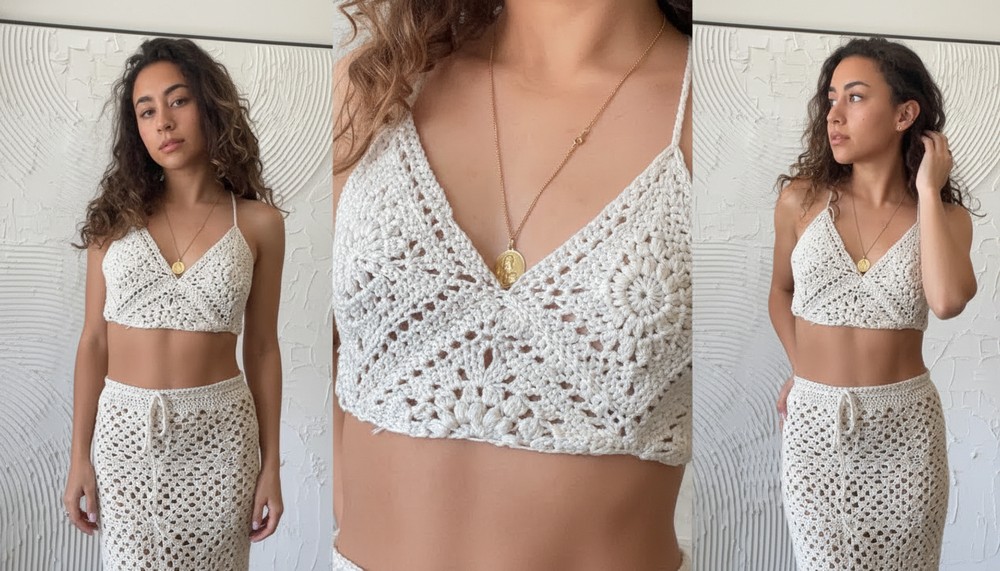
Free Crochet Summer Top Pattern for a Breezy Look
Fresh style awaits with this free crochet summer top pattern, for keeping cool and comfortable on sunny days with easy-to-follow instructions.
Warm weather calls for something light and joyful that hugs your skin just right. The crochet summer top pattern brings a pop of color and lovely patterns into your wardrobe, making each piece feel extra special and made just for you. Gentle stitches and openwork designs help keep you cool on even the sunniest days. With every simple step, it’s easy to make a top that matches your style, from bright and playful to calm and classic shades.
Free Crochet Summer Top Pattern for Every Occasion

Great for pairing with jeans, skirts, or shorts, this top fits any outing, whether you’re spending time with friends or relaxing at home. The best part is how comfortable and easy to wear it is, never heavy or awkward. Wearing something made with this pattern brings smiles and confidence, making ordinary days feel just a bit more beautiful and bright.
Free Crochet Summer Top Pattern
Materials
- Yarn: Worsted weight cotton/acrylic or similar (category 4), 3–4 colors for a patchwork look
- Hook: 4.0 mm (G/6), or as required for gauge
- Notions:
- Yarn needle
- Scissors
- Measuring tape
- Blocking materials (optional: pins and mat or DIY board/nails)
- Optional: Braided cord or ribbon for ties, stitch markers
Key Abbreviations (US Terms)
| Abbreviation | Stitch Name |
|---|---|
| ch | chain |
| st(s) | stitch(es) |
| sl st | slip stitch |
| sc | single crochet |
| hdc | half double crochet |
| dc | double crochet |
| sp | space |
| rep | repeat |
| BLO | back loop only |
Special Notes
- Gauge/Size: Easily customizable. Add more rounds to motifs for a larger size or use bulkier yarn.
- Blocking is highly recommended for neatness.
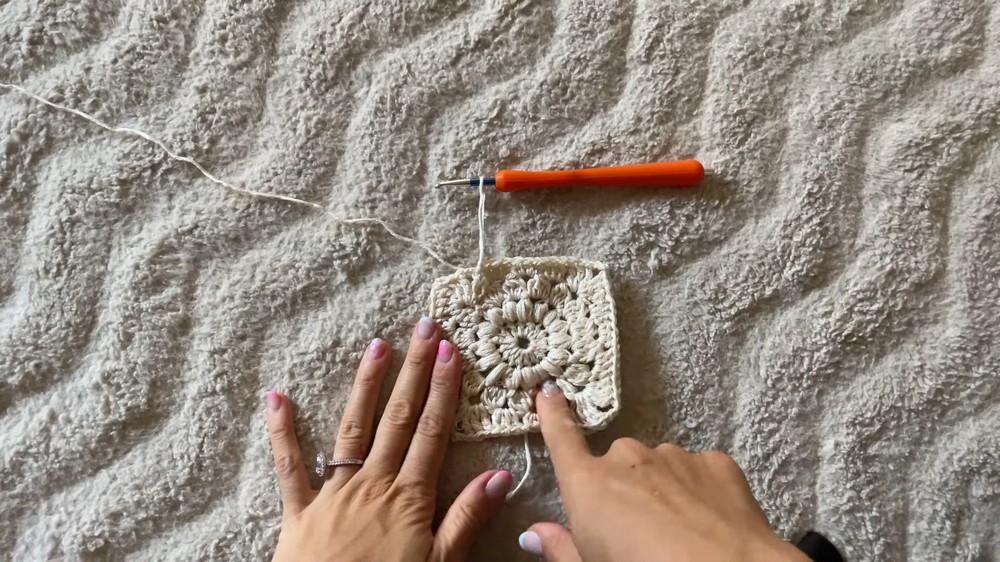
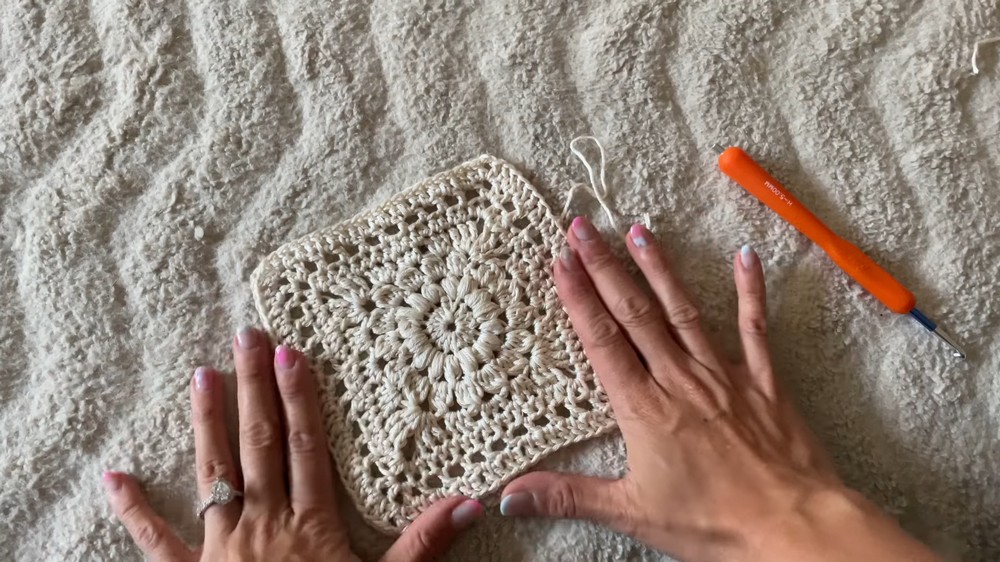
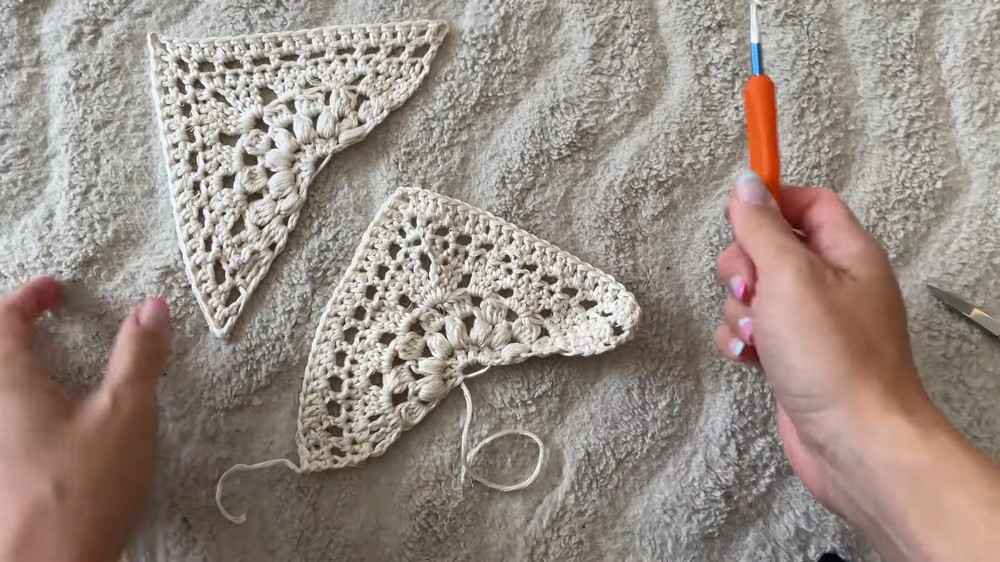
- All motifs: See Emma’s “Sunburst Granny Patch” & “Sunburst Granny Triangle” tutorials before continuing.
- Pattern is written for joining by sewing with a tapestry needle for an invisible seam.
Pattern Instructions
1. Make the Motifs
- Sunburst Granny Square (Make 2): Follow your favorite pattern or Emma’s video.
- Sunburst Granny Triangle (Make 3): See tutorial or pattern.
- Block all motifs (soak and pin to a board or mat; let dry fully).
2. Additional Rows for Squares
Work the following around each finished, blocked Sunburst Granny Square:
Row 1 (HDC Border):
- Join yarn to any st, ch 2 (counts as first hdc).
- Hdc in each st across, [hdc, ch 2, hdc] in each corner sp.
- Sl st to top of beginning ch-2 to close.
Row 2 (DC Space Row):
- Ch 2 (counts as dc), ch 1 (for space), skip 1 st, dc in next st, ch 1, skip 1, and rep to corner.
- At corner: (dc, ch 2, dc) in corner sp.
- Continue pattern around, ending with a dc, join with sl st.
Row 3 (Solid DC Row):
- Ch 2, dc in every st and ch-1 sp around (placing [dc, ch 2, dc] in each corner sp).
- Join with sl st.
- Fasten off and sew in ends. Block if needed.
3. Additional Rows for Triangles
Work the following around each triangle (from Sunburst Granny Triangle base):
Row 1 (HDC Border):
- Join yarn at a side; ch 2, hdc across to corner.
- At corner: (hdc, ch 2, hdc) in sp.
- Continue hdc across each side; do not join—turn at row ends if working flat.
Row 2 (DC Space Row):
- Ch 2, ch 1, skip 1, dc, ch 1, skip 1, dc to corner.
- At corner: (dc, ch 2, dc) in corner sp.
- Continue, then turn or join and cut if working in the round.
Row 3 (Solid DC Row):
- Ch 2, dc across all sts and ch-1 sps, at corners (dc, ch 2, dc).
- Fasten off. Block.
4. Layout and Sewing Motifs
Layout:
- Place the two squares as your bust cups (V-neck join at center).
- The three triangles form the lower edge:
- 1 triangle attaches below the square join (center bottom), pointing down.
- 1 triangle on each side, attached to the bottom of the squares.
Tip: Lay all pieces on a table/floor before sewing.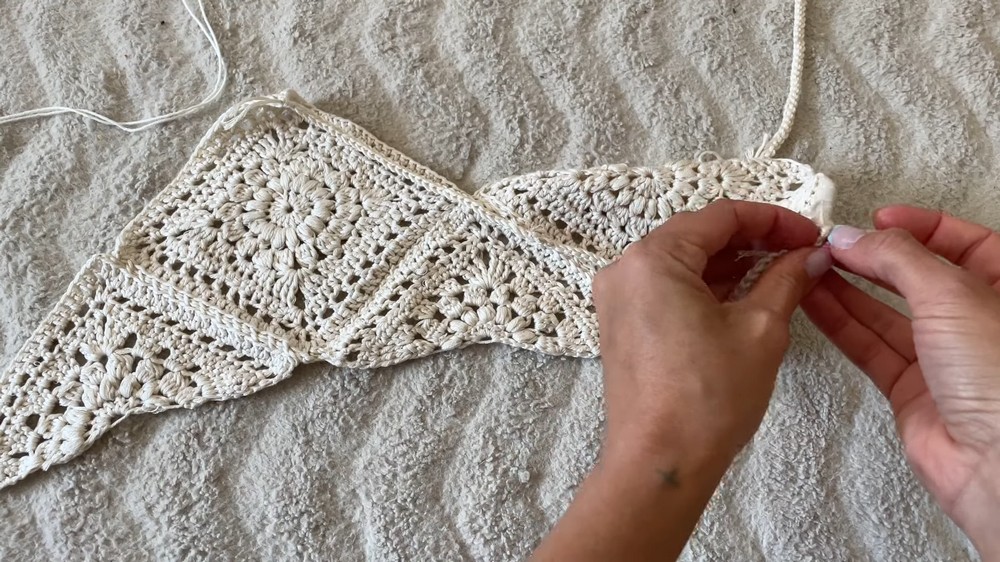
Stitching:
- With RS facing out, whipstitch or use an invisible back-loop ONLY method:
- Working one st per motif, grab the back loop of each st/edge with a tapestry needle and yarn for as invisible a seam as possible.
- Attach triangles to squares, and join squares at desired neckline depth.

5. Straps
- Use a crochet i-cord, braid, or chain for straps.
- Method:
- Cut two long lengths of yarn, fold in half for each strap.
- Attach at top corners of squares (the “V” for neck tie), OR at top and sides for adjustable/wrap-around fit.
- Pull ends through and braid or twist for durability.
- Knot ends and sew in well; trim any excess.
6. Optional: Lower Hem Edging
Row 1:
- Join yarn at one lower triangle corner.
- Work sc along triangle edge, switch to hdc as you near the square, then dc across each square panel, repeat hdc, then sc along last triangle.
- Turn if working in rows, or work in the round if complete overlap.
Row 2:
- Ch 2 (or ch 3 for dc), turn/continue, work space (mesh) stitch along the same principle: in each stitch across, dc, ch 1, skip 1.
- Repeat pattern transitions (sc/hdc for the triangle, dc for main panel) for a tapered, custom hem.
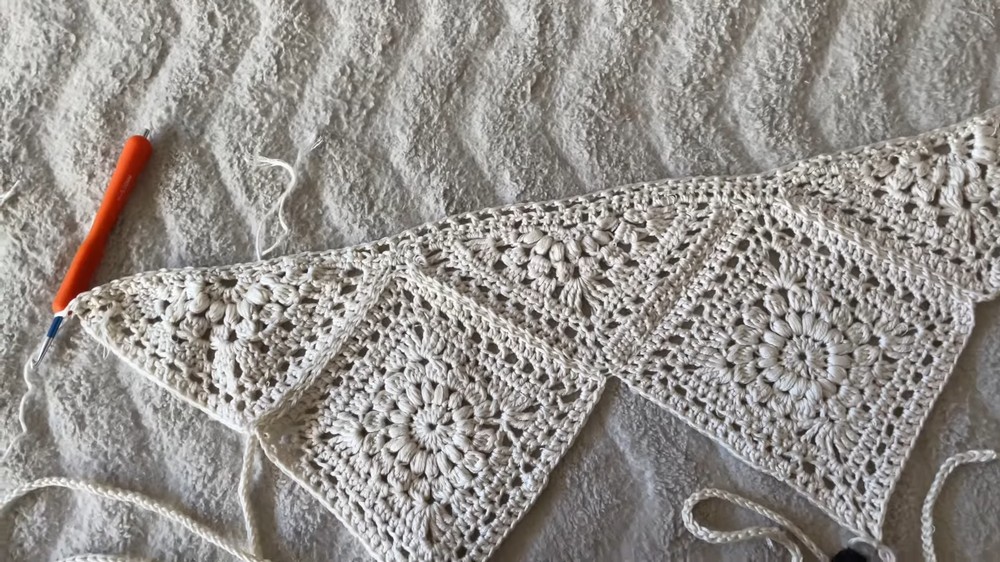
Row 3:
- Switch back to single crochet, hdc, and dc as in Row 1 for a tidy, clean finish.
- Fasten off, weave in all ends.
7. Finishing & Blocking
- Block again for ultra-neat edges and perfect symmetry.
- Confirm all seams are secure.
- Try on and fit: Adjust strap length/placement to your comfort—re-tie or knot as needed!
Pattern Correction & Tips
- Remember to mirror the triangle and square placement for symmetry.
- Blocking after every stage ensures the final fit is sharp and even.
- Edge stitch counts: On triangles, stitch placement may require improvisation with equalizers (adding extra dcs/hdcs in puffier sections).
- End with hem rows for a professional look.
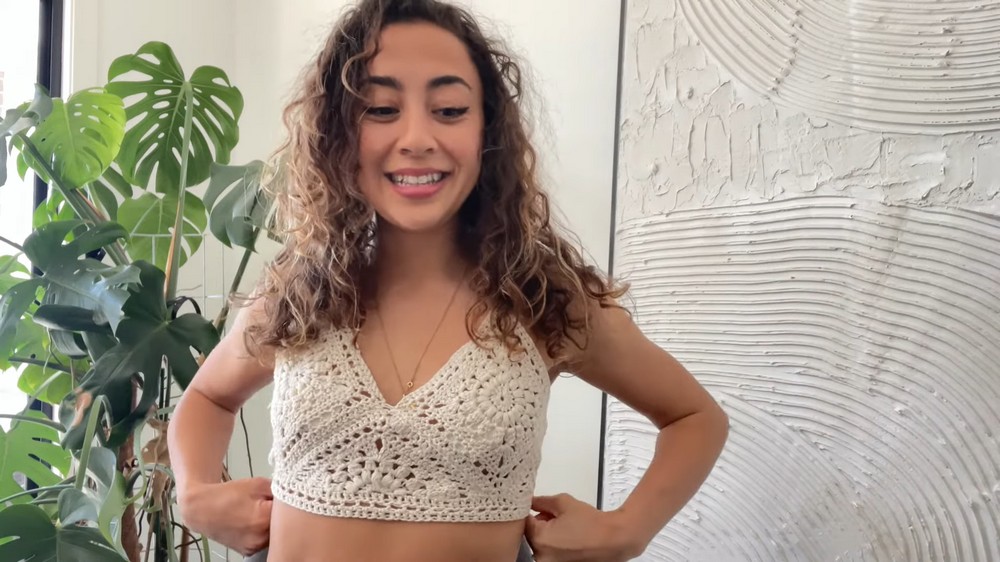
Conclusion
You’ve created a beautiful, retro patchwork crop with ultimate stash-busting potential and full custom fit! Seamless updates, neat joining, and shaping make this a pattern you’ll return to for matching sets, tops, or even as swimsuit covers.