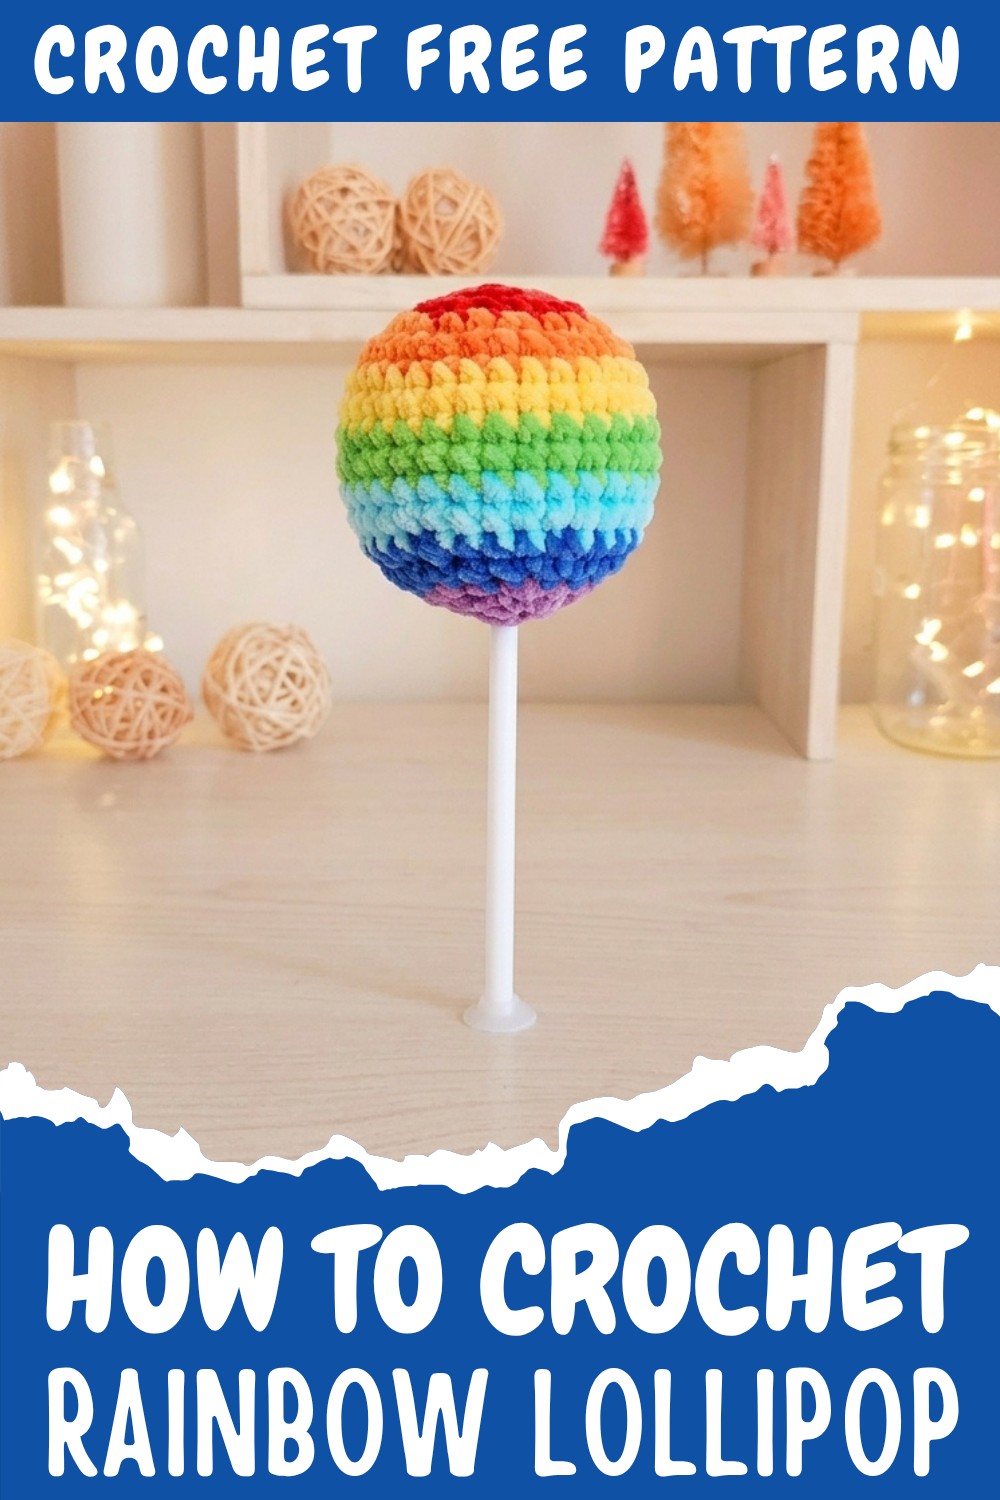
Adorable Crochet Rainbow Lollipop Free Pattern with Colorful Yarn

Brighten your creations with our free crochet rainbow lollipop pattern, designed to help you easily make colorful, fun decor or delightful handmade gifts.
I love bright colors paired with sweetness, which is exactly why I was so excited to work on this free crochet rainbow lollipop pattern. This fun project creates a cheerful, round lollipop that’s bursting with color, a perfect little treat to brighten up your day or someone’s special moment. It’s a playful decoration or gift that’s both charming and easy to make.
Crochet Rainbow Lollipop Free Pattern for Kids
The lollipop features a smooth spiral design with vivid rainbow stripes that wrap around in a swirl. Its shape is simple yet eye-catching a perfect circle mounted on a stick, just like the real thing! The texture is soft but defined, thanks to the spiral stitch technique, giving it a lively, dynamic look. You can make this project in various sizes, from tiny keychain charms to larger decorative pieces, by simply changing your yarn thickness and hook size.
This pattern is great for those who are comfortable with basic crochet stitches and working in rounds. The main method involves continuous spiral crochet, which not only creates that signature swirled look but also keeps stitching fun and interesting. I suggest using smooth, worsted-weight yarn because it really highlights the spiral texture and lets the bright colors pop.
Inspired by classic candy and a love for vivid hues, this rainbow lollipop makes a sweet gift, party favor, or festive decoration. Don’t hesitate to mix up colors or add a touch of sparkle to make it your own creation. If you enjoy colorful, cheerful projects that bring a smile, this pattern is definitely worth a try!
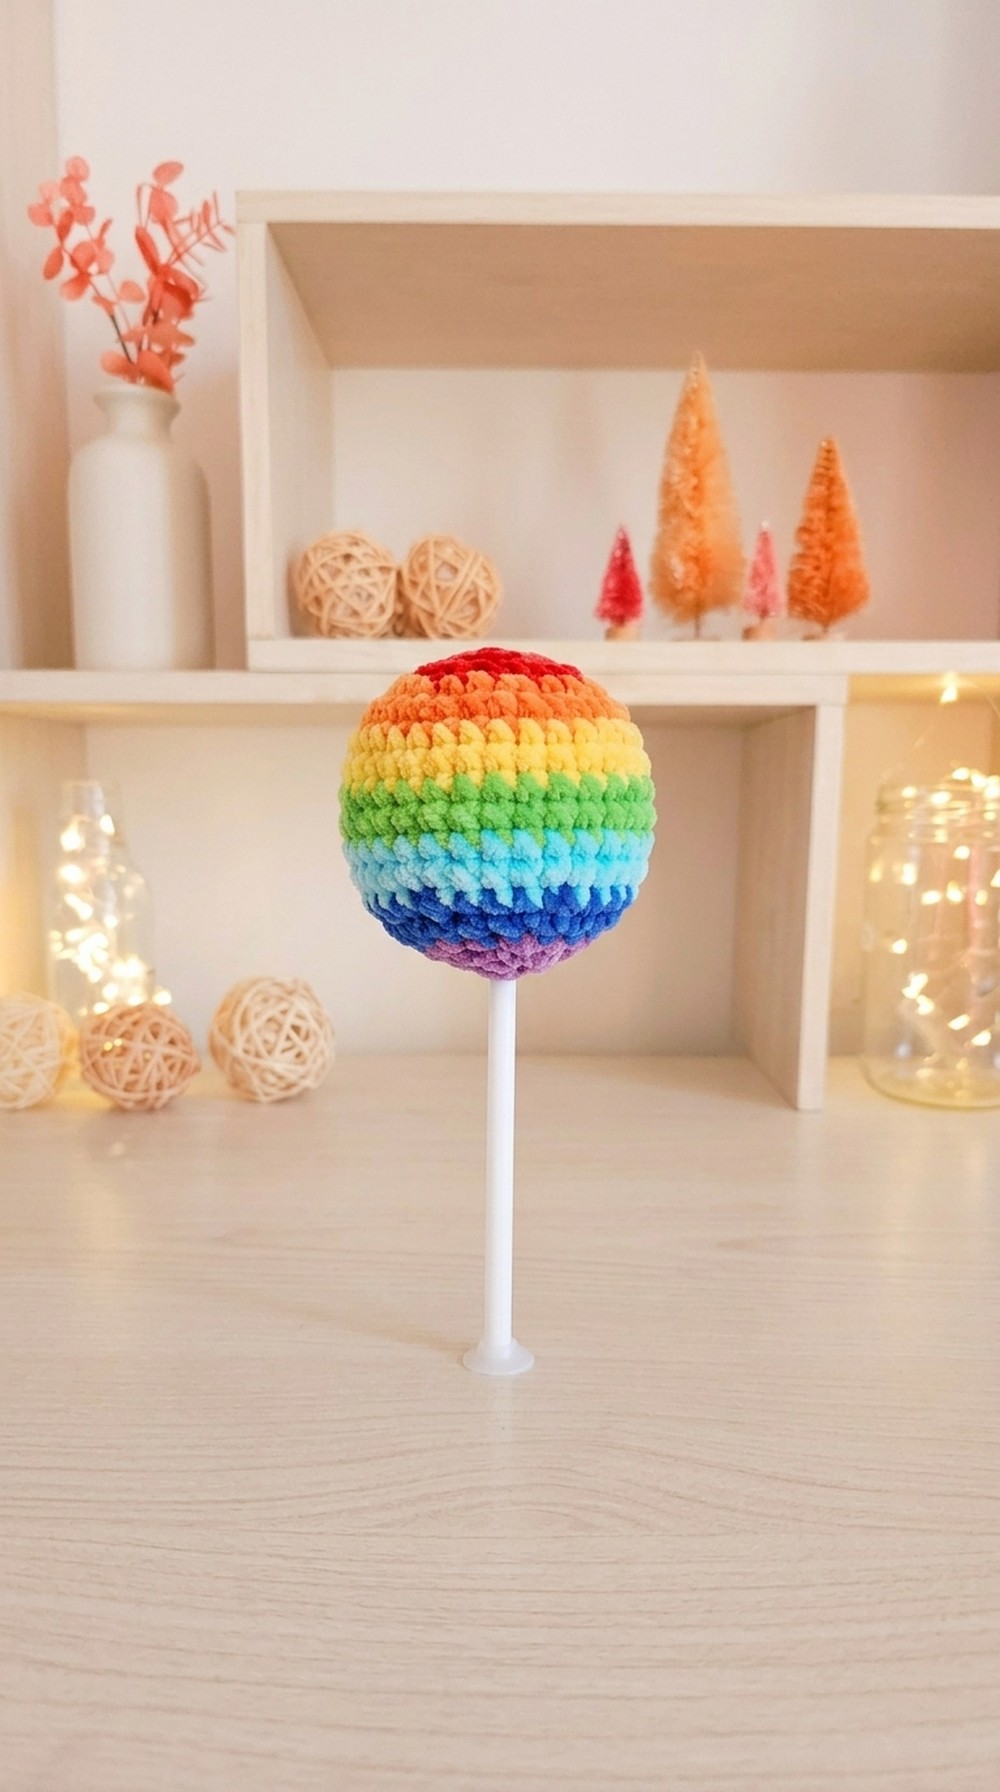
Adorable Crochet Rainbow Lollipop Pattern
This pattern allows you to create two styles of charming crochet lollipop keychains, as featured in the tutorial. Using 4-ply milk cotton yarn and a 2.25 mm crochet hook, you can produce a cute, beginner-friendly project measuring approximately 3.5cm.
Skill Level
This is a beginner-friendly amigurumi pattern, ideal for those looking to practice color changes and basic spherical shaping.
Stitch Abbreviations
For your reference, this pattern uses the following full terminology:
-
Single crochet (sc): Insert hook, yarn over, pull up a loop, yarn over, and pull through both loops on hook.
-
Increase (inc): Work 2 single crochet stitches into the same stitch.
-
Decrease (dec): Insert hook into the front loops of the next 2 stitches, yarn over, pull through those 2 loops, yarn over, and pull through the remaining loops on the hook.
-
Magic Ring (mr): A technique to start working in the round.
-
Slip stitch (sl st): To join rounds.
-
Round (R): A continuous loop of stitches.
Gauge
Gauge is not critical for this project, but aim for a tight, consistent tension to prevent the fiberfill from showing through the stitches. Use a smaller hook size than recommended on the yarn label to maintain this density.
Gauge Swatch Tips
Before starting, ensure your stitches are small enough that your stuffing will not bulge out. If you see gaps between your stitches, consider switching to a smaller hook size or pulling your yarn tighter.
Pattern Notes
-
This pattern is worked in continuous rounds, not joined, unless specified.
-
Use a stitch marker to keep track of the first stitch in each round.
-
When changing colors, carry the yarn or fasten off and rejoin as shown in the tutorial.
Materials Needed
-
Yarn: 4-ply Milk Cotton Yarn (Red, Orange, Yellow, Green, Sky blue, Blue, Purple, Milky white)
-
Tools: 2.25 mm crochet hook, lollipop stick, fiberfill for stuffing, stitch markers, sewing needle, and scissors.
Abbreviations/Symbols
-
R: Round
-
MR: Magic ring
-
X: Single crochet (sc)
-
V: Increase (inc) – 2 single crochet in the same stitch
-
A: Decrease (dec) – 2 single crochet together
-
ch: Chain
-
sl st: Slip stitch
-
st: Stitch
-
*( ) : Repeat instructions * times
-
[ ]: Work in the same stitch as indicated
-
= N: Total number of stitches in a round
Step-by-Step Pattern
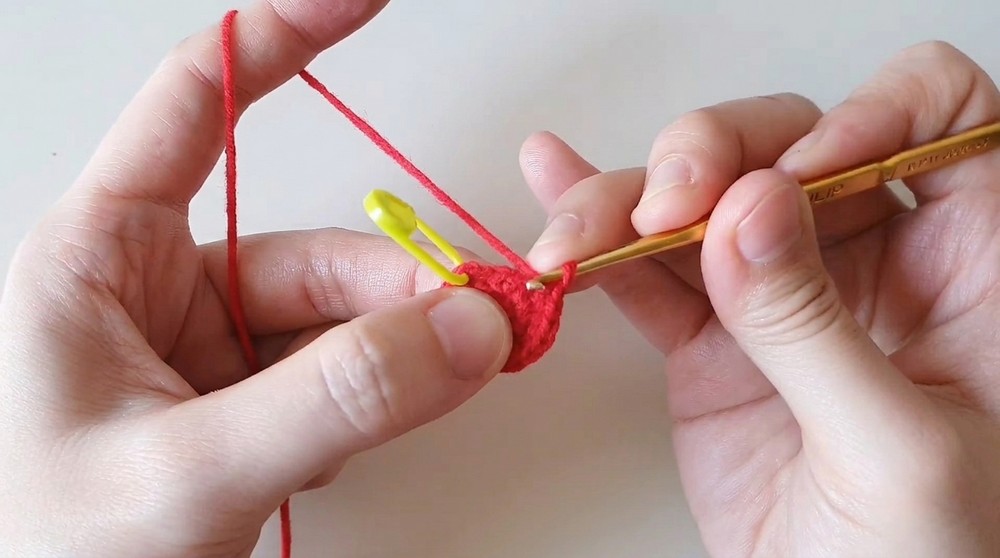
Beginning this colorful project requires a firm grip on the magic ring, the foundation of every spherical amigurumi creation. By meticulously working your initial six single crochet stitches and gradually increasing your count, you set the structural integrity for a perfect, uniform lollipop shape. This phase demands patience as you establish the base rhythm for your rainbow color sequence.
Round-by-Round (Rainbow Lollipop)
-
Start with Red:
-
R1: 6 X in MR (6)
-
R2: V * 6 (12)
-
R3: (X, V) * 6 (18)
-
-
Change to Orange:
-
R4: (X, V, X) * 6 (24)
-
R5: (3X, V) * 6 (30)
-
-
Change to Yellow:
-
R6-R7: 30 X (30)
-
-
Change to Green:
-
R8-R9: 30 X (30)
-
-
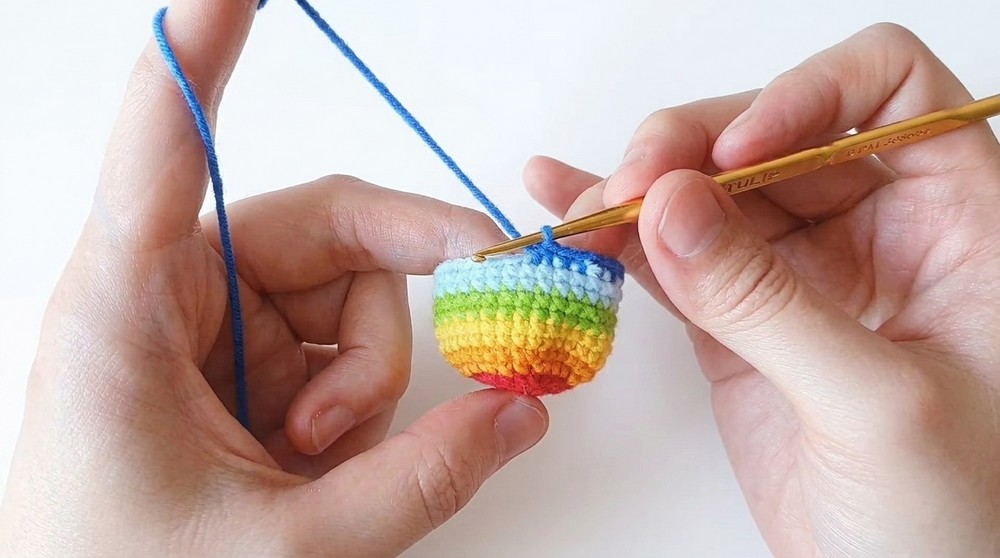
Change to Sky Blue:
-
R10-R11: 30 X (30)
-
As you transition into the mid-section, the project gains substance through consistent, round-by-round building. Keeping your tension tight is essential here, as these rows provide the canvas for your vibrant yarn color changes, creating the iconic layered look. Maintaining a steady stitch count during these rounds ensures the lollipop maintains its intended spherical form without distorting.
-
Change to Blue:
-
R12: (3X, A) * 6 (24)
-
R13: (X, A, X) * 6 (18)
-
-
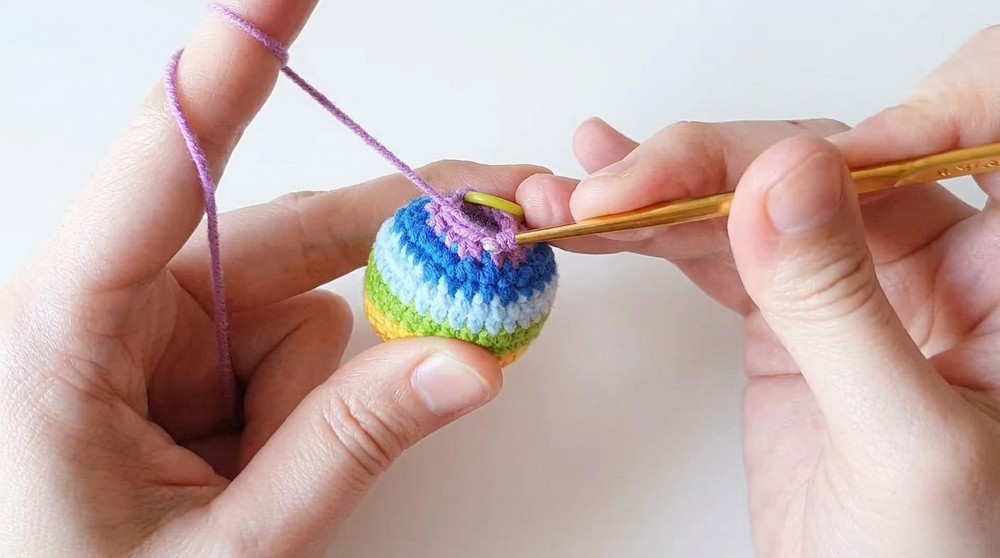
Change to Purple:
-
R14: (X, A) * 6 (12)
-
Stuff with fiberfill.
-
R15: A * 6 (6)
-
-
Finish off: Sew to close the remaining stitches and fasten off.
Finally, the closure phase transforms your work from a hollow shell into a plush, finished accessory. Carefully decreasing stitches creates a neat, rounded top, allowing you to secure the final form before adding the tactile finishing touches. Properly stuffing and attaching your hardware completes this delightful DIY endeavor.
Assembly & Finished Size
Once the final round is complete, add a generous amount of fiberfill stuffing into the lollipop head before closing the opening completely by sewing through the remaining front loops. The finished lollipop head should measure about 3.5cm. To assemble, secure the lollipop stick into the base of the sphere and attach your key ring to the top.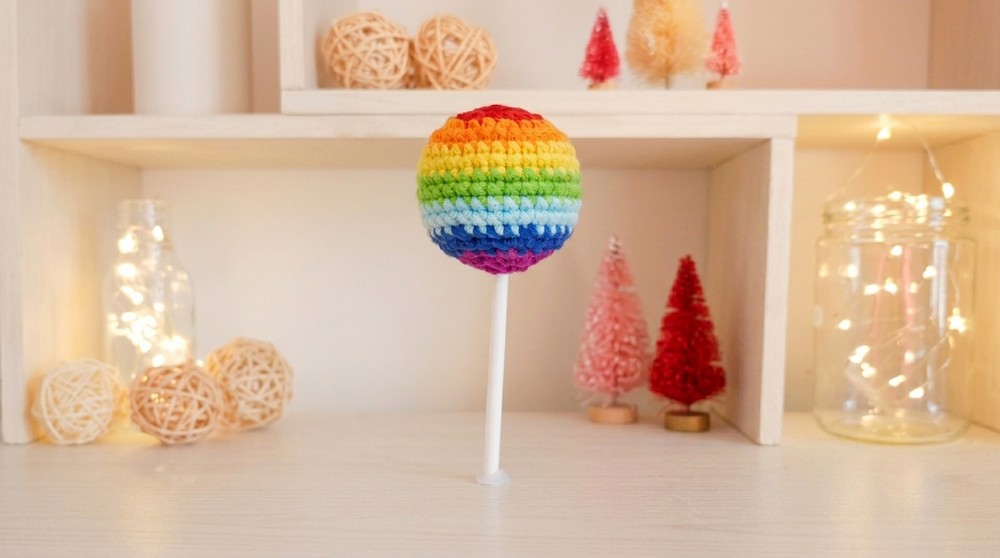
Conclusion
Creating these delightful lollipop keychains is a wonderful way to practice your amigurumi skills and produce lovely, personalized accessories. Whether you decide to stick to the rainbow palette or try the grape and milk style, you have successfully completed a charming DIY project. Enjoy your new keychains, and feel free to experiment with different color combinations for even more fun designs. You have done an excellent job, and this piece will surely be a lovely addition to your collection or a fantastic handmade gift!

![How to Crochet Eleven (Stranger Things) Amigurumi Tutorial [EN, ES, DE Sub] 13](https://claireabellemakes.com/wp-content/uploads/2026/07/How-to-Crochet-Eleven-Stranger-Things-Amigurumi-Tutorial-EN-ES-DE-Sub-13-768x768.jpg)