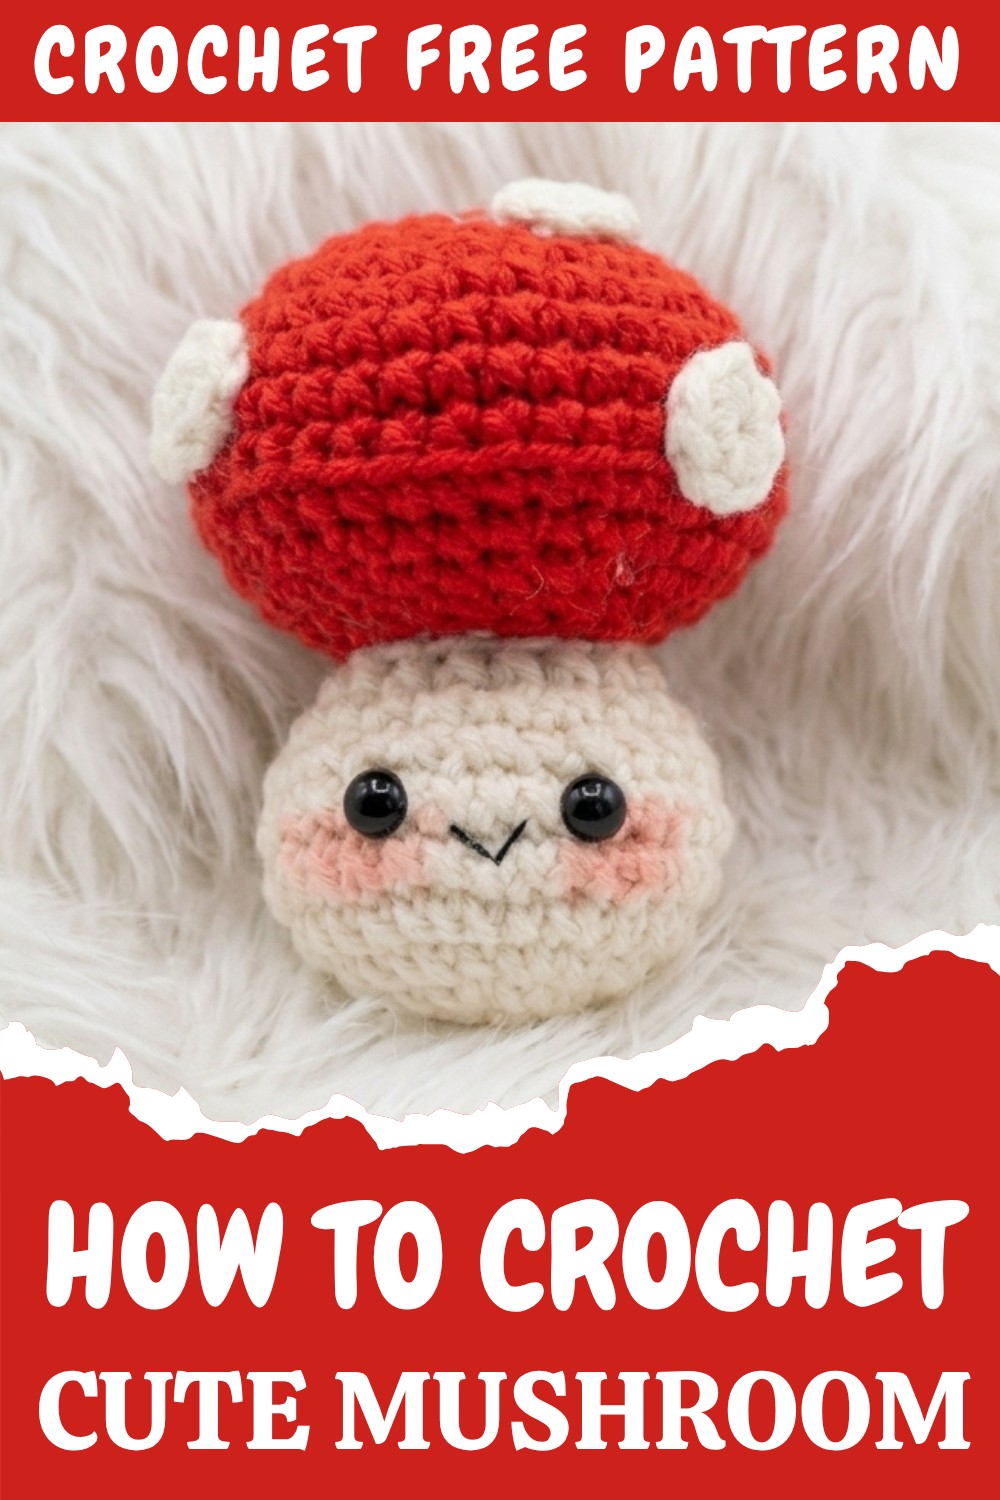
Whimsical Free Crochet Mushroom Pattern for Home Decor
Uplift your space using a free crochet mushroom pattern that injects playful style and color into even the coziest corners.
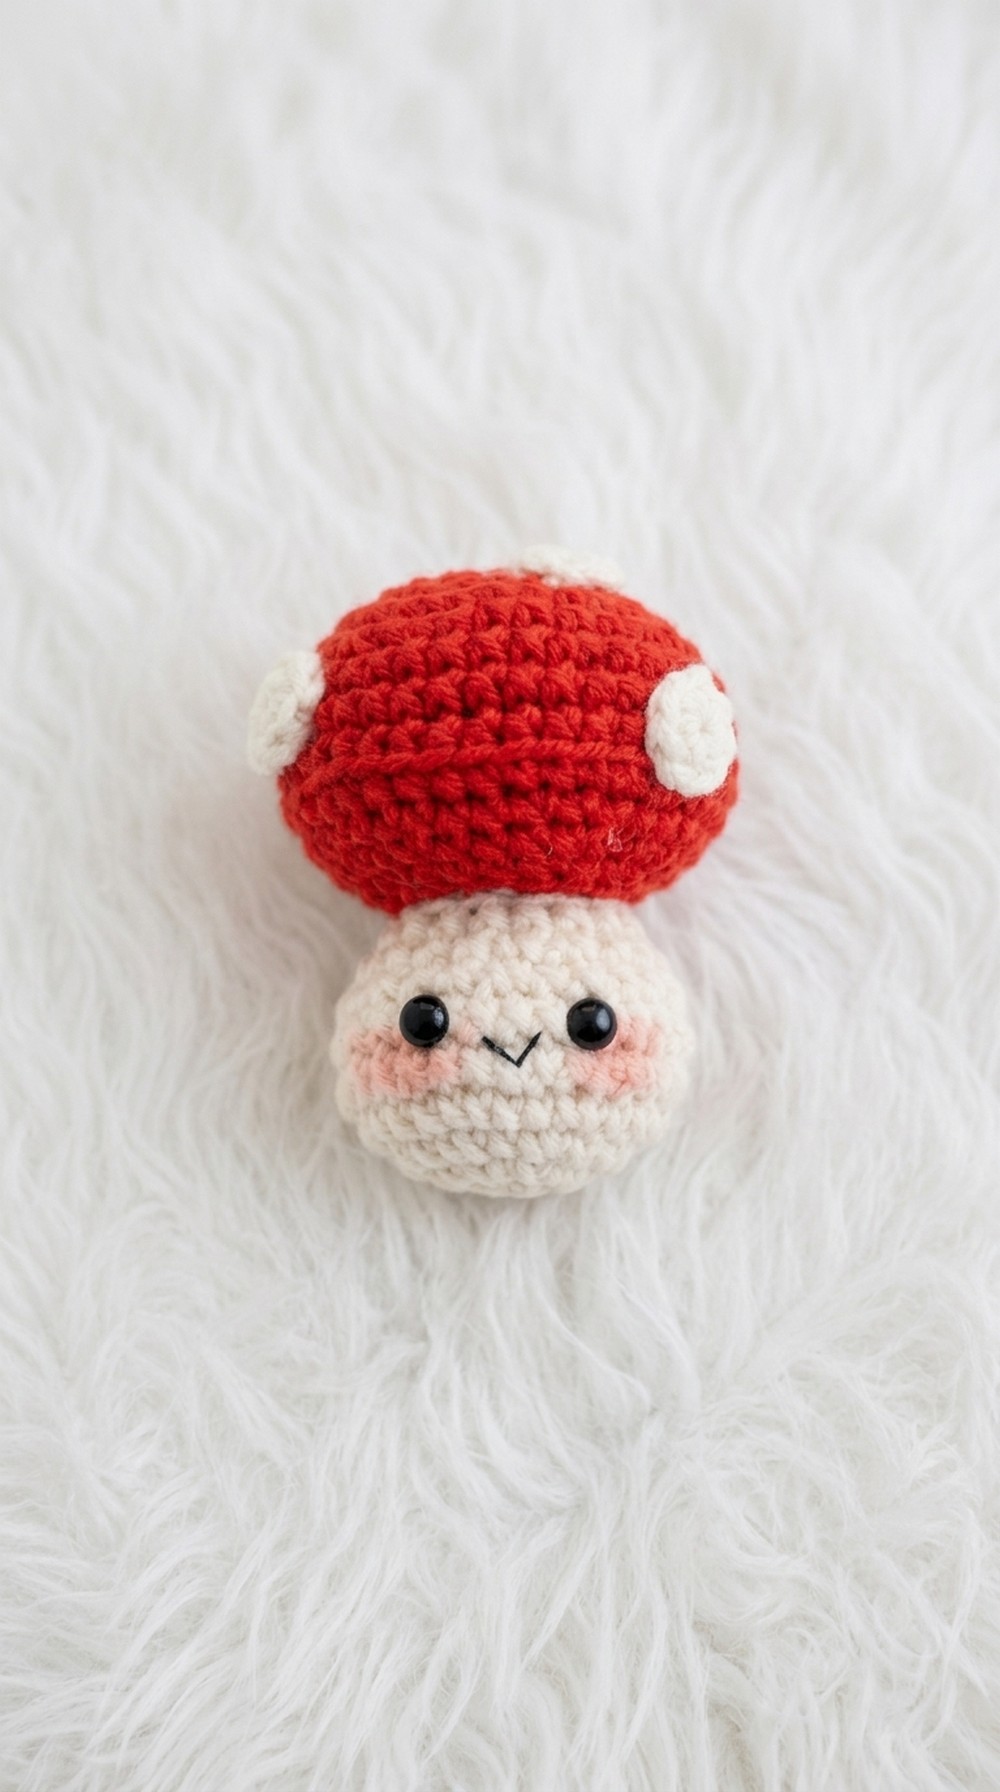
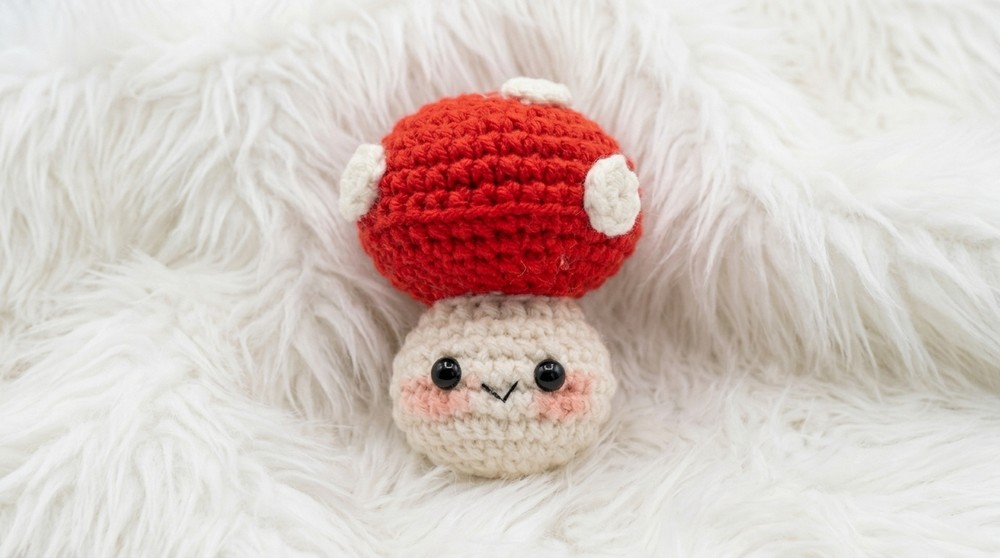
Creating a crochet mushroom is such a delightful experience! From its playful red cap dotted with bright white spots to its sturdy, rounded base, this project is as fun as it is charming. The versatility of this mushroom makes it even more exciting—you can use soft pastels for a whimsical décor piece, bright reds and whites for a classic toadstool, or even earthy tones to create a woodland-inspired masterpiece. Whether you use plastic safety eyes or embroider sweet little eyes with black thread, these mushrooms make perfect gifts, decorations, or even adorable keychains. Plus, you can customize the size to make miniatures or plush versions!
Learn this Crochet Mushroom Pattern for Fairytale Home Accent
This pattern mainly uses basic yet versatile stitches like single crochet (sc), increase (inc), and invisible decrease (dec), all worked in continuous rounds using the magic circle technique. These stitches are building blocks for endless crochet projects and can also be adapted to create designs such as stuffed toys, flowers, or simple ornaments. The pattern adds a touch of texture by working into back loops to form defining edges, making this both a creative and beginner-friendly crochet skill builder.
Other Creations You Can Make With This Pattern and Stitches
This pattern opens creative doors to other crochet projects, such as:
- Amigurumi designs like animals, snails, or playful plants.
- Seasonal ornaments, including pumpkins and holiday decorations.
- Functional items like pincushions, keychains, or whimsical desk decor.
Why You’ll Love This Pattern
- Customizable: Use any colors or sizes for your mushroom.
- Beginner-friendly: Simple stitches with detailed instructions.
- Quick and fun: Finish the project in no time and enjoy the reward of creating something cute and unique.
Get ready to let your imagination grow with this enchanting pattern! You’ll be amazed by what you can create with just a few fundamental stitches and a little practice!
Crochet Pattern: Cute Mushroom Amigurumi
Crocheting a mushroom can be such a delightful and calming project! This adorable mushroom amigurumi pattern is beginner-friendly and makes a perfect toy, home décor accent, or gift for mushroom enthusiasts. You can customize the mushroom with various colors for the stalk, cap, and spots, giving each one a unique personality. In this pattern, you’ll learn how to crochet its vibrant cap, plump base, delicate stitched mouth, and fun spotted details. This pattern primarily uses single crochet (sc), increase (inc), decrease (dec), slip stitch (sl st), and works in rounds, making it an excellent stepping stone into amigurumi for beginners.
Skill Level & Terminology
- Skill Level: Beginner
- Terminology: US Crochet Terms
Materials & Tools
To crochet your mushroom, you will need:
- Yarn: A combination of red, white, and neutral-colored yarn (e.g., cream) in a medium weight. Susan yarn is used in the original pattern.
- Hook: 2.5 mm crochet hook. Adjust according to your yarn size.
- Stuffing: Polyester fiberfill for shaping.
- Plastic safety eyes: Optional. You can also use black thread for embroidered eyes.
- Tapestry/darning needle: For sewing and embroidery.
- Scissors
- Hot glue or fabric glue (optional): To attach the spots to the mushroom cap.
Gauge
Gauge is not critical for this project. However, make sure your stitches are tight enough to prevent stuffing from showing through.
Abbreviations
Refer to this key while following the pattern:
- ch: Chain
- sc: Single Crochet
- inc: Increase (2 sc in 1 stitch)
- dec: Decrease (invisible decrease recommended)
- sl st: Slip Stitch
- BL: Back Loop (crochet only in the back loop of the stitch)
- FO: Fasten Off
Special Stitch Instructions
- Magic Circle: Wrap the yarn around your fingers to form a loop. Insert the hook, pull up a loop, and crochet your first stitches into the circle. Pull the tail to close.
- Invisible Decrease: Insert hook into the front loops of the next two stitches, yarn over, pull through two loops, yarn over again, and pull through the remaining loops.
Finished Size
- Approx. 4–5 inches tall, depending on the yarn and hook size.
What You’ll Learn
Working through this pattern, you’ll gain skills that can be used in a variety of crochet projects:
- The magic circle technique, which is perfect for creating seamless, round designs.
- How to increase and decrease to shape rounded and tapered forms.
- Adding personality with finishing details, like sewing and attaching embellishments, eyes, and spots.
- The ability to create seamless transitions between the mushroom’s cap and body.
The Pattern
Part 1: The Mushroom Cap
Rounds 1–7: Working in Increasing Rounds
- Round 1: Start with a magic circle. Work 6 sc into the loop. Tighten the loop and sl st into the first sc. (6 sc)
- Round 2: Ch 1, then work 2 sc in each stitch around. Sl st into the first stitch. (12 sc)
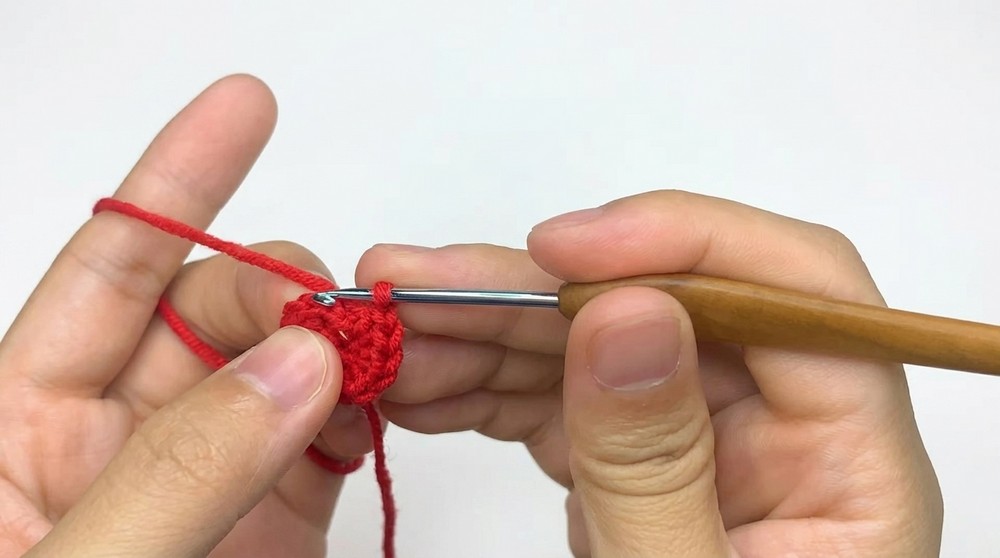
- Round 3: Ch 1. Work 1 sc in the first stitch, inc in the next stitch. Repeat (1 sc, inc) around for 6 sets. Sl st into the first stitch. (18 sc)
- Round 4: Ch 1. Work 1 sc, inc, 1 sc in sequence and repeat across the round. Sl st into the first stitch. (24 sc)
- Round 5: Ch 1, then work 3 sc across, inc. Repeat (3 sc, inc) 5 more times. Sl st to the first sc. (30 sc)
- Round 6: Ch 1. Crochet 4 sc, inc. Repeat (4 sc, inc) around. Sl st into the first stitch. (36 sc)
- Round 7: Work 1 sc into each stitch. No increases. Slip stitch at the end. (36 sc)
Rounds 8–13: Shaping the Cap
- Round 8: Work only into the BL (back loops): sc into each back loop around. Slip stitch at the end. (36 BL sc)
- Rounds 9–13: Work regular sc stitches all the way around for each round. (36 sc)
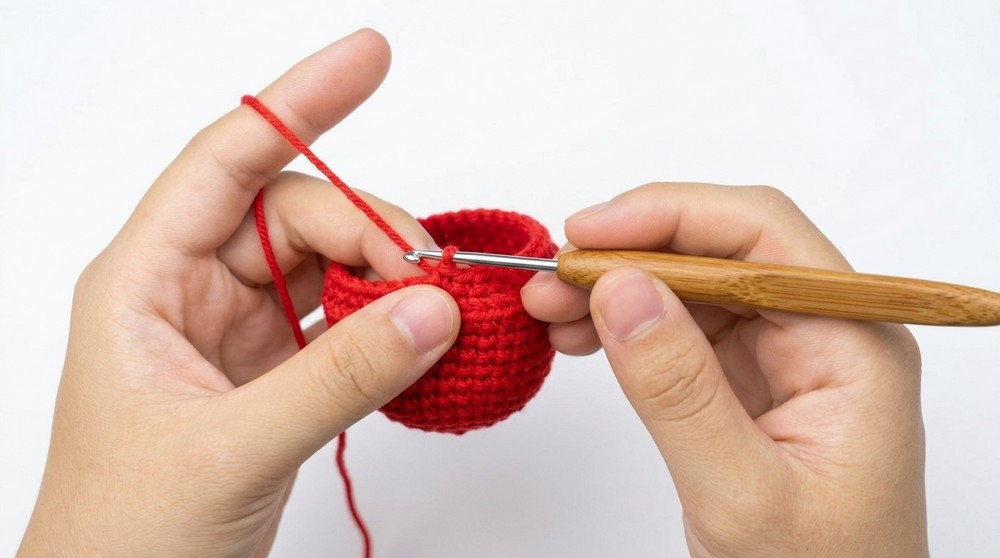
At this point, the cap will take shape with a slight curve. If you’re a visual learner, think of it as creating a bowl-like structure.
End of this section: You’ve completed the mushroom cap! It’s time to move on to making the body.
Part 2: The Mushroom Body
Rounds 1–9: Shaping the Base
- Round 1: Start with a magic circle. Work 8 sc into the loop. Tighten and slip stitch into the first sc. (8 sc)
- Round 2: Ch 1. Work 2 sc into each stitch. Slip stitch at the end. (16 sc)
- Round 3: Ch 1. Work 1 sc, inc and repeat for 8 sets. Slip stitch to the first stitch. (24 sc)
- Round 4: Ch 1. Repeat (1 sc, inc, 1 sc) around. Slip stitch at the end. (32 sc)
- Rounds 5–6: Work 1 sc into each stitch (no increases). Slip stitch at the end of each round. (32 sc)
- Round 7: Decrease by working 1 sc, dec, 1 sc for 8 sets. Slip stitch to the first stitch. (24 sc)
- Round 8: Ch 1. Work 1 sc, dec for 6 sets. Slip stitch at the end. (18 sc)
- Round 9: Work 1 sc into each stitch. Slip stitch to the first stitch. (18 sc)
This will complete the cylindrical shape of the mushroom body.
Part 3: The Assembly & Details
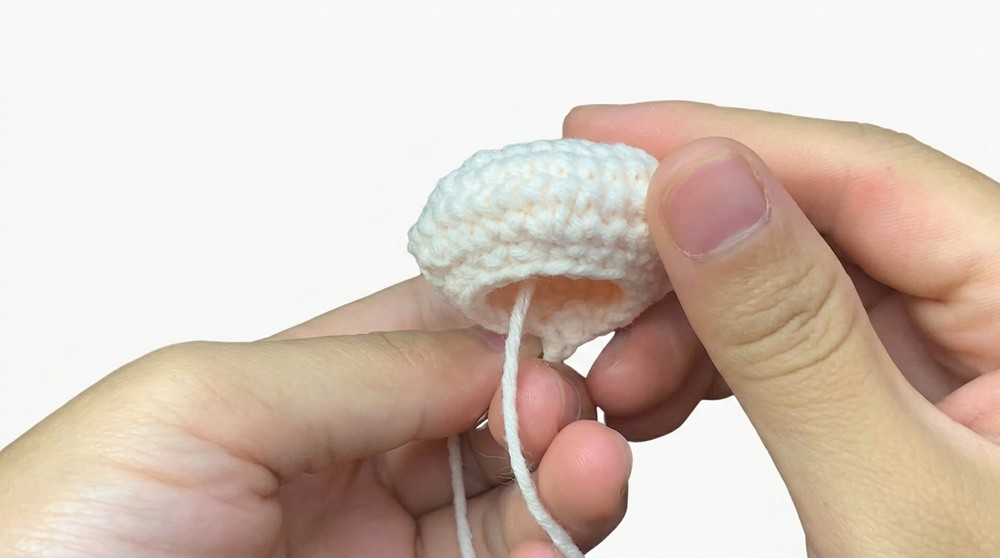
Connecting the Cap and Body
- Use the long tail from the cap and your darning needle.
- Sew the cap onto the top of the body by connecting the inner edges of each part together. Stop halfway to add stuffing. Once stuffed to your preference, continue sewing until secure.
Adding the Mushroom Dots
- Crochet small dots for the cap:
- Create a magic circle.
- Work 6–8 sc into the loop (depending on your desired size). FO and leave a tail for sewing.
- Use hot glue or sew the dots onto the top of the mushroom cap as desired.
Eyes and Mouth
- Attach plastic safety eyes between the cap and the body or embroider eyes using black thread.
- Stitch the mouth with black thread below the eyes.
Finishing Touches
- Add blush to the mushroom’s cheeks using soft pastels or fabric paint for an added “cuteness” factor.
Key Takeaways from This Pattern
- You’ll learn:
- Using a magic circle for a seamless start.
- Crocheting amigurumi shapes using increases and decreases.
- Crocheting into the back loop for added shape and texture.