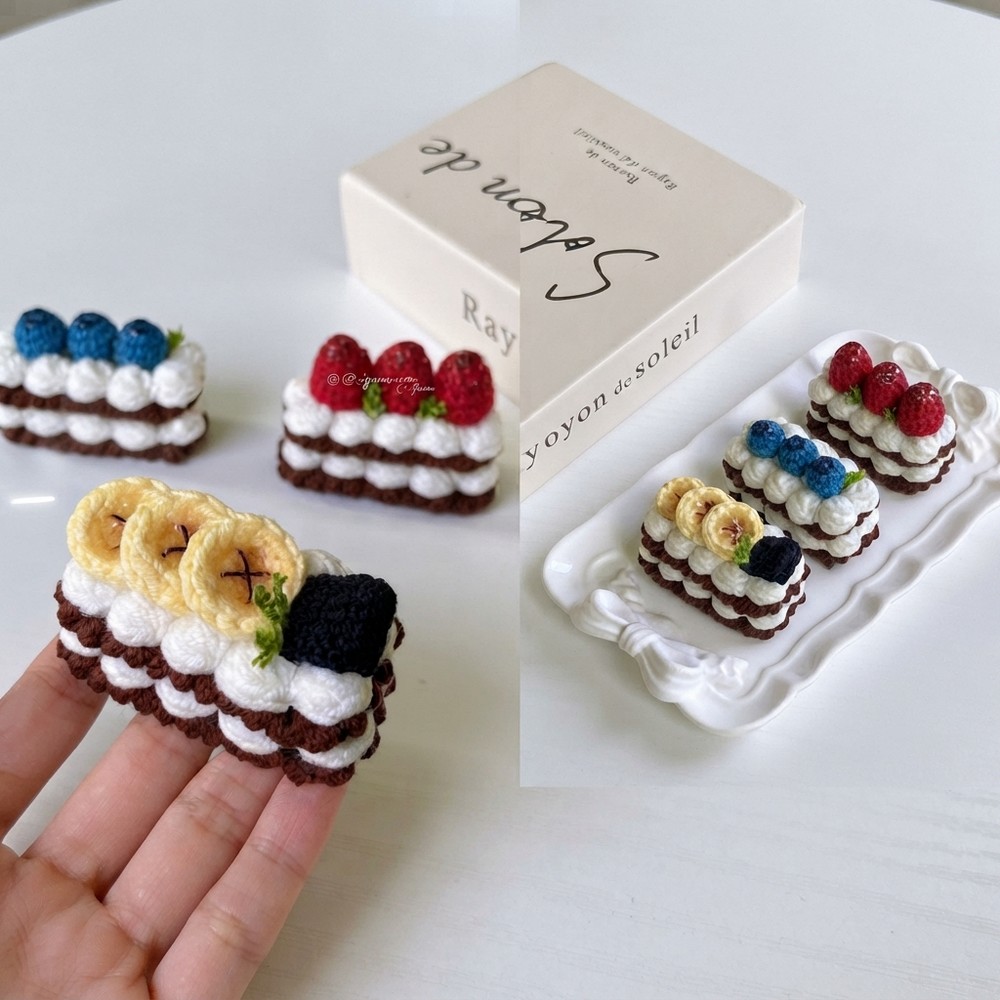
Crochet Mini Fruit Cake Keychain Pattern | Free Tutorial

Sweetness is stitched into every loop of this adorable mini fruit cake crochet project! When I first tried making this tiny treat, I was amazed at how such a simple crochet item could bring so much joy. This charming little creation is a delightful stuffed cake, part of the amigurumi family of handmade yarn crochets. For anyone eager to try, the YouTube channel “HappyYarny” provides an easy-to-follow free crochet mini fruit cake pattern that breaks down each step clearly, from crocheting the cake layers to adding those colorful, fruity toppings.
Cute Crochet Mini Fruit Cake Keychain Free Pattern
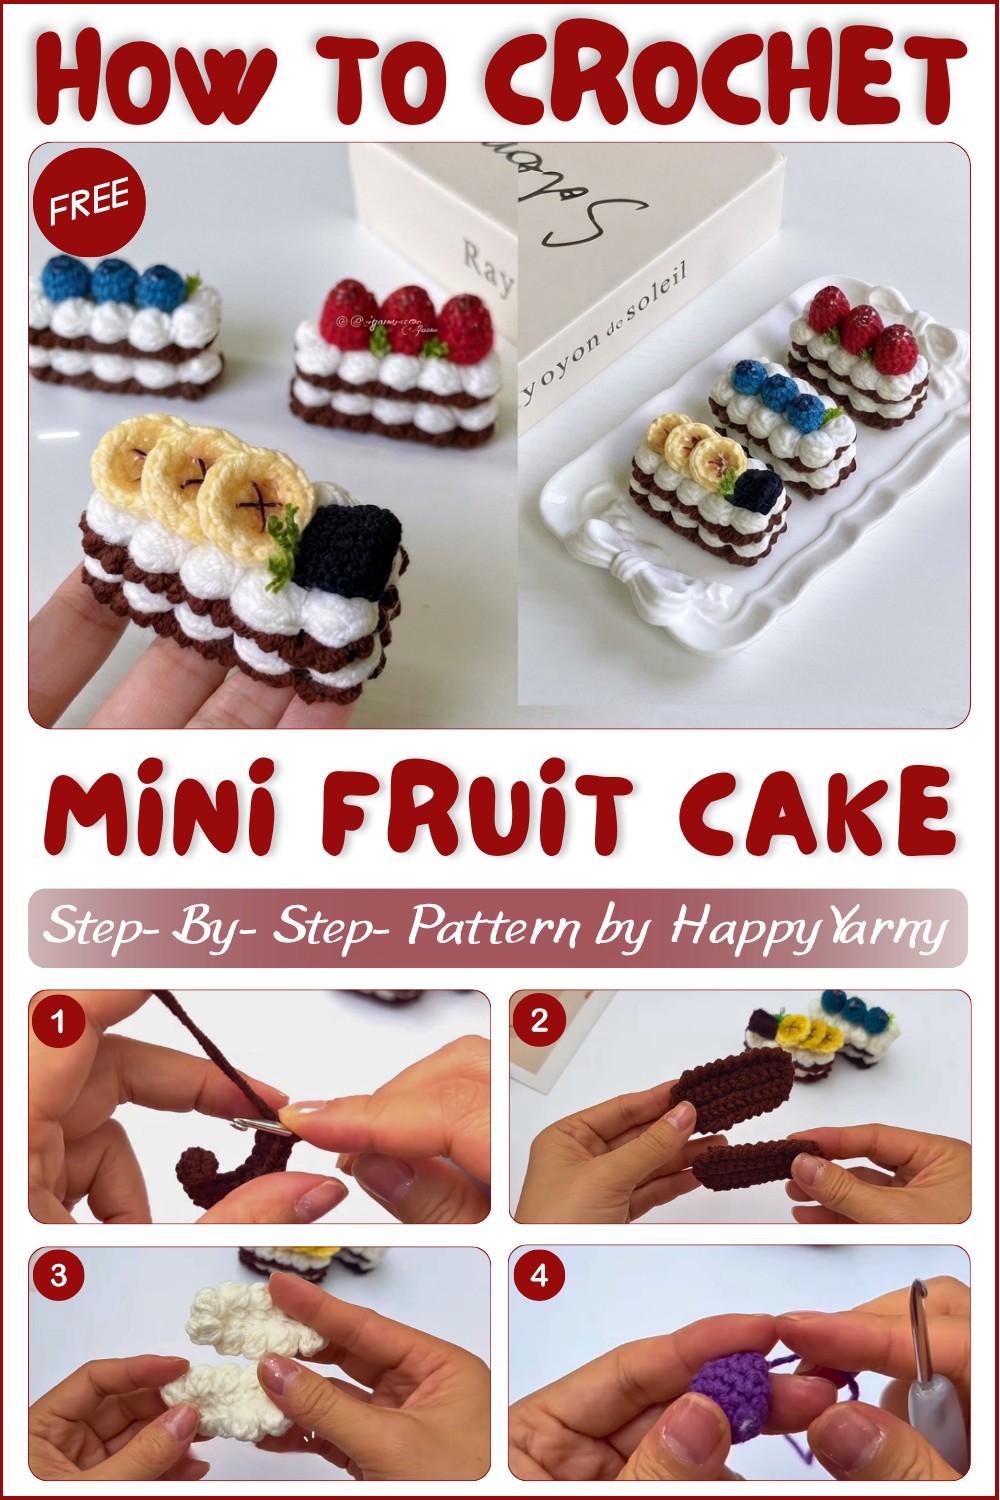
The mini fruit cake is a true feast for the eyes with its round, layered shape and eye-catching fruit decorations perched on top. The texture is soft yet firm, thanks to closely worked stitches that hold the form nicely. Its style is playful and sweet, with bright pieces that resemble real fruit adding charm and personality to this tiny dessert. This piece shines as a cute decor item or a collectible, brightening up any space with its cheerful vibe.
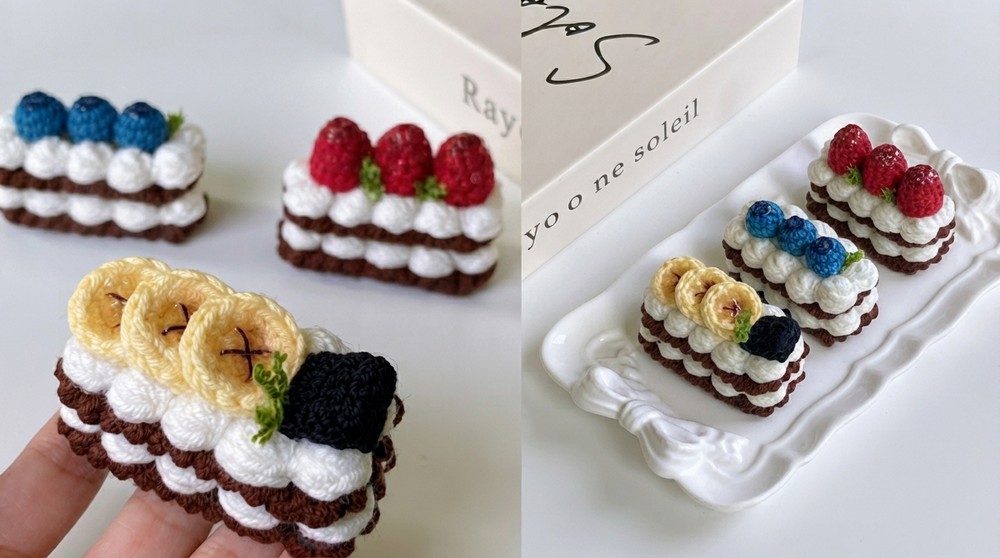
Perfect for beginners and those comfortable with basic crochet, this project mainly uses single crochet stitches worked in rounds, along with some slip stitches to shape the details. The tutorial’s clear instructions make it easy to follow along and create a neat, polished result. Whether you’re looking for a delightful handmade gift or a fun decorative piece, this mini fruit cake is a fantastic project to try.
Super Easy Crochet Mini Fruit Cake Tutorial
The project showcased in the video is a sweet, miniature fruit cake slice, designed to be a cute and portable accessory. The tutorial breaks down the process of crocheting the cake body, the delicate frosting, and the small fruit embellishments. The result is a realistic-looking treat that serves as an adorable keychain. By following the pattern closely, you will learn how to build structure and add decorative details using basic crochet stitches and minimal assembly tools.
About Channel
Creating miniature crochet items is a delightful way to explore the versatility of yarn, and the HappyYarny channel excels at providing straightforward, aesthetically pleasing tutorials for exactly this purpose. This particular video focuses on crocheting a charming miniature fruit cake slice, which doubles as a whimsical keychain.
This is known for its clear, step-by-step instructions that make even intricate-looking projects accessible and highly achievable for crocheters of varying skill levels. By utilizing common materials and simple assembly techniques, the channel guides viewers through creating a high-quality finished product that is as fun to make as it is to display.
Quick Overview of Pattern
-
Components: Two cake base pieces, two frosting layers, and three decorative fruits.
-
Techniques Used: Chain stitch, single crochet (sc), reverse single crochet (crab stitch), 3-double crochet cluster, magic ring, and increasing/decreasing stitches.
-
Construction: Simple assembly using hot glue to layer the components.
-
Finishing Touches: Optional application of UV resin on the fruit pieces for a polished, glossy effect.
Notes
-
Use two strands of yarn for the cake part to provide better structural integrity.
-
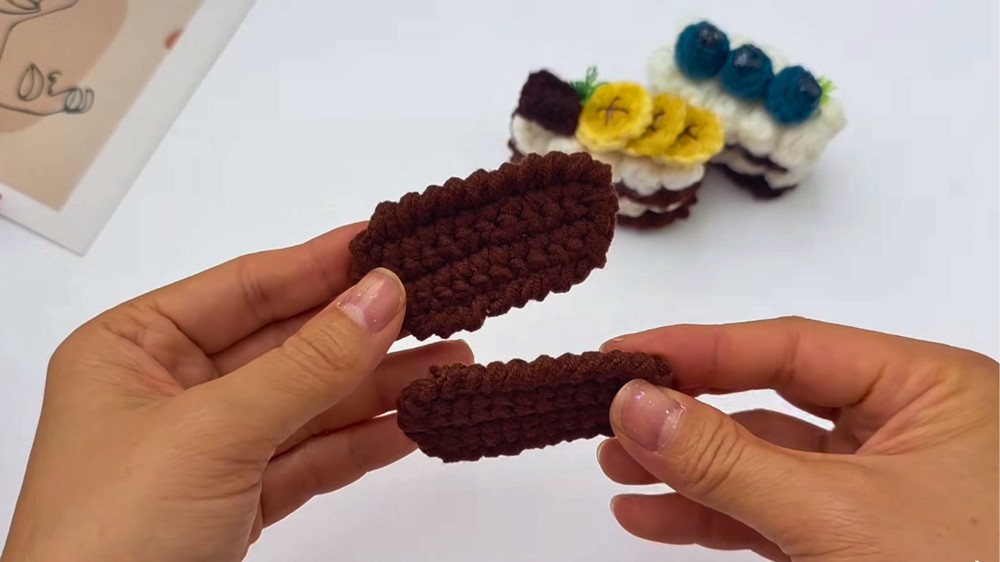
Crochet the cake part using two identical flat pieces.
-
Apply a reverse single crochet (crab stitch) around the edge of the cake to create a finished look.
-
Use a UV resin and a UV light to give the fruit pieces a realistic, shiny appearance, though this step is optional.
Skill Level
-
Beginner to Intermediate: This pattern is very easy to follow but requires some comfort with basic shaping and assembly.
Materials
-
Cotton Yarn: White (frosting), Brown (cake), and Purple (fruit).
-
Tools: 3 mm crochet hook, sewing needle, scissors.
-
Additional Supplies: Hot glue gun and sticks, UV resin, and a UV light.
Gauge
-
The gauge is not strictly defined, as the project is a small, decorative item. However, consistent tension is important to ensure the pieces fit together well.
Stitch Abbreviations
-
SC: Single crochet
-
SL ST: Slip stitch
-
CH: Chain
-
3-DC Cluster: Three-double crochet cluster stitch
-
Inc: Increase
-
Dec: Decrease (specifically an invisible decrease)
The Crochet Pattern
Cake Part (Make 2 pieces, using brown yarn, 2 strands)
-
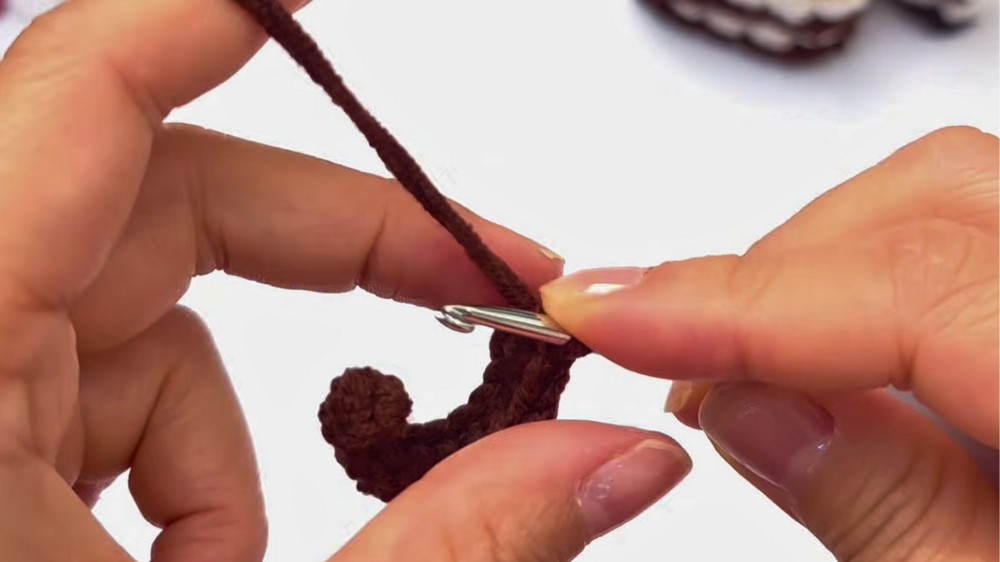
R1: Ch 12. Start in the 2nd chain from the hook and work 11 sc across.
-
R2–4: Ch 1, turn, and work 11 sc in each row.
-
Edge: After completing the final row, finish the edge with a reverse single crochet all the way around the piece.
Frosting Part (Make 2 pieces, using white yarn)
-
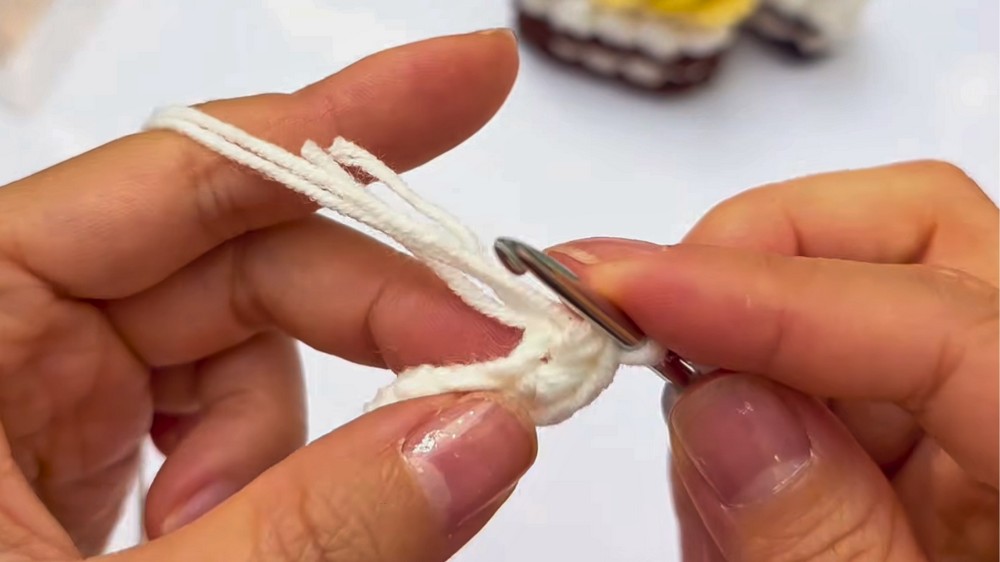
R1: Ch 10. Start in the 2nd chain from the hook, work 8 sc, then 3 sc in the last stitch. Work 7 sc on the other side and an increase in the last stitch (20 stitches total).
-
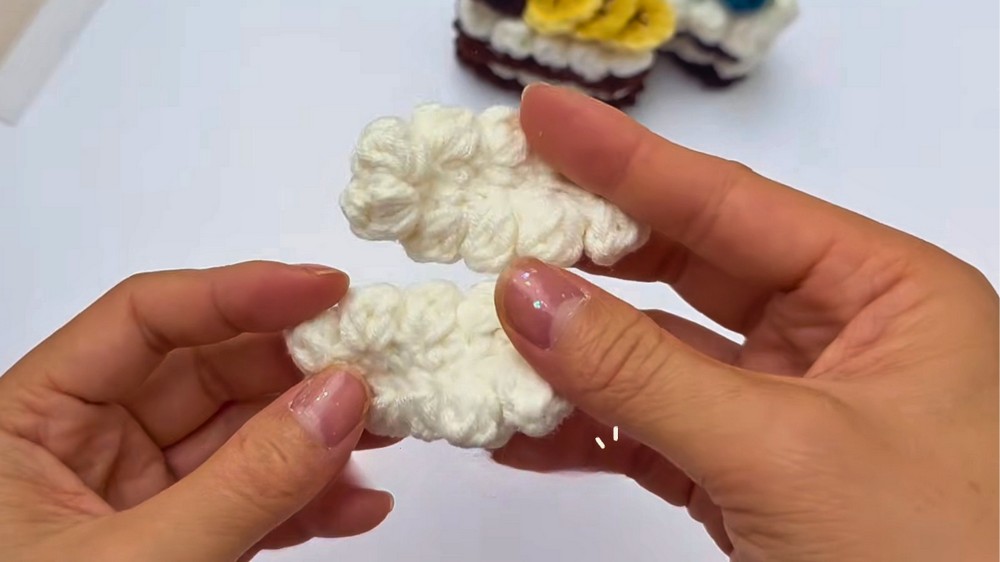
R2: Ch 2, 3-dc cluster, skip one stitch, and slip stitch into the next stitch. Repeat this sequence all the way around the edge.
Fruit Piece (Make 3, using purple yarn)
-
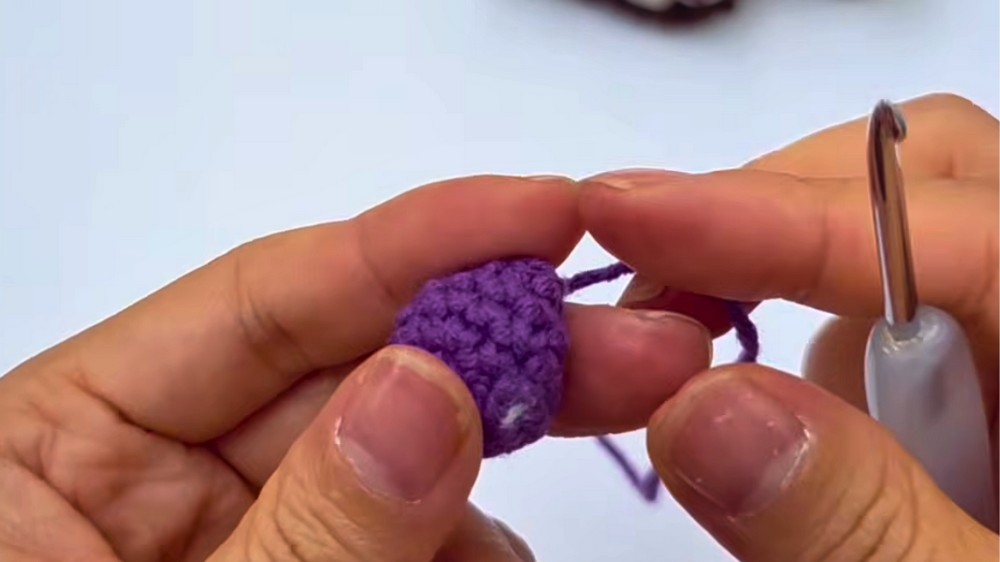
R1: Work 6 sc into a magic ring.
-
R2: Repeat (1 sc, 1 increase) 3 times (9 stitches).
-
R3: Repeat (1 sc, 1 increase, 1 sc) 3 times (12 stitches).
-
R4–5: Work 12 sc in each round.
-
R6: Finish with 6 invisible decreases, using the front loops only. Add a small amount of stuffing, cut the yarn, and sew the opening closed.
Assembly & Finished Size
To assemble the cake, use a hot glue gun to layer the components. Start by gluing one frosting piece onto one cake base piece. Glue the second cake base on top of the first, followed by the second frosting piece. Finally, glue the three fruit pieces onto the top of the cake. If you choose to use UV resin for a glossy finish, apply it to the fruit pieces and cure them using the UV light. The finished product is a small, miniature cake slice perfectly sized for a keychain.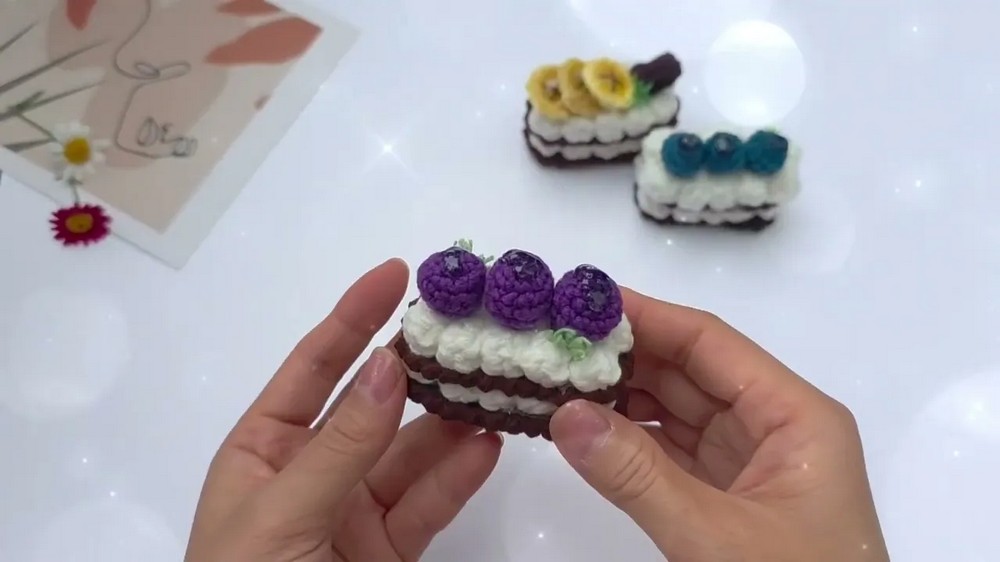
Conclusion
This miniature fruit cake tutorial is a wonderful way to practice your crochet skills while creating a unique, personalized accessory. By layering the different pieces, you achieve a realistic effect that showcases the beauty of simple crochet techniques. Whether you are a beginner or a more experienced crocheter, this project offers a fun, quick, and rewarding experience.