Trendy Free Crochet Halter Top Pattern That You’ll Love Wearing

Free crochet halter top pattern for girls, perfect for summer! Easy-to-follow instructions for creating stylish and lightweight handmade tops.
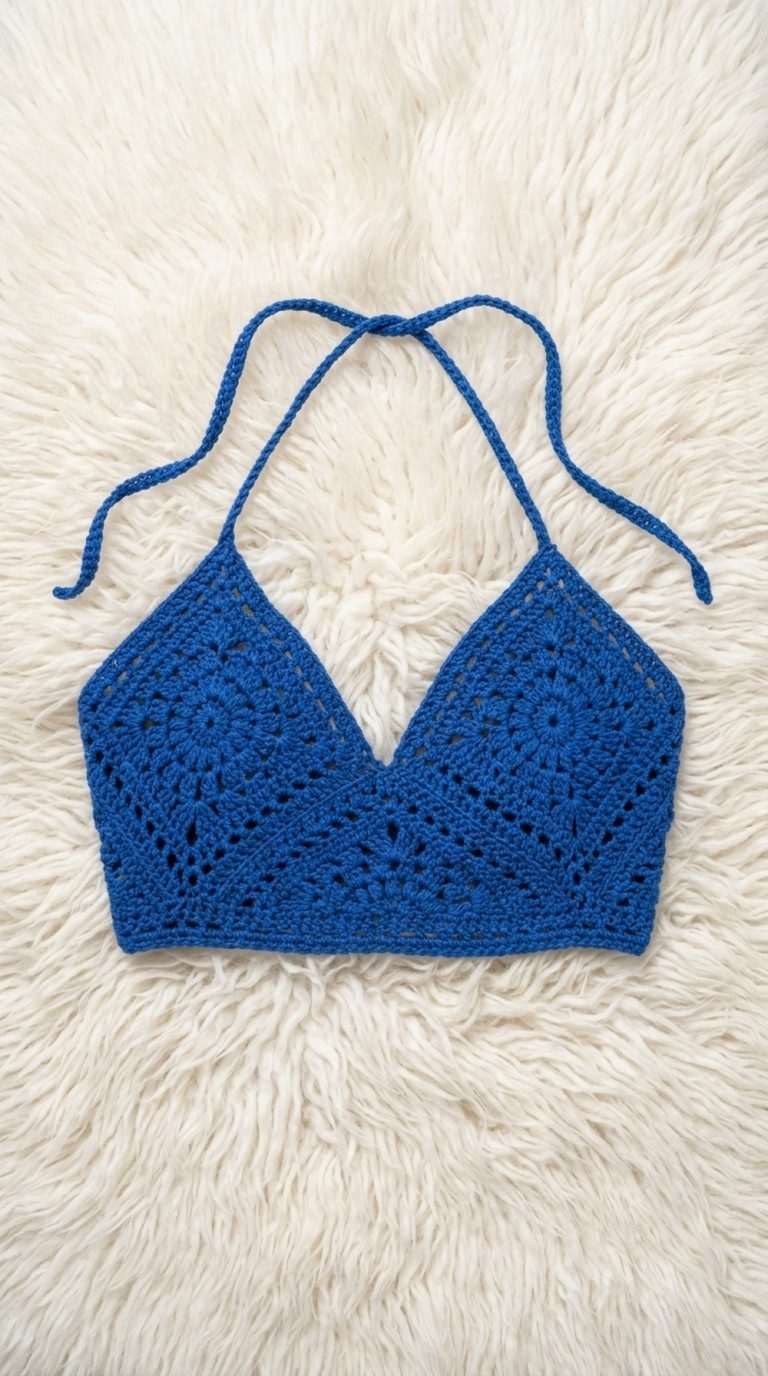
Crocheting a halter top can be a rewarding experience, blending style and creativity into a single project. This particular pattern uses the Sunburst Granny Triangle as its foundation, a beautiful variation of the traditional granny square that’s both versatile and timeless. With its boho-inspired design, this pattern is perfect for summer days, beach outings, or casual wear layered with a cardigan.
Lightweight Crochet Halter Top Pattern for Summer
What makes this project truly unique is the combination of techniques such as double crochets, space stitches, and cluster stitches, all of which add texture and structure to the design. These stitches aren’t just limited to halter tops, —once mastered, they can be used for other projects like crop tops, scarves, bags, or even blankets.
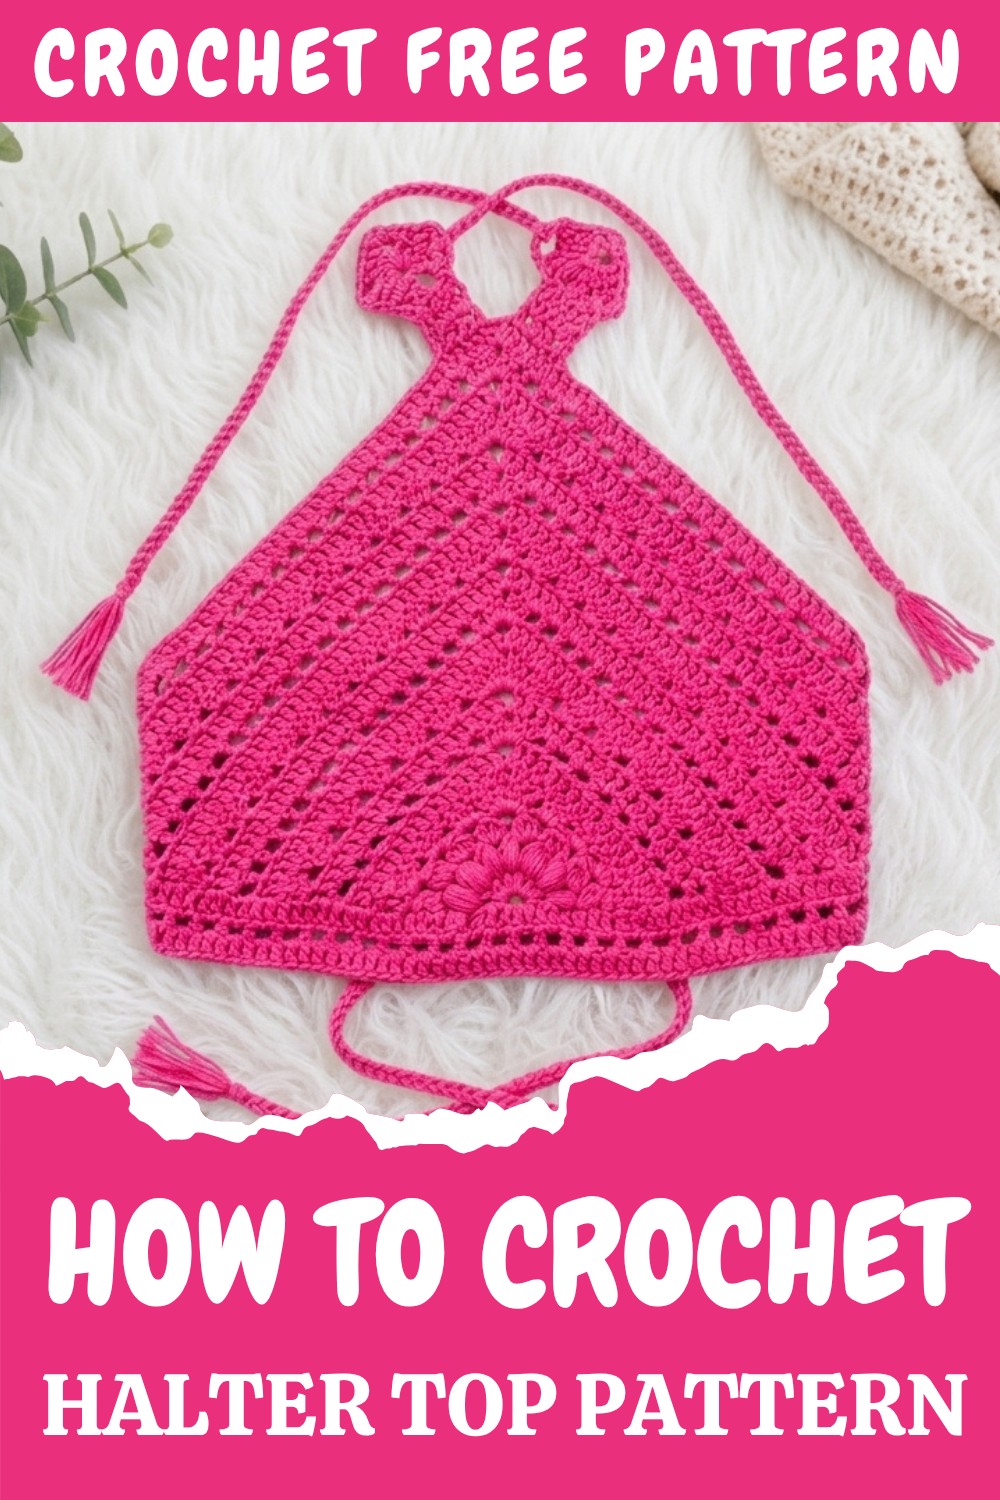
The beauty of this pattern lies in its customizable nature. You can adjust the size of the Sunburst Granny Triangle according to your body type while ensuring the halter neckline and waist ties fit perfectly. The project also allows for creativity with colors; whether you prefer neutral tones or vibrant hues, the pattern showcases the yarn beautifully. Adding braided ties at the waist and halter points not only enhances the look of the top but provides functionality, ensuring that the garment hugs your body comfortably.
From this pattern, you will learn how to modify a granny square into a triangle, build rows with varying stitch techniques, and even create braided drawstrings with precision. These skills open the door to endless possibilities; this pattern, for instance, can be a stepping stone to creating other wearables like bralettes and tank tops, or accessories like bohemian headbands or decorative pillow covers.
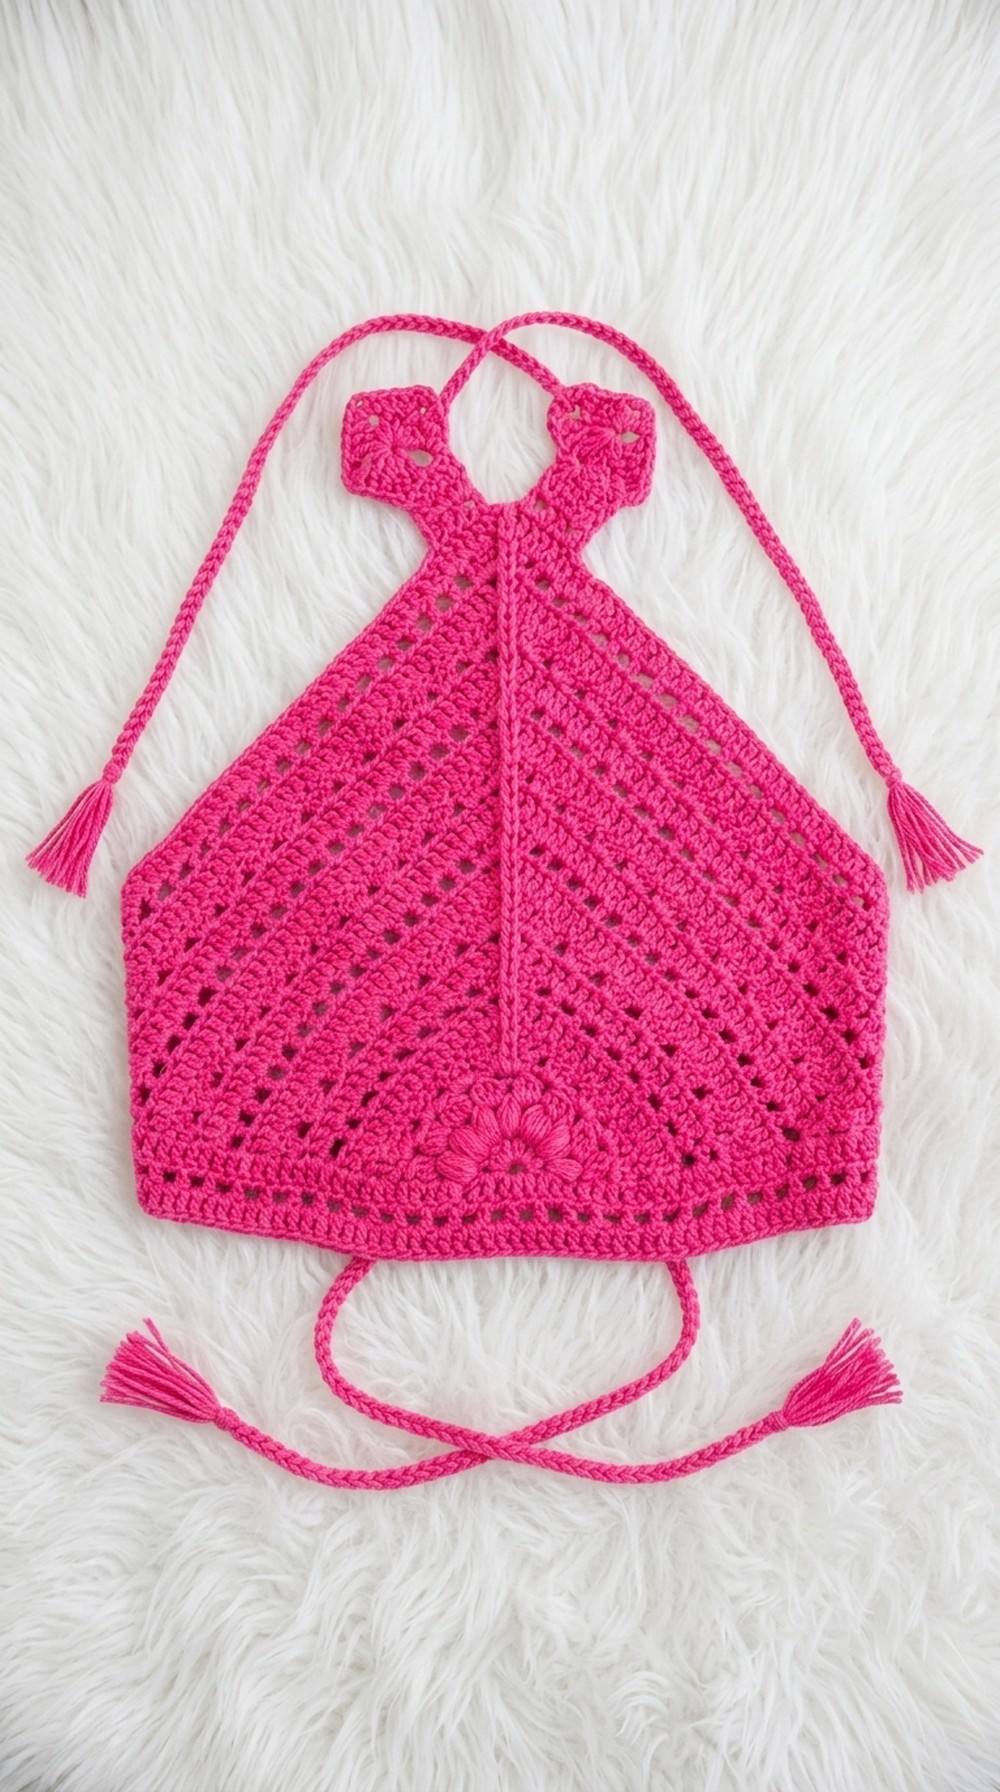
Sunburst Granny Square Halter Top – Step-by-Step Crochet Pattern
The crochet Sunburst Granny Square Halter Top is a stylish and beginner-friendly piece perfect for warm weather. This versatile halter top pattern features a modern boho-chic design made using fundamental stitches, like double crochet (dc) and cluster stitches, making it both functional and visually appealing. It’s customizable, lightweight, and suitable for anyone looking to create a trendy handmade outfit.
Materials Required
- Yarn: Lightweight cotton yarn in bright pink or your preferred color(s).
- Hook: Corresponding hook size as recommended for your yarn (e.g., 4mm/5mm).
- Tapestry Needle: For weaving in loose ends.
- Scissors: To trim yarn.
Abbreviations
- ch: Chain
- dc: Double Crochet
- tr: Treble Crochet
- sl st: Slip Stitch
- st(s): Stitch(es)
- sp: Space
Special Techniques Used
- Granny Triangle: A variation of the traditional granny square design.
- Cluster Stitches: Groups of double crochets used to create textured rows.
- Space Stitch: Alternating double crochets and spaces for an open and airy design.
Level of Difficulty
Beginner to Intermediate: Beginners can follow this pattern, as it uses straightforward stitches, while intermediate crocheters can experiment with adjusting sizes, colors, and other variations.
Step-by-Step Instructions
A) Making the Granny Triangle Base
- Start with a Sunburst Granny Triangle. If you don’t already know, follow any tutorial to create a granny triangle.
- From your completed triangle:
- Chain 2, then work double crochets (dc) in every stitch of the triangle edge.
- At each corner, work:
- (dc, ch 2, dc) to maintain the sharp triangular corner.
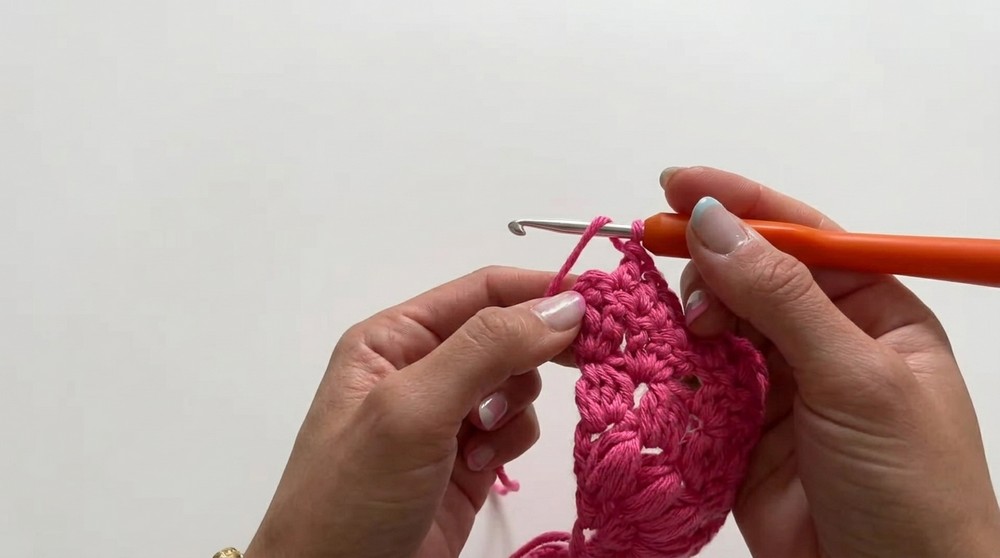
- (dc, ch 2, dc) to maintain the sharp triangular corner.
- Continue this row until you reach the end.
B) Adding Decorative Rows to the Triangle
- Row of Space Stitches:
- Chain 2, turn your work, and ch 1 more.
- Skip 1 st, dc into the next stitch. Repeat this pattern for the entire row.
- At the corner: (dc, ch 2, dc) into the corner space.
- Row of Double Crochets:
- Turn your work and make a row of dc in every stitch or chain. Follow the same instructions for maintaining the corner space with (dc, ch 2, dc).
- Row of Cluster Stitches:
- Chain 2, work 3 dc (a cluster) into the same stitch.
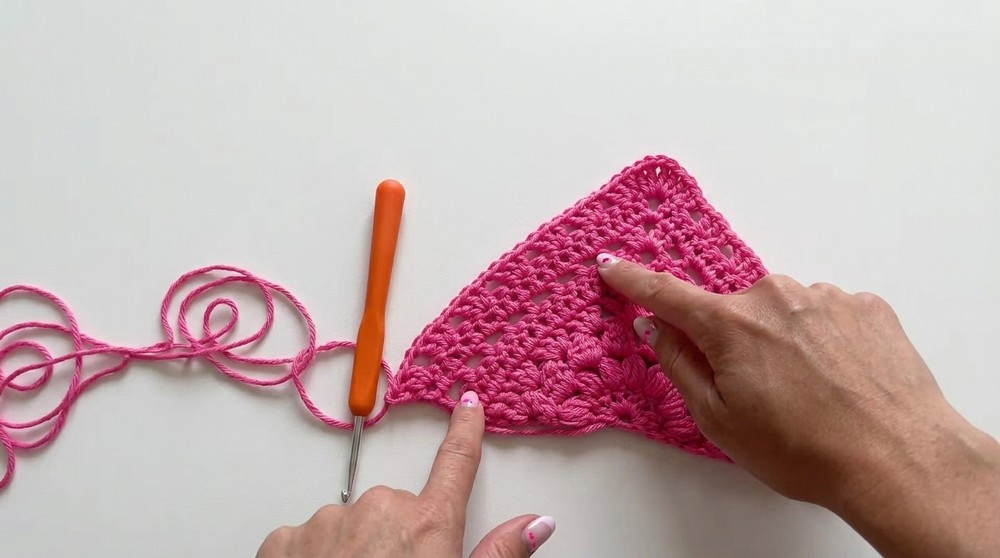
- Skip 2 sts, create another cluster of 3 dcs into the third stitch. Repeat along the row.
- At the corner, work (2 dc, ch 2, 2 dc) into the space.
- Chain 2, work 3 dc (a cluster) into the same stitch.
- Repeat the pattern sequence:
- Double Crochet Row → Space Stitch Row → Double Crochet Row → Cluster Stitch Row.
- Add as many rounds as needed until the triangle covers your bust area comfortably.
Tip: Place the corner of the triangle at your neckline to check for coverage as you increase the size.
C) Creating the Halter Neck Ties
- Find the top corner of the triangle that will sit at your neckline.
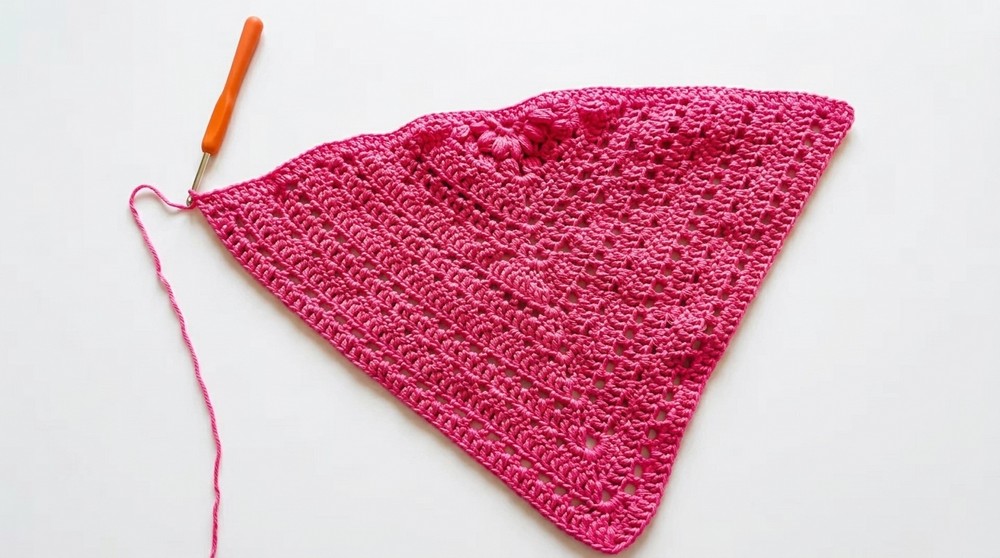
- Attach your yarn and create rows of space stitches and double crochet rows:
- Begin with 6 stitches wide, alternating space stitches and solid rows.
- Repeat until the strap reaches halfway around your neck or the back.
- Adjust the strap length as needed, finish off, and weave in the ends.
D) Adding Waist Ties and Final Adjustments
- For waist ties:
- Take 6 long strands of yarn, fold them in half, and secure them in one of the bottom corners of the triangle.
- Braid the strands to create a strong and neat tie. Tie a knot at the end to secure the braid.
- Repeat for the other corner.
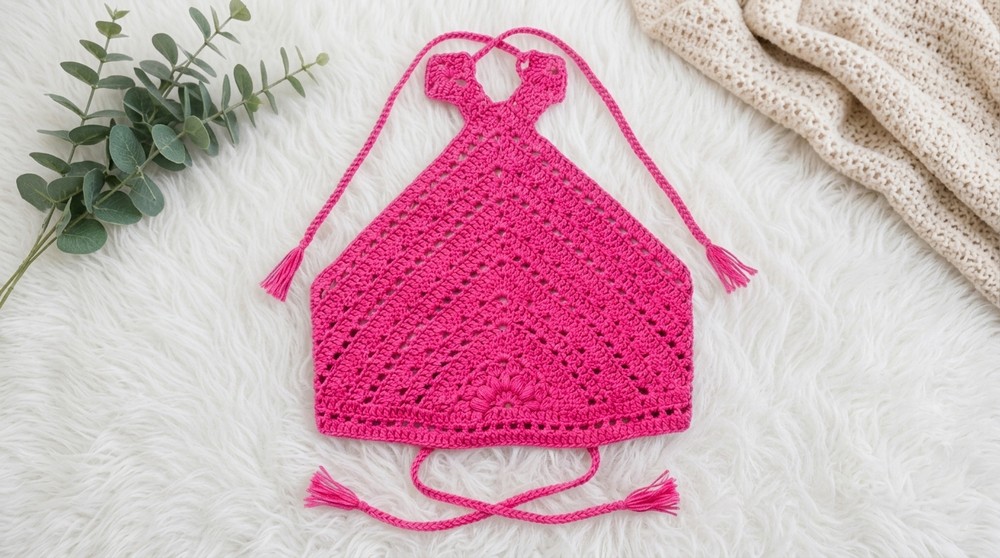
- Ensure the ties are even and long enough to wrap around your waist and form a bow.
Tips for Success
- Check as You Go: Consistently check your coverage to ensure the end product fits well.
- Keep Edges Straight: Be mindful of stitch placement to maintain straight edges for a polished look.
- Experiment with Colors: Use a bold yarn color for the triangle and neutral tones for the ties for added contrast.
- Clean Finishing: Weave in all loose yarn ends for a tidy appearance.
Final Thoughts
This crochet halter top is not only trendy but also extremely satisfying to make. It has all the essentials of a beginner-friendly project while helping you practice a variety of stitches and techniques. Whether you pair this top with shorts for a casual day out or layer it with a cute cardigan, it’s bound to become a summer favorite!
What I Learned from This Pattern
Through this project, I learned the importance of customizing fit and taking creative liberties with stitch patterns. The combination of solid rows, space stitches, and clusters adds texture and variety to the design. This halter top pattern also reminded me of how simple projects can turn into something truly unique with just a little extra effort.