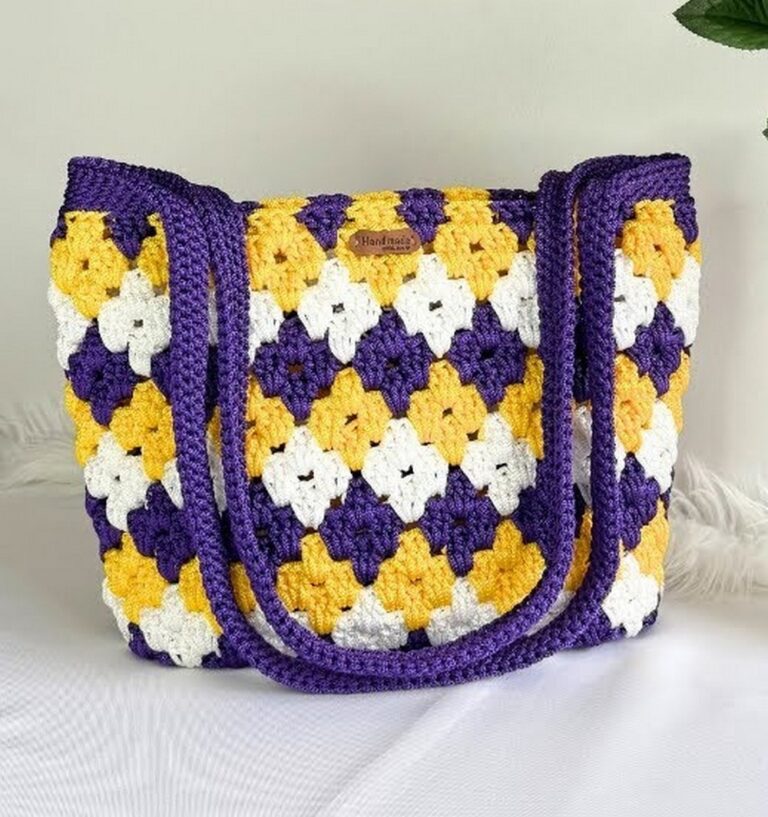
Beginner-Friendly Free Granny Square Beach Bag Crochet Pattern
Not everyone enjoys buying the same old store-bought bags that everyone else has—sometimes, you want something totally different! That’s why starting the Free Crochet Granny Square Beach Bag Pattern is a fantastic idea, even if you’ve never picked up a crochet hook before. Crocheting this bag is not just relaxing and rewarding—it’s a great way to create a fun, personalized accessory for beach trips or summer outings. The satisfaction of making your own unique bag is huge, and along the way, you’ll pick up creative skills you can use for other projects.
Easy Granny Square Beach Bag Crochet Pattern
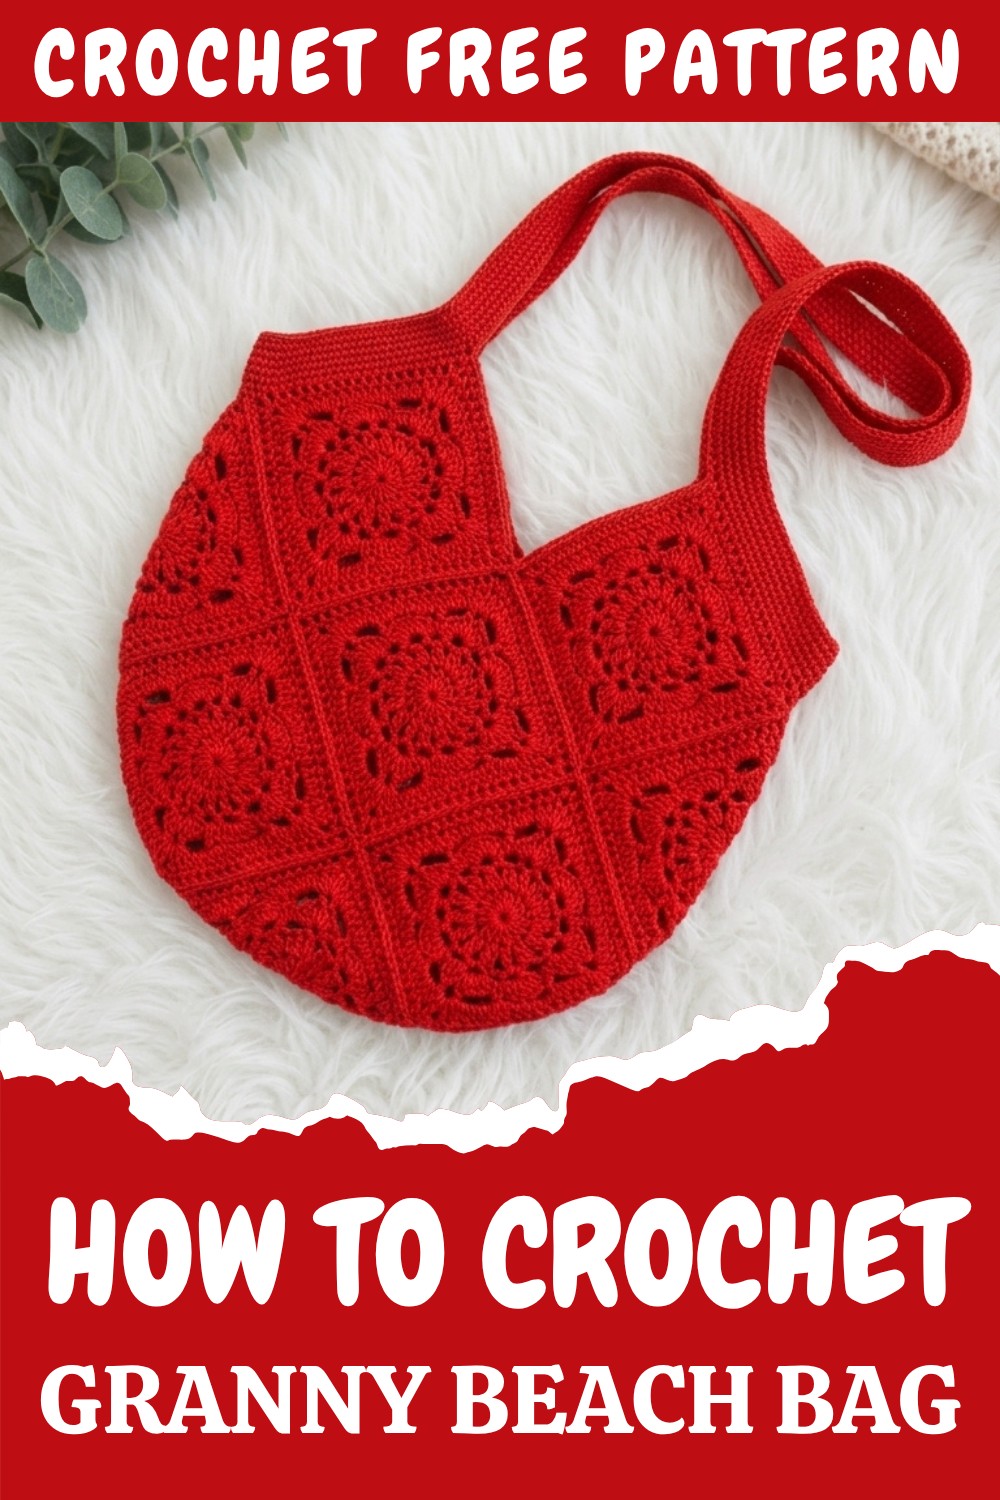
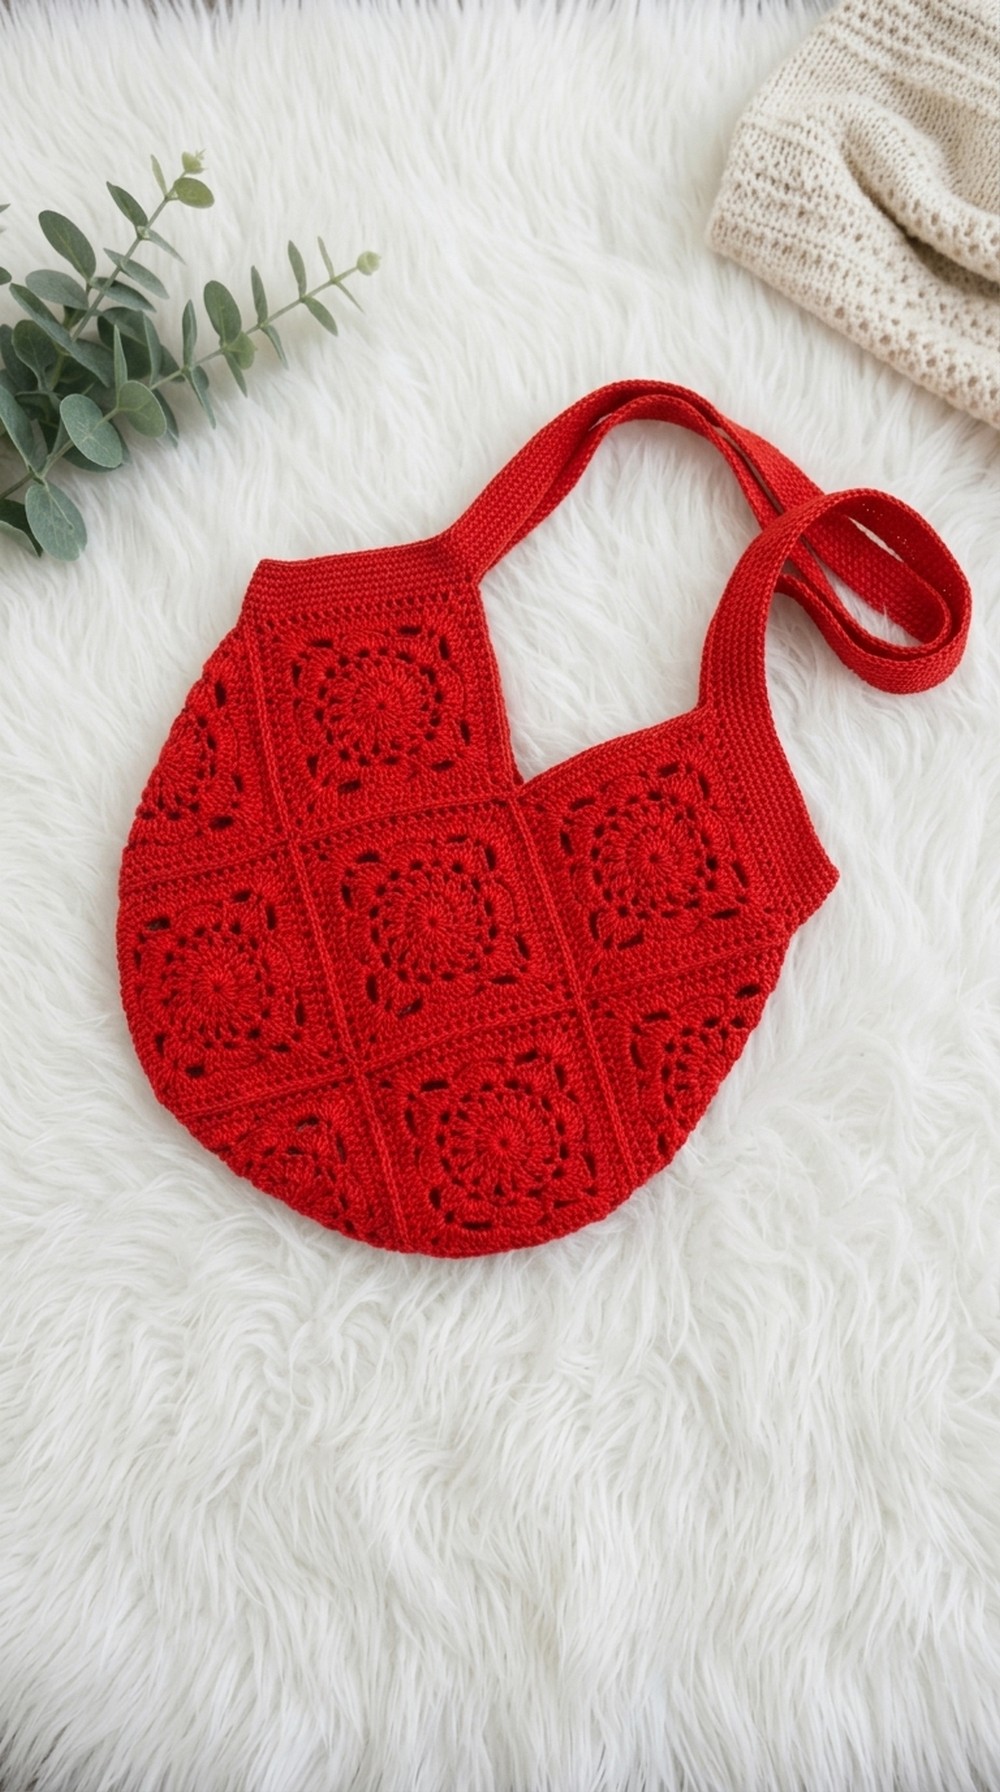
One of the best things about this bag is its eye-catching granny square design. You can choose any colors you love—bright and crazy, soft and pastel, or classic neutrals—and watch them come together in a cool pattern. The main stitches are simple: double crochet, treble crochet, single crochet, and chain stitches. You’ll see in the video how these are joined into squares and sewn together to make a roomy, durable bag. The versatility of this pattern means that, once you know how to crochet granny squares, you can easily use the same idea to make pillows, shawls, or blankets by just changing the number of squares.
For the best results:
- Follow the pattern step-by-step.
- Plan on making about 21 squares for a standard beach bag size—adjust the number up or down if you want a bigger or smaller bag.
Sometimes, you might find your squares look uneven, or your seams are bulky. If this happens, check your yarn tension and keep your stitch size the same. Be sure to line up the sides and corners carefully when sewing them together to avoid holes or twisted joins. If your handles aren’t strong, add some extra stitches at the joints.
Don’t Forget These Important Steps:
- Begin each granny square with a magic ring (as shown in the video) so they’re flat and neat.
- Carefully count your stitches to keep your squares even in size.
- When joining, place squares with the right sides together and join using only the outer loops for invisible seams.
- Secure the handles well—try your bag on to check the length before attaching them fully.
- Remember to weave in and trim all yarn ends so your bag looks neat and tidy.
Crochet Square Beach Bag Pattern (Beginner Friendly)
Skill Level
Beginner to Intermediate
No prior crochet experience necessary! If you can chain and double crochet, you can make this bag.
Materials
- Yarn: 100% cotton, approx. 2.5 balls (100g, 230m per ball)
OR 5 balls (50g, 100–150m per ball). Cotton is sturdy for bags. - Hook: 2.5 mm crochet hook
- Yarn needle (blunt tip, for sewing and weaving in ends)
- Scissors
- (Optional) Contrasting yarn: For sewing if you want a visible seam for demonstration or style
Key Abbreviations (US Terms)
- ch = chain
- sc = single crochet
- dc = double crochet
- tr = treble crochet
- sl st = slip stitch
- st(s) = stitch(es)
- rep = repeat
- sp = space
Special Notes
- This bag is made by joining 14–21 identical granny squares. Each square is built with a combination of basic and decorative stitches (clusters and petals).
- The squares are joined together and then sewn into a bag shape.
- The handle is crocheted and sewn on at the end.
- Take your time—each square can take a couple of hours if you’re new to crochet.
- Adjust the number of squares for a smaller or larger bag.
Pattern
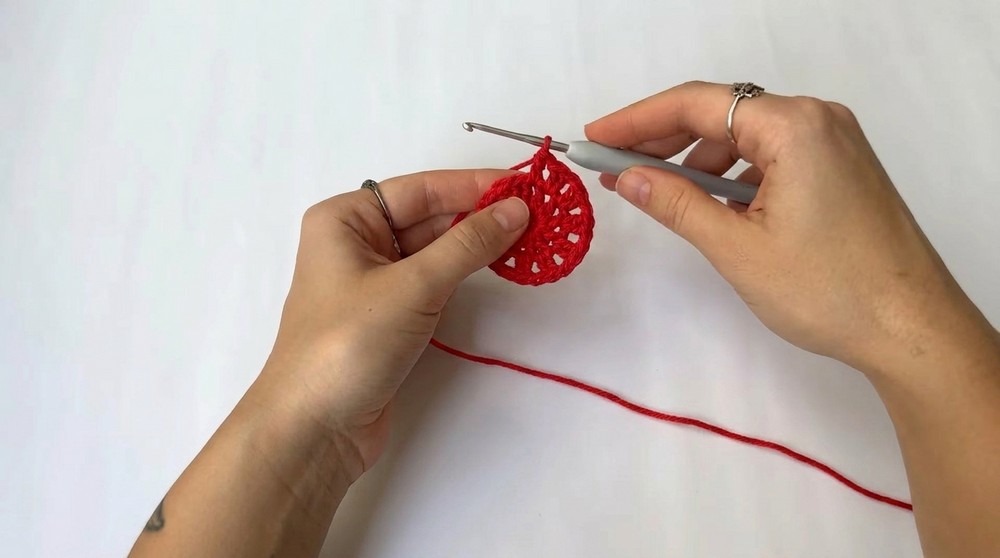
Step 1: Square Motif – Center Circle (Round 1)
- Start with a magic loop. Leave a tail about 15 cm long.
- Ch 2 (counts as first dc).
- Work 15 dc in the magic loop (going under both strands).
- Pull the tail to close the loop tightly.
- Sl st to top of first dc or starting chain to close the round. (16 dc total)
This forms the sturdy center of your square. Pull the tail to cinch the hole tightly. Make sure you have 16 dc!
Step 2: Small Arches (Round 2)
- Ch 3 (counts as first dc).
- (Dc in next st, ch 1) rep around.
- Join with sl st to top of starting chain. (16 dc, 16 ch-1 spaces)
This creates an even ring of pairs with “arch” spaces forming between each dc.
Step 3: Petal Cluster (Round 3)
- Ch 2 (counts as first leg of cluster).
- In each ch-1 space:
(Yarn over, insert in space, pull up a loop, yarn over, pull through two loops) three times; you now have 4 loops on hook. Yarn over, pull through all loops (a 3-dc cluster). - Ch 4 between each cluster.
- Repeat clusters and ch-4’s in each ch-1 space around the circle.
- Sl st to top of first cluster to join. (16 clusters, 16 ch-4 spaces)
Clusters in each arch with chain bridges creates the “petal” motif in the square.
Step 4: Large Chain Arches (Round 4)
- Bring loop to center of first ch-4 space with 2 sc.
- Ch 5.
- Sc in next ch-4 space. Ch 5; rep around.
- Join with sl st to first sc. (16 ch-5 arches)
You will have a new row of arches, which will frame the squares’ next petals and corners.
Step 5: Petals and Corners (Round 5)
- Move to center of first arch with 2 sc.
- In this arch: 10 dc (single round petal).
- In the next arch: sc.
- In the next arch (corner arch): 5 dc, ch 4, 5 dc (corner petal).
- Next arch: sc.
- Repeat this pattern:
10 dc (petal), sc, (5 dc, ch 4, 5 dc), sc
across the row to form 4 corners and 4 side petals. - Join with sl st to the beginning of the row.
Alternating these patterns creates a rounded-square shape. Sides = 10-dc petal; corners = (5 dc, ch 4, 5 dc) in one arch.
Step 6: Shaping the Square (Round 6)
- Move to next arch if needed.
- Side arches: sc in arch, ch 2, tr in same arch, ch 4, sl st to top of next petal.
- After each tr: Ch 4, sl st to top of next petal.
- In corner arches: (2 dc, ch 4, 2 dc) in one arch.
- Continue: On each side, (sc in arch, ch 2, tr in same arch, ch 4, sl st into petal), on corners, (2 dc, ch 4, 2 dc) in same arch.
- Repeat for all 4 sides and 4 corners.
- Join with sl st.
This row gives the square its final sharp corners. Ch-4’s frame each petal and connect corners.
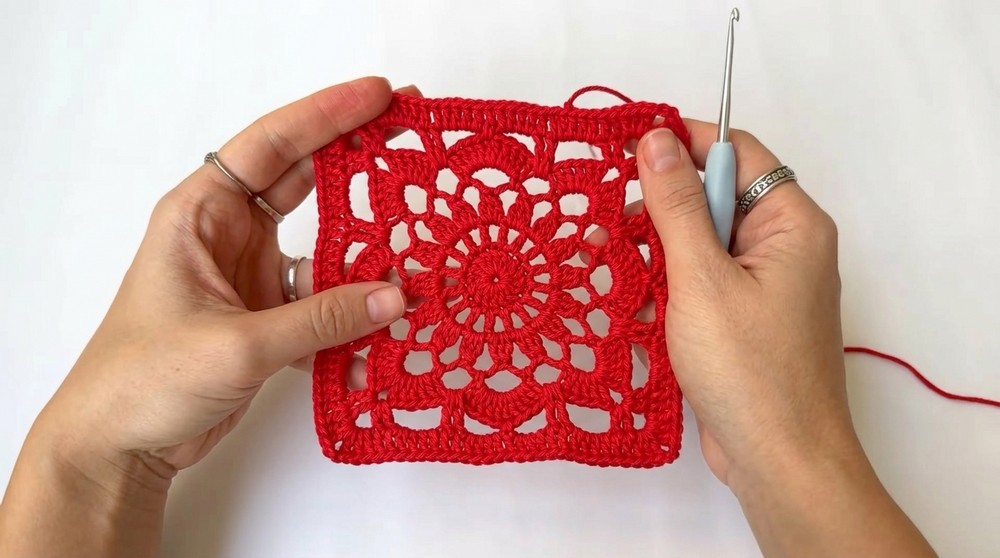
Step 7: Double Crochet Outline (Round 7)
- Ch 2 (counts as first dc).
- Dc in every stitch and chain space around the square (for ch-4 spaces, dc 4 times; in each dc or tr, dc once; for corners, (2 dc, ch 4, 2 dc) in ch-4 space).
- Join with sl st at the end of the round.
Work evenly and count stitches—your sides will be straight, and the corners will stay pointy with (2 dc, ch 4, 2 dc) in each corner.
Step 8: Last Round – Eyelet Border (Round 8)
- Ch 3 (counts as dc).
- (Skip 1 st, dc in next st, ch 1) repeat around.
- At corners: (dc in corner space, ch 4, dc in same space).
- Continue pattern all around, ending with sl st to join.
This final round adds a nice lacy edge to your squares for a subtle openwork look.
Step 9: Weave in Ends
- Use the yarn needle to carefully hide the starting and ending tails on the wrong side of your finished square.
- Weave back and forth for 4–5 cm, then trim excess yarn.
This helps your squares stay tidy and not come undone!
Step 10: Make More Squares
- Repeat steps 1–9 until you have 21 squares (or your chosen amount for your desired bag size).
Lay out your squares and play with the layout/arrangement before joining.
Step 11: Join the Squares
- Arrange your squares into the desired configuration.
- Place two squares right sides together.
- Use yarn needle and matching yarn to sew through the outer loops only
of each stitch (for a nearly invisible seam). - Sew in straight rows until all squares are joined into a large rectangle or L-shape as per your design.
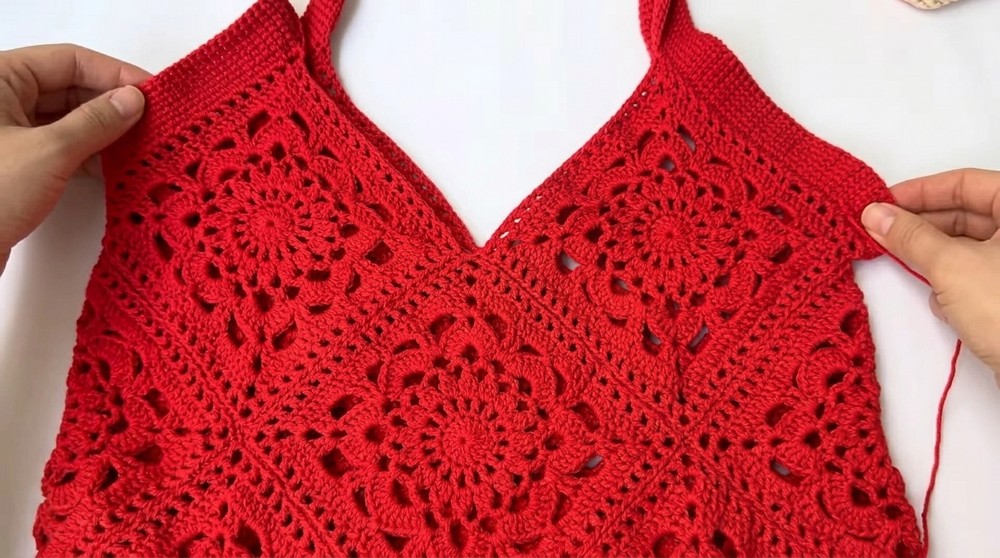
Always sew with right sides together and outer loops only for a neat, flat join!
Step 12: Shape the Bag & Sew Sides
- Fold your joined square piece as described in the video.
- Sew sides and bottom, leaving the top open.
- Double-check symmetry; align squares carefully.
This turns your flat panel into a 3D bag structure.
Step 13: Handles
- Attach yarn at a top corner of the bag.
- Ch 7 for foundation row (first chain made with both tails for extra strength).
- For each row, make a Tunisian-style return pass:
- Skip first ch, insert hook into each next ch across, leaving loops on hook (7 loops).
- At bag edge, sl st to attach handle to next st at bag top.
- Repeat for approx. 80 rows or desired handle length.
- Attach at other top corner.
This creates wide, sturdy flat handles. Try the bag on your shoulder and add more rows for a longer handle if desired!
Step 14: Finishing Touches
- Sew down handle joins for extra security and neatness, folding edges under if needed.
- Weave in all extra yarn tails.
- Sew up any gaps in seams, and block if you want sharper edges.
Conclusion
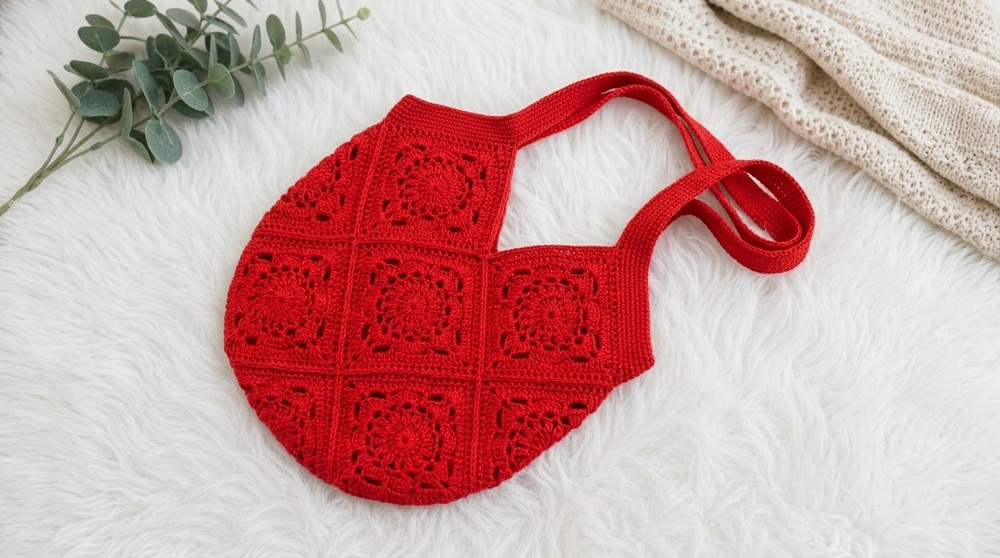
Congratulations! You have finished a strong, stylish beach bag, made entirely from crocheted squares. With cotton yarn, sturdy seams, and a flat handle, your finished bag will hold up beautifully. You now have a reusable accessory perfect for the beach, market, or daily use.
Pattern Correction & Tips
- Adjust the bag size by using more or fewer squares.
- If your square starts curling, check your stitch counts in each round.
- Use a tapestry needle and outer loops for nearly invisible seams.
- Tug gently as you sew for even joins—do not pull too tight.
- For easier assembly, block your finished squares so they are perfectly flat.
- Handles can be replaced with rope, leather, or other creative materials if desired.