Crochet Sweater with V-Neck Free Pattern With Design
Learn how to create a stylish and cozy crochet sweater with a V-neck pattern, perfect for any season and easy to customize to your style.
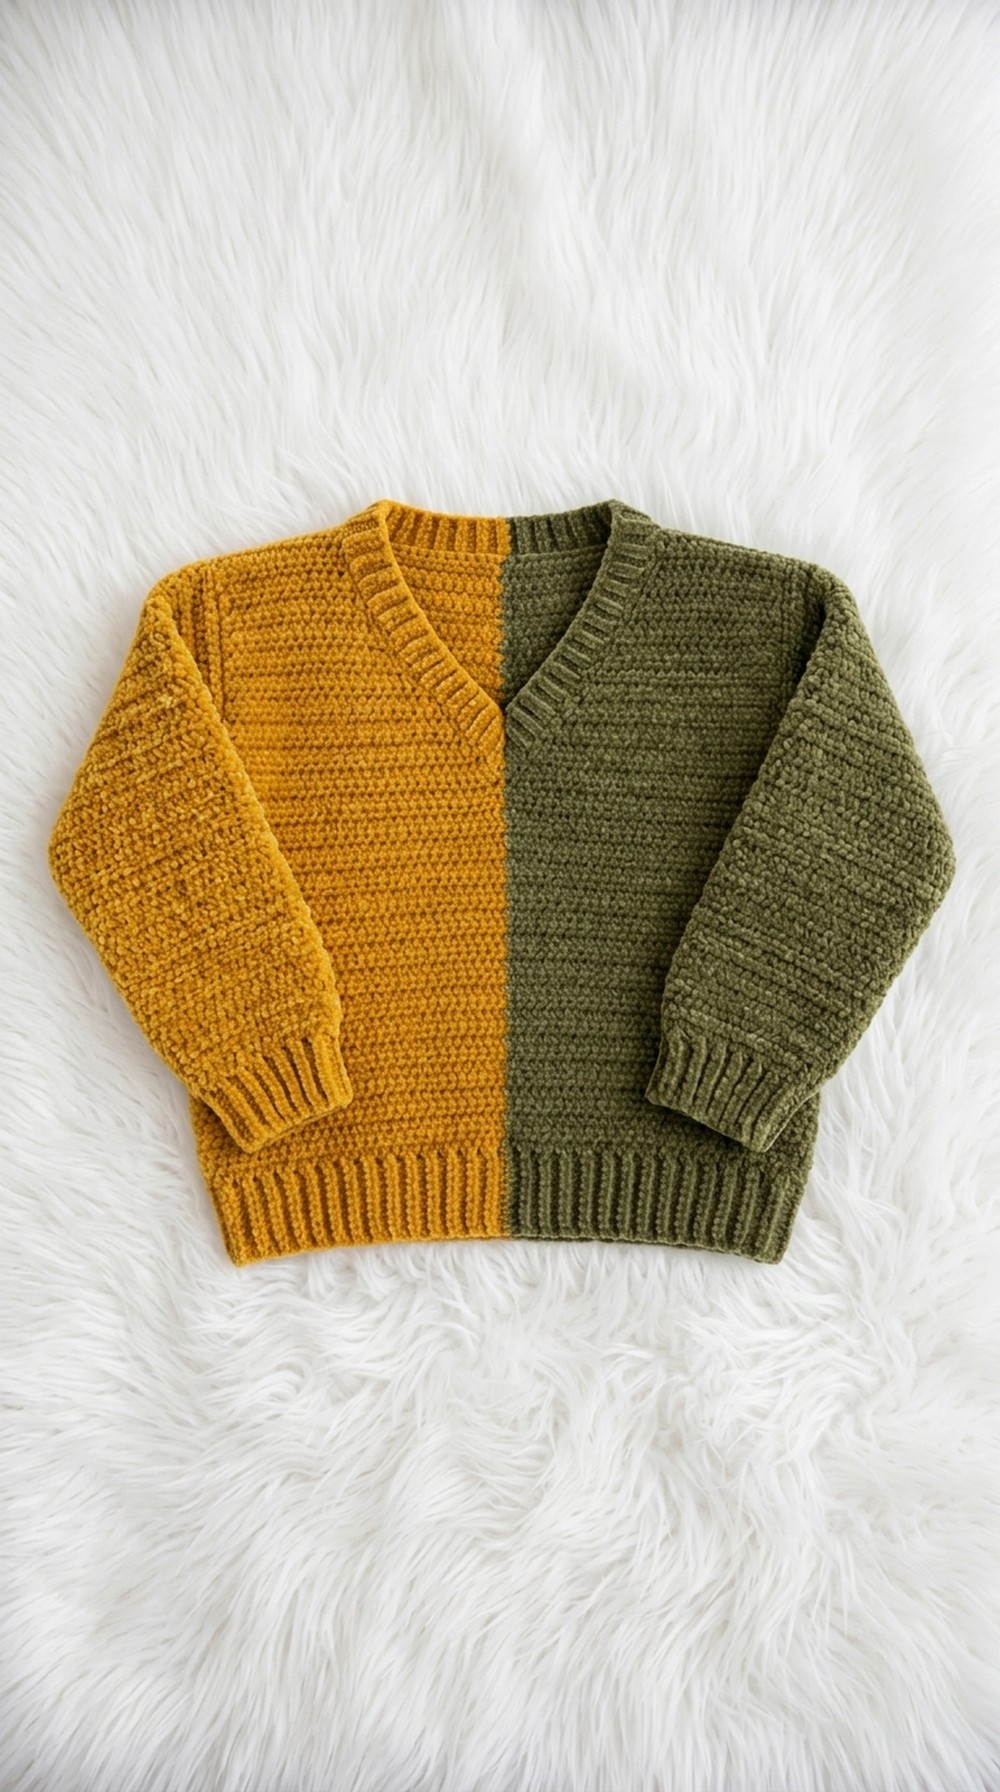
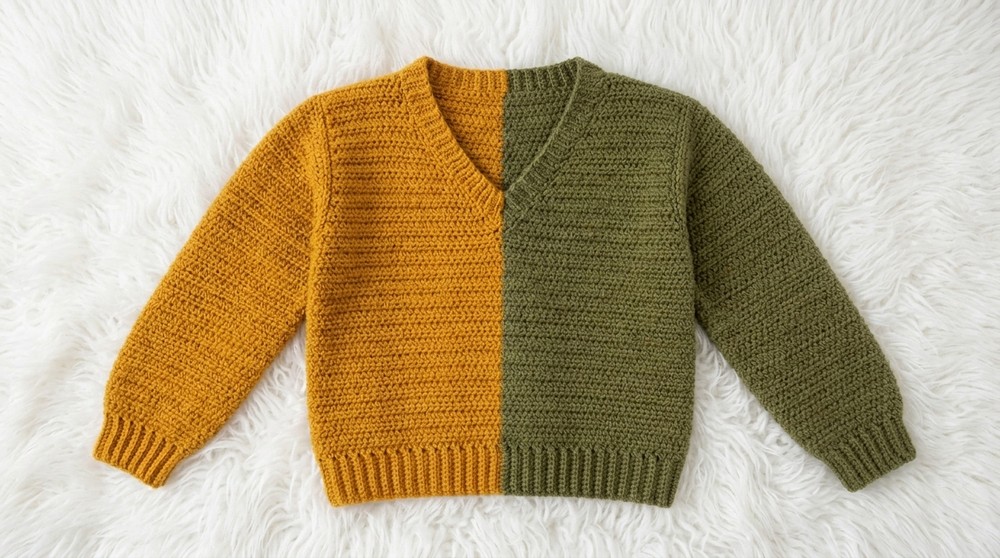
The free crochet sweater with a V-neck pattern stands out for its eye-catching style and modern shape. One side of the sweater is olive green and the other is a warm mustard color, making it bold and playful. The neat V-neck in front makes it flattering and great for layering over shirts or dresses. Chunky ribbing along the neckline, cuffs, and bottom edge gives this sweater a soft texture and helps it hold its shape really well. The way the two colors are joined creates a lovely split effect that looks different from every angle, so the sweater always feels interesting and fresh.
Cozy Crochet Sweater with V-Neck Pattern Design
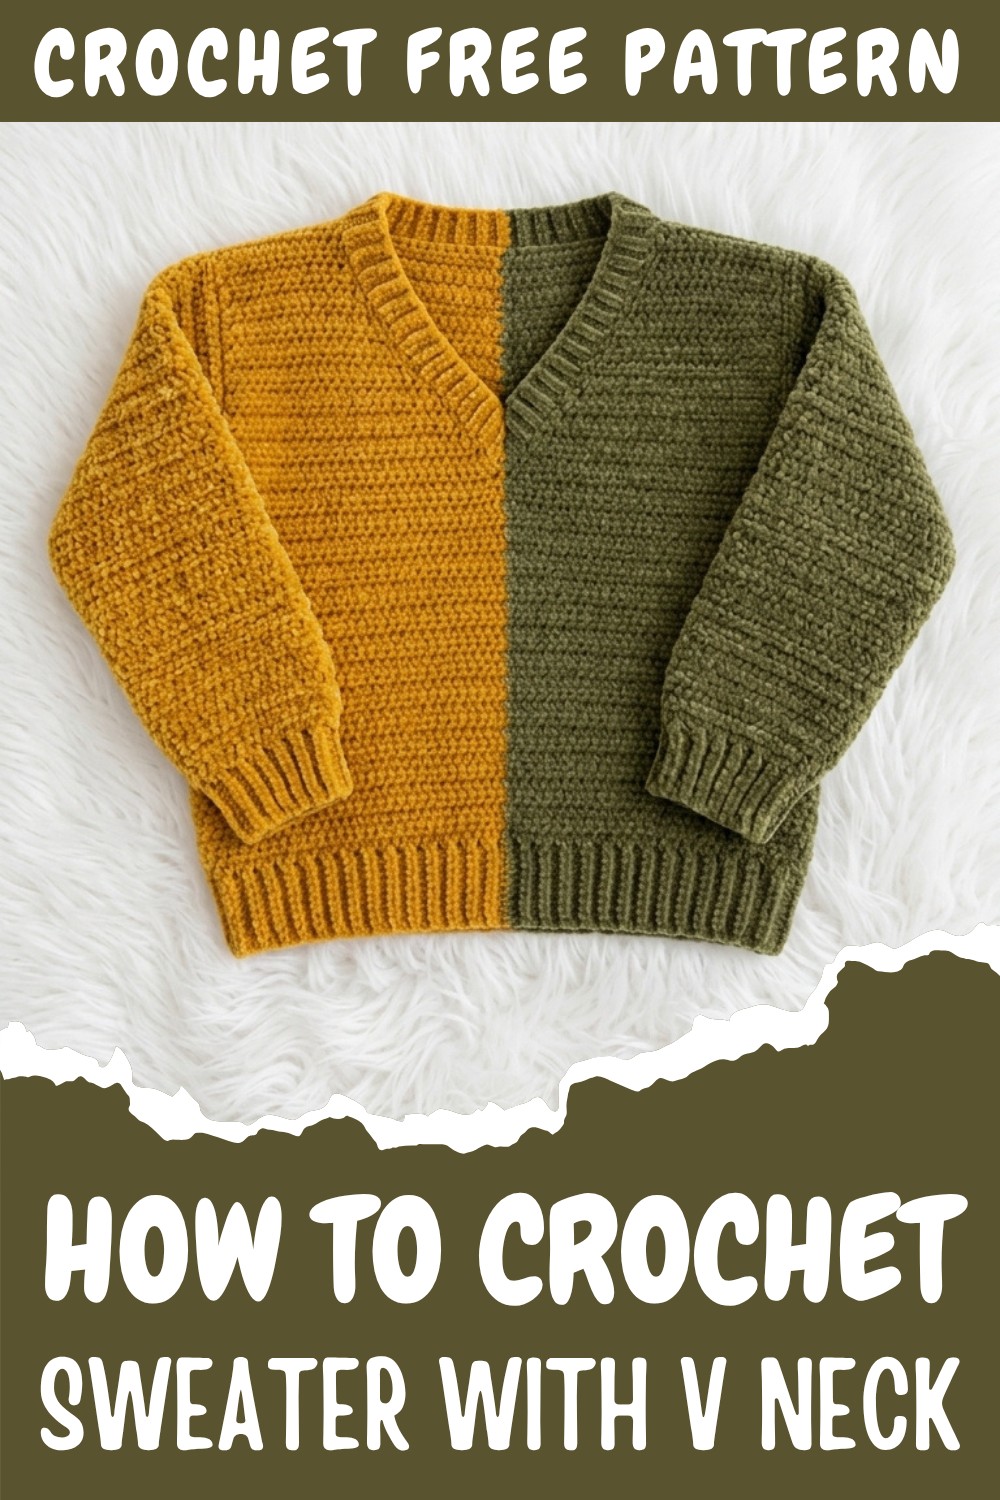
Crocheters will love working on this project because it uses simple stitches but still looks impressive when finished. You use single crochet, chain, and half double crochet to create a thick, cozy fabric with a neat finish. It’s easy to change the size or even switch up the colors to personalize your sweater and make it just right for you. Another fun option is to try only one color, or to use stripes, or just make the main part of the sweater as a cute vest.
This sweater is great for keeping warm during cooler days, adding a pop of color to everyday outfits, or bringing something special to family events. It fits loosely so it feels comfy and relaxed, and it’s a thoughtful handmade gift idea for anyone who likes unique, cozy clothes. Wear it at home, to school, or out with friends, the V-neck crochet sweater is sure to be a favorite in any wardrobe.
Two-Color V-Neck Sweater (Ages 8–9) – Crochet Pattern
This step-by-step crochet pattern for a stylish, contemporary two-color sweater, featuring a dramatic half-and-half color split with a striking V-neck. This eye-catching sweater is designed for children aged 8 to 9 years, but you can easily adjust the measurements for any size — simply follow the customization hints provided throughout the pattern. This project is a rewarding make for confident beginners and intermediate crocheters, with clear instructions on color change, neat ribbing, and assembly for a garment you’ll be proud to gift or keep!
Skill Level & Terminology
Skill Level: Confident Beginner to Intermediate
Terminology: US Crochet Terms
This pattern is suitable if you are comfortable with basic stitches and ready to try color changes, seaming, and neck/sleeve shaping.
Materials & Tools
- Yarn: DMC Niti 4, weight 3/medium (two contrasting colors; e.g., olive green and mustard). You may substitute equivalent light-worsted/DK acrylic or cotton acrylic blend.
- Hook: 4 mm (main body and sleeves); 3 mm (for ribbed cuffs and edges, optional for a tighter finish)
- Notions: Scissors, yarn/tapestry needle, stitch markers, measuring tape
Gauge
- 10 sc & 10 rows = 2 inches (5 cm) unblocked in ribbing
- One ribbing strip to fit desired circumference (adjust for custom sizing below)
Abbreviations List
| Abbreviation | Meaning |
|---|---|
| ch | Chain |
| sc | Single Crochet |
| hdc | Half Double Crochet |
| dc | Double Crochet |
| sl st | Slip Stitch |
| st(s) | Stitch(es) |
| BLO | Back Loop Only |
| YO | Yarn Over |
| dec | Decrease |
| RS | Right Side |
| WS | Wrong Side |
Special Stitch Instructions
- Ribbing (BLO sc): Work sc INTO the back loop ONLY for each row, except the first/last st (where you can use both loops for a neater edge).
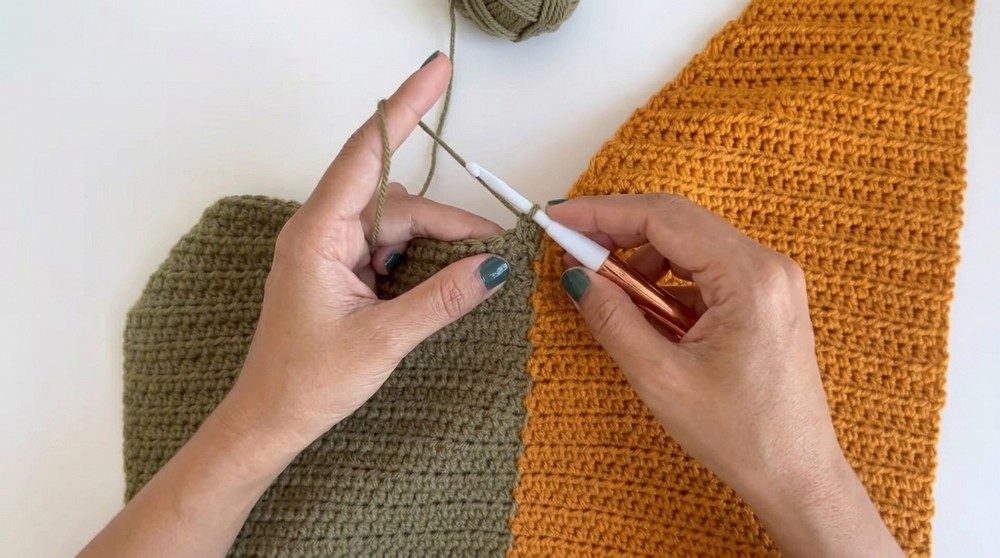
- Color Change: Before finishing the last YO of your last st before a color change, drop old color, YO and pull through with new color, then continue working with new color.
- Hdc Dec (Decrease): YO, insert hook into next st, YO pull up a loop, insert hook in next st, YO and pull up a loop (4 loops on hook), YO and pull through all 4 loops.
Finished Size
- Chest/Hip Circumference: 33 cm (13 in) wide per panel (fits 8–9 yrs; adjust as needed)
- Body Length: 47 rows or desired length (from hem to shoulder)
- Sleeve Length: 39 cm (15 in), width 20 cm (8 in)
- Ribbing/Cuffs: Customize width/length for fit and style
Pattern Notes
The sweater is worked in two main parts (back and front panels) with contrasting color halves, plus two sleeves and ribbed cuffs, and a textured V-neck. All ribbing is worked in back loop only, and color is changed cleanly for a neatly merged look.
The Pattern Itself
A. BACK PANEL
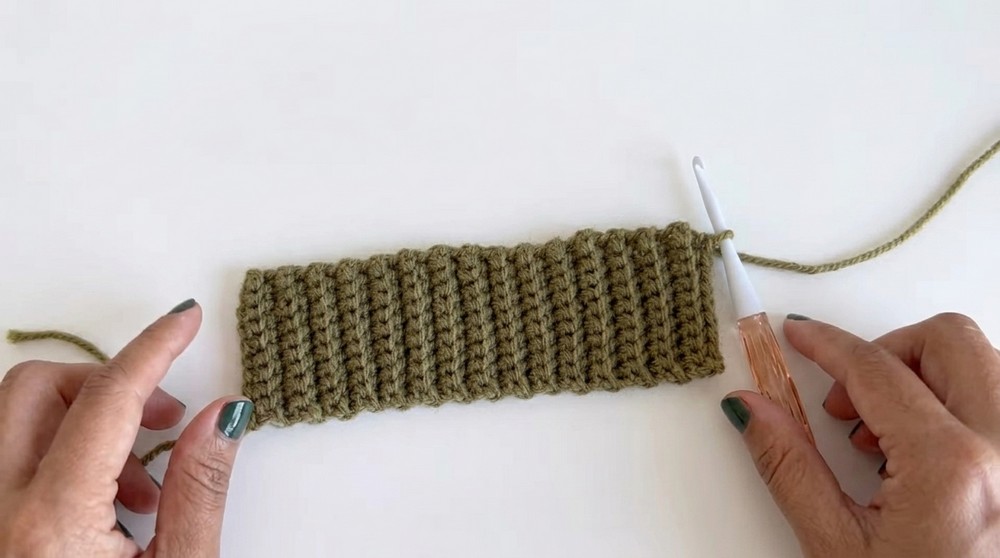
Ribbing:
- With Color A, ch 11 (for hem ribbing height).
- Row 1: Starting in 2nd ch from hook, sc in each ch across (10 sc). Ch 1, turn.
- Row 2: Sc in BLO in each st across. Ch 1, turn.
- Repeat Row 2 until you reach 16.5 cm width (half total desired width).
- Switch to Color B: To achieve a smooth change, in the last sc of Color A, pull through Color B on final YO.
- Continue with Color B, sc BLO for same number of rows (to reach total width, approx 33 cm or as needed).
This creates a stretchy hem ribbing with a seamless color change. Always work the color change in the last stitch pulling through with the new color.
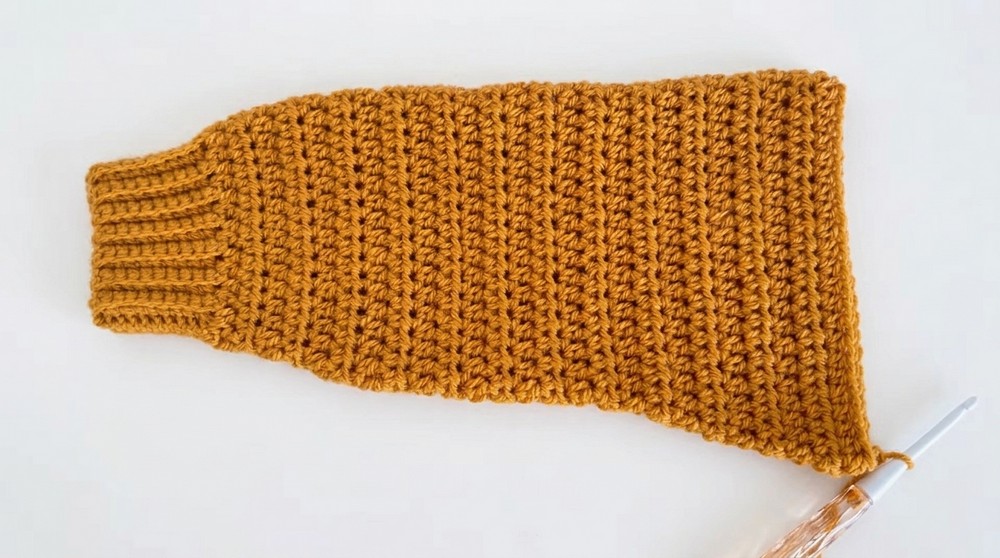
Body (worked along edge of ribbing):
7. With Color B still attached, ch 1 and turn work to long side.
- Row 1: Work 1 hdc into the side of each ribbing row for entire panel edge (one hdc per ribbing row—should be 60 hdc if you did 60 rows).
- Rows 2–47: Ch 1, turn, hdc in each st across, maintaining color blocks by changing back to Color A as needed (always change color on last YO of last hdc in color section).
At each color section, carry the unused yarn up the side of your work for tidy color changes. The body is a simple back-and-forth hdc row; switch color in the same spot every row to keep the half-and-half effect.
B. FRONT PANEL
Mirror the back but reverse starting/ending colors for a symmetrical effect.
- Begin ribbing with Color B, work for half the width, switch to Color A, and work to full width as per back panel.
- Repeat as in back panel for body until you have 27 rows.
- V-Neck shaping:
- At row 28, separate the panel — you will work each side of v-neck separately.
- For each side, hdc to center, then stop; for next row, hdc dec at the neck edge (first or last 2 sts on neck side) to shape the V.
- Keep decreasing 1 st on the neck side every row until 12 sts remain.
- Work straight with 12 hdc sts to match length to back.
For beginners: When you “decrease,” insert hook in one stitch, pull up a loop, then into the next, pull up another loop, and finish as directed in the decrease technique above. Always decrease at the neckline edge for a clear V shape.
C. SHOULDER SEAM / ASSEMBLY
- Align front and back panels with right sides facing out.
- Use stitch markers to match up 12 shoulder stitches per side.
- With matching yarn and yarn needle or hook, whipstitch or slip stitch the shoulder seams.
- Weave in all ends for a smooth finish.
Joining at the shoulders ensures a sturdy, neat fit.
D. NECKLINE RIBBING
- With 3 mm hook, join yarn at center V.
- Work slip stitches evenly around neckline, switching color at shoulders for the color-block effect.
- After completing slip stitch round, with color A, ch 7 (for ribbing height), sc in 2nd ch from hook and next 5 ch (6 sc).
- Attach ribbing to neckline by slip stitching into next slip st on neckline, turn, sc BLO in each ribbing st back.
- Repeat: at each row, after working back on ribbing, slip stitch to next neckline stitch, turn, sc BLO on ribbing. Change color at shoulder as needed.
- Continue in this manner until the ribbing is complete around neckline, finish off, seam at the center if needed.
This creates a stretchy, fitted rib finish. Change color at shoulder for a seamless two-color look.
E. SLEEVES & CUFFS
Cuffs:
- With 3 mm hook and Color A or B, ch 11.
- Row 1: Sc in 2nd ch from hook and each across (10 sc), ch 1, turn.
- Row 2: Sc BLO in each across, ch 1, turn.
- Repeat for 31 rows (15 cm/6 in).
- Fold in half, sl st short edge to short edge to form cuff. Do not fasten off.
Sleeve:
6. Switch to 4 mm hook, turn cuffs to work along the long edge.
- Work 1 hdc into each row-end (31 hdc), sl st to first to join.
- Ch 1, turn, work as follows:
- Row 2: 31 hdc, sl st to join.
- Row 3: 2 hdc in first st, 1 hdc in each remaining (increase at start). (32 hdc)
- Subsequent rows: alternate increasing 1 at start every other row until elbow (about 36 hdc/19 cm).
- After elbow, increase 2 sts per row (first and last st of row) for shaping, up to 58 hdc over 36 rows (39 cm).
The sleeve is worked flat and then seamed. Shape for a comfortable fit.
F. SLEEVE & SIDE SEAMS
- Match sleeve center to shoulder seam.
- Seam sleeve into armhole using whipstitch or mattress seam, matching color changes as closely as possible.
- Seam sides from waist hem up to underarm.
Make sure seams are flexible but secure for comfort.
Assembly & Finishing
- Weave in all ends cleanly.
- Tighten up the neckline by sewing small gaps if needed.
- Lightly block (steam or wet block) to soften and even out stitches.
- Try on the sweater, check for fit, and adjust as needed before final tail weaving.
- Your unique color-blocked V-neck sweater is ready!
Conclusion
Congratulations on finishing your modern two-color V-neck sweater! With clear, strong color changes, a snug ribbed finish, and a tailored fit, this project lets you showcase both your color sense and crochet skills. Adjust colors, sizing, or styling to fit any child or adult, and enjoy the endless compliments to come. If you loved this tutorial, share your results, subscribe, and keep learning new crochet skills!