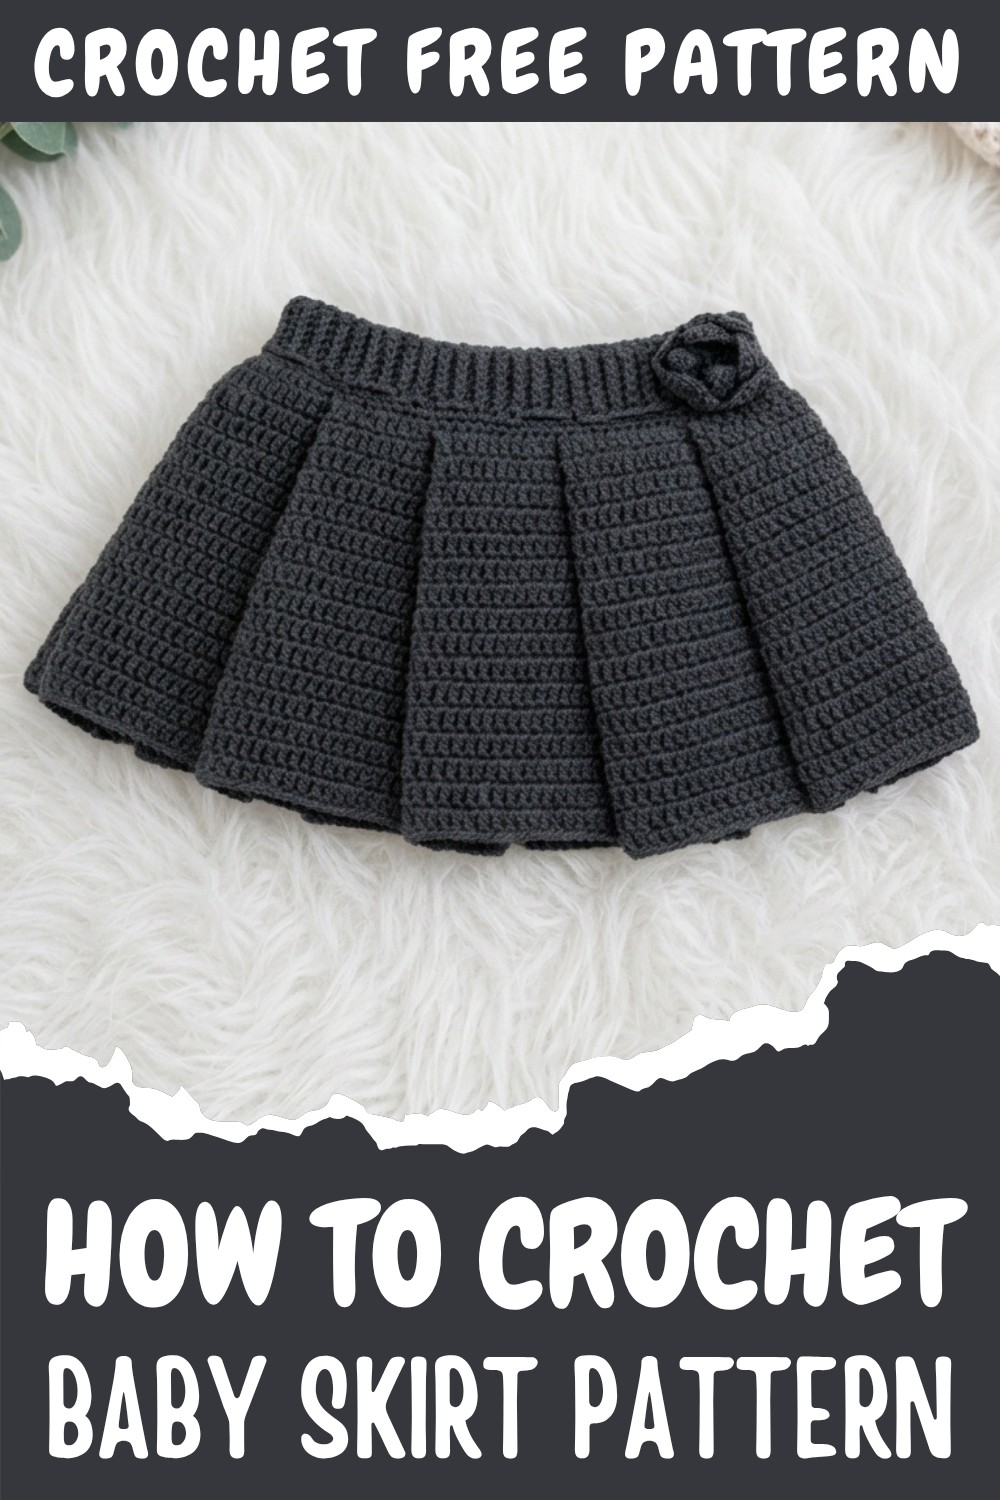
Free Crochet Baby Skirt Pattern Designed for Comfort
Dress your little one in a charming crochet baby skirt with this easy and delightful pattern, adding style and sweetness to their wardrobe.
Are you looking for an adorable project to crochet for a little one? A Free Crochet Baby Skirt Pattern might be just what you need. This easy pattern is perfect even for beginner crocheters, and the end result is both cute and practical. One of the best things about crocheting a baby skirt is how lovely and soft it turns out. The skirt usually has a gentle, ruffled shape that looks beautiful on little babies. The stitches create a pretty texture that makes the skirt stand out, while still being soft and comfortable against a baby’s skin.
Charming Crochet Baby Skirt Pattern Designed for Comfort
What I love most about this pattern is how the skirt flares out slightly, giving it that sweet and classic “twirly” look. Sometimes, all it takes is a simple yarn in your favorite color to make the design pop even more. Many crocheters enjoy making this skirt because it doesn’t take too long, and you can use it to practice different stitches. Plus, seeing the finished skirt come together row by row is really satisfying.
This baby skirt is perfect for many occasions. Dress up a baby for a family photo, a birthday, or a holiday. It also makes a thoughtful handmade gift for a baby shower or a newborn. Pair it with a cute onesie, and you have an easy, stylish outfit for any baby girl. Whether you’re making it for your own little one or as a gift, a crochet baby skirt is a joyful and rewarding project.
Beginner Pleated Baby Skirt Crochet Pattern
Welcome to this guided pattern for creating a fitted, pleated baby skirt! Inspired by a subscriber’s request, this skirt is made from scratch with step-by-step instructions, perfect for absolute beginners. The project uses basic stitches, simple techniques, and structured pleats, resulting in a beautifully classic skirt suitable for ages 0–3 months. With a core repeat, you’ll find this pattern approachable and rewarding. Follow each section, and you’ll soon have a handmade skirt—ready to pair with your own crochet top or add your custom embellishments!
Skill Level & Terminology
Skill Level: Beginner
Terminology: US Crochet Terms
All steps are explained for those who may be new to crochet. You’ll use chain, single crochet (sc), half double crochet (hdc), slip stitch (sl st), and variations of working in both loops or back loops—essential techniques for texture and shaping.
Materials & Tools
- Soft baby-friendly yarn (wool, cotton, or acrylic), recommended DK or light worsted
- Crochet hook: 2.5 mm for waist band, 3.0 mm for pleats/body
- Scissors
- Stitch markers (recommended: 4)
- Tapestry/yarn needle
- Measuring tape
Gauge
Gauge is flexible for this pattern. Ensure your stitches are even and not too tight for comfort. Exact dimensions are based on the baby’s size, but for a 0–3 month skirt, waistband should be approx. 43–44 cm and skirt length around 17 rounds.
Abbreviations List
| Abbreviation | Meaning |
|---|---|
| ch | Chain |
| sc | Single Crochet |
| hdc | Half Double Crochet |
| dc | Double Crochet |
| sl st | Slip Stitch |
| st(s) | Stitch(es) |
| BLO | Back Loop Only |
| YO | Yarn Over |
Special Stitch Instructions
- Single Crochet (sc): Insert hook, YO, pull through, YO again, pull through both loops.
- Half Double Crochet (hdc): YO, insert hook, YO, pull through (3 loops), YO, pull through all 3 loops.
- Back Loop Only (BLO): Insert hook under the back loop of the stitch only.
- Pleats: Work into the 3rd loop behind the hdc for crisp pleat effect.
- Seaming: Slip stitch through both matching stitches at each end.
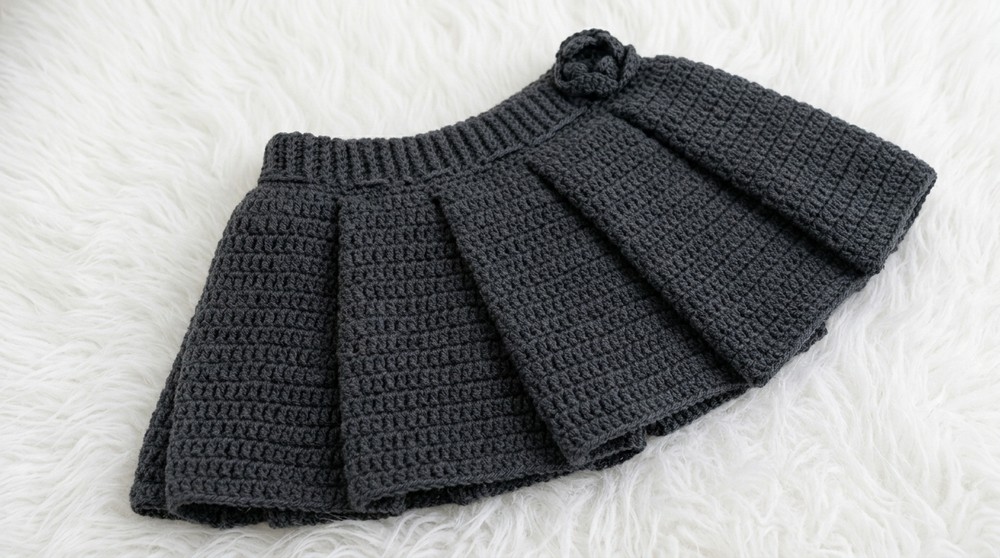
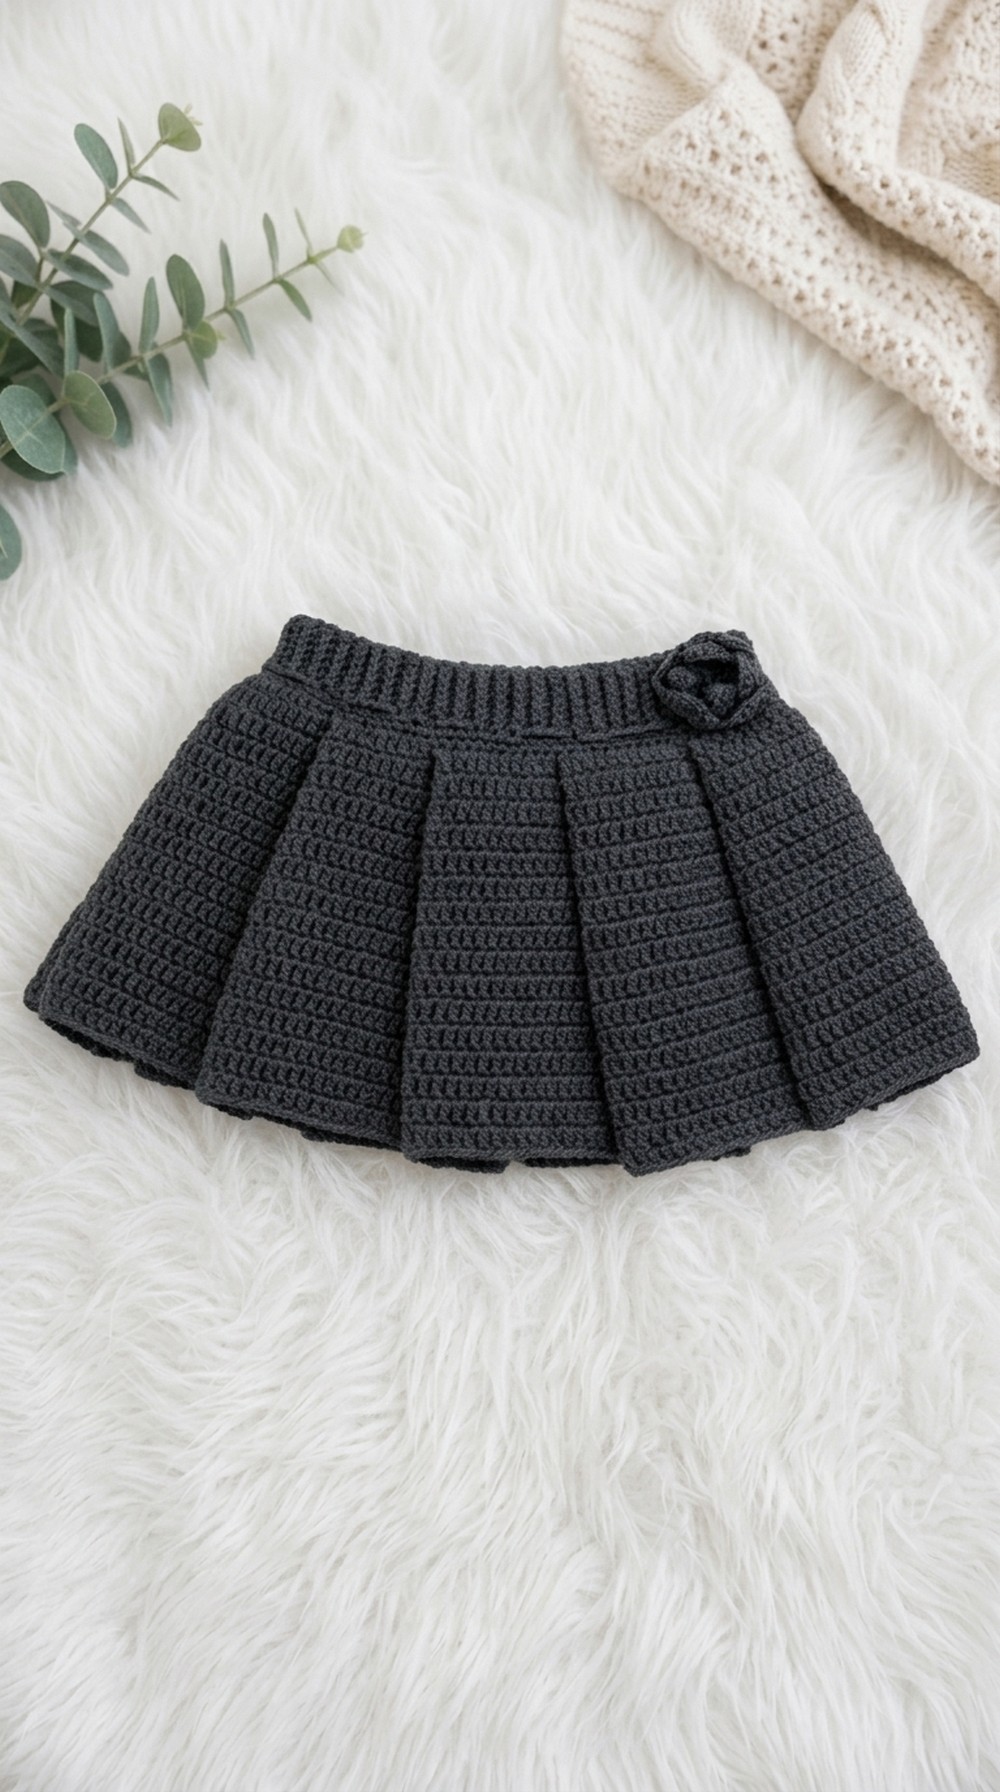
Finished Size
- Waist: 43–44 cm (approx. 102 sc) for 0–3 months (adjust for other sizes)
- Length: 17 rounds (adjust as needed)
- Skirt width: Divisible by 10 for pleat pattern repeat
Starting the Pattern
Begin with the waistband as a strip of single crochets for structure and elasticity. Then join the ends, fold for half the length, and work around for the skirt body. Pleating is achieved by working into the distinctive third loop of the hdc stitch, creating beautiful texture and volume. Read each explanation after every section for clarity.
The Pattern Itself
Begin with the waistband as a ribbed strip, counting stitches. Join ends for a circle, then work the skirt base and pleats.Chain, single crochet, half double crochet, slip stitch, back loop only.Multiples of 10 in waistband and skirt guarantee even pleats. Stitch markers help track sections and rounds.
Waistband
- Foundation Chain
- With 2.5 mm hook, make a slipknot.
- Ch 8.
- Row 1 (Waistband Strip)
- Starting in 2nd ch from hook, sc in each ch across (7 sc total).
- Turn.
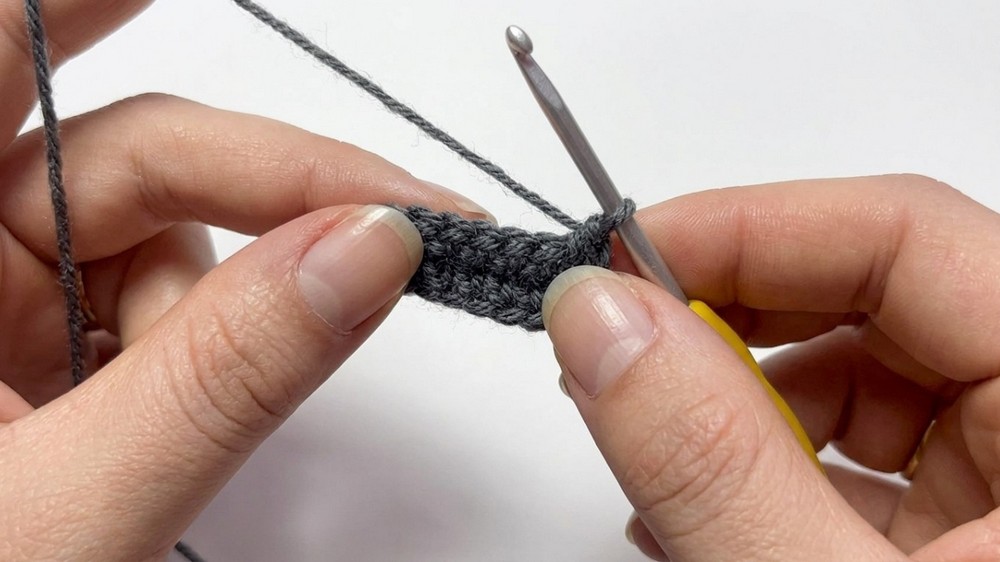
- Row 2 and Beyond
- Ch 1, sc in both loops of first st, then sc in BLO for all other sts.
- Work final sc in both loops of last st of each row (7 sc).
- Rep for desired waistband length—approx. 44 cm for 0–3 months (check chart for other sizes).
- Always count your stitches for consistency. Aim for multiples of 10 (e.g. 102 sc).
This creates a stretchy, ribbed band. Work in BLO after first stitch; always count stitches and ensure neat edges.
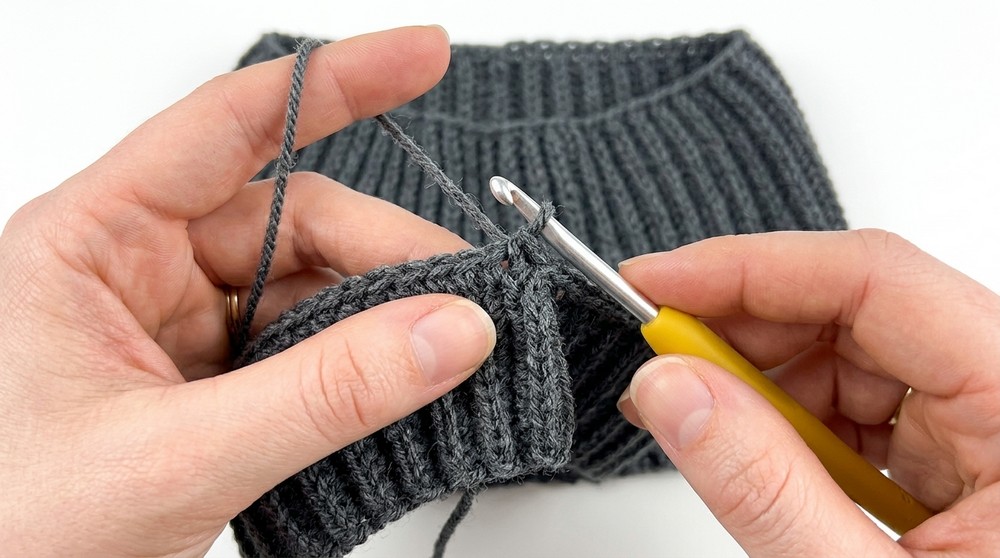
Joining Waistband
- Fold the strip so ends meet. With hook, sl st through each set of matching stitches to join.
- Ch 1 to fasten off.
- Turn band inside out so seam is hidden.
Joining the waistband transforms your strip into a circle. This foundation provides stability for the skirt body.
Skirt Body – Foundation Round
- With skirt color, and hook, work sc evenly around waistband (1 sc in each row end, 102 sts for 0–3 months).
- Insert stitch marker in first st, continue around, sl st to join at end.
Single crochets anchor the skirt to the waistband. Place stitch marker for easy round counting.
Skirt Body – First Round of Hdc
- Ch 1, remove stitch marker.
- Begin hdc in each sc around (102 hdc).
- Insert stitch marker in first hdc; continue around.
- Sl st to join at round end.
The half double crochets build height for the skirt. The marker makes tracking rounds simple.
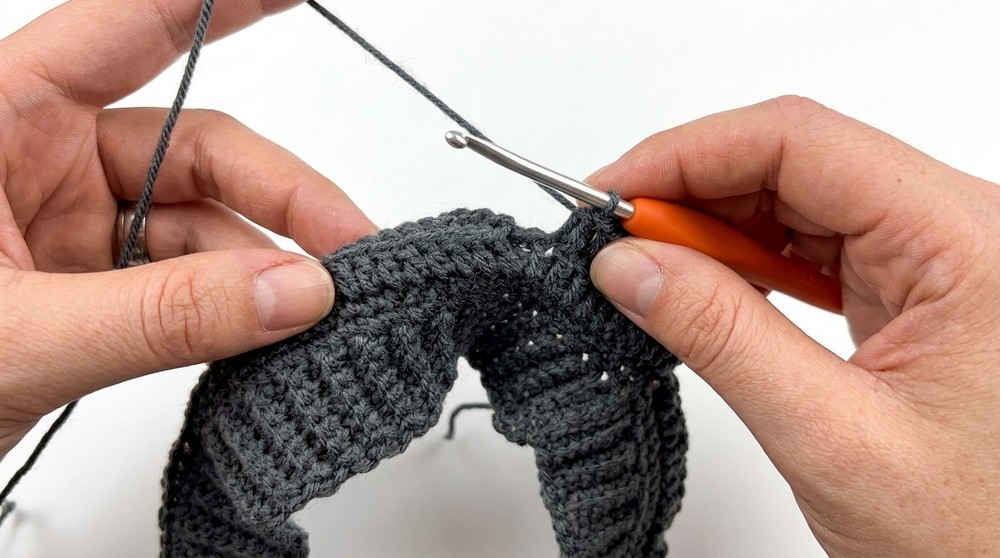
Pleat Section
- Switch to 3.0 mm hook for more volume.
- Ch 2 (does not count as a stitch).
- Pleat pattern is worked into “third loop” behind hdc.
- For each pleat:
- Work hdc into third loop for 10 sts. Mark first pleat st.
- For next pleat section, work hdc into the top of stitch at the front, as seen.
- Repeat for all pleat sections, alternating between third loop and top of stitch.
Working into the third loop (behind hdc) gives the skirt a crisp, classic pleat effect. Alternately, you may need to “bend” the work slightly for accuracy.
Repeat Pleat Pattern
- At end of pleat section, sl st to join round.
- Ch 2, repeat pleat pattern as before.
- Mark and count each section—always 10 sts per pleat.
- Continue for desired skirt length (17 rounds for 0–3 months).
- End each round with sl st to join and ch 2 to start next.
Continue repeating pleat rounds for your desired length. Always maintain stitch count, working into pleat zones as described and marking sections for neat pleats.
Skirt Edge/Finishing Row
- After last pleat round, fasten off.
- Weave in ends securely with your tapestry needle.
Skirt edge is optional; add decorative edging (shell, picot, or sc border) if desired. Keep finishing neat for comfort.
Belt (Optional)
- Ch a very long chain (enough to tie around the waist).
- Weave through the waistband if desired—a decorative and functional touch.
The belt adds charm and allows for slight waist adjustment.
Embellishments (Optional Flower & Tag)
- Adorn with a cute crochet flower or tag; simply sew behind waistband or side pleat.
- See linked flower pattern for inspiration.
Custom embellishments personalize your skirt; a flower or tag is lovely, but optional.
Assembly & Finishing
- Make sure all ends are woven in and pleats are defined.
- Turn skirt inside out for clean seams.
- Try on baby or fit to chart size for best comfort.
- Adjust waistband or add belt as needed.
Take care during assembly; defined pleats and tidy seams keep the skirt wearable and attractive.
Conclusion
Congratulations on finishing your fitted baby pleated skirt! With ribbed waist, classic pleats, and easy construction, this pattern is a foundation for more complex garments. Customize with length, color, or embellishments as desired. Whether for your own child or as a thoughtful handmade gift, this skirt will be a cherished addition to any baby wardrobe.