Free Crochet T-Shirt Yarn Bag Pattern With Step By Step Detail

I still remember the first time I turned a simple ball of t-shirt yarn into a granny square bag. It felt like magic watching those chunky stitches grow into something beautiful and practical that I could actually wear outside. This crochet t-shirt yarn bag has that same charm. It looks modern and “trendy” but it is built from very simple basics, so even if you are not an expert, you can absolutely make it.
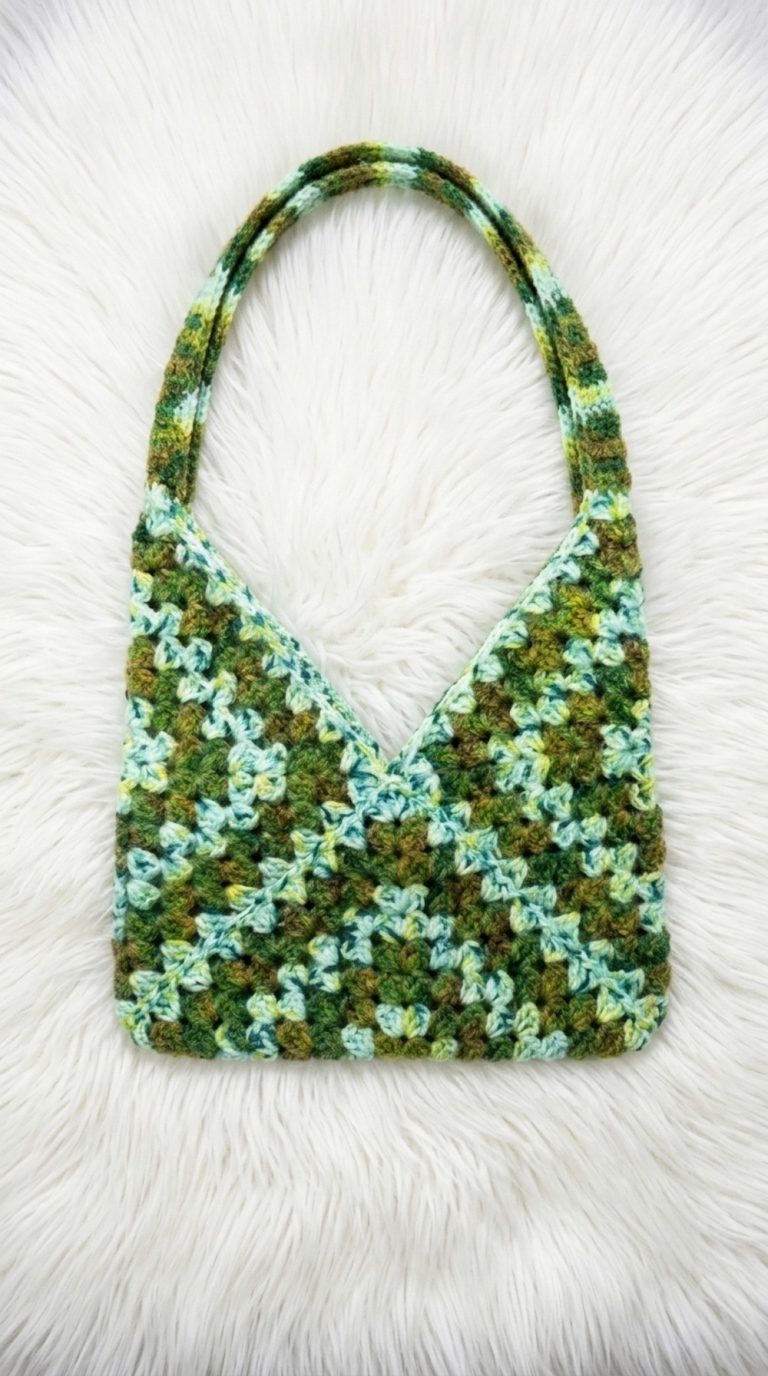
The beauty of this pattern lies in the bold texture of the t-shirt yarn, the clean granny square lines, and the way the contrasting edge and strap give it a polished, designer feel. It is sturdy enough for everyday use as a market bag or tote, yet stylish enough to take to a café, the beach, or a casual outing.
Classy Free Crochet T-Shirt Yarn Bag Pattern for Everyday Carryall Charm
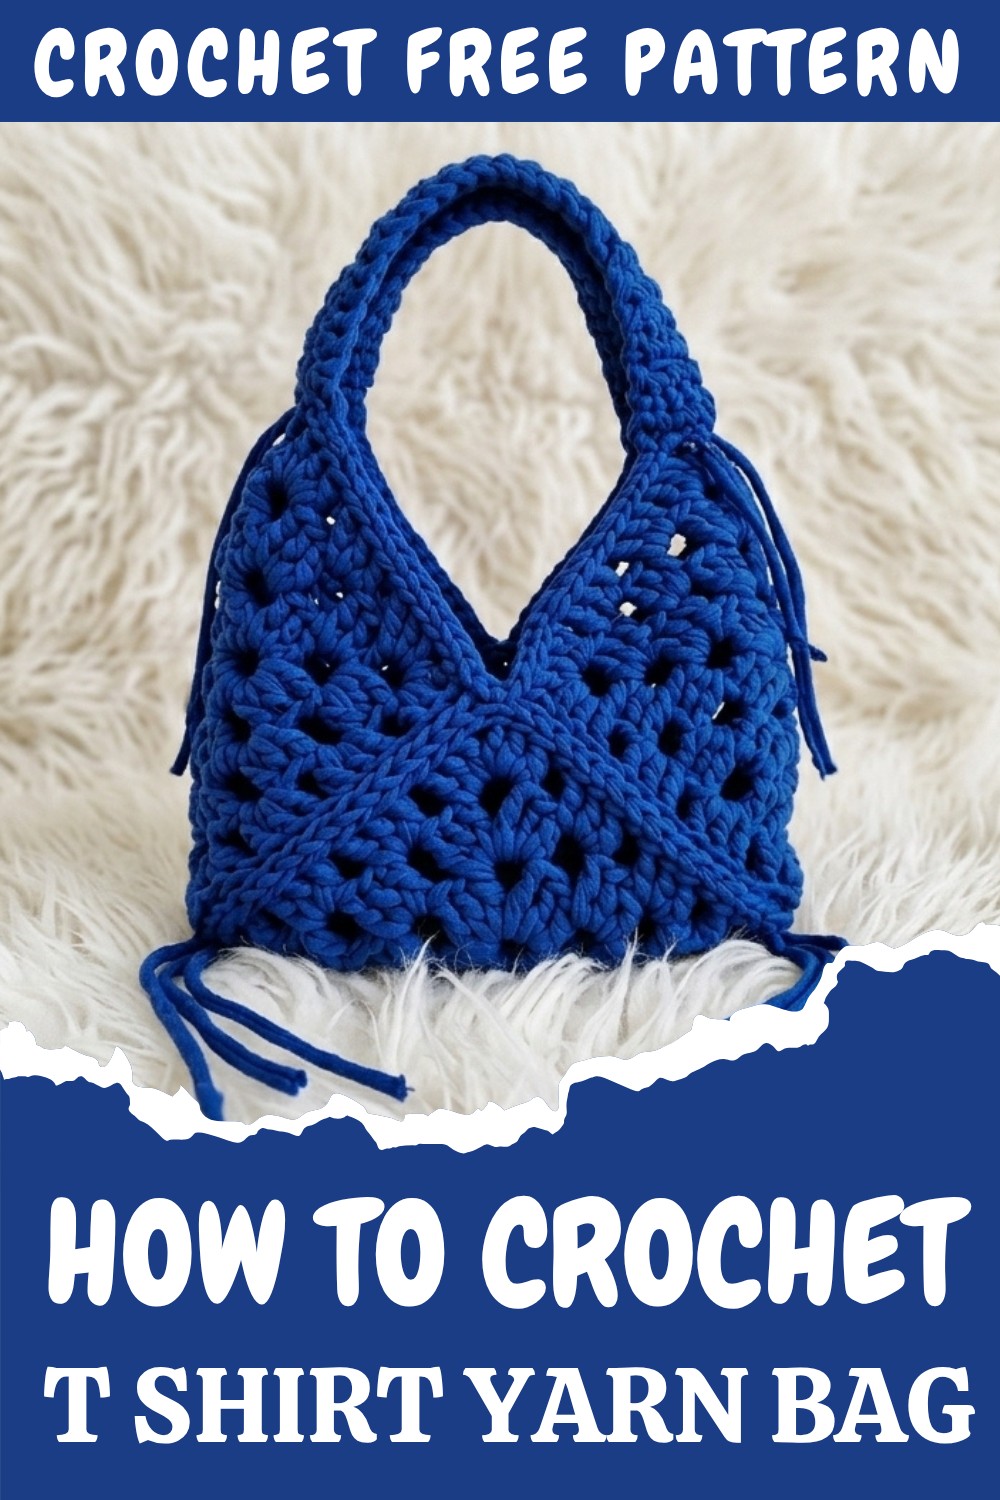
This bag is perfect for casual outings, groceries, or as an everyday tote. The combination of bold colors and textured stitches gives it a modern edge that pairs beautifully with any outfit. Plus, the magic ring start and granny square design make it not just a bag, but a stepping stone for other crochet projects like blankets, pillow covers, cardigans, and baskets.
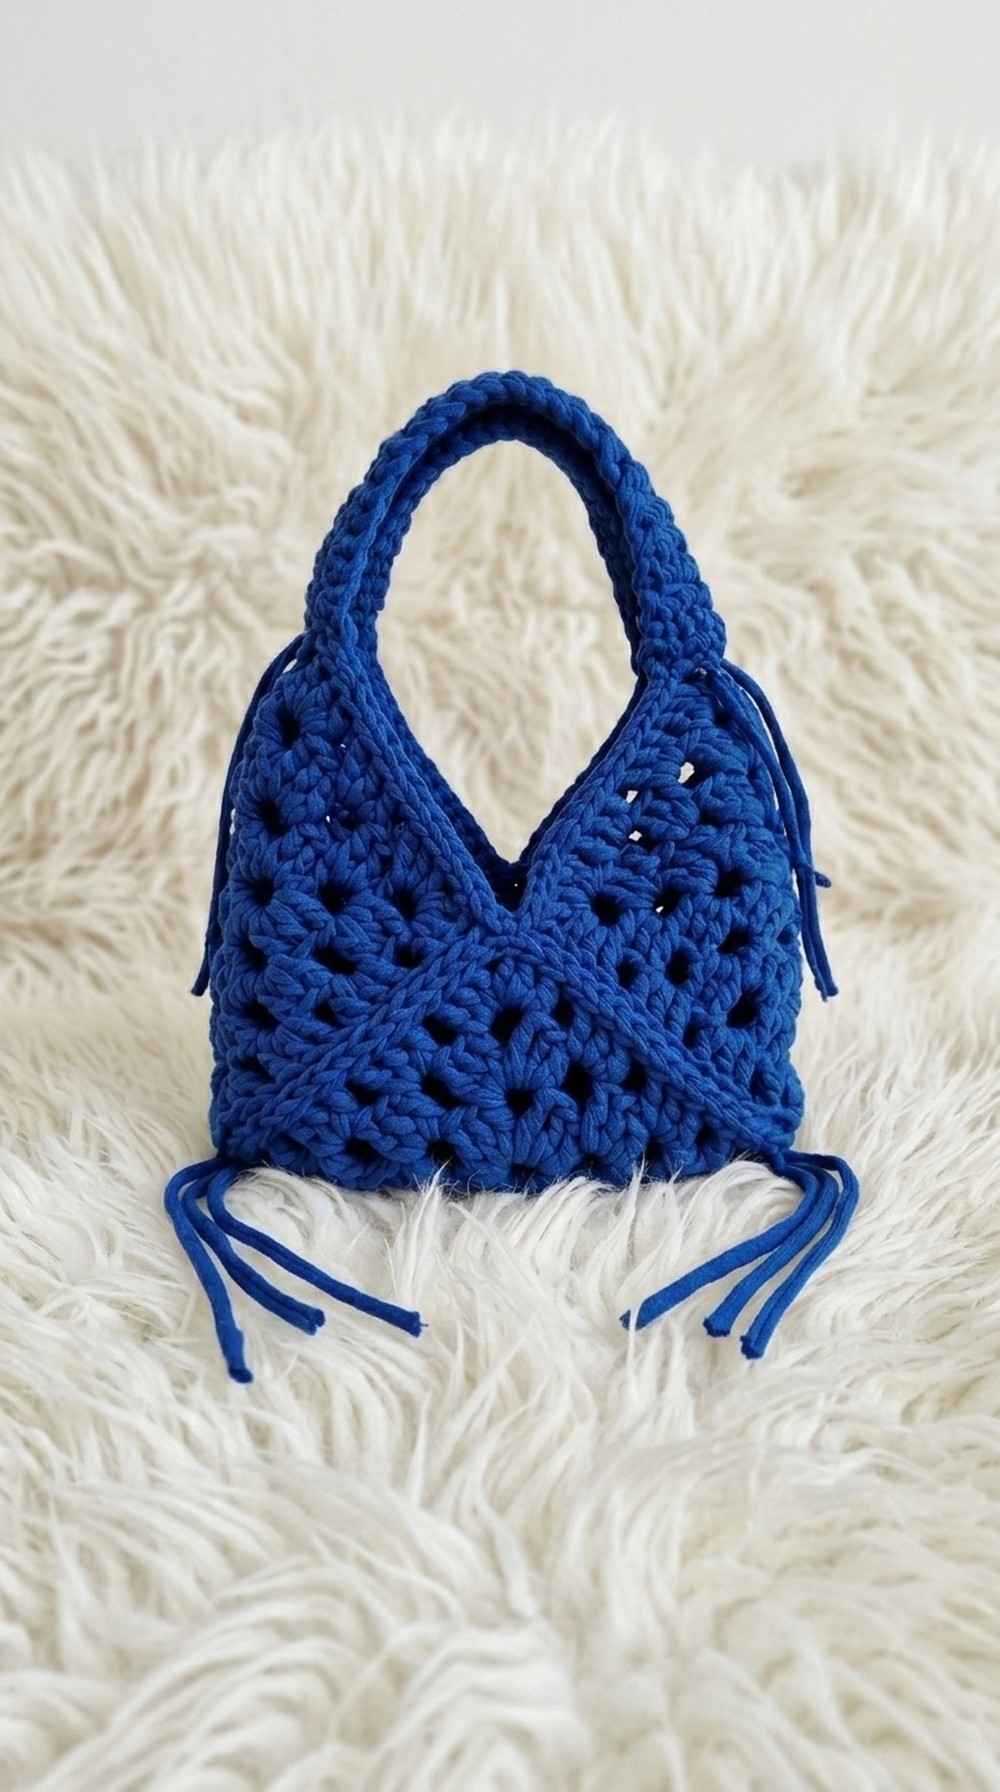
Granny Square T-Shirt Yarn Bag Pattern
Create a trendy and eco-friendly Granny Square T-Shirt Yarn Bag to showcase your crochet skills! This step-by-step pattern will walk you through crocheting your very own bag using granny squares, t-shirt yarn, and basic crochet techniques. You’ll love the versatility and charm of this handmade bag, perfect for daily use or as a thoughtful handmade gift.
Skill Level & Terminology:
Skill Level: Beginner to Intermediate
Terminology Used: US Crochet Terms
Materials & Tools:
- T-Shirt Yarn (Main Color Blue and same the secondary)
- 8 mm Crochet Hook
- Scissors
- Tapestry Needle (for weaving in ends and assembly)
Gauge:
Exact gauge is not critical for this project. However, approximately 2 double crochet stitches per inch is a good standard to follow when using t-shirt yarn and an 8mm hook.
Abbreviations List:
- Ch: Chain
- Sl St: Slip Stitch
- Dc: Double Crochet
- MC: Magic Circle
- St: Stitch
- Sp: Space
Special Stitch Instructions:
Magic Circle (MC): A method to create a tight, adjustable center for your granny squares. To begin, loop the yarn to form a circle, crochet around the loop, and pull tight at the end.
Slip Stitch (Sl St): Insert hook into stitch, yarn over, and pull through all loops on hook to create a smooth join.
Finished Size:
Bag Dimensions (approx.): 14 inches (height) x 14 inches (width) when laid flat. Strap length is customizable.
The Pattern:
Starting the Granny Square:
- Create a Magic Circle (MC):
- Form an adjustable loop with the yarn and hold it securely.
- Round 1:
- Ch 3 (counts as the first Dc).
- Work 2 Dc into the magic circle, followed by Ch 2.
- Create 3 more groups of 3 Dc, each separated by Ch 2. This forms 4 “clusters” within the square.
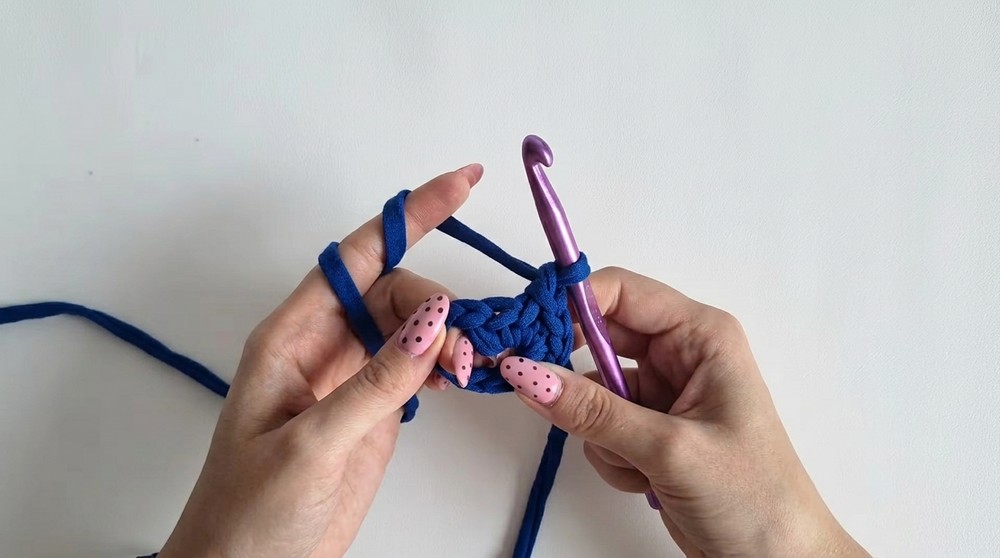
- Pull the MC tightly and secure it with a Sl St in the top of the starting Ch 3.
- Round 2:
- Sl St into the nearest corner space.
- Ch 3 (counts as the first Dc), then work 2 Dc, Ch 2, 3 Dc into the same corner space to form the new corner.
- Move to the next corner space by working Ch 1, then in the corner, crochet 3 Dc, Ch 2, 3 Dc.
- Repeat this process around the square. End the round with Ch 1 and secure with a Sl St.
- Round 3 and Beyond:
- For larger squares, repeat the process above, adding 3 Dc clusters into each new side space and corners with 3 Dc, Ch 2, 3 Dc.
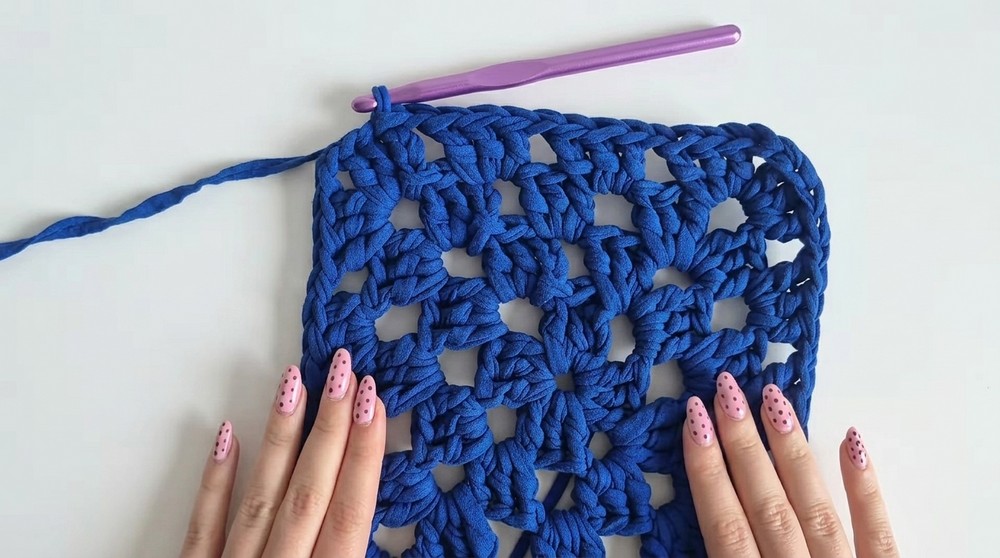
- For larger squares, repeat the process above, adding 3 Dc clusters into each new side space and corners with 3 Dc, Ch 2, 3 Dc.
Tip: Complete enough rounds to grow each granny square to your desired size. For this bag, each granny square should measure approximately 10×10 inches.
Making and Finishing the Granny Squares:
- Repeat Process: Create a total of 3 granny squares using the same method described above.
- Fasten Off: Once complete, fasten off your yarn and weave in any tail ends using the tapestry needle.
Each bag requires three identical granny squares. Work in rounds starting with a magic circle, adding clusters of 3 Dc separated by chain spaces. Grow your square outward until it reaches the preferred size.
Assembling the Bag:
- Initial Placement: Arrange the squares, folding one into a triangle for the base and placing two as the sides.
- Joining Squares:
- Take your secondary yarn color.
- Use a Sl St to join squares along their adjacent edges, working into back loops of the stitches for a neater finish.
- Continue joining all edges until the structure of the bag is fully formed.
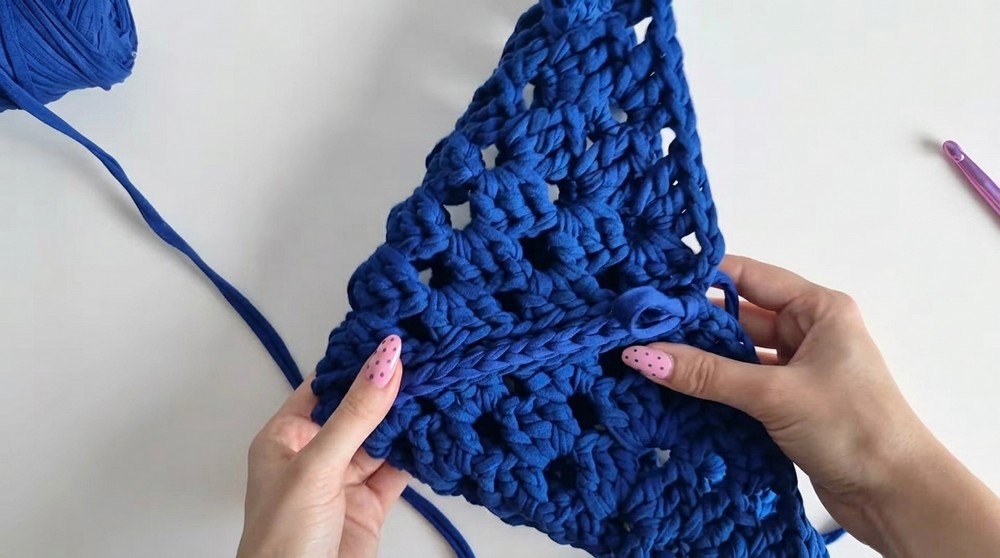
- Reinforce: Once joined, your three squares will form a triangular bag shape.
Fold the granny squares into a triangular bag shape, matching edges. Use a slip stitch with your second yarn color to join squares along their sides.
Adding the Finishing Edge:
- Smooth the Edge:
- Work Sl St around the bag’s top edge, ensuring a neat and polished finish.
- Use only the back loops for a subtle, decorative touch.
- Fasten Off: Cut the yarn and secure with a final pull-through, weaving in ends.
For Non-Readers: Add a sturdy edge to the bag’s opening by crocheting slip stitches around the top. This reinforces the bag’s structure and makes it visually appealing.
Creating & Attaching the Strap:
- Start the Strap:
- Use your secondary yarn color or match the main color.
- In the center of the bag edge, locate and mark 4 stitches for the strap.
- Ch 1 and work 1 Single Crochet (Sc) into each of these 4 stitches for Row 1.
- Build the Strap:
- For Row 2, turn your work and crochet into front loops only to add durability.
- As the strap grows, alternate rows by working into front loops on some rows and through both loops on others. Continue until the desired strap length is reached.
- Attach the Strap:
- Secure the strap to the opposite edge of the bag by working slip stitches to attach 4 corresponding stitches.
For Non-Readers: Mark 4 stitches at the bag top where you wish the strap to begin. Crochet in single stitches to the desired length, then join to the opposite edge.
Optional Decor:
- Fringe or Knots: Add small decorative yarn tassels or fringe to the bag, tying knots wherever you prefer for additional customization.
- Contrast Accents: Use leftover yarn to create contrast details along the corners or edges.
Assembly & Finishing:
- Shape the Bag: Gently stretch and shape the bag by blocking (optional).
- Weave in Ends: Carefully weave in all remaining loose ends for a polished look.
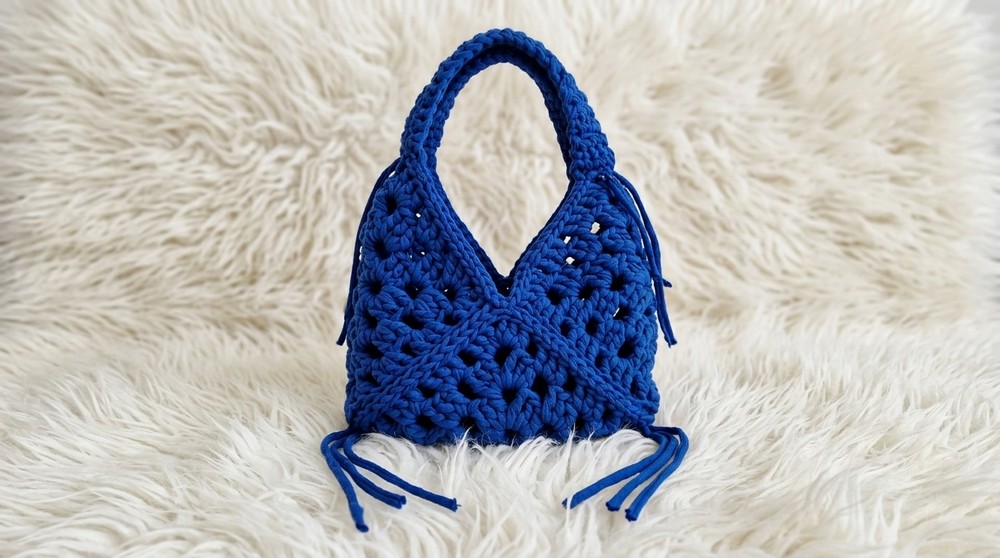
- Personalize: Add tassels, knots, or other embellishments to make the bag unique to you.
About This Pattern:
This easy crochet project uses granny squares, double crochet clusters, and slip stitches to achieve a simple yet stylish bag. The entire pattern can be modified by adjusting colors, adding rows, or changing the strap length. Whether you’re a beginner or seasoned crocheter, this project is a satisfying way to turn scrap yarn into a versatile accessory.