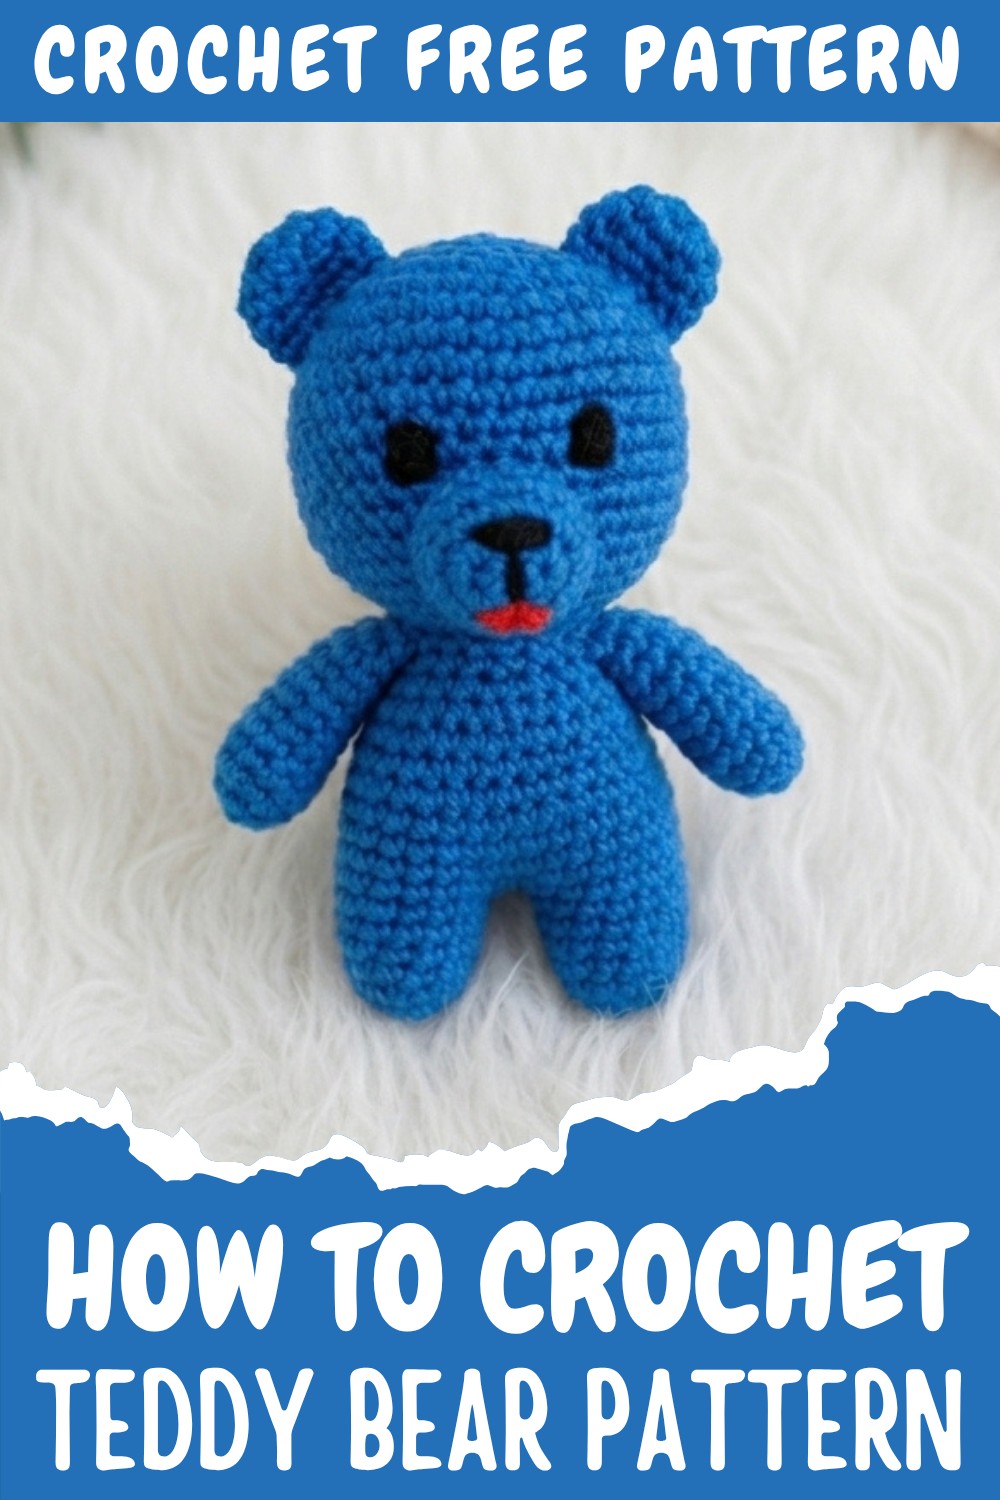
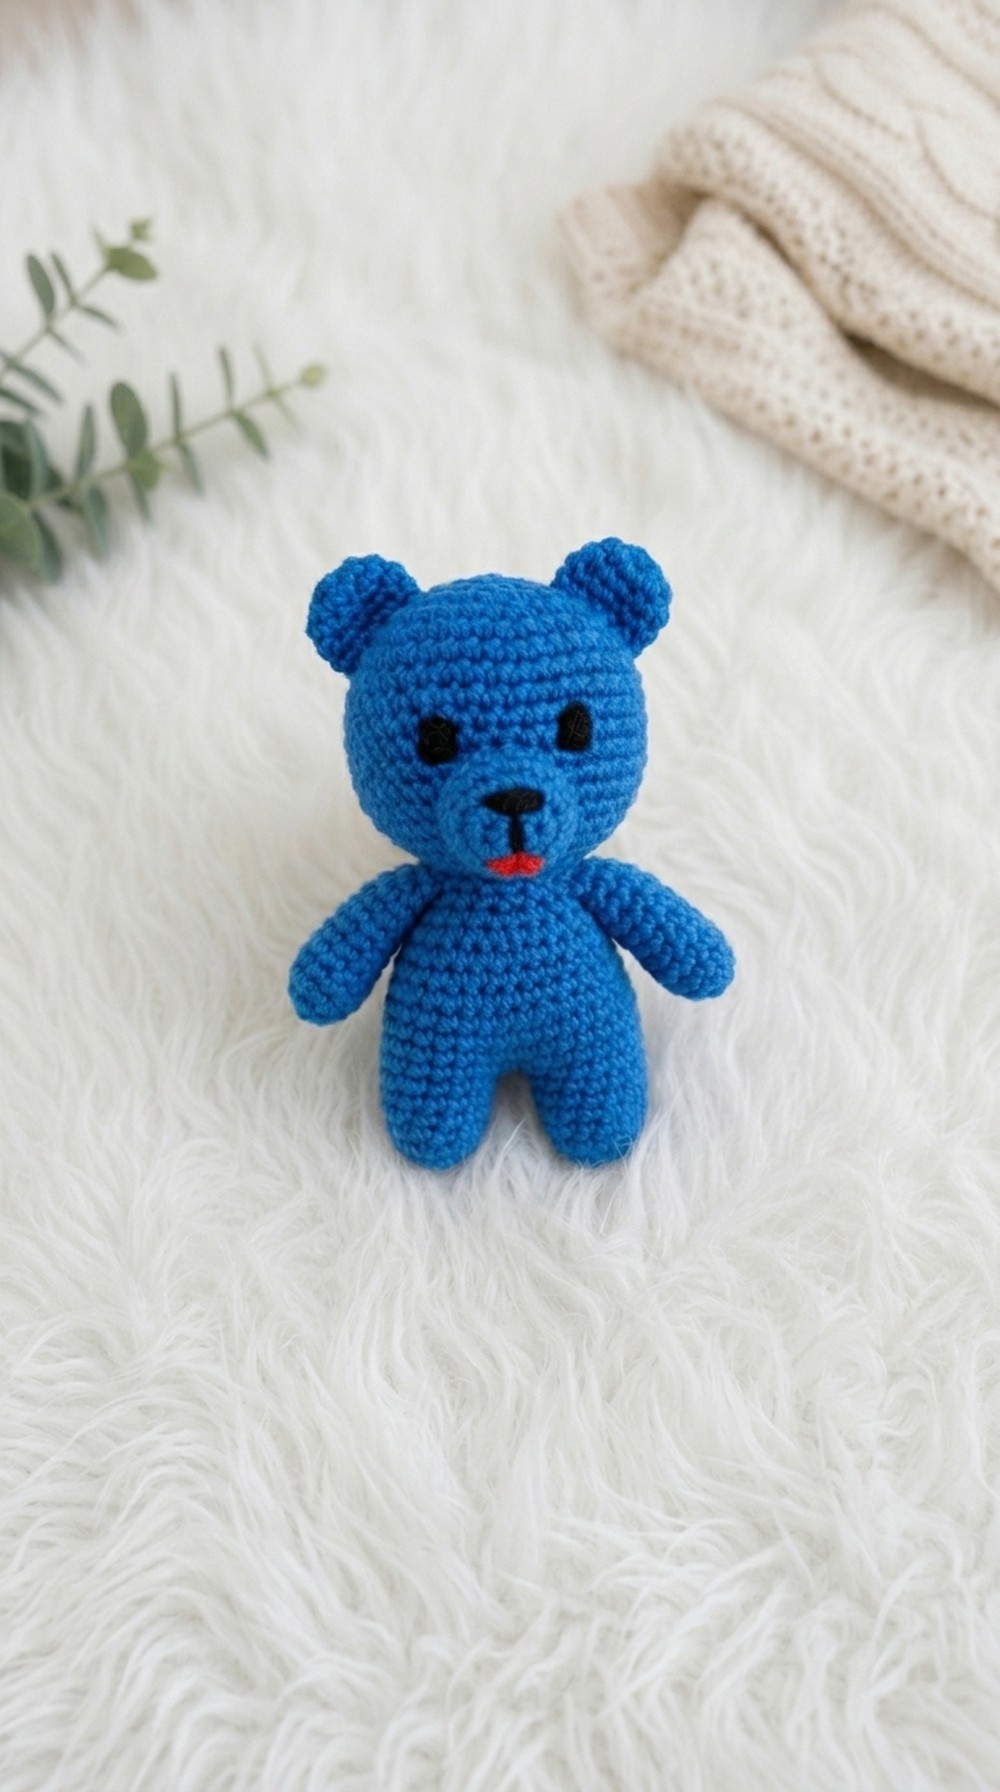
Teddy Bear Free Crochet Pattern with Cute Details
Enjoy cute moments with this Free Crochet Teddy Bear Pattern featuring soft details and lovable style perfect for baby rooms playful decor.
I really love crocheting because it lets me make something unique. Recently I made a crochet teddy bear that turned out cute. If you want a fun project to work on you should try this “free crochet teddy bear pattern”. The best part about this pattern is that you can easily change the colors, sizes and details to make animals like bunnies or puppies. You can make it your own. Add your own ideas to it.
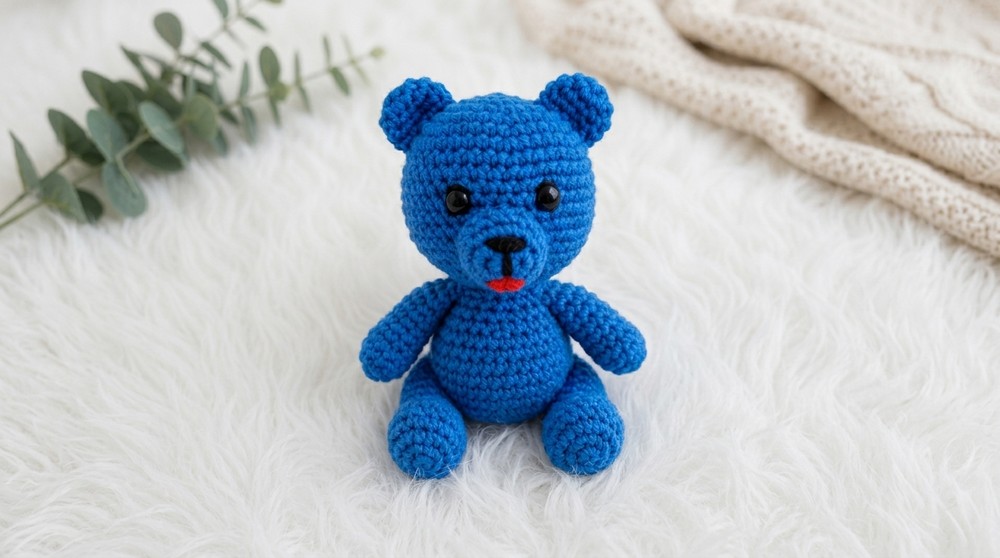
This crochet teddy bear is so cute and cuddly. It has a texture that makes you want to hug it. The bear has rounded arms and legs a little bow and eyes that make it look sweet. It is firm enough to cuddle or display. The stitches are smooth and even. The style is classic so it will always look good. The details that are stitched by hand make it special and different from toys that are made in factories.
This project is great for people who are just starting to crochet. It mainly uses the crochet stitch, which is easy to learn. The pattern shows you how to work in rounds and make the stitches bigger or smaller. It is a way to practice the basic stitches while making a toy that you will love.
Unique Crochet Teddy Bear Pattern for Kids’ Toys
You can give this teddy bear to someone you care about use it to decorate your home or add it to your collection of toys. It is an charming gift. The teddy bear has a lot of personality. You will be proud of yourself when you finish making it. If you like crocheting with yarn and want to make something useful this pattern is a good choice, for your next project.
Cute Teddy Bear Crochet Pattern – Complete Step-by-Step Guide
Create an adorable handmade teddy bear with this detailed crochet pattern. This full pattern will guide you through making every part of the teddy—from head and body to limbs and adorable facial details. Perfect as a gift, toy, or sale item, this teddy is a delightful project for crochet enthusiasts of varying skill levels.
Summary
This charming teddy bear is made using four-ply acrylic yarn and a 3 mm crochet hook. It features classic amigurumi construction techniques such as working in the round using magic rings, increasing and decreasing single crocheted stitches, and detailed finishing for facial features. The finished teddy is plush with well-defined limbs, ears, and a cute tied bow.
Pattern Notes
- Work in US crochet terms throughout the pattern.
- Keep stitches tight and consistent to avoid stuffing showing through.
- Use stitch markers to mark beginning of rounds if desired.
- Take time during shaping limbs and facial parts to ensure balanced and symmetrical features.
- The teddy can be stuffed with fiberfill or suitable stuffing material.
- All pieces are sewn securely to the body for durability.
Skill Level
- Intermediate Beginner – basic knowledge of single crochet, magic rings, increases and decreases, and sewing amigurumi parts required.
Materials
- Four-ply acrylic yarn in three colors:
- Main color for body and bow
- Color for eyes and facial features
- Crochet hook: 3 mm
- Fiberfill stuffing
- Tapestry needle for sewing and embroidering details
- Stitch markers (optional)
- Scissors
Measurements
- The finished teddy’s height and width depend on tension; typically a small, cuddly toy ideal for gifting or children’s play.
- Proportions mimic classic teddy bears with rounded body, limbs, and a tied bow adornment.
Gauge and Stitch Pattern Tips
- Gauge swatch is recommended but not critical; aim for tight stitches to create defined shapes.
- All parts use single crochet (sc) in rounds or rows based on instructions.
- Work increases and decreases evenly to shape spheres and cylinders for body parts.
- Use magic ring starts to avoid holes.
Stitch Abbreviations
- sc = single crochet
- inc = increase: 2 single crochet in one stitch
- dec = decrease: single crochet two stitches together
- mr = magic ring
- sl st = slip stitch
- ch = chain
Special Stitches
- Magic Ring (mr): Form adjustable ring as foundation to work rounds without holes.
- Increase (inc): Crochet two single crochets in the same stitch.
- Decrease (dec): Crochet two stitches together to reduce stitch count, shaping the body parts nicely.
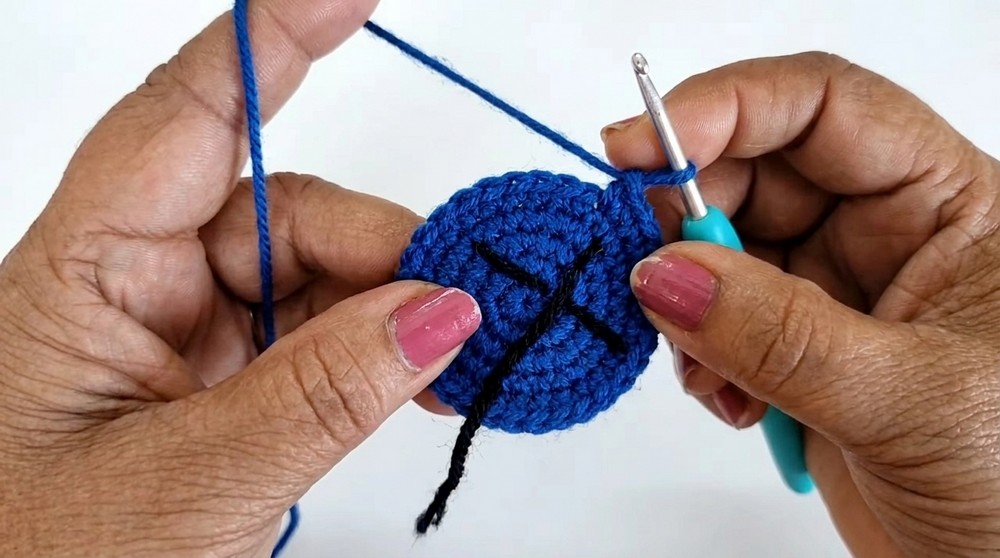
The Crochet Pattern!
Head & Face
Round 1:
- Make a magic ring (mr), crochet 6 sc into the ring. Pull the tail tightly to close.
- Join with a slip stitch to the first sc.
Round 2:
- Inc in every stitch around. (12 sc)
- Place a stitch marker at start.
Round 3:
- Inc in first stitch, sc in next stitch repeat around. (18 sc)
Round 4:
- Inc in first stitch, sc in next two stitches repeat around. (24 sc)
Round 5:
- Inc in first stitch, sc in next three stitches repeat around. (30 sc)
Round 6:
- Inc in first stitch, sc in next four stitches repeat around. (36 sc)
Round 7:
- Inc in first stitch, sc in next five stitches repeat around. (42 sc)
Rounds 8–15:
- Work 42 sc in each round to create height and bulk for the head.
Round 16 (Decrease begins):
- Sc 5 stitches, dec 1 repeat around. (36 sc)
Round 17:
- Sc 4 stitches, dec 1 repeat around. (30 sc)
Round 18:
- Sc 3 stitches, dec 1 repeat around. (24 sc)
Round 19:
- Sc 2 stitches, dec 1 repeat around. (18 sc)
Round 20:
- Sc 1 stitch, dec 1 repeat around. (12 sc)
Round 21:
- Dec 1 repeat to close.
Finish off leaving a long tail for sewing. Stuff the head firmly.
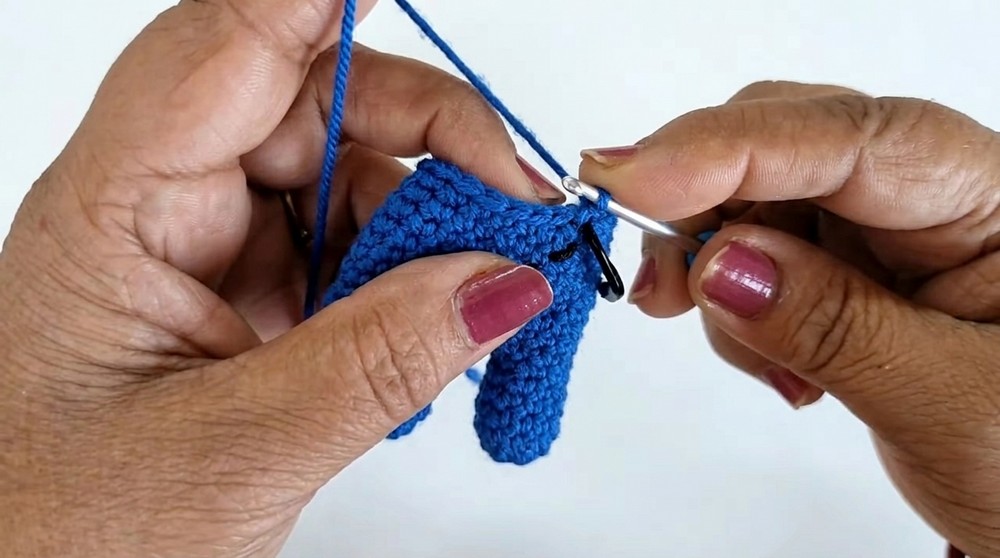
Hands (Make Two)
Round 1:
- Make a magic ring, crochet 5 sc inside.
Round 2:
- Inc in every stitch around to make 10 stitches total.
Rounds 3–8:
- Work 10 sc evenly to create the hand length.
Round 9:
- Decrease 2 stitches per round until you reach 8 sc.
Finish off leaving a tail for sewing. Stuff lightly.
Repeat for second hand.
Ears (Make Two)
Round 1:
- Make a magic ring, crochet 6 sc inside.
Round 2:
- Inc in every stitch to make 12 sc.
Rounds 3–6:
- Work 12 sc evenly.
Finish off, leave tail to sew. Make two ears.
Body
Round 1:
- Start with a magic ring, crochet 6 sc inside.
Round 2:
- Inc in every stitch (12 sc).
Round 3:
- Inc, sc repeat around (18 sc).
Round 4:
- Inc, sc, sc repeat (24 sc).
Round 5:
- Inc, sc, sc, sc repeat (30 sc).
Round 6:
- Inc, sc, sc, sc, sc repeat (36 sc).
Round 7:
- Inc, sc x5 repeat (42 sc).
Rounds 8–15:
- Work 42 sc each round for length.
Round 16:
- Decreasing rounds to shape waist and bottom:
Sc 5, dec 1 (36 sc).
Round 17:
- Sc 4, dec 1 (30 sc).
Round 18:
- Sc 3, dec 1 (24 sc).
Round 19:
- Sc 2, dec 1 (18 sc).
Round 20:
- Sc 1, dec 1 (12 sc).
Round 21:
- Dec 1 to close. Stuff firmly.
Bow Tie
- Wrap yarn twice, tie a knot, shape into a bow.
- Sew or glue onto the neck area to adorn the teddy.
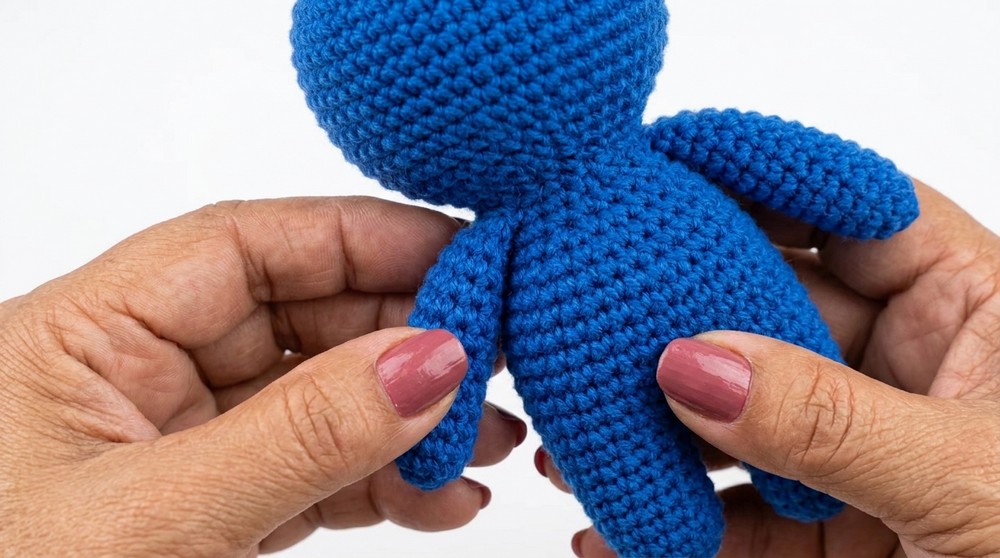
Assembly and Finishing
- Sew the head securely onto the body.
- Sew each hand on either side of the body.
- Attach ears symmetrically to the head.
- Embroider face details (eyes, nose, mouth) with contrasting yarn or thread.
- Stuff limbs firmly but pliable.
- Add bow tie as a beautiful finishing touch.
Finished Size
- The approximate teddy size is compact and cuddly, suitable for children and gifting purposes.
- Exact dimensions depend on yarn, tension, and stuffing.
Final Notes
- Maintain consistent stitch tension for a neat finish.
- Use a yarn needle to weave in ends securely.
- Adjust stuff firmness as desired for a softer or firmer teddy.
- This pattern is versatile—customize colors and embellishments for unique bears.
- Perfect for gifts, décor, or selling as handmade crafts.
Summary
- Begin with magic rings and work in single crochet rounds.
- Increase stitches evenly to shape spherical parts.
- Decrease evenly to taper limbs and head.
- Crochet separate pieces for body parts and assemble with sturdy sewing.
- Embroider facial expressions carefully for best effect.