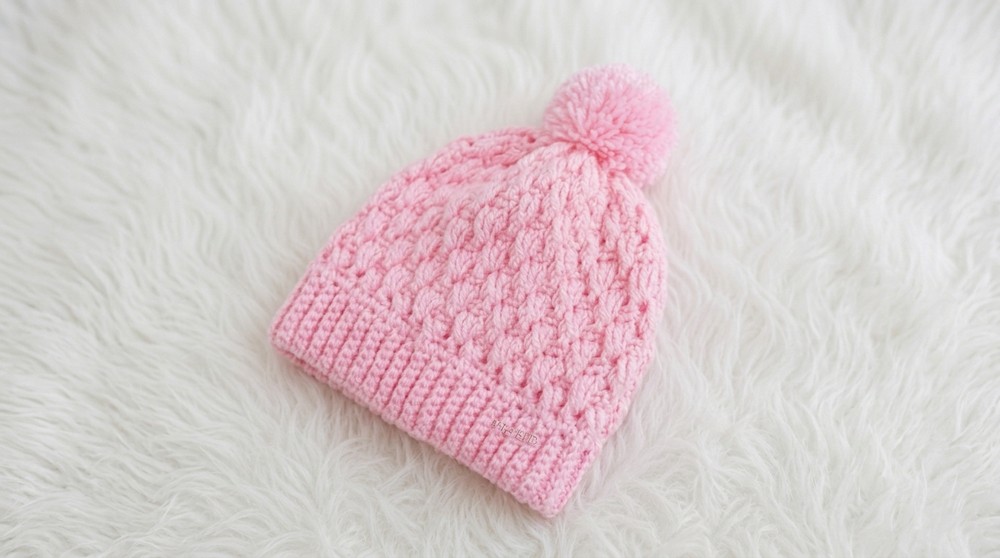
Free Crochet Beanie Pattern for Colorful Seasonal Accessories
Instantly boost your look using the Free Crochet Beanie Pattern for a touch of handmade charm and everyday comfort.
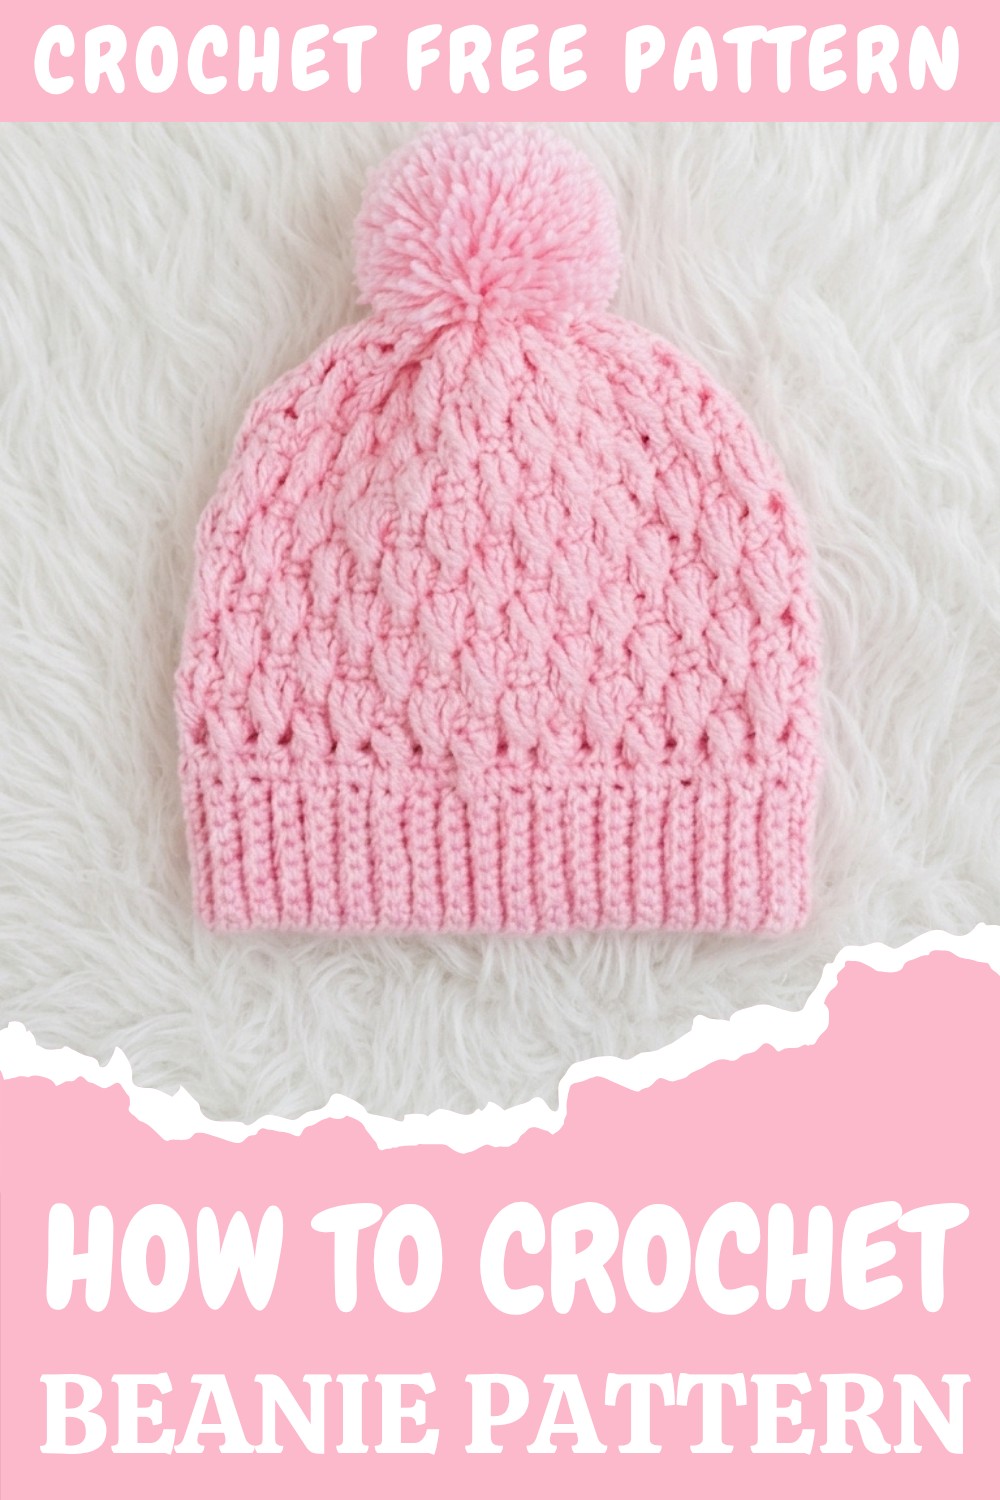
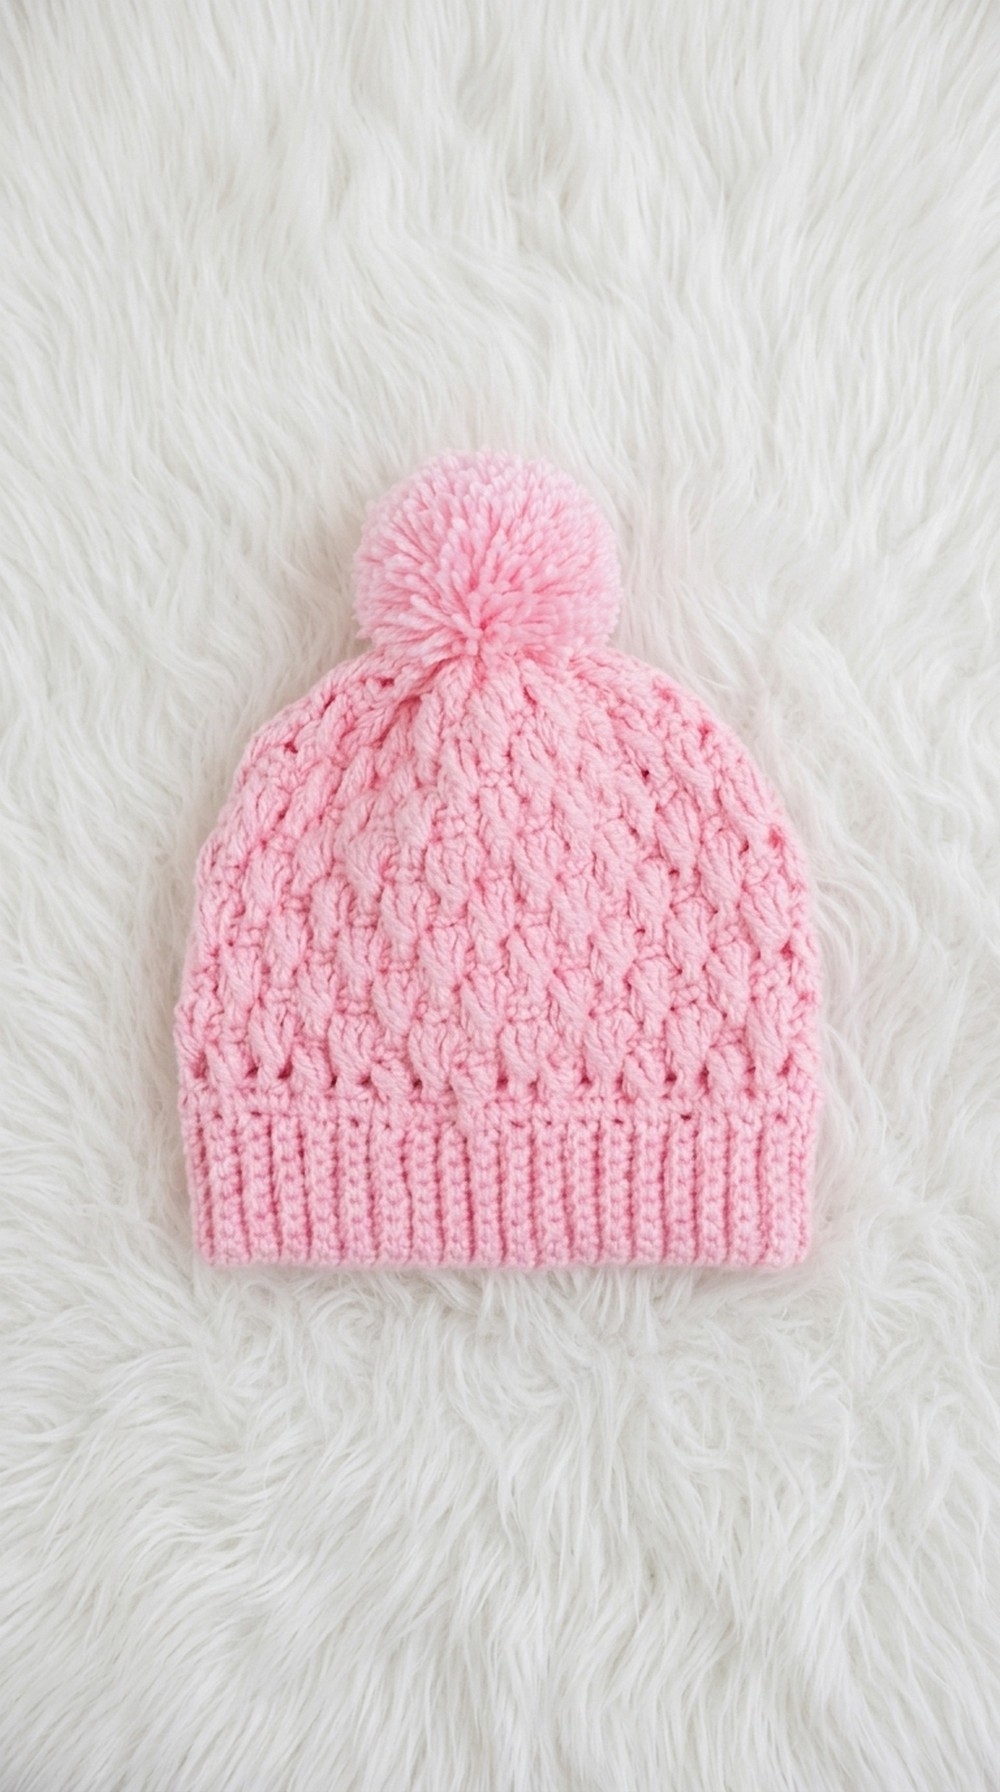
There’s something magical about crocheting a cozy beanie with your own hands. This textured crochet beanie pattern offers just the right balance of style and functionality! The intricate raised design gives the hat a stunning 3D effect, making it look chic yet so practical for everyday wear. Whether you use soft neutral tones for a classic winter vibe or playful, vibrant colors to brighten chilly days, this versatile pattern is tailored to fit everyone—from newborns to adults. You can even add a playful pom-pom at the top for that extra charm! It’s not just a hat; it’s a stylish accessory you’ll love wearing or gifting to your loved ones.
Smart Crochet Beanie Free Pattern for Easy Beginner Projects
The pattern uses a combination of single crochet (sc), double crochet (dc), and relief stitches, which create a textured ribbing throughout. These relief stitches add a lot of structure and depth to the fabric, giving the beanie a polished, professional look. Plus, the ability to modify the size means you can crochet beanies for the whole family, no matter their age. Whether you’re a beginner or an experienced crocheter, this project is straightforward and fun, making it the perfect weekend crochet project.
What Else Can You Create from This Pattern
- Slouchy Beanies: Add extra rows before decreasing for a trendy, oversized look.
- Headbands: Use the textured band design for cozy ear warmers.
- Matching Scarves: Continue the stitch pattern to crochet a beautiful matching set.
- Baby Caps: Simply resize the initial band for newborn or toddler versions.
Why You’ll Love Crocheting This Pattern
- Customizable for all sizes and ages.
- Perfect for gifts, donations, or personal use.
- Fun and creative techniques that beginners can quickly master.
Textured Crochet Hat Pattern With Pom-Pom
This detailed pattern will guide you through making a textured hat suitable for a range of sizes, from newborn to adult. The stitch creates a beautiful raised texture, making this hat perfect for chilly days and occasions. Follow step-by-step instructions for crocheting the hat and adding a pom-pom for extra style.
In this pattern, you will learn to crochet a textured hat step-by-step, complete with instructions for sizing between newborn and adult. This pattern boasts bold raised stitch details, giving the hat a unique, attractive texture. A pom-pom at the top completes the playful and stylish look.
Skill Level:
Beginner-friendly (with basic crochet knowledge)
Crochet Terminology Used:
US Terminology
Materials & Tools
- Yarn: 100g of wool (3–4 mm thick) – opt for yarn with visible texture for better results.
- Hook: 4.5 mm crochet hook.
- Yarn needle: For sewing and finishing.
- Pom-Pom Maker (or a cardboard piece measuring approximately 9 cm long).
- Scissors: For trimming yarn tails and pom-pom finishing.
Gauge
- 4 stitches by 4 rows = 2 cm using single crochet (sc). Gauge checks are essential to ensure the correct hat size.
Abbreviations List
- ch: Chain
- sc: Single crochet
- dc: Double crochet
- relief dc: Raised double crochet (working around the previous round’s post)
- sl st: Slip stitch
- rep: Repeat
Special Stitch Instructions
Relief Double Crochet (Relief dc)
Work the double crochet around the post of the previous round’s stitch instead of into the top loops as usual. This creates the raised texture.
Finished Size
Circumference:
- Child (4–10 years): 50 cm
- For other sizes: Follow size adjustments in Section 2.
Height:
- Approximately 16 cm before closing the hat.
What You Will Learn from This Pattern
- How to create a stretchy band using single crochet stitches in the back loop.
- Techniques for crocheting relief stitches to create texture and patterns.
- How to decrease seamlessly to close the crown of the beanie.
- Optional steps for attaching a pom-pom securely and neatly.
Pattern Instructions
1. Hat Band
- Work the foundation chains:
- Make a slip knot and chain 9 ch for the child size (adjust: 6–8 chains for smaller sizes; 12–15 chains for adult size).
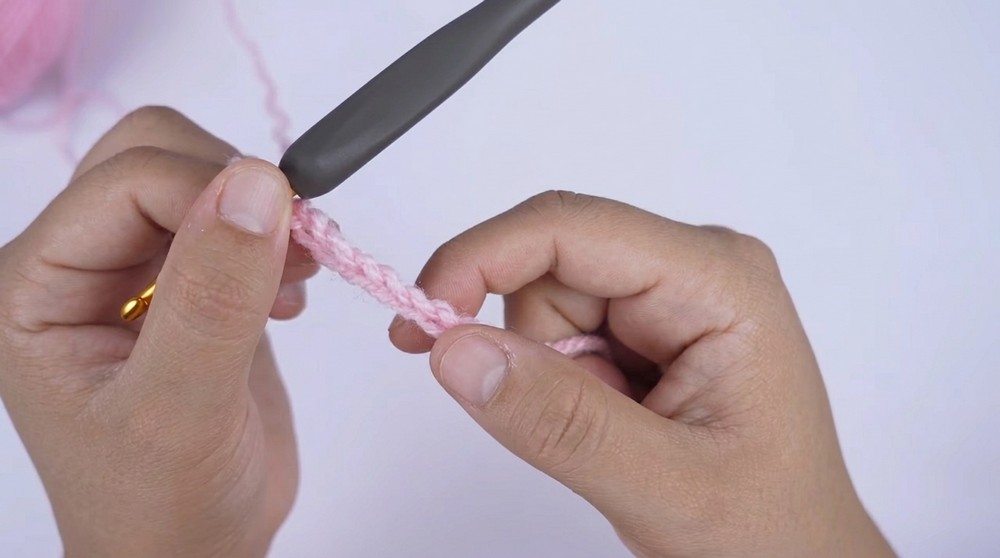
- This determines the band’s width!
- Make a slip knot and chain 9 ch for the child size (adjust: 6–8 chains for smaller sizes; 12–15 chains for adult size).
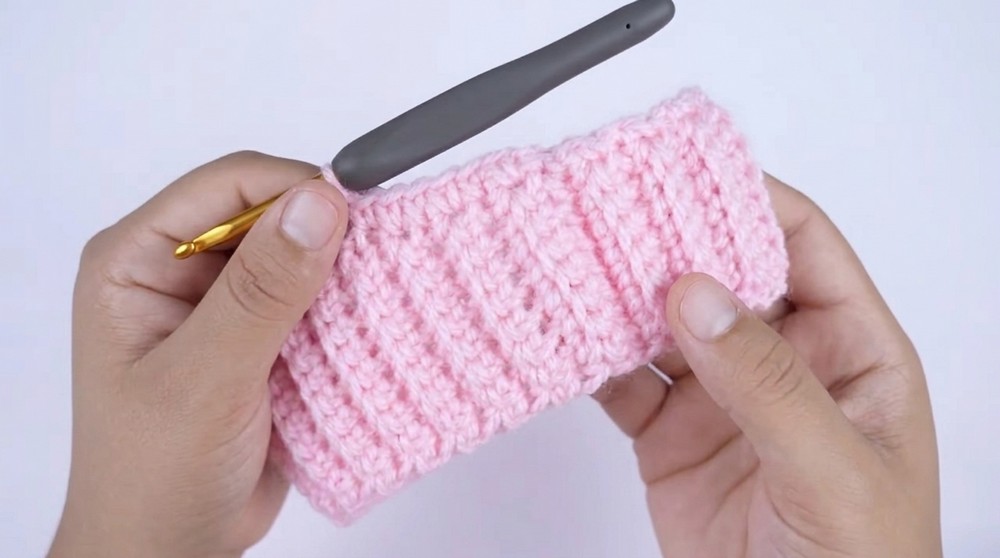
- Create the ribbing:
- Return to the second chain (from the hook) and crochet 1 sc in each ch across (8 sc total).
- Ch 1, turn your work.
- To create the textured ribbing, make 1 sc through the back loop only (BLO) for every stitch, except at the first and last stitch of each row—work these stitches normally through both loops.
- Continue working BLO sc rows until the band measures 50 cm in circumference for 4–10 years. Count rows in multiples of 4 (76 rows recommended).
- Closing the band:
- Fold the band’s ends together and align the stitches.
- Use sl st to join both ends of the band. Avoid pulling too tightly!
Start by creating a ribbed band using single crochet stitches worked in back loops only. Once you finish the desired number of rows, close the band to form a circle.
2. Hat Body
- Foundation row:
- Insert your hook into the edge of the band. Crochet 1 sc evenly into every ribbed edge (ensure you don’t add or skip stitches).
- Sl st to join the round.
- Insert your hook into the edge of the band. Crochet 1 sc evenly into every ribbed edge (ensure you don’t add or skip stitches).
- Texture pattern:
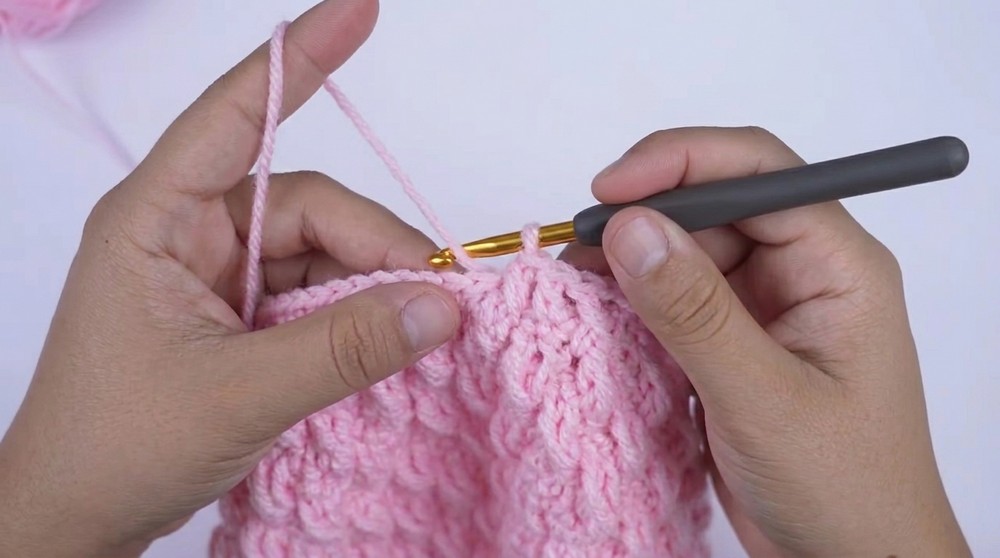
Begin the raised stitch design.- Round 1:
- Ch 2, skip the first stitch. Crochet 1 relief dc around the post of the next stitch.
- Continue alternating between:
- 3 relief dc into every second stitch
- 1 dc between relief groups.
- Repeat this pattern until you finish the round. Make sure it ends with a relief dc group.
- Round 1:
- Alternate rows:
- Next round: Crochet 1 sc in every stitch across.
- Continue alternating between raised stitch rounds and single crochet rows. Remember that the raised stitch placement will alternate in each repeat:
- Relief dc groups will be placed where dc stitches were before.
- Dc stitches will be placed where relief dc groups were before.
- Work this pattern sequence until the height of the hat (from the band) measures 16 cm before decreases.
To make the hat’s body, use alternating rows of textured stitches and single crochet. Textured rows consist of double crochet and raised double crochet worked in groups. Repeat the alternation until the desired height is reached.
3. Decrease Rows
Begin decreasing to shape the top.
- First decrease row:
- Instead of 3 relief dc in a group, crochet only 2 relief dc.
- Follow the established texture pattern, reducing stitches evenly.
- Second decrease row:
- Continue reducing relief dc groups from 2 relief dc to only 1 relief dc.
- Maintain alternation with single crochet rows between decrease rounds.
- Continue reducing relief dc groups from 2 relief dc to only 1 relief dc.
- Final decrease row:
- Crochet 1 relief dc followed by 1 standard dc. Repeat this until the round closes.
Closing the top of the hat:
- Once fully decreased, leave a long yarn tail and use a yarn needle to sew through each remaining stitch. Pull tightly to close the top and stitch over the opening for added security.
If you don’t read patterns:
When decreasing, reduce the raised stitch pattern to fewer stitches per group in each new round. After enough rounds, close the top by pulling yarn through remaining stitches.
4. Adding the Pom-Pom
- Create a pom-pom using either a pom-pom maker or a cardboard cutout measuring 9 cm in length.
- Tie the pom-pom onto the center of the hat using the two tails left after closing the top. Ensure it’s securely fastened.
Optional: Add a logo tag or decorative piece next to the brim for personalization.
If you don’t read patterns:
Attach a pom-pom at the top of the hat after sewing it securely closed. You can make the pom-pom easily using a piece of cardboard.
Assembly & Finishing
- Weave in all yarn tails.
- Block lightly if desired for neatness.
Starting & Stitches Used
This pattern begins with a ribbed band made from rows of single crochet worked in back loops only. The hat body alternates between single crochet rows and raised double crochet textures until decreases shape the crown. Pom-poms and other finishes add fun customization!
Enjoy crocheting this beautiful hat that combines creativity and cozy texture—perfect for gifting or personal use! If you have questions or feedback, let me know in the comments.