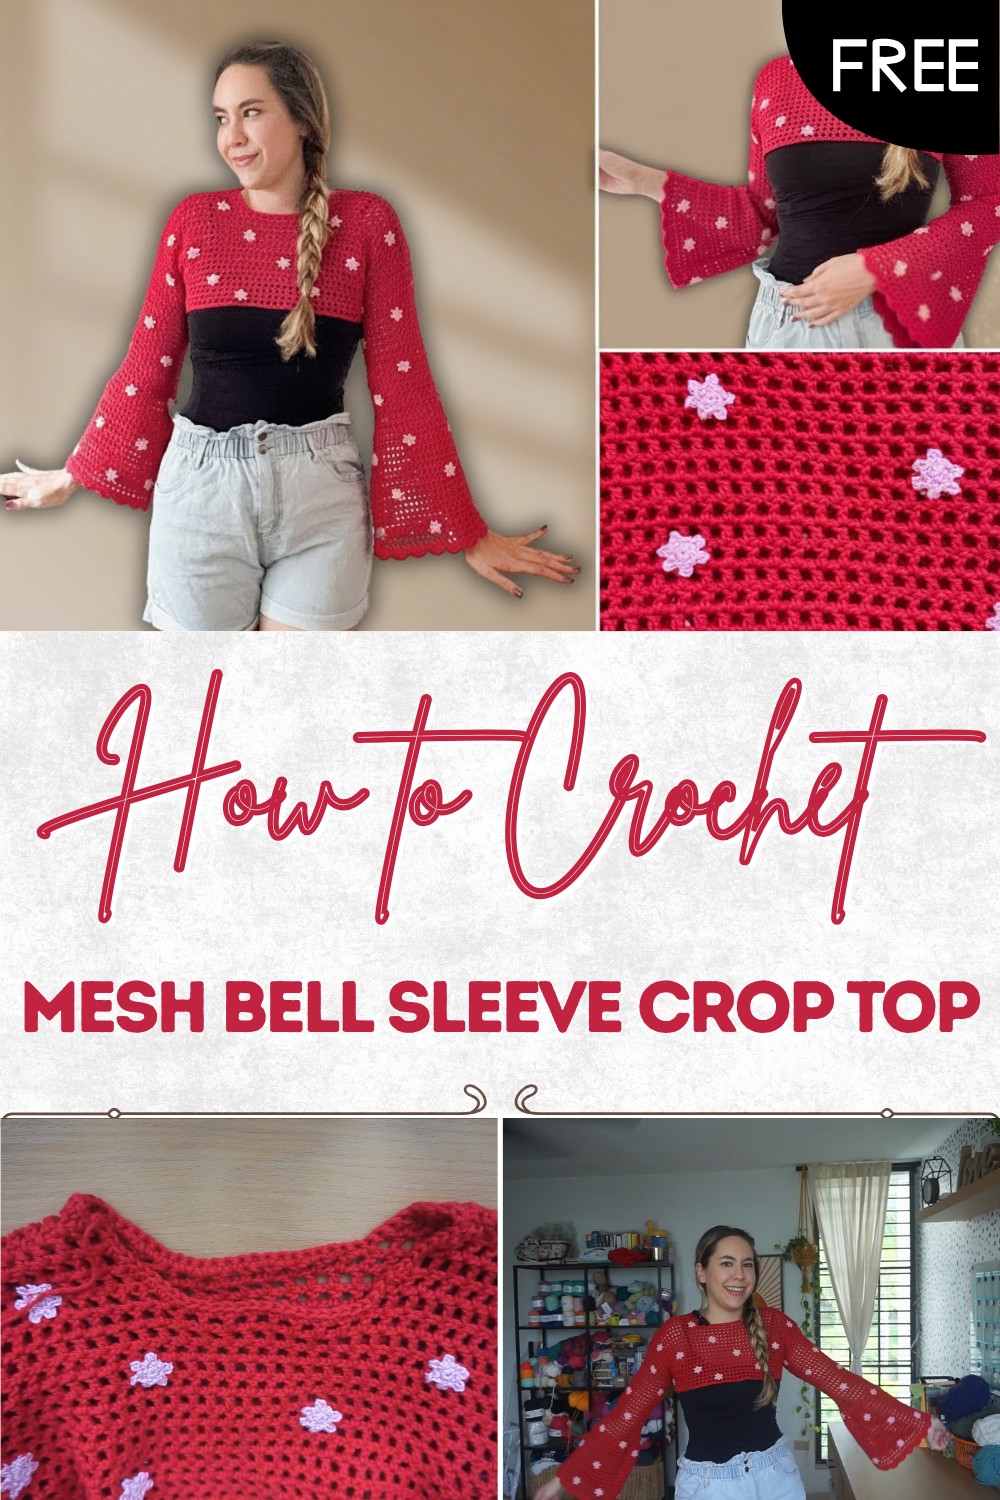
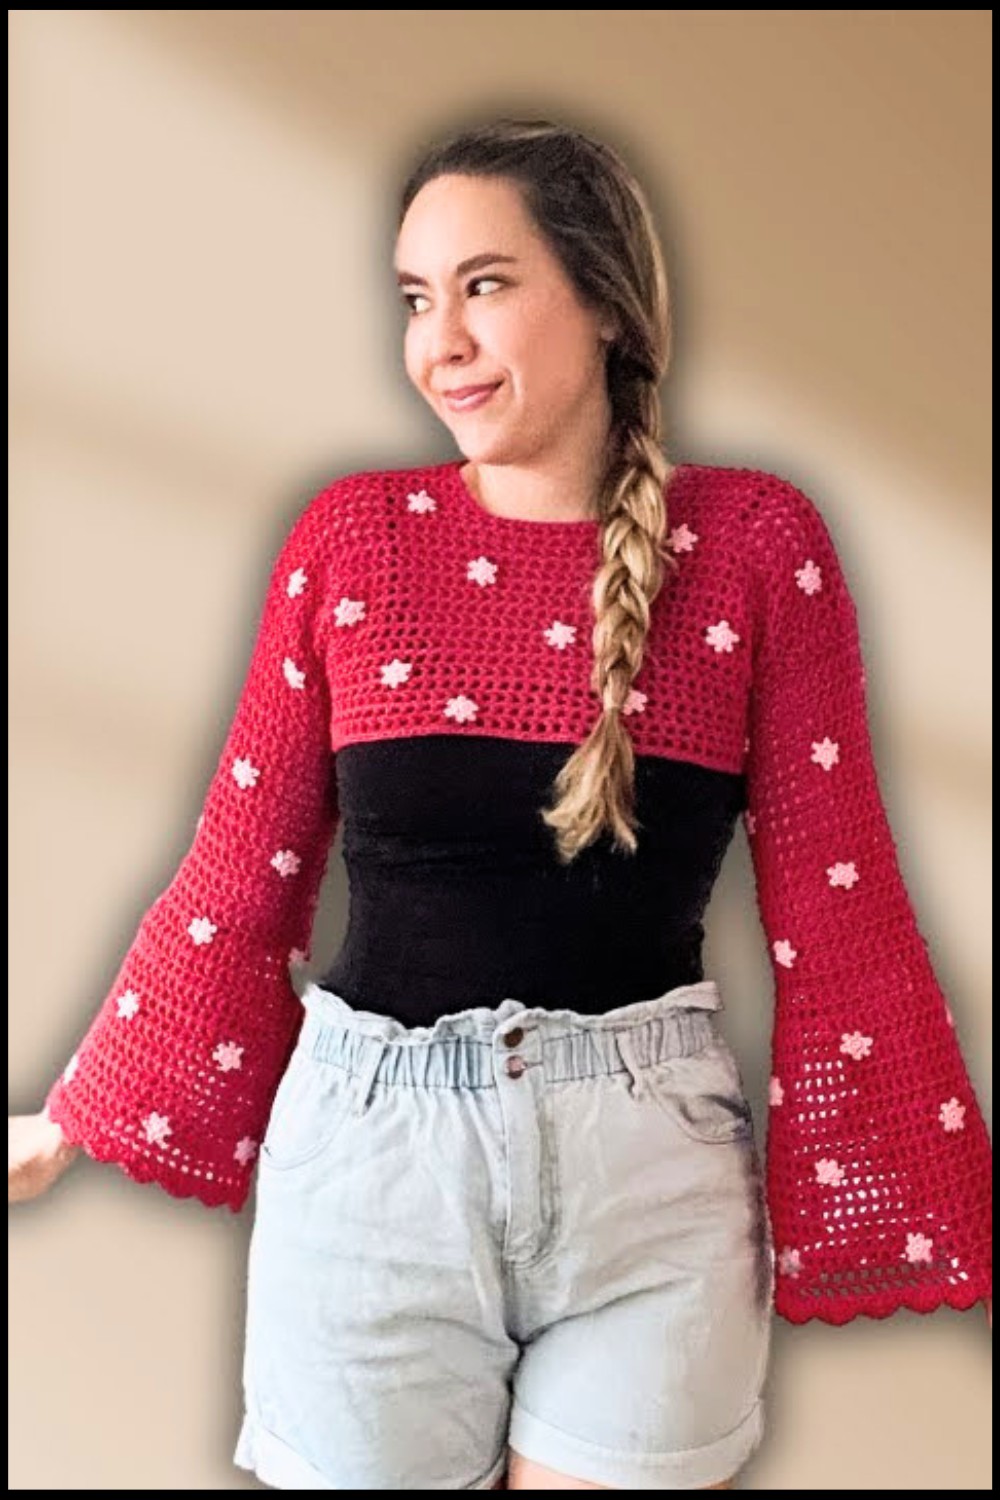
Simple Mesh Bell Sleeve Crop Top – Free Crochet Pattern
Feel the breeze with free crochet mesh bell sleeve crop top pattern that’s for all skill levels and perfect for a stylish and summer look.
Imagine a top that feels as light as a gentle breeze against your skin turning everyday moments into something special. Flowing bell sleeves set this piece apart adding style that catches the eye and comfort that welcomes every movement. The crochet mesh bell sleeve crop top pattern is designed for those who love both beauty and ease offering an open airy design that keeps you cool and comfortable. Its lovely mesh look is not only pretty but stretches to fit different shapes making everyone feel included and stylish.
Easy Free Crochet Pattern: Mesh Bell Sleeve Crop Top
This unique top goes well with any bottom—try it with your favorite pants or a skirt and see how it fits so many occasions. Bright colors or soft shades shine through the open stitches making your outfit pop in every setting. Gentle on skin and simple to make the crochet mesh bell sleeve crop top pattern brings a fresh joyful feeling to casual days or festive events letting you celebrate your creativity every time you wear it.
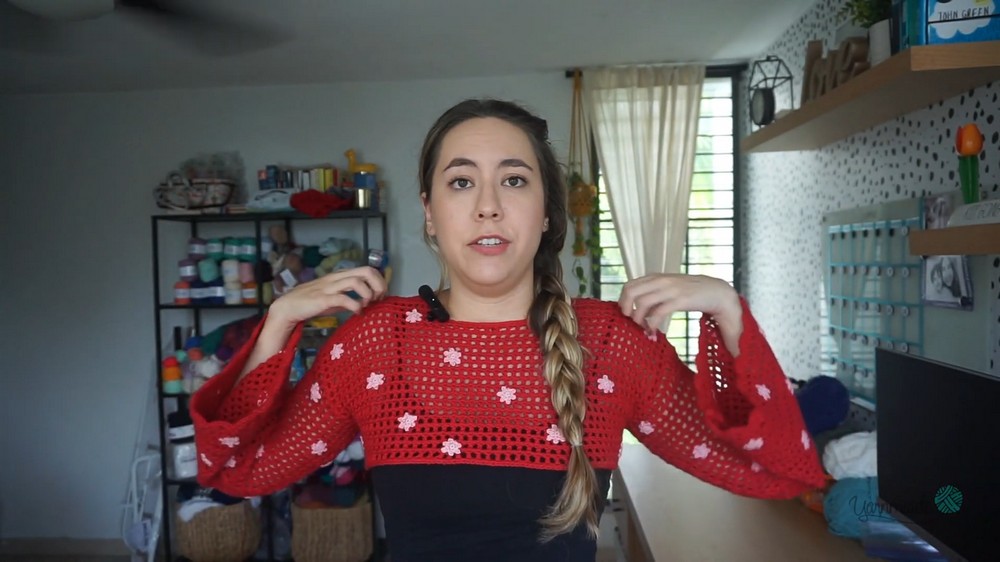
Flower Bell Sleeve Cropped Sweater
Materials
- Yarn:
- Worsted weight cotton yarn (sample: from “We Crochet”) for main panels and sleeves
- Super fine yarn or embroidery thread for flower appliqués
- Hook: 4.5 mm crochet hook (main panels/sleeves)
- Notions:
- Yarn needle (for sewing seams and appliqués)
- Stitch markers
- Scissors
Key Abbreviations (US Terms)
| Abbreviation | Meaning |
|---|---|
| ch | chain |
| sc | single crochet |
| dc | double crochet |
| sl st | slip stitch |
| rep | repeat |
| st(s) | stitch(es) |
Special Notes
- Panel and sleeve lengths: All chains are adjusted by measuring your body—shoulder-to-shoulder for panels, arm circumference for sleeves.
- Base chain: All foundation chains must be a multiple of 2 plus 3 (e.g., 88 + 3 for the sample).
- Bell sleeve expansion: Bell sleeves are achieved by doubling dc clusters in every other stitch at the elbow.
- Flowers: Simple magic ring motif, sewn on after panels are complete.
Pattern
Main Panels (Make 2—Front & Back)
1. Foundation
- Measure shoulder-to-shoulder (or desired width).
- Work a base chain: multiple of 2, then add 3 (e.g., 88 + 3).
- Ch to desired length.
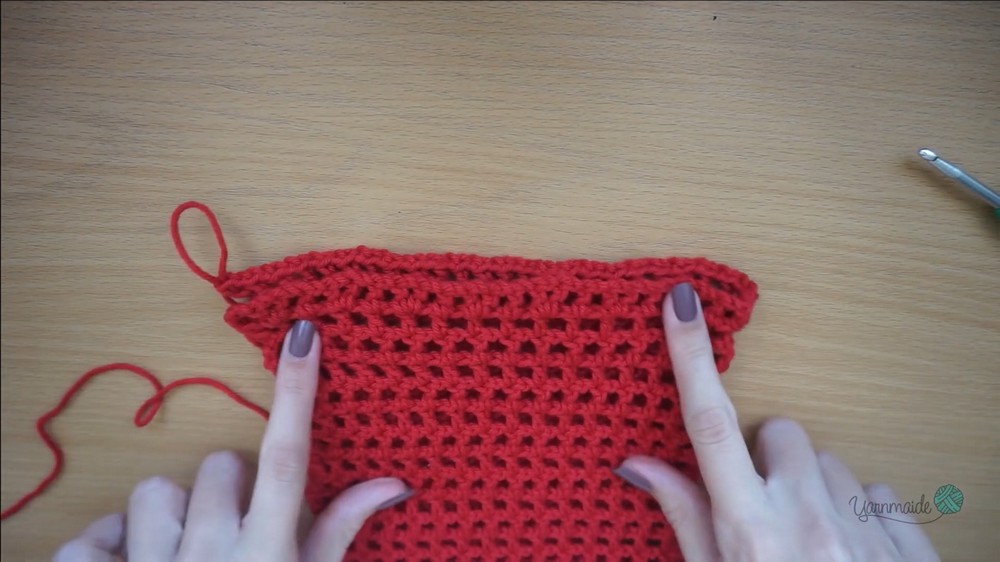
2. Row 1 (Mesh Pattern)
- Skip first 5 ch (counts as first dc and ch-1 space).
- Dc in next ch, ch 1, skip 1 ch, dc in next ch; rep across.
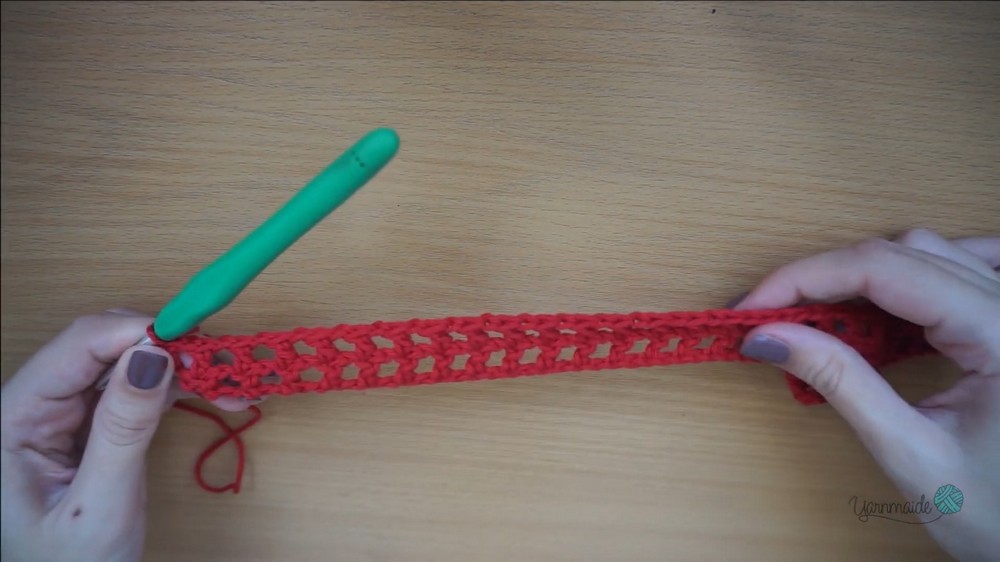
3. Row 2
- Ch 4 (counts as dc + ch 1), turn.
- Dc in next dc, ch 1, skip 1, dc in next dc; rep across.
4. Row 3+
- Rep Row 2 until the panel covers half your chest/bust (as desired).
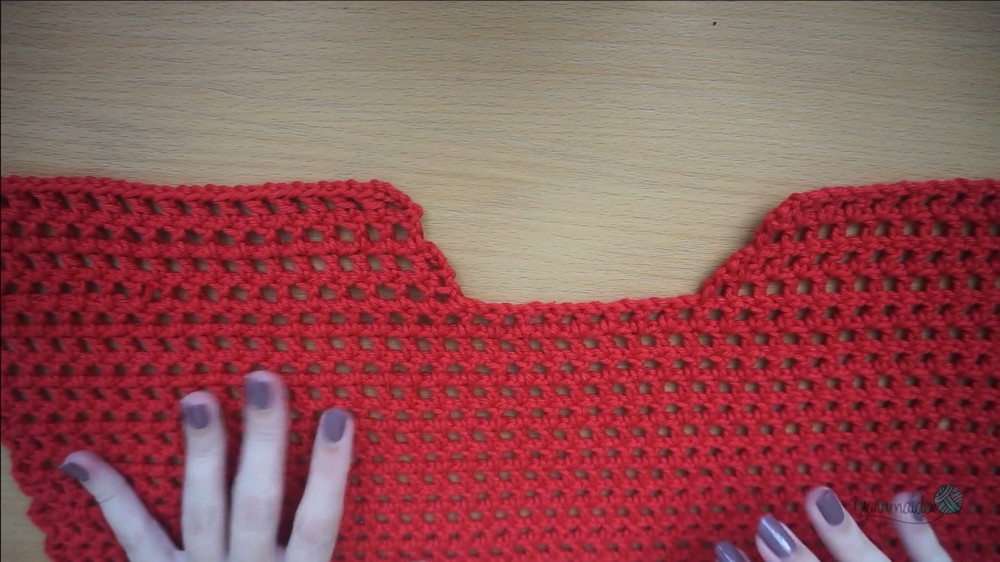
Creating the Neckline
- Fold one panel in half; mark center with stitch marker.
- Try panel against your neck as a guide; mark neckline width (neck hole should be smaller than actual neck circumference for nice fit).
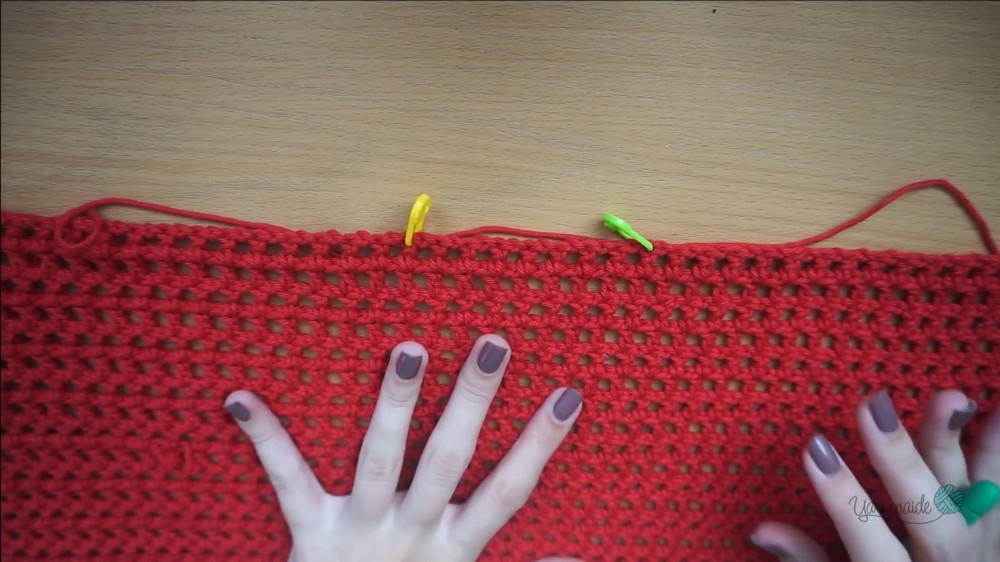
- To shape neckline, when you reach the stitch marker row:
- Work row as usual, stopping at marker.
- In the last 2 sts (dc + ch-1 space), omit ch-1: work only 1 dc.
- Next row: Ch 3 (counts as dc), no chain, dc in adjacent st, then resume mesh pattern.
- Alternate neckline decreases every other row until desired shaping is achieved (e.g., 4 rows of shaping).
- Fasten off.
- Rep neckline shaping at opposite panel edge.
Sleeves (Make 2)
1. Sleeve Foundation
- Determine arm circumference (measure and add 2–3” for ease).
- Ch a multiple of 2 plus 3 (e.g., 64 + 3).
- Begin mesh pattern as for main panels.
2. Lower Sleeve (Straight)
- Rep mesh pattern rows until sleeve reaches elbow (sample: 22 rows).
3. Bell Sleeve Increase
- Next row: Ch 4, turn.
- In first dc: (dc, ch 1, dc) in same st to increase.
- Alternate: (dc, ch 1, dc) in every other dc; mesh pattern in between across row.
4. Upper Bell Sleeve
- Rep mesh pattern rows until sleeve length reaches desired length (sample: 17 additional rows).
Sleeve Edging (Scallop Detail)
- Ch 1, turn. Work sc in every dc and ch-1 space across.
- Ch 1, turn. Skip 2 sts, in next st work 5 dc (scallop), skip 2 sts, sc in next st.
Rep across. Adjust final scallops to match start and end (combine final sc if needed). - Fasten off.
Flower Appliqués
1. Mini Flowers
- With super fine yarn (any color), make a magic ring, leaving a long tail for sewing.
- Ch 1, make 6 sc into ring. Pull tail tight to close center.
- Sl st to first sc. Ch 3, sl st to first ch, sl st in next sc; rep for each petal (total 6 petals).
- Fasten off, leaving tail.
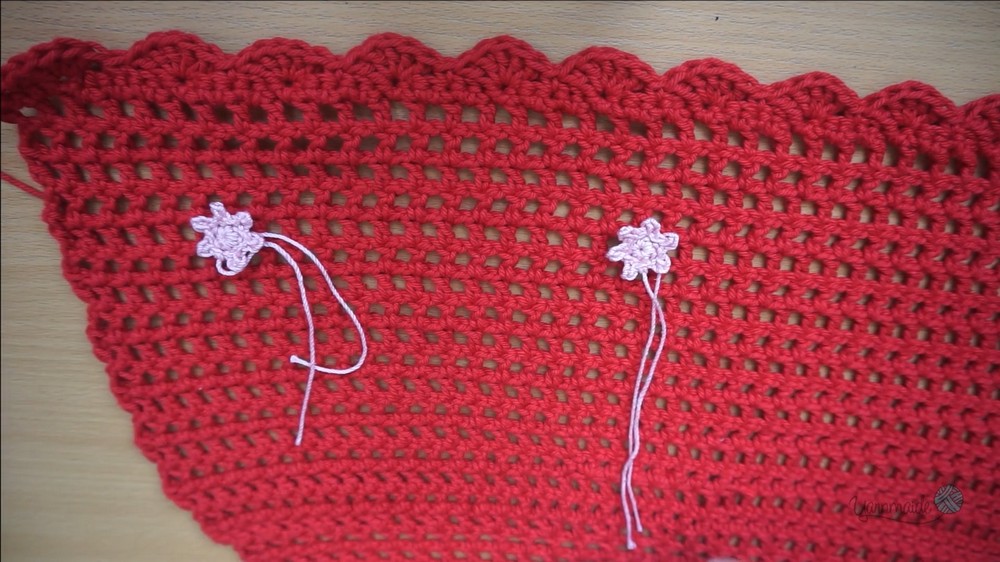
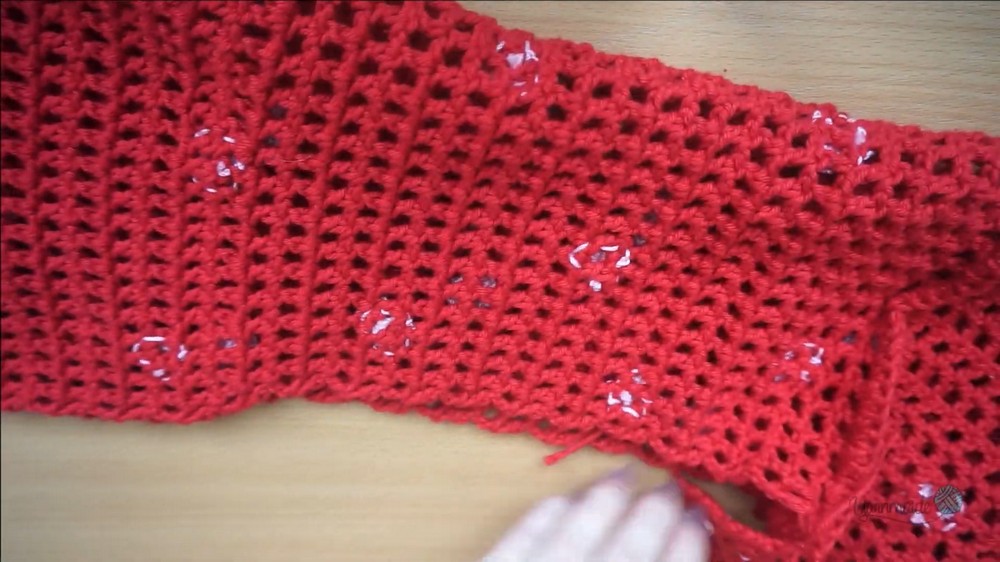
2. Placement & Sewing
- Map out flower placement on sleeve and main panels.
- Sew each flower down securely: use tails to attach 3 petals each side to the fabric; knot and weave in ends on back.
Assembly
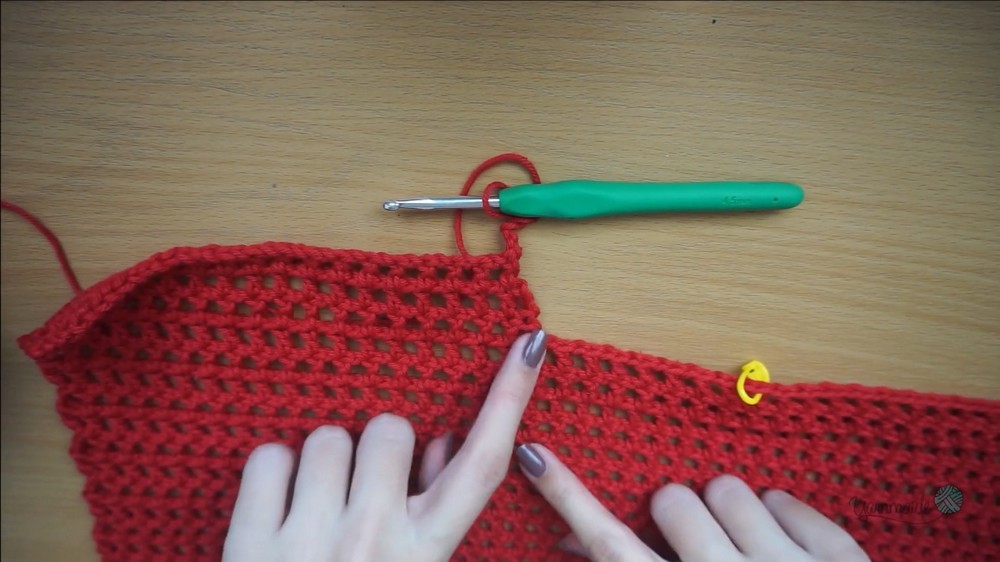
Step 1: Join Main Panels
- Lay panels RS together.
- Seam shoulders by working sc along top edges.
- Fasten off.
Step 2: Attach Sleeves
- Fold sleeve in half, mark midpoint.
- Align midpoint with shoulder seam, pin with stitch marker.
- Seam sleeve to panel with sc; match and count rows to keep sleeve even on both sides.
- Fasten off.
Step 3: Side and Sleeve Seams
- With RS together, fold sweater. Seam sides from underarm down (sc seam).
- Seam sleeves from underarm to wrist.
- Fasten off, weave ends.
Collar and Bottom Edging
- Join yarn at neckline. Ch 1, work sc evenly around neckline. If space is large, place extra sc for neat edge.
- Join/yarn at hem, work sc evenly around bottom edge.
- Sl st to first sc, ch 1, fasten off.
- Weave in remaining tails.
Conclusion
This whimsical cropped sweater features pretty mesh fabric, dramatic bell sleeves, and charming sewn-on flower motifs. With straightforward panel construction and simple seams, it can be customized for any size or fit. The flower appliqués and scallop finishing deliver a fun, feminine aesthetic.
Pattern Corrections & Tips
- Correction: Check the base chain multiples before starting (multiple of 2 + 3); always count stitches after row 1 for mesh consistency.
- Tips:
- For a relaxed fit, add extra chains to foundation row.
- For larger bell sleeves, increase more often on increase row.
- Place flowers before assembly for easier sewing.
- Keep sc seams loose for good drape and stretch.
- Hide tails behind flowers or seams for a neat finish.