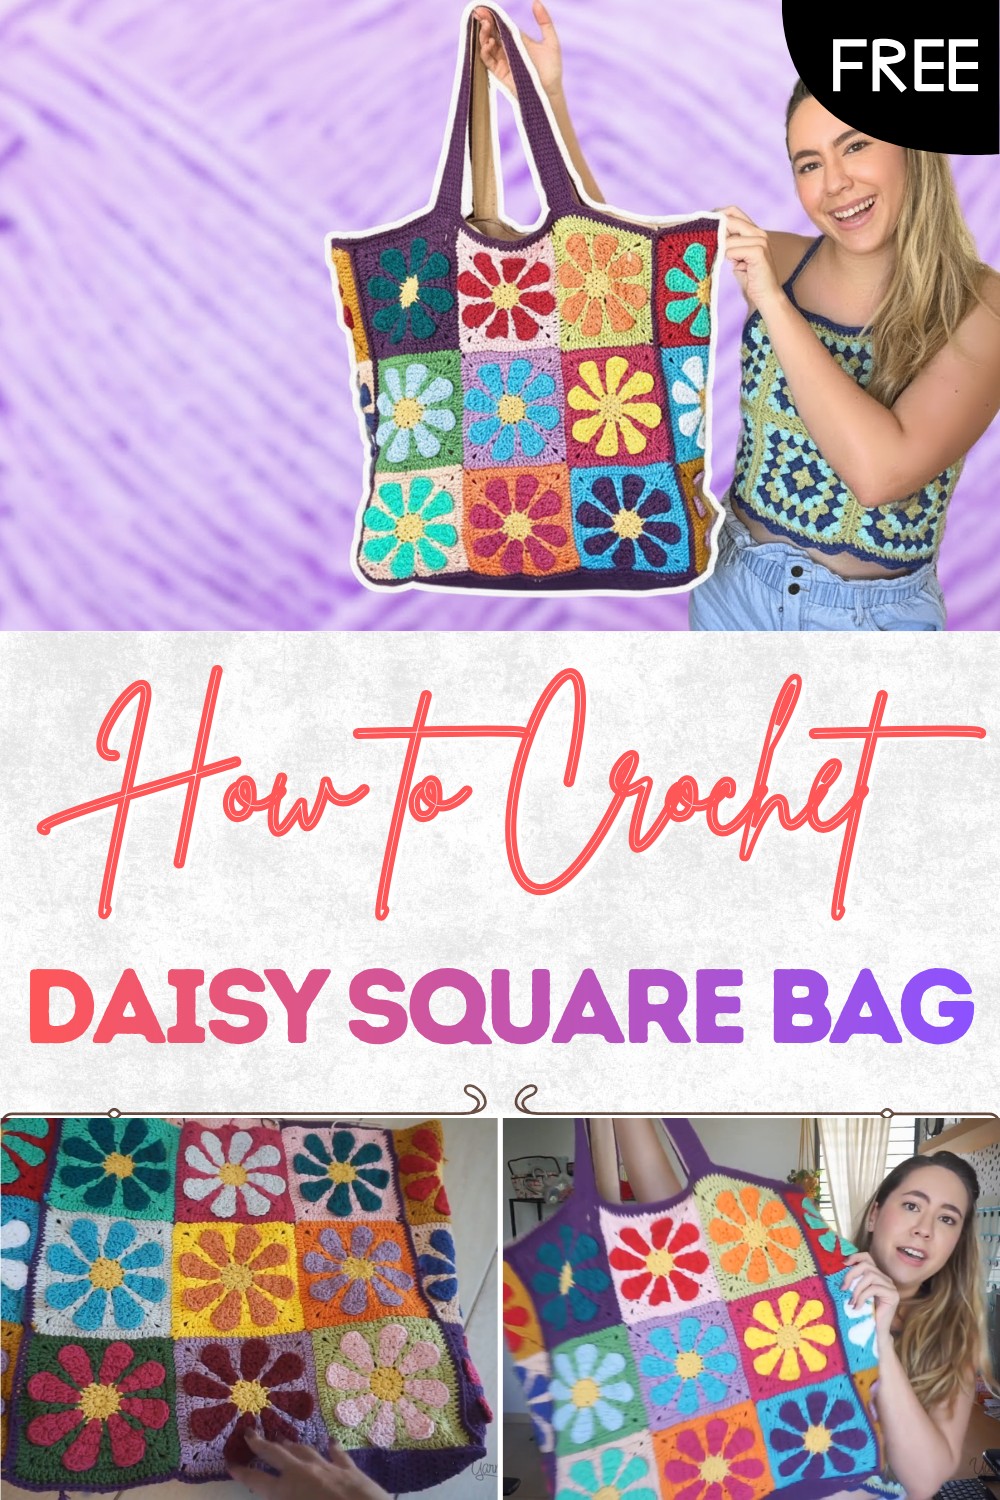
How to Crochet a Daisy Square Bag Free Pattern
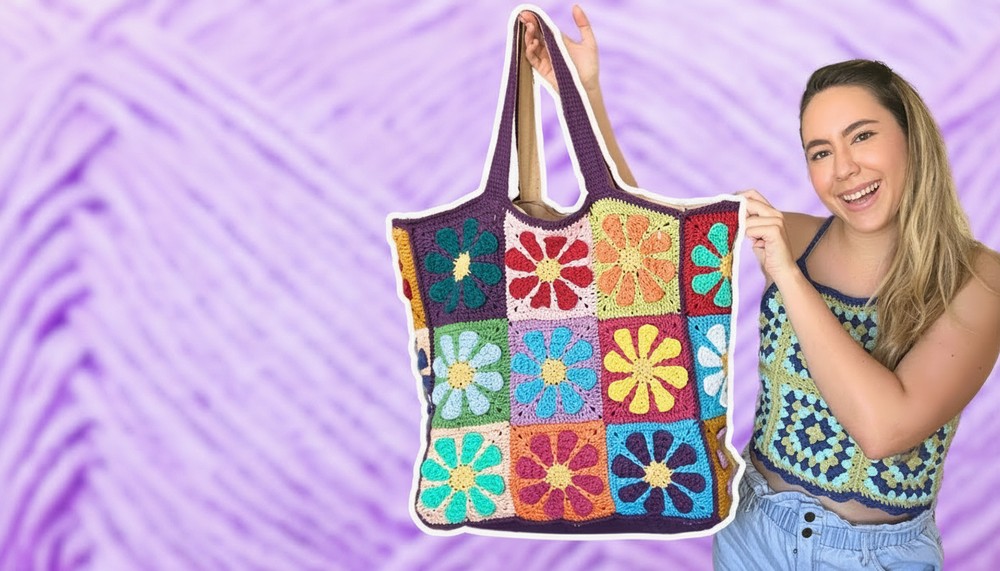
Adorn your days with this crochet daisy square bag pattern, featuring soft petals and sturdy design for a practical and cheerful accessory.
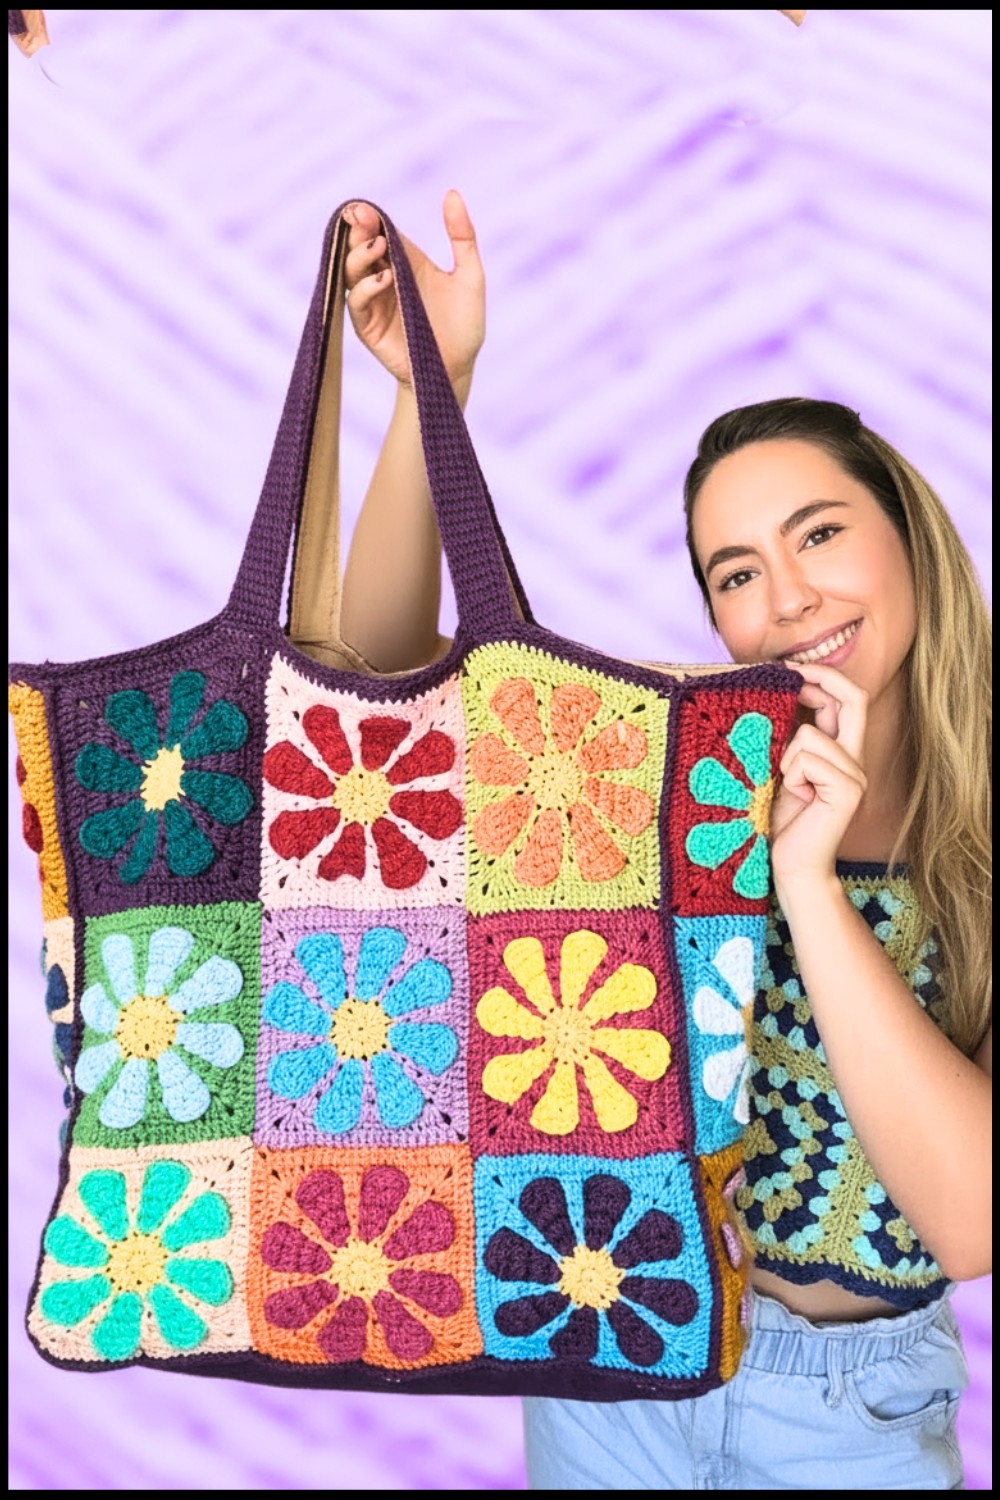
Bright petals bloom together to make a bag that stands out in any crowd. Each piece joins to form a soft square with a single daisy in the middle. This square feels cheerful and gentle to hold, and it turns into a roomy bag that is as practical as it is pretty. The crochet daisy square bag pattern uses a simple repeat, so the project feels fun from the first stitch to the last. The daisy design looks beautiful in any color and gives the bag a lovely homemade charm.
Stylish & Free Crochet Daisy Square Bag Pattern
You can carry groceries, use it as a tote for your work, or take it along on a day trip to the park. Thick stitches lend strength, while the flexible shape makes it comfortable to sling over your arm. A crochet daisy square bag pattern brings a sense of summer joy and makes you feel proud each time you use your own creation. People always notice the bright flower and the cozy touch this bag adds to everyday outings.
Crochet Patchwork Purse with Lining and Strap
Materials
- Yarn: Scraps of worsted weight yarn in assorted colors (for granny squares)
- Hook:
- 5.0 mm crochet hook (for base/bottom panel)
- 4.5 mm/5.0 mm crochet hook for granny squares (adjust as needed)
- Fabric: Scrap fabric for interior lining
- Notions:
- Yarn needle for seaming
- Sewing needle and thread or sewing machine
- Scissors
- Stitch markers (optional)
- Cardboard or thin wooden/plastic insert for base (optional for structure)
- Strong glue (optional for base insert)
- Measuring tape
- Pins
Key Abbreviations (US Terms)
| Abbreviation | Meaning |
|---|---|
| ch | chain |
| sc | single crochet |
| hdc | half double crochet |
| dc | double crochet |
| sl st | slip stitch |
| st(s) | stitch(es) |
| rep | repeat |
| RS | right side |
| WS | wrong side |
Special Notes
- Granny squares: Make as many as needed to achieve your desired bag size. (Example: 3 squares tall × 3 squares wide for each large panel.)
- Seaming: Mattress stitch is recommended for an invisible join, but single crochet or slip stitch seams can be used as alternatives.
- Lining: Lining construction requires basic sewing skills—hand or machine.
- Straps: Sample uses Tunisian crochet for a sturdy, flat strap, though any dense crochet method can be used.
Pattern
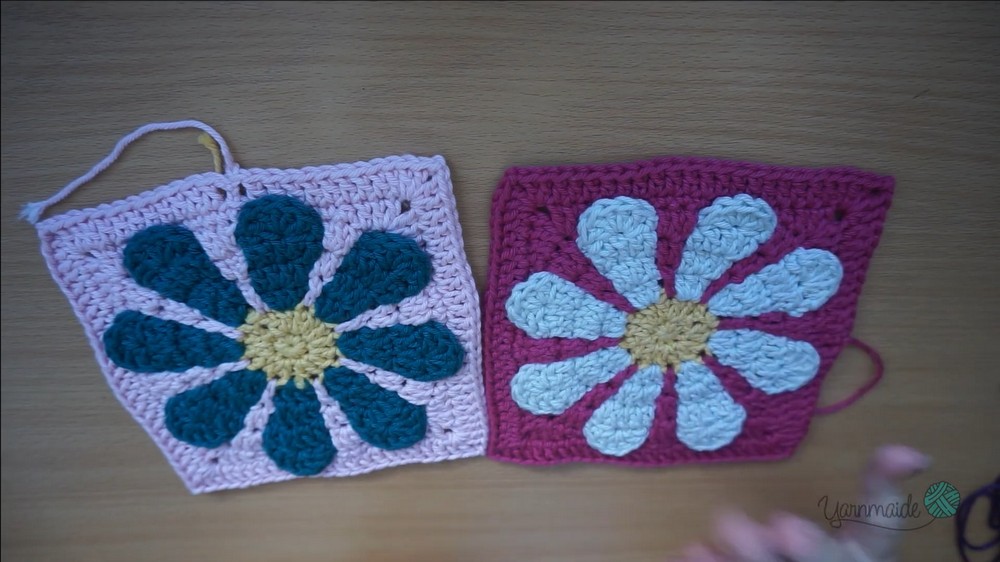
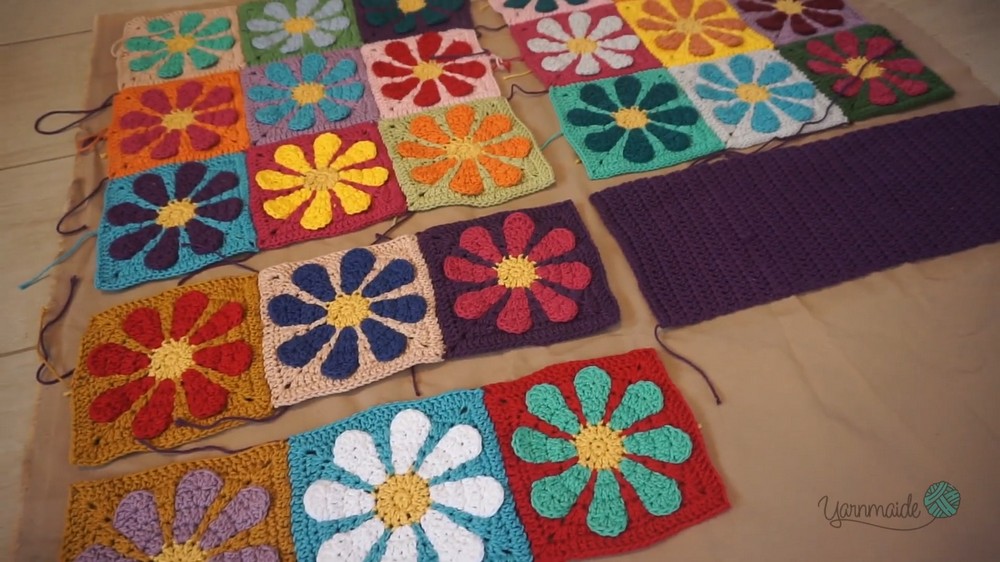
1. Make Granny Squares
- Work classic granny squares in preferred colors. (Standard: ch 4, join to ring. Ch 3, 2 dc, ch 2, [3 dc, ch 2] three times, join. Continue with usual granny square increases.)
- Make enough for 2 main panels (example: each 3 squares wide × 3 squares tall = 9 squares per panel).
- Side panels: Make strips or single squares as needed.
- Weave in ends.
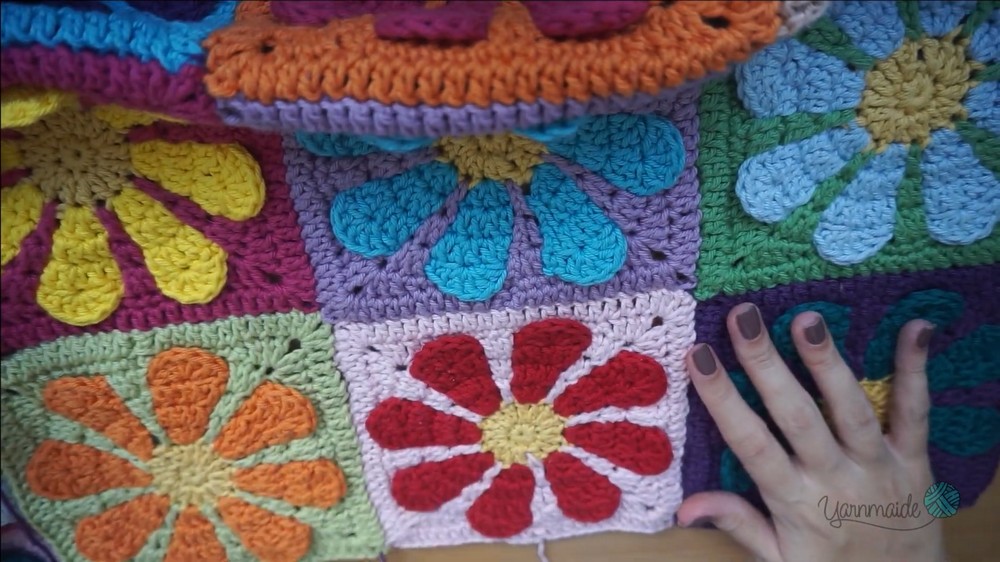
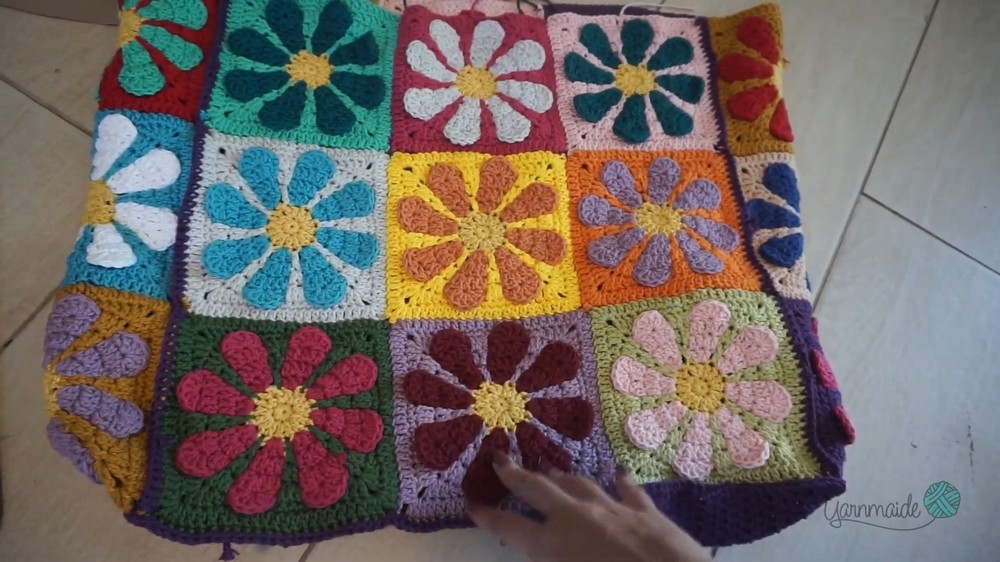
2. Seam Squares Into Panels
- Arrange squares (right side up), join into main panels and side panels.
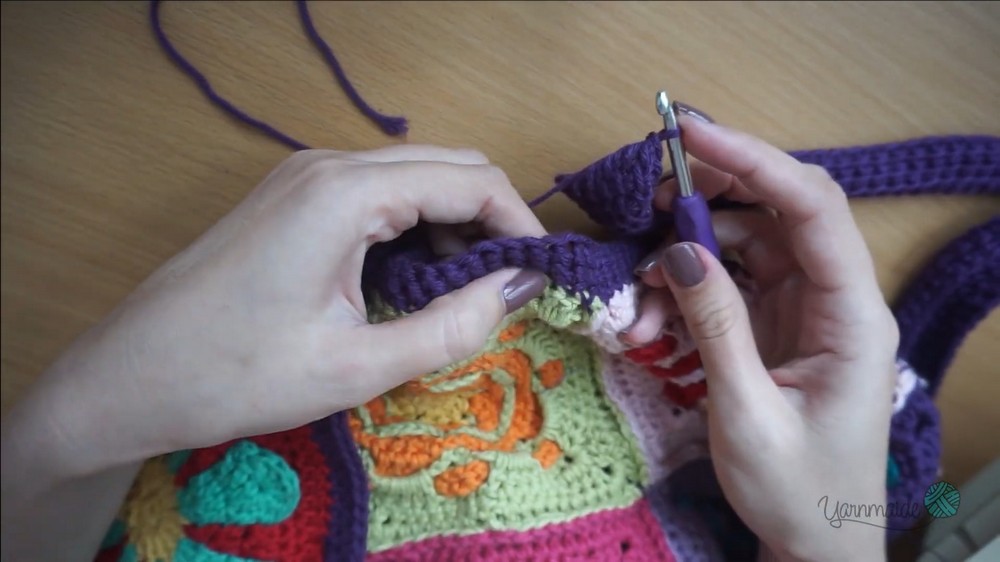
- Mattress Stitch Seaming:
- Thread long tail onto yarn needle (measure 3× seam length).
- Insert needle back to front through the ch/edge of the first square, leave a small tail.
- Do the same for the adjacent square’s edge.
- Pull yarn through gently, and repeat this process (“front to back, back to front”) along the seam.
- Gently pull to close seam, creating an almost invisible join.
- Assemble full front, back, and side panels.
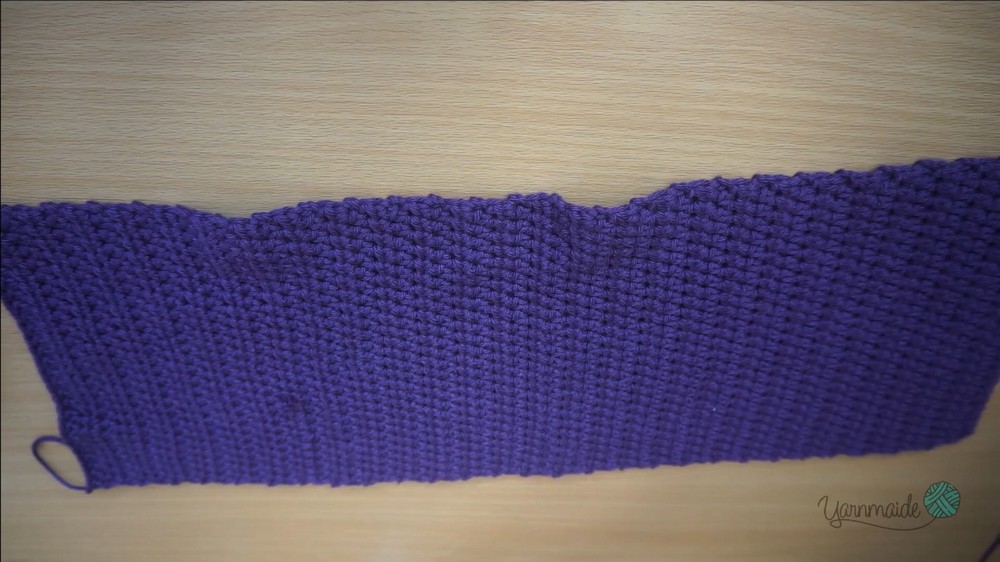
3. Create the Bottom Panel
- With 5.0 mm hook and a durable color yarn, ch 25 + 1.
- Row 1: Hdc in 2nd ch from hook and each ch across.
- Rows 2+: Ch 1, turn, hdc in each st across.
- Continue until panel is long enough to match the width of your assembled bag (should equal 3 squares).
- Fasten off, weave in ends.
4. Cut and Prepare Lining
- Lay each crocheted panel on a large scrap of fabric, pin in place.
- Cut out lining pieces about 1 inch larger on each edge than crochet panels (for seam allowance).
- Set lining aside.
5. Assemble Bag
a) Side & Base Seaming
- Lay out side, base, and main panels.
- Attach side panels to front and back using sc seam:
- Hold panels RS together, insert hook through both panels’ corners, join yarn, sc through both layers. Work evenly along join, matching up sts and corners.
- Repeat for other side and base, ensuring seams align and sides are neat.
b) Attach Bottom Panel
- Attach bottom to side and main panels using sc seam as above.
- Optionally, reinforce base with cardboard/thin wood/plastic insert cut to fit, wrapped in fabric and glued/sewn shut for extra sturdiness.
6. Add Single Crochet Border at Top
- Join yarn at any corner of opening.
- Work 2–3 rounds of sc evenly around top edge for a clean, reinforced finish.
- Sl st to first st of each round, ch 1 to turn between rounds as needed.
- Fasten off, weave in ends.
7. Make and Attach Straps
(Sample uses Tunisian crochet for added strength)
- Attach yarn at starting point for strap on main panel.
- Foundation Tunisian Row:
- Insert hook into each of 7 sts, pull up loop (keep all loops on hook).
- Yarn over, pull through 1 loop; then yarn over, pull through 2 loops at a time across row (standard Tunisian return pass).
- Next Rows:
- Insert hook under next vertical bar, pull up loop (across row).
- Work return pass as above.
- Repeat rows to desired strap length.
- Attach end of strap to corresponding position on the bag using sl st or by sewing firmly.
- Repeat for second strap.
Alternatively: make any dense crochet strap of your preference (e.g. sc, hdc, or braid).
8. Sew In Lining
- Fold and pin lining edges under (~½”).
- Tuck lining inside bag, fit to shape.
- Hand or machine sew lining to inner top edge of crochet bag, hiding raw edges.
- For strap lining, cut fabric to strap width and length, fold and sew as a tube, then hand-stitch to the back of the straps, hiding seam inside.
9. (Optional) Stiffen the Base
- Wrap a piece of thin wood, cardboard, or plastic in fabric.
- Sew or glue fabric closed.
- Insert constructed panel into the bottom of the bag for added shape and support.
Conclusion
This patchwork purse project is a versatile and practical way to use up scrap yarn and create a beautiful accessory. The combination of crochet and fabric techniques allows for a professional-looking finished piece, complete with a customized lining and sturdy structure.
Pattern Corrections & Tips
- Correction: Keep all seams consistent; check panel alignment before joining. For mattress stitch, ensure you are stitching into matching rows for a seamless look.
- Tips:
- Use pins or stitch markers to hold pieces in place before seaming.
- If your sewing machine struggles with layers, sew slowly and adjust tension as needed.
- Reinforce handles, especially if using as a tote, for durability.
- For best results, cut lining slightly smaller than exterior so it fits snugly.
- Match strap attachment points on both sides for even carrying.
- Weave in all crochet ends before lining assembly for a clean finish.