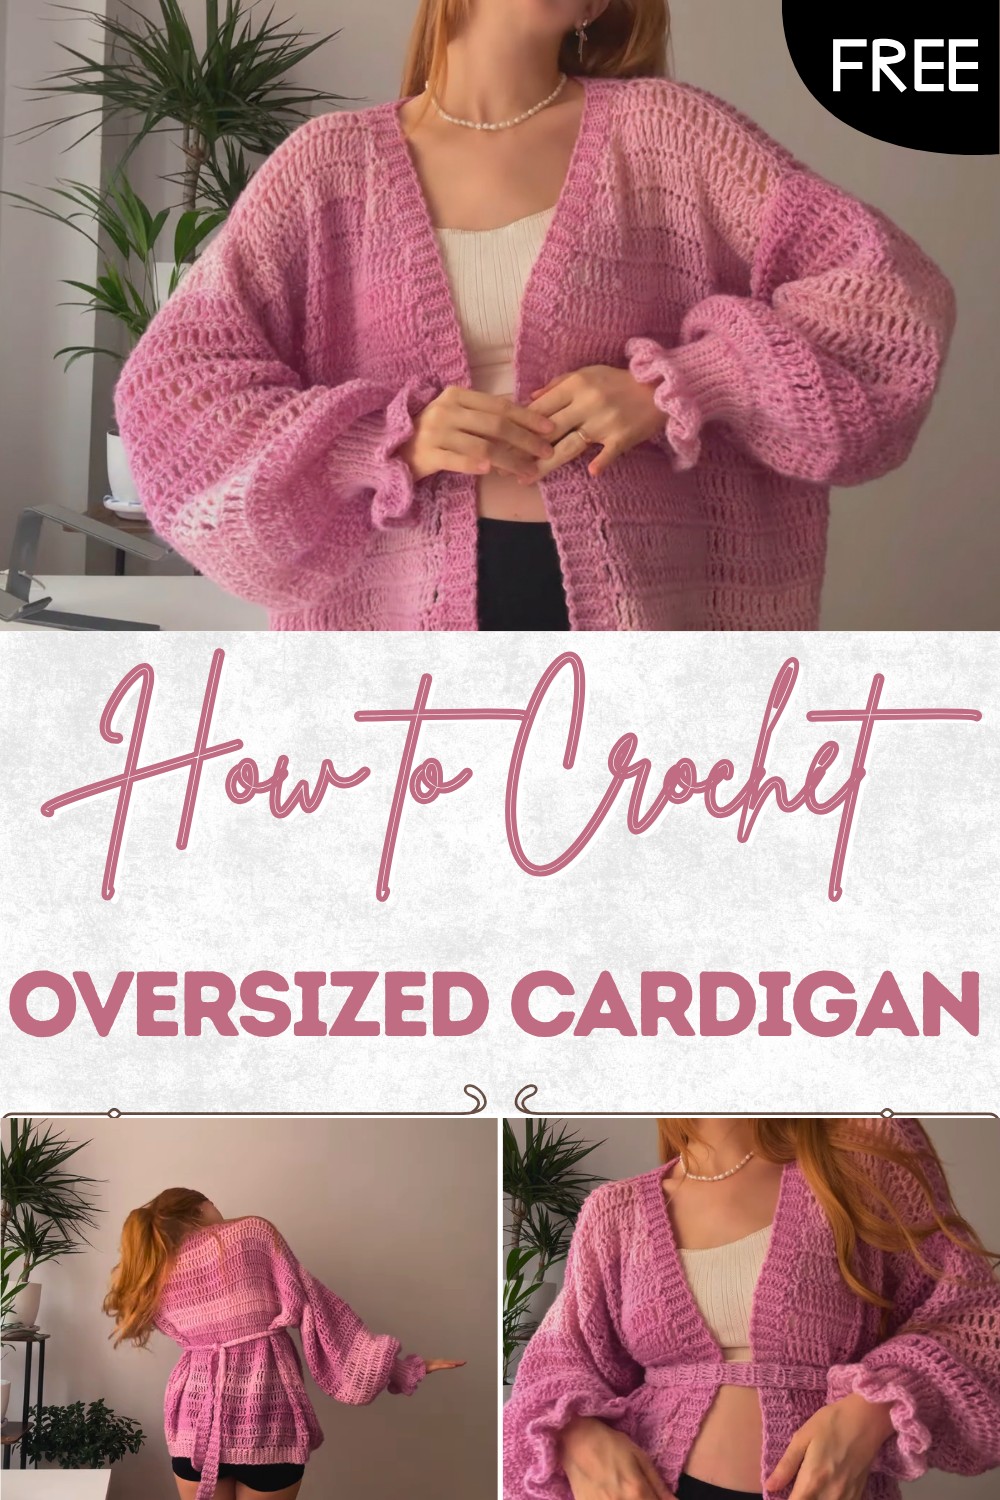
Oversized Cardigan Free Crochet Pattern for Ultimate Comfort
Warmth and style blend perfectly with this free crochet oversized cardigan pattern inviting everyone to create a cozy piece for every season.
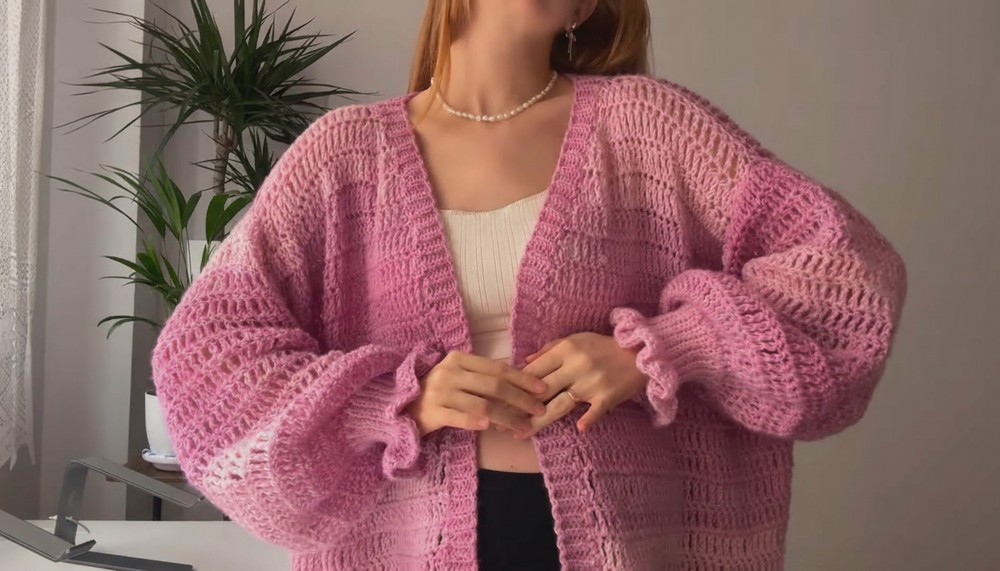
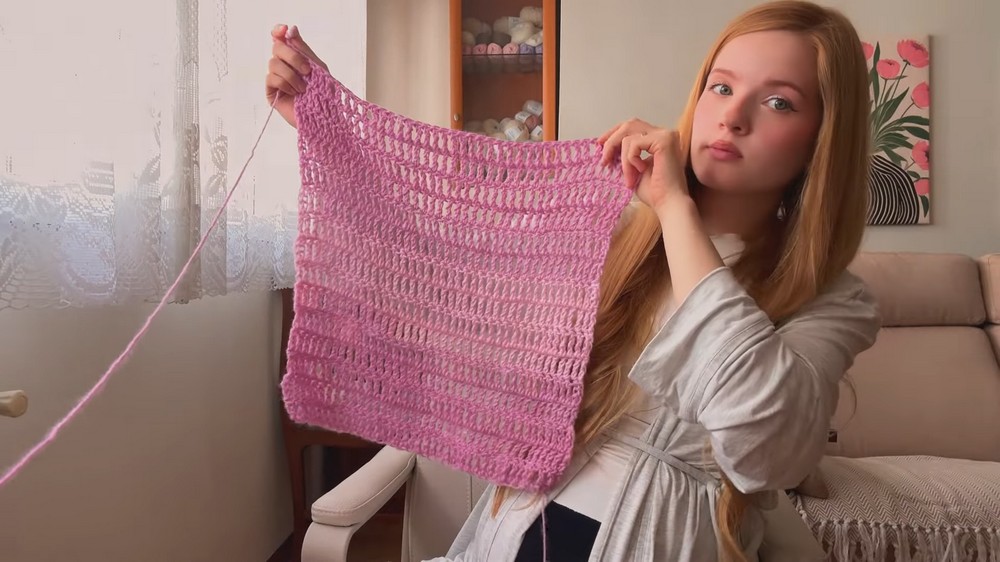
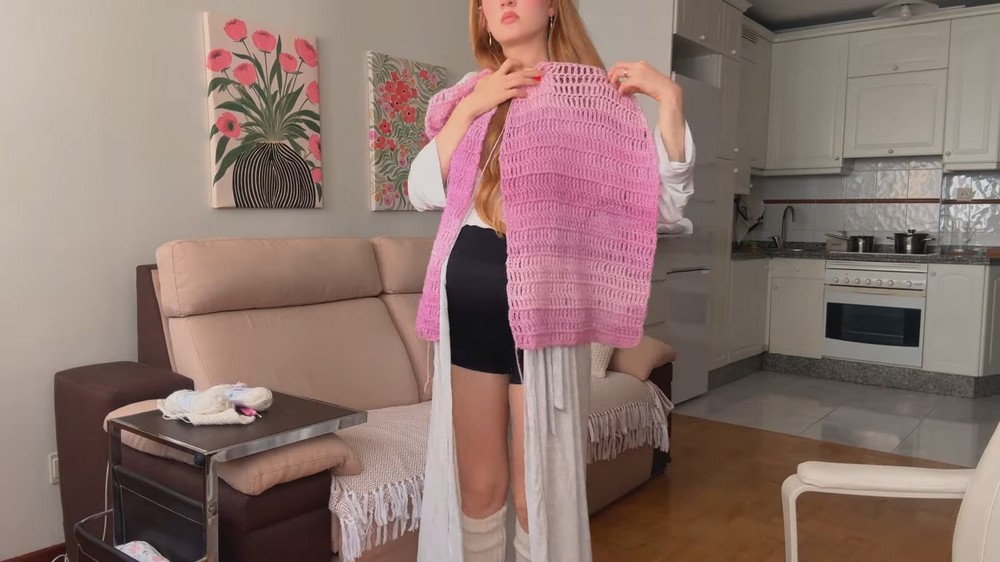
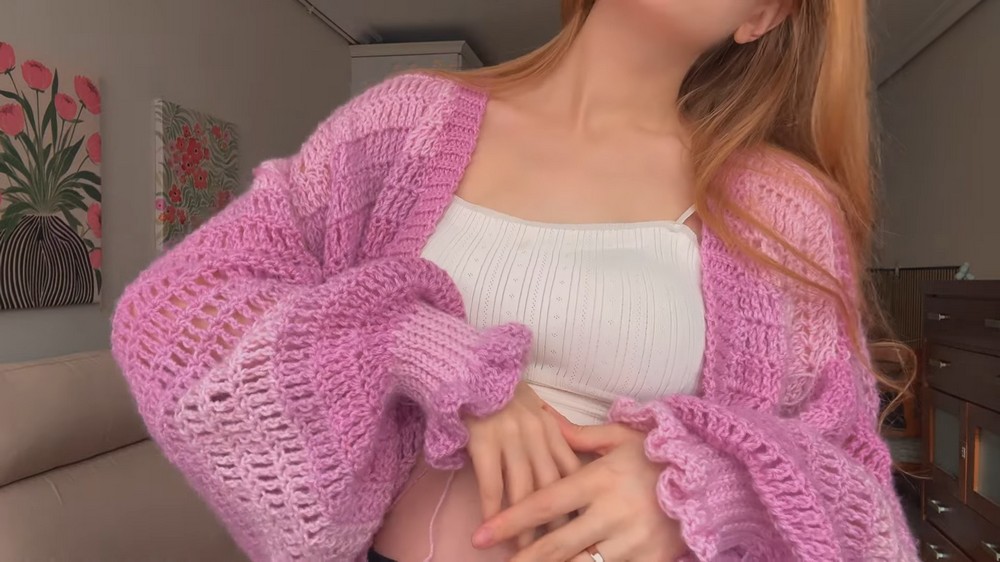
You see a soft cardigan hanging by the door and it calls to you each time the air grows chilly. This piece, created using a crochet oversized cardigan pattern, is like a gentle shield that wraps you in coziness. Big sleeves and a flowing design mean it fits anyone easily, giving comfort without tightness. It’s perfect for keeping warm while relaxing at home or for adding a splash of color and texture when out with friends.
Easy Free Crochet Oversized Cardigan Pattern You’ll Love
The roomy design lets your hands find pockets or wrap around a mug with ease. Every stitch tells a story of care and creativity, making this cardigan more than just clothing. It’s a layer you will reach for again and again—a friend during cold evenings, a gift that shows love, and a fashion piece that makes you stand out. No need to worry about size or shape, it is for everyone seeking pure comfort.
Crochet Oversized Cloud Cardigan (Free Pattern)
Materials
- Yarn: DK weight gradient yarn (Sample: Hobbii “Jade,” color 04, 100g/300m, 4 skeins for the cardigan)
- Crochet hooks:
- 6 mm (main cardigan and ribbing)
- 5 mm (sleeve cuffs)
- Notions:
- Stitch markers
- Scissors
- Yarn needle (for seaming and weaving in ends)
- Tape measure
Optional: Substitute with other DK yarns or use fluffy yarns like mohair for a lighter feel.
Abbreviations & Stitches Used (US Terms)
- ch – chain
- sl st – slip stitch
- sc – single crochet
- tr – treble crochet
- tbl – through back loop (for ribbing)
- st(s) – stitch(es)
Special Notes
- The entire cardigan body is made in treble crochets for an airy, quick-to-crochet fabric.
- The cardigan is constructed from three rectangles (back and two fronts) with shaping via decreases for the front panels, then seamed together.
- Sleeves are worked from the cuff up; cuffs are slip stitch ribbing for stretch.
- Ribbing is added around the neckline and optionally the hem for stability and finishing.
- All measurements and stitch counts can be adjusted to customize fit.
- Sizing as written fits a women’s M/L and is meant to be very generous/oversized.
Construction Overview
- Make two identical front panels with shaping.
- Make one large back panel with minimal shaping.
- Sew shoulder, side and sleeve seams with a flat joining method.
- Work sleeves from ribbed cuff base upward, then attach.
- Add ribbing around neck/front edges, then bottom if desired.
Pattern
RONT PANELS (make 2)
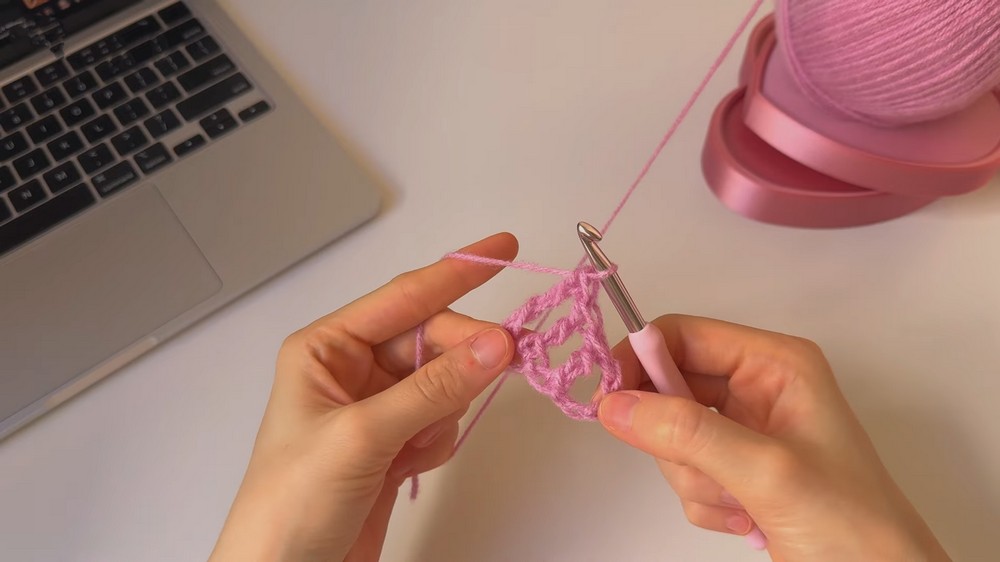
Elastic Foundation Row with Treble Crochet:
- Ch 5.
- Yarn over twice, insert hook into the first ch, pull up a loop. [Foundation treble crochet:] Yo, pull through 1 loop (this creates your “chain”), then [yo, pull through 2] three times to finish standard tr.
- Continuing inserting the hook at the base of the previous st’s “chain” part, repeat foundation tr until you have 40 tr.
- You should have a foundation row with 40 tr (approx. 37 cm wide), very stretchy.
Rows 1–15:
- Turn, beginning row edge: Instead of ch 4, for a neat edge, insert hook into first st, sl st, insert hook again into the same st, sl st. Repeat for a total of 4 times.
- Continue across row: Tr in each st (work 1 tr in each st across; ensure to work tr into the last stitch—which is the previous row turning chain).
- Work 15 rows straight up (height should measure approx. 40 cm).
Rows 16–18 (Single Decreases):
- Begin and end each row with 1 decrease (at both ends):
- Insert hook into the first st, pull up a loop; insert into second st, pull up another loop (3 loops on hook). Yo, pull through all 3 for a decrease.
- Immediately work a total of 3 sc on top of that decrease, then continue the row with tr as before, ending with a decrease over the last two sts as described (but make two unfinished tr, then pull through all loops to finish).
Row 19 (Double Decreases):
- Begin and end the row with 2 decreases in a row (work decrease as above for first two pairs of stitches at each end).
Rows 20–21 (Triple Decreases):
- Begin and end each row with 3 consecutive decreases (over pairs of sts at both ends).
Row 22:
- At start, make 3 decreases at the beginning only.
- Continue across in tr to end (do not decrease at end).
- Place a stitch marker at neckline/chest edge for reference during seaming.
Fasten off, leaving a long tail for sewing.
- The finished panel should measure 56 cm tall and ~16 cm wide at the top.
Repeat for second front panel (mirror placement during assembly).
BACK PANEL
- Foundation: Work 80 foundation treble crochets as for fronts.
- Rows 1–15: Tr in each st across for 15 rows (no shaping).
- Rows 16–18: Decrease one st at each end of every row (same as fronts).
- Row 19: Two decreases at both beginning and end of row.
- Rows 20–21: Three decreases at both beginning and end of each row.
- Row 22: No decreases, work tr across.
Fasten off. Finished piece will be very wide and tall, like a small blanket.
SLEEVE (make 2)
Cuff:
- With 5 mm hook, ch 13 (for a ribbed cuff; can adjust based on desired cuff width).
- From 2nd ch from hook, sl st in each ch across (12 sl st).
- Ch 1, turn.
- From 2nd st from hook, sl st tbl in every st across (12 sts). Keep your tension loose.
- Repeat until you have 18 ridges (or as needed for your wrist circumference).
- Fold cuff in half, join the short ends with slip stitch through both layers in back loops only to form a tube.
- Turn cuff right side out.
Sleeve Body:
- Switch to 6 mm hook.
- Ch 4, tr into each ridge:
- Work 2 tr into each “ridge” and 2 tr in each “valley” between ridges, all the way around, for a total that matches the number of ridges times 2 (here, around 36 tr).
- Join with sl st to the top of beginning ch-4. Fasten off.
Main Sleeve Rounds:
- Attach working yarn at seam, ch 4.
- Round 1: Tr in every stitch (no increases).
- Round 2 (Increase Round): Ch 4, (tr in next st, 2 tr in next st (increase)) repeat around. Join.
- Rounds 3–15: Tr in each st around (no increases). Always join and ch 4 to start a new round.
- Fasten off, leaving tail for sewing.
ASSEMBLY
Seaming:
- Place front panels overlapping back at shoulders; match decreased neckline edges.
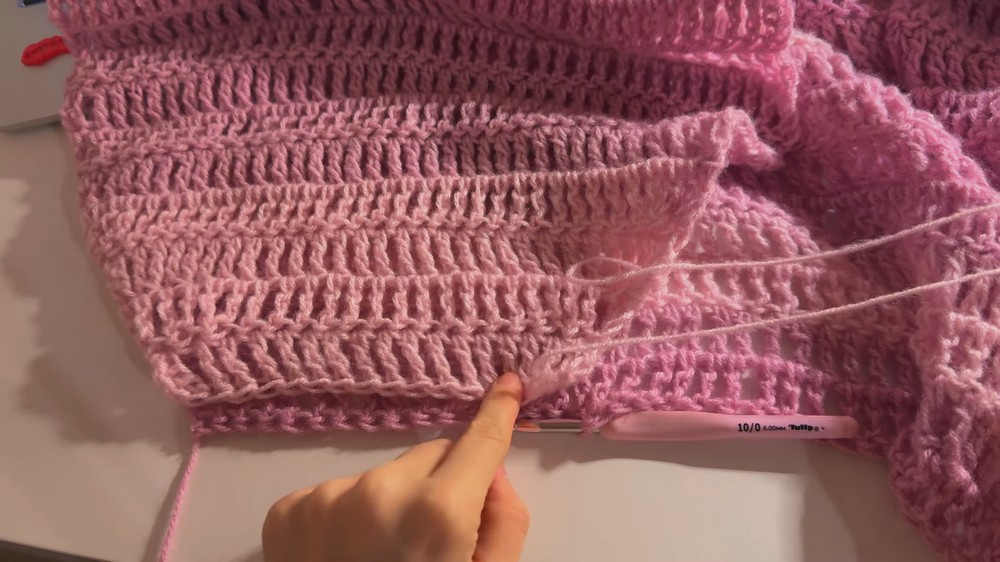
- Seam fronts to back at shoulders using flat slip stitch seam:
- Insert hook through back loop of one panel and front loop of the other, sl st to join.
- Seam sleeve to body in the round, matching midpoint of sleeve to shoulder seam and working four sleeve sts to each body row as described.
- Seam sleeve edges and cardigan sides, matching increases/decreases.
RIBBING EDGING
Neckline/Front Opening:
- With 6 mm hook, attach yarn to front lower corner.
- Ch 7 (or as many as needed for your desired rib width).
- From 2nd ch from hook, sl st across for 6 sl sts.
- Sl st into side of next two rows of cardigan.
- Turn, sl st back up ribbing tbl (always use back loop only except at very last st).
- Ch 1, turn, sl st tbl down for 6, sl st to sides of next two rows of cardigan.
- Continue in this way across both fronts and back neck.
- Optional: Add ribbing to the bottom hem, working as for neckline.
FINISHING TOUCHES
- Weave in all ends. Block lightly if you’d like the fabric to relax and the ribbing to lay smoothly.
- Optional: Belt: Crochet a long chain, turn, and work sc down the length for about 4–6 rows for a simple, matching belt.
Conclusion
This super oversized “cloud” cardigan works up quickly thanks to treble crochet stitches and bulky shaping. It is designed for absolute comfort, dramatic sleeves, and a cozy, cloudlike appearance—perfect for beginners as well as experienced crocheters eager for a fast and trendy project. The gradient yarn adds a modern look, but this pattern works equally well in solids.
Pattern Corrections
- Gauge is not critical but can impact finished size—adjust hook size or number of stitches/rows for a truly custom, oversize fit.
- Seaming alignment: Always count stitches and rows to ensure fronts and back match at shoulder and side seams.
- When joining sleeves to body: Work four sleeve stitches to each body row for an even join; don’t gather the sleeve or stretch the body.
- Ribbing: Avoid too-tight slip stitches to prevent puckering.
Tips
- Keep loose tension when working slip stitch ribs for stretch.
- Try on as you go—this is an oversized garment, but adjust widths, lengths, and number of decreases as needed.
- Gradient yarn: To match stripes on both fronts/sleeves, start yarn from the same color section for each piece.
- Finishing: Steam blocking helps relax the fabric, opens up the treble stitches, and smooths the seams.