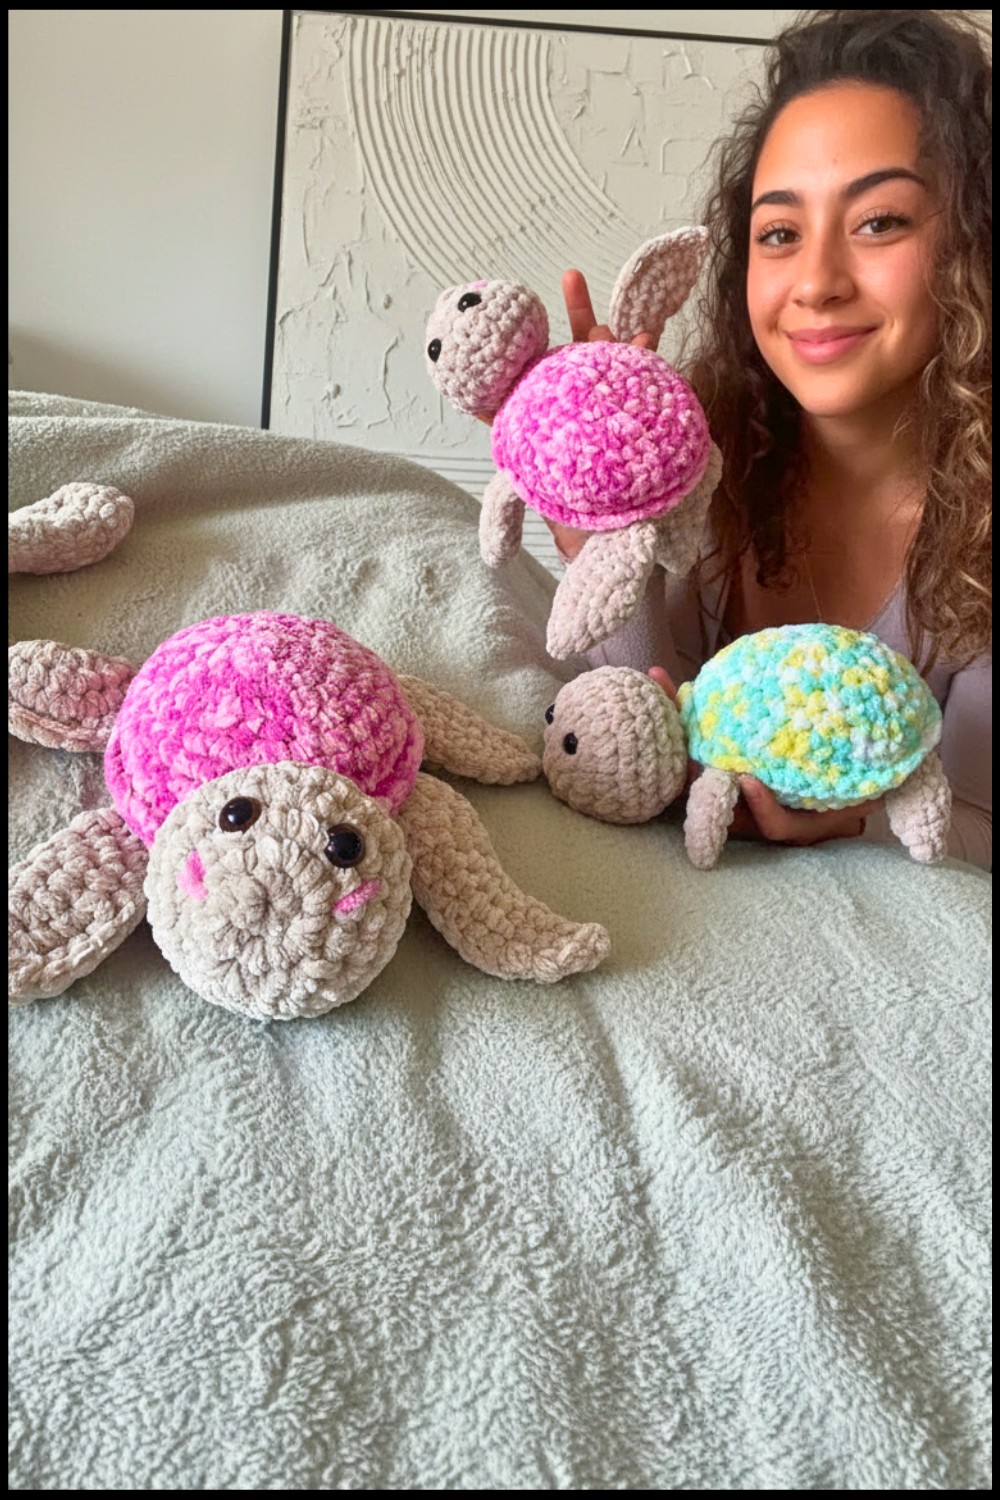
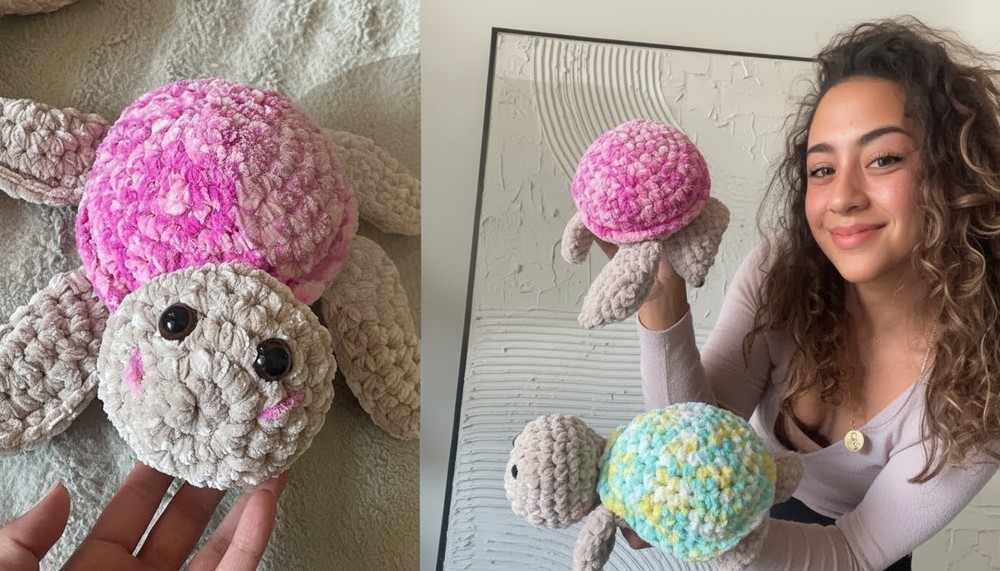
Best Free Crochet Turtle Pattern for Kids & Adults
Charming little turtles come to life with this free crochet turtle pattern that’s ideal for decorations or thoughtful gifts on any occasion.
Sometimes the simplest toys bring the brightest smiles and a small handmade turtle can light up many hearts. Soft to the touch and gentle in its shape the crochet turtle pattern is easy to follow even for beginners and makes a lovely gift for people of all ages. It is not just a cute decoration for shelves or desks but also works well as a soft toy for children or a keepsake for someone special.
Free Crochet Turtle Pattern: Perfect for Home Decor or Toys

Colors can be changed to make each turtle look different and personal. Some like to use the crochet turtle pattern for baby showers birthday parties or even as a stress relief companion at work or school. Its round shell and tiny feet give it a friendly look that makes everyone feel welcome. Easy to carry around this turtle fill every place with warmth and a bit of handmade love making any room feel a little happier.
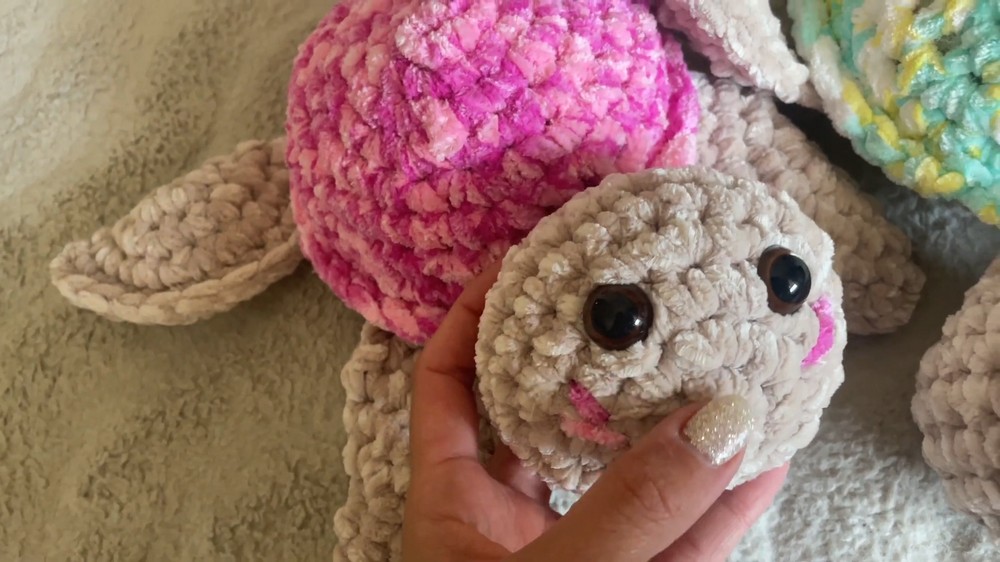
Plush Turtle Crochet Pattern
Materials
- Main yarn: Bulky chenille (e.g., Bella Baby Nippers or equivalent)
- Body color: 1 skein
- Shell color: 1 skein
- For extra thickness, hold 2 strands together (see Tips)
- Hook: 7.0mm crochet hook (or as required for your yarn)
- Notions:
- Stitch marker(s)
- Scissors
- Yarn needle
- Toy stuffing (polyfill/hobby fill)
- Safety eyes (optional, embroider if for babies)
- (Optional) Scraps of pink yarn for blush detail
Abbreviations (US Terms)
| Abbreviation | Meaning |
|---|---|
| ch | chain |
| st(s) | stitch(es) |
| sl st | slip stitch |
| sc | single crochet |
| BLO | back loop only |
| rep | repeat |
| inc | increase (2 sc in same st) |
| dec | decrease (sc2tog, see special notes) |
Special Notes
- Worked in continuous rounds unless otherwise noted.
- For color changes, change yarn on the last yarn over of the previous stitch.
- Invisible decrease: Insert hook under front loop of next 2 sts, yarn over and pull through both loops (2 loops on hook), yarn over and pull through both. This helps avoid holes in plushies.
- Use two yarn strands together for bulk if using lighter weight yarn, or use super bulky chenille.
- Safety eyes are only recommended for ages 3+; use embroidered eyes for baby-safe projects.
Pattern Instructions
1. Head (Body Color)
Note: Use a stitch marker to mark the first stitch of each round.
Magic Ring, then:
R1: 6 sc in magic ring. (6)
R2: 2 sc in each st around. (12)
R3: 1 sc, inc around. (18)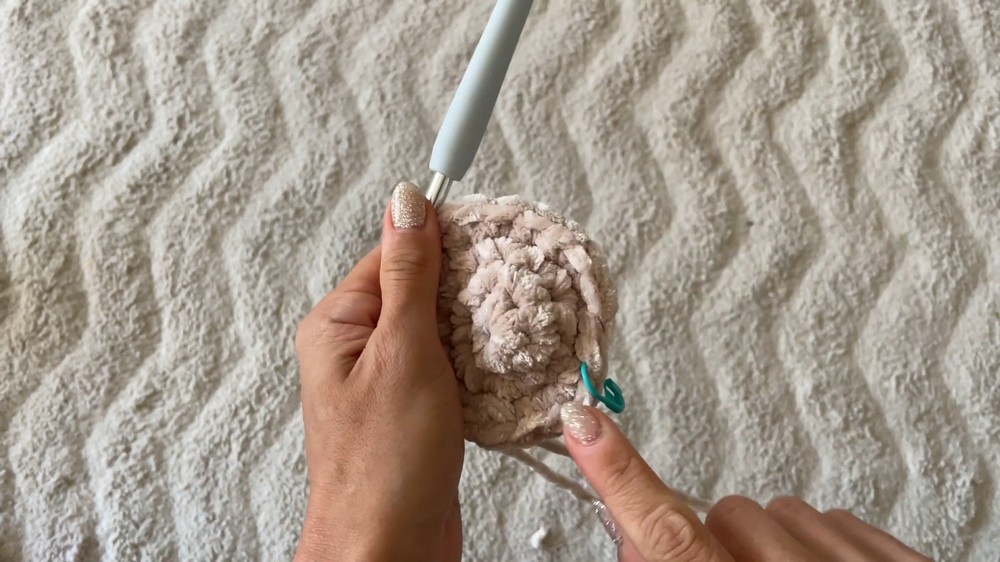
R4: 2 sc, inc around. (24)
R5: 3 sc, inc around. (30)
R6–8: Sc in each st around. (30) — 3 rounds straight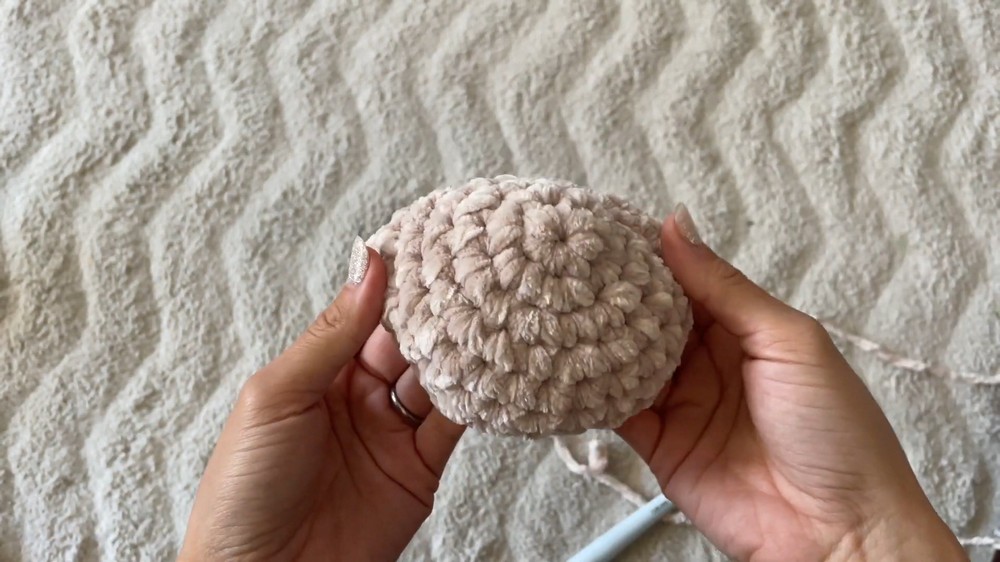
- Insert eyes between Rounds 6–8, 5–6 sts apart, or embroider them.
- Optional: Add blush at this stage with pink yarn.
Decrease to close:
R9: 2 sc, dec around. (24)
R10: 1 sc, dec around. (18)
Stuff firmly with hobby fill.
R11: sc, dec around. (12)
R12: dec around. (6)
- Fasten off, weave tail through fp of remaining sts, pull tight to close and weave in on the inside.
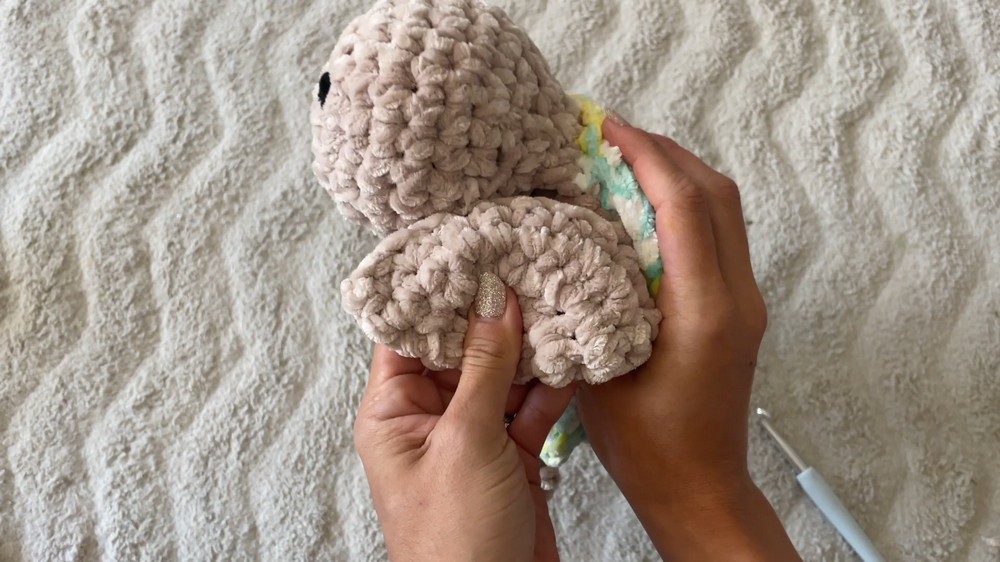
2. Arms & Legs (Body Color, Make 4)
R1: 8 sc in magic ring. (8)
R2: 2 sc in each st around. (16)
R3: 1 sc, inc around. (24)
R4: sc in each st around. (24)
- Fasten off, leaving a long tail.
- Fold flat, sew shut with single crochet as demonstrated (optional: use hook or needle).
- Repeat to make 4 limbs.
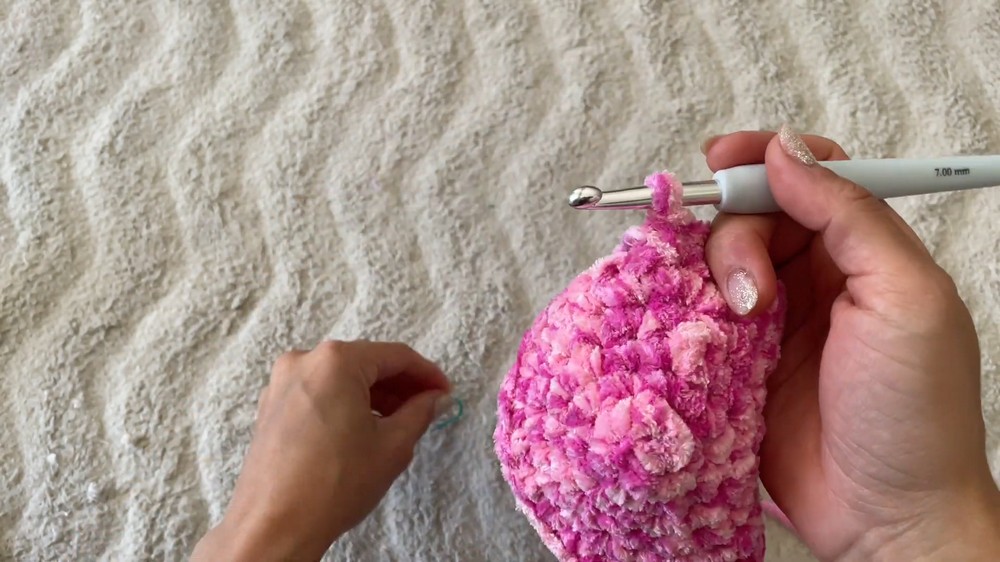
3. Shell (Shell Color)
R1: 6 sc in magic ring. (6)
R2: 2 sc in each st around. (12)
R3: 1 sc, inc around. (18)
R4: 2 sc, inc around. (24)
R5: 3 sc, inc around. (30)
R6: 4 sc, inc around. (36)
R7-R9: sc in each st around. (36)
R10 (BLO): sc in back loop only around. (36)
- Sl st to join. Fasten off, leave long tail for sewing.
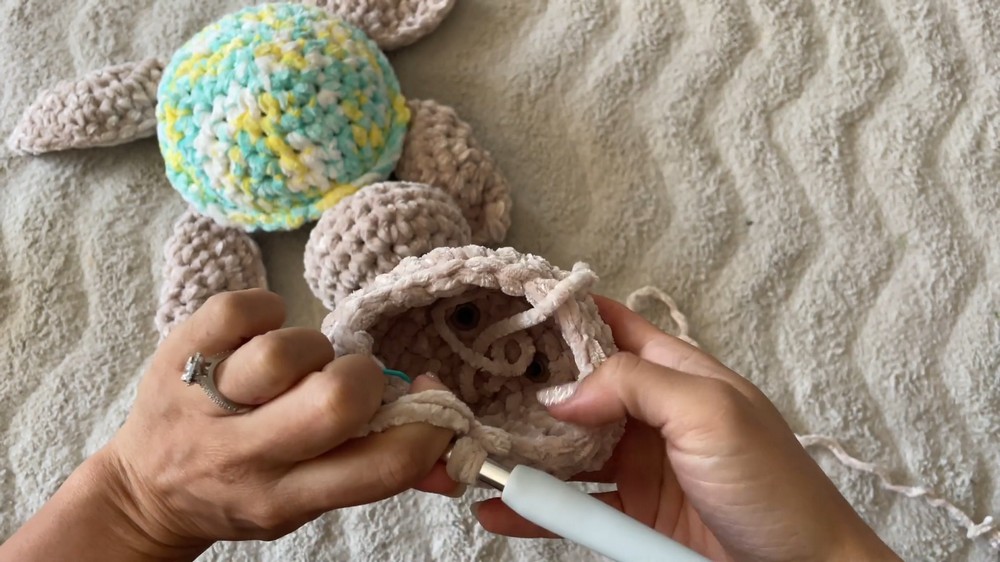
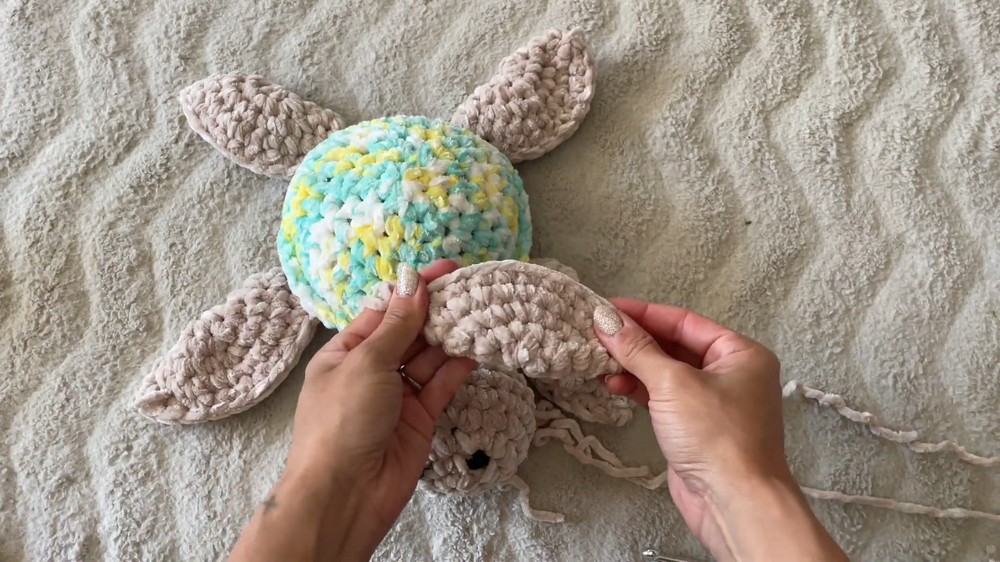
4. Assembly
Optional Blush
- With a darning needle and pink yarn, add two small bars for blush on each side, tie and tuck ends inside.
Join Head to Shell
- Place open side of head into the center of shell (wrong side of shell facing in).
- Sew securely through both layers using yarn needle or with hook and sc.
Attach Limbs
- Pin two arms and two legs evenly on each side, curved side facing upwards.
- Sew securely through both layers.
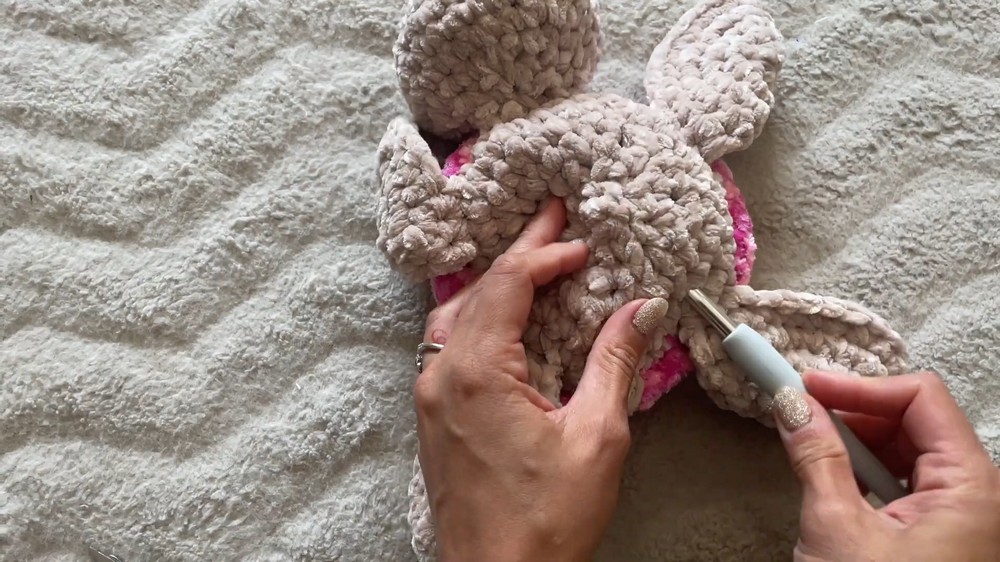
Add Tail
- Attach body color yarn at center back of shell.
- Ch 4, sl st into first ch to create a small tail. Fasten off and hide ends.
Close Shell Bottom
- With shell bottom facing you, work single crochets, decreases as follows:
- (Starting from side of head) 4 sc, dec, around (for 1 round).
- Next round: 3 sc, dec around.
- Next round: 2 sc, dec around.
- Next round: sc, dec around.
- Stuff shell.
- Final rounds: Dec around until closed.
- Fasten off, sew shut if needed, and hide all remaining ends within the body.
Finishing
- Shape by squishing and rolling the turtle between your hands for even stuffing.
- Trim fuzzies.
- Your plush turtle is now finished!
Pattern Correction
- Row counts align with the standard method for amigurumi. Each round matches increasing/decreasing by increments of 6 or 8 to maintain shape.
- Joining method: The pattern demonstrates “crochet together” but sewing using a needle is also acceptable for clean joins.
Tips
- Use a stitch marker; chenille yarn can be hard to see where rounds start.
- Don’t overstuff—plush may stretch slightly over time.
- Insert limbs and pin before final sewing for even spacing.
- For smaller turtles, use lighter yarn and matching hook.
- Add fun elements (bows, shells, hats) for extra personality.
Conclusion
This plush turtle works up quickly and is excellent for gifts, charity, or any plushie collection. With chunky yarn, easy assembly, and customizable options, it’s a delightful entry point into plushie-making—even if you never thought you’d try.