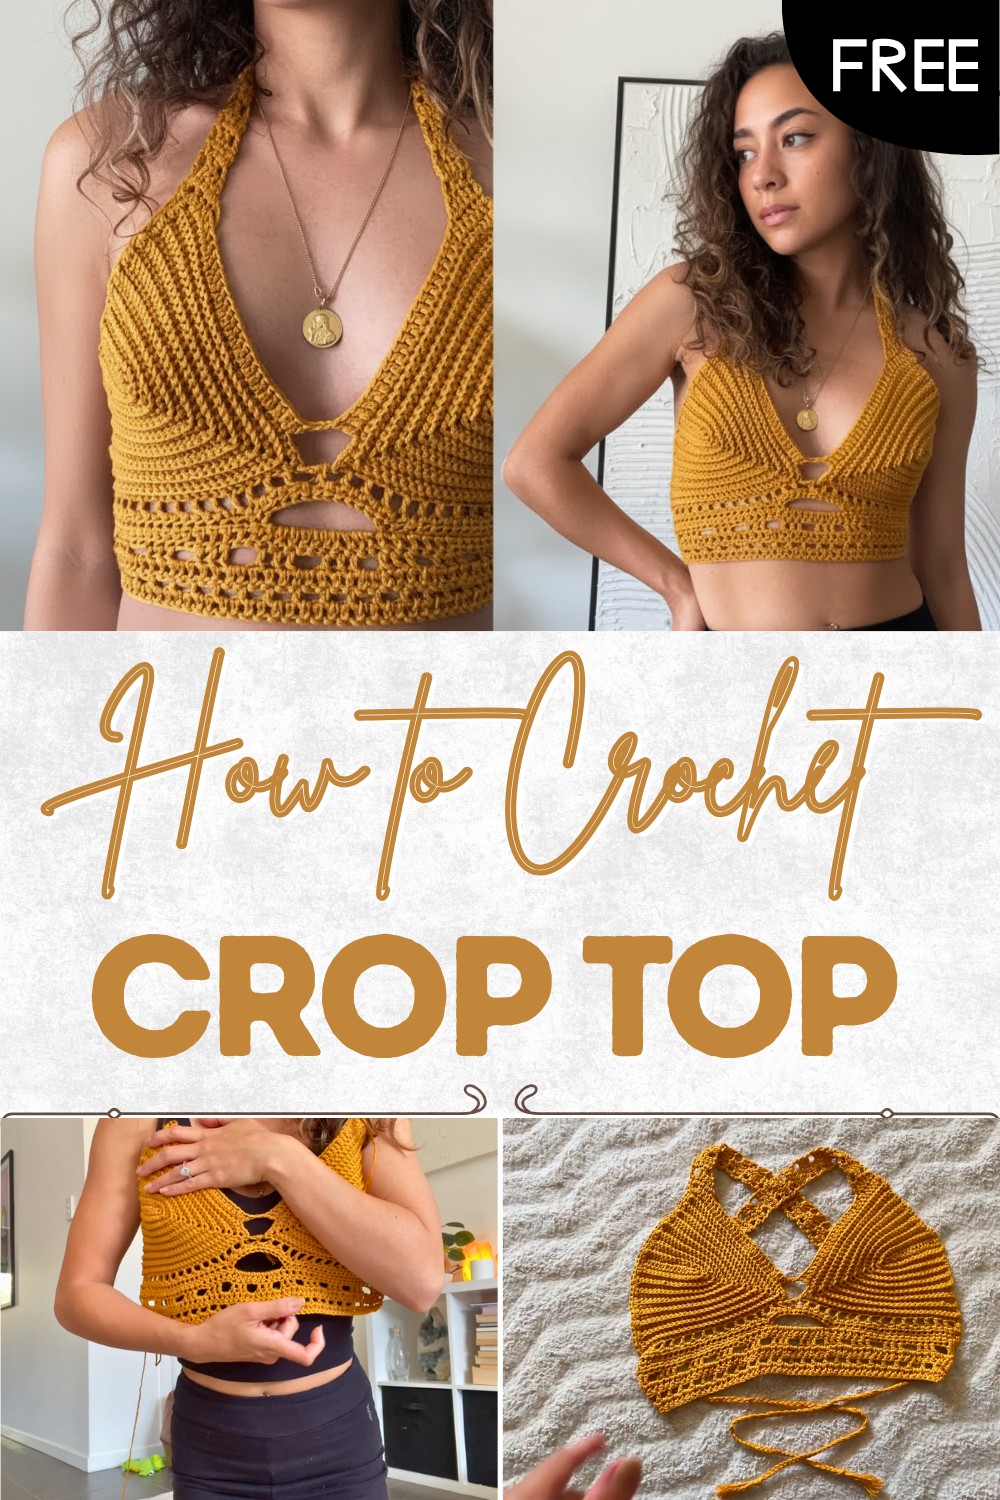
Fresh Free Crochet Crop Top Pattern for Stylish Outfit
Find your perfect summer style with this free crochet crop top pattern and enjoy making a trendy cute top that is easy & perfect for everyone.
Sunshine and laughter go hand in hand with a vibrant outfit that reflects a happy spirit. Every crochet crop top pattern offers a wonderful way to express style, whether heading out for a day in the park or relaxing with family. Bright colors and playful stitches add a pop of fun to any wardrobe, standing out at parties or quiet gatherings alike. Flexible for any occasion, this top pairs perfectly with shorts, jeans, or skirts, offering endless mix-and-match options.
Free Crochet Crop Top Pattern for Cool and Comfy Look
The airy design keeps things cool, making it just right for sunny days or casual outings. With a crochet crop top pattern, anyone enjoys a custom fit and a look that’s truly one of a kind. An easy pattern means finishing quickly, so it’s simple to add fresh flair every week. Celebrate beauty, comfort, and confidence with every new piece added to the closet.
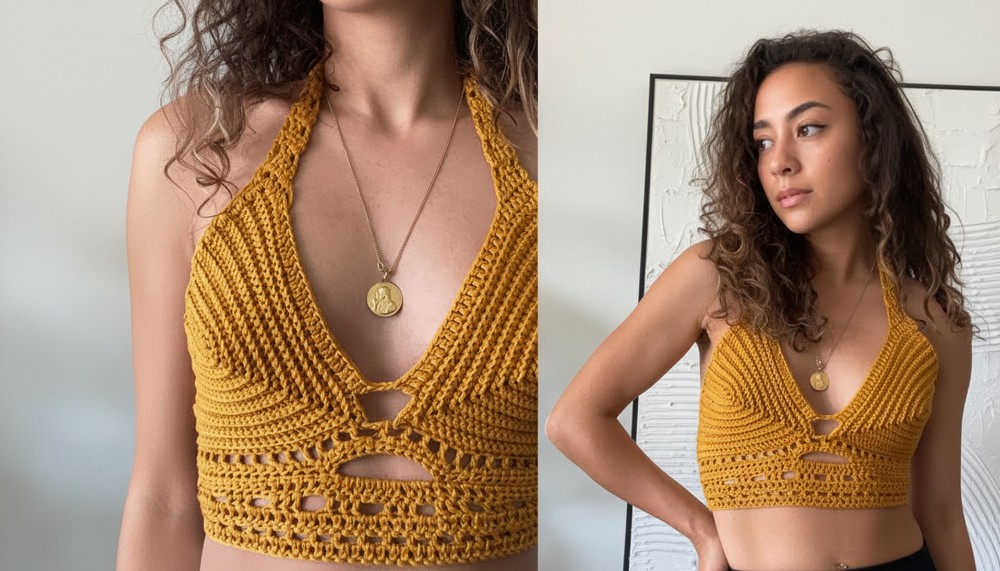
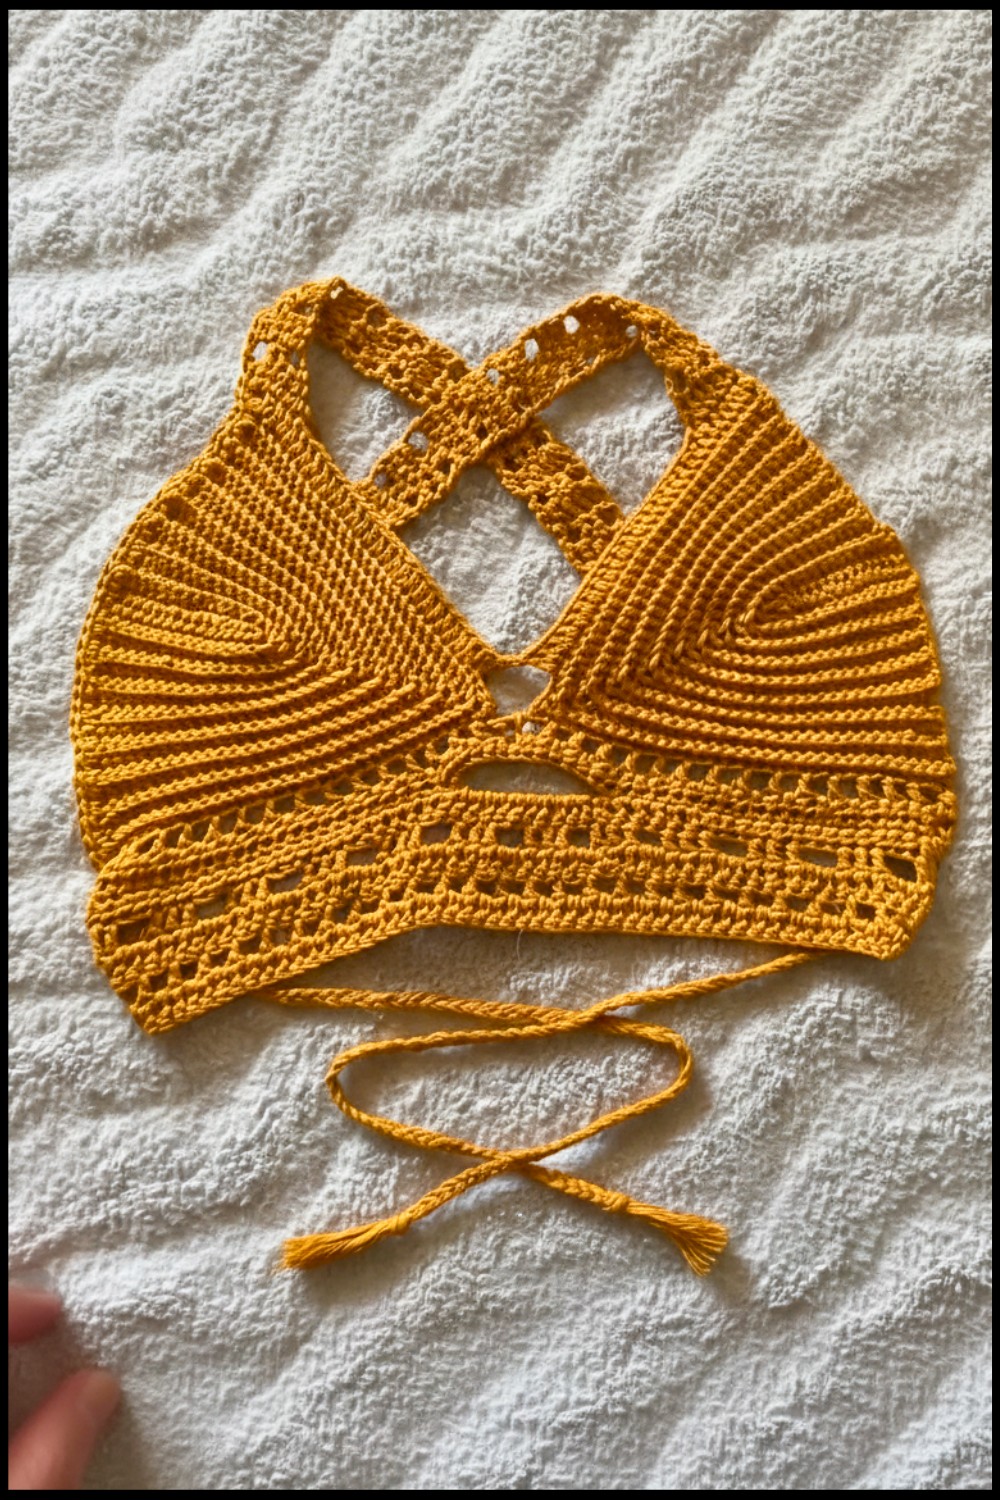
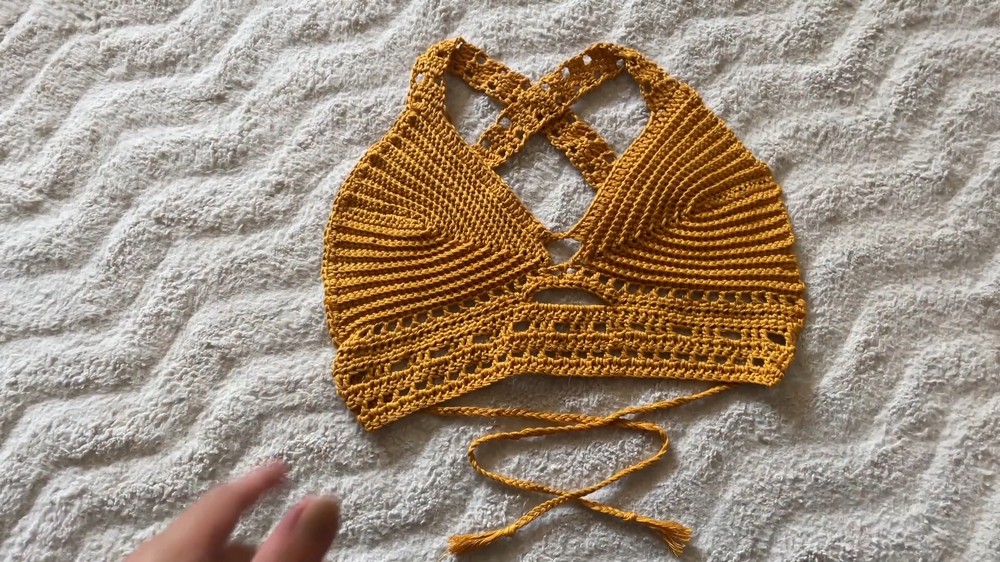
Keyhole Cut-Out Crochet Top Pattern
Materials
- Yarn: Worsted Weight (Category 4) cotton or cotton-blend yarn (approx. 200–250g depending on size and length)
- Hook: 4.0mm (G/6) crochet hook (or size needed to obtain gauge)
- Notions:
- Yarn needle (for weaving in ends)
- Stitch markers
- Scissors
- Measuring tape
- (Optional) Small clips to hold pieces together
Abbreviations (US Terms)
| Abbreviation | Meaning |
|---|---|
| ch | chain |
| sc | single crochet |
| hdc | half double crochet |
| dc | double crochet |
| sl st | slip stitch |
| st(s) | stitch(es) |
| sp | space |
| rep | repeat |
Special Notes
- This pattern is fully customizable based on your measurements; adjust initial cup chains and base length as needed.
- For a snug fit, measure on your own body as demonstrated.
- All stitches are in back loop only unless otherwise noted for cup sections.
- Pattern is written for an adjustable size; use more or fewer chains and rows as needed.
Pattern Instructions
1. Cups (Make 2)
a. Foundation Chain
- Measure from your nipple to the side of your bust.
- Ch the number required to match this length (example in video: 16 chains).
b. Set-up Row
- Turn and sc in 2nd ch from the hook.
- Sc in each ch across. (You will have 16 sc or your chosen number.)
c. Increase at Tip
- At the end of the row (last ch), place 5 sc into the same stitch (work as follows):
- Sc 3 times, and after the 3rd, place a stitch marker in the third (this will be your center tip).
- Work 2 more sc into the same st (now 5 total).
- Continue sc back down the opposite side of the foundation ch, working one sc in each ch.
d. Growing the Cup (Rows 2+)
- Ch 1, turn your work.
- Sc in the back loop only (BLO) for all sts across.
- At the marker, remove marker, place 3 sc BLO in center st (the one marker was in) for this and every subsequent row.
- After the 2nd sc of the increase, place the marker in that stitch again (move each round to keep track).
- Continue sc BLO to the end.
- Repeat Row 2: Continue working rows as above, always placing 3 sc (BLO) in the tip stitch (where the marker is), until the cup is large enough to cover from just under your armpit to center chest and underbust (try on to check fit). Fasten off.
Repeat for second cup.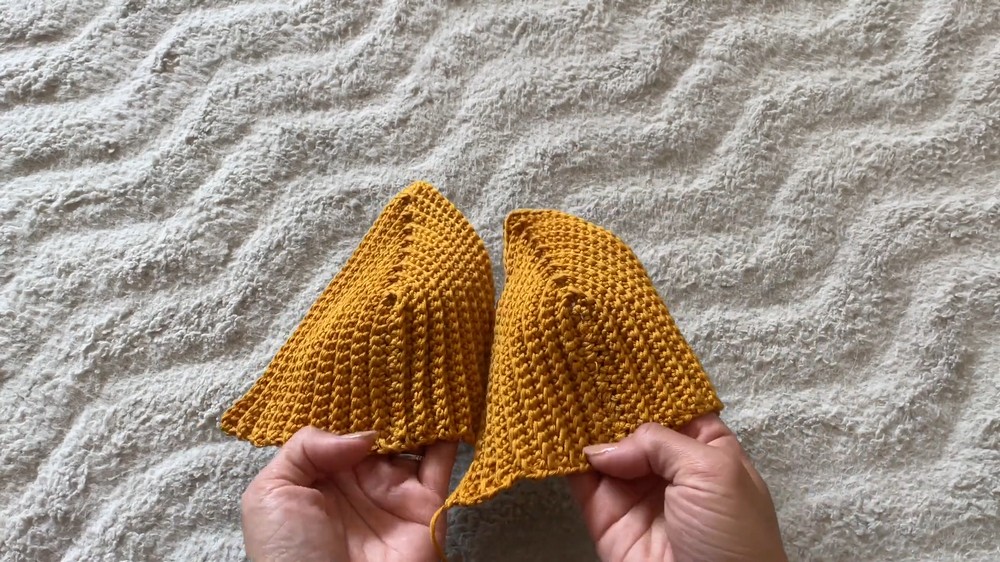
2. Joining Cups at the Bottom
- Position cups as desired (ensure they’re symmetrical).
- Attach yarn with a slip stitch at the bottom of one cup (side edge).
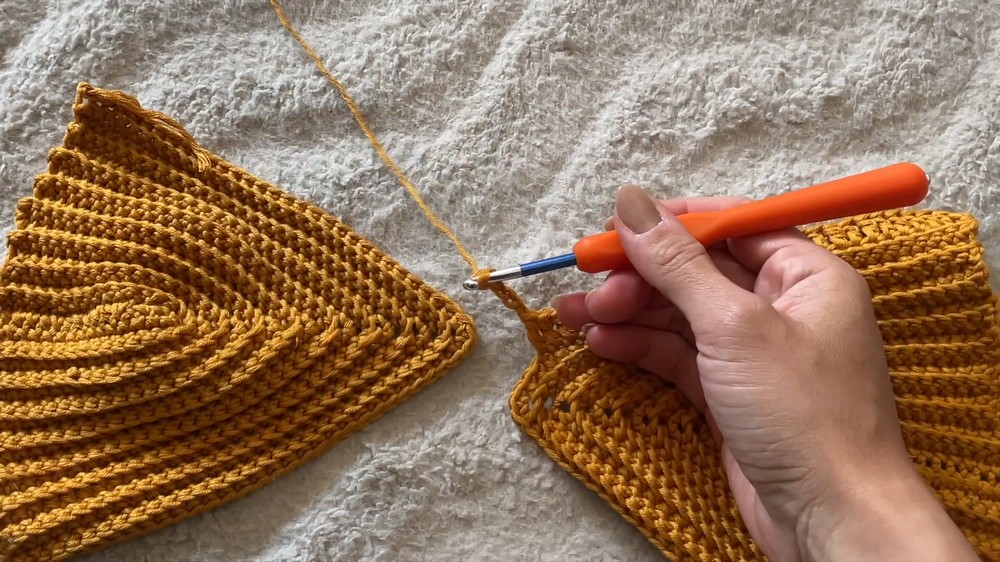
- Dc in each st along the bottom edge of cup 1; stop 4 sts from the edge (use 4–5 sts as a guide based on your shape).
- Ch 5 (for center gap), skip those 4 sts on each cup.
- Dc into the 5th st from center on cup 2 and continue dc to the end.
- Fasten off.
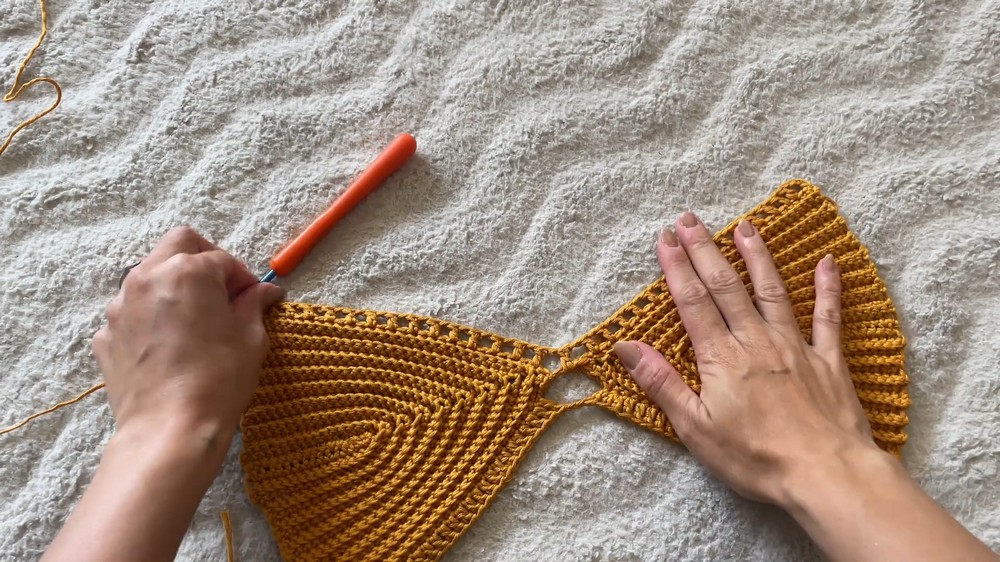
3. Joining at the Center (Upper Keyhole)
- With RS facing you, insert hook into the first sc of the 3 at the tip on cup 1, sl st, then ch 3.
- Find the matching st on cup 2 and sl st across to connect.
- Ch 1, fasten off.
4. First Bottom Row (Space Stitches/Fillet Mesh Pattern)
- Attach yarn at side edge.
- Ch 4 (counts as dc + ch 1).
- Skip 1, dc in next st, ch 1, skip 1, rep across the entire bottom, including across the 5-ch center keyhole.
- On the chain, simply dc into the ch-space as needed.
- Turn.
5. Half Double Crochet Row
- Ch 2, turn.
- Hdc in each st and ch-1 sp across.
- Fasten off.
6. Measuring & Placing Second Keyhole (Try On for Fit)
- Place the top against your body and note where you’d like the second keyhole cutout.
- Use stitch markers to mark the space stitches on each side to delimit where the keyhole should be.
a. Single Crochets to Keyhole Location
- Ch 1, turn.
- Sc across to the marked spot (For example: after 9–13 sc, per your size).
b. Chain for Second Keyhole
- Ch the number matching the gap length (e.g., ch 13).
- Skipping the center, sc into the matching space on the other side of the keyhole (where you’ve placed another marker).
- Continue sc to end of row.
7. Bottom Shaping (Flatten the Arch Curve)
- Place markers on both sides of the dip/curve as needed (typically 6 sts from either end after the keyhole connection).
- Ch 2, turn.
- Hdc to first marker.
- Dc across the keyhole and marked section for an even, flat edge.
- Hdc to the end.
8. Large Space Stitch/Fillet Row
- Ch 2, turn.
- Dc in next 2 sts (so you have 3 dc total, including ch-2 as dc).
- Ch 2, skip 2, dc in next 3, continue across row: 3 dc, ch 2, sk 2, 3 dc…
- End row.
9. Solid Double Crochet Row
- Ch 2, turn.
- Dc in every st and in each ch-2 sp (put 2 dc into each ch-2 space).
10. Repeat Space Stitch Row
- Ch 2, turn.
- Ch 1 (making a sk-1), dc in next st, ch 1, dc in next, and so on: ch 1, sk 1, dc in next across.
11. Final Row of Solid Double Crochets
- Ch 2, turn.
- Dc in each st and ch-1 space across.
- Fasten off and weave in ends if not continuing to straps.
- For extra length: Alternate large space rows and solid dc rows as desired.
- For extra length: Alternate large space rows and solid dc rows as desired.
12. Side Edges and Straps
a. Finishing the Side
- Attach yarn at side edge.
- Hdc along the side edge (make sts evenly along raw edge).
b. Neck Straps (Make 2)
- At top edge over each cup, dc evenly across (6 dc recommended).
- Ch 3, turn.
- Skip first 2 sts, dc in next st, dc in next, ch 1, dc in last.
- Ch 2, turn, dc in each st and ch-1 space across (total 6).
- Repeat Rows 3 and 4 for a total of 30 rows (or until desired length). End on a row of double crochets. Fasten off.
c. Side/Bodice Ties (Make 2)
- Cut 6 long strands of yarn per side.
- Fold strands in half and insert hook into side space at the bottom of the top.
- Pull loop through, then pull all yarn ends through to make a tassel-style tie.
- Split into 3 groups and braid.
- Knot end, cut, and unravel ends for a tassel look if desired.
Finishing
- Weave in all ends.
- Try on and adjust straps as needed for perfect fit.
- Block your top (optional) for a more professional finish.
Pattern Correction & Tips
- Pattern Correction: In the video, sometimes the number of stitches to skip at the center (for joining and keyholes) varies slightly. Always check symmetry on your body and keep counts mirrored for both sides.
- Fit Tip: Try on the piece frequently, especially when determining cup size, placement of keyholes, and body length.
- Strap Tip: If you want sturdier straps, you can double the yarn for the chain or add more rows.
- Customization: Adjust the body length by adding more rows of the lacy space stitch and double crochet rows at the bottom.
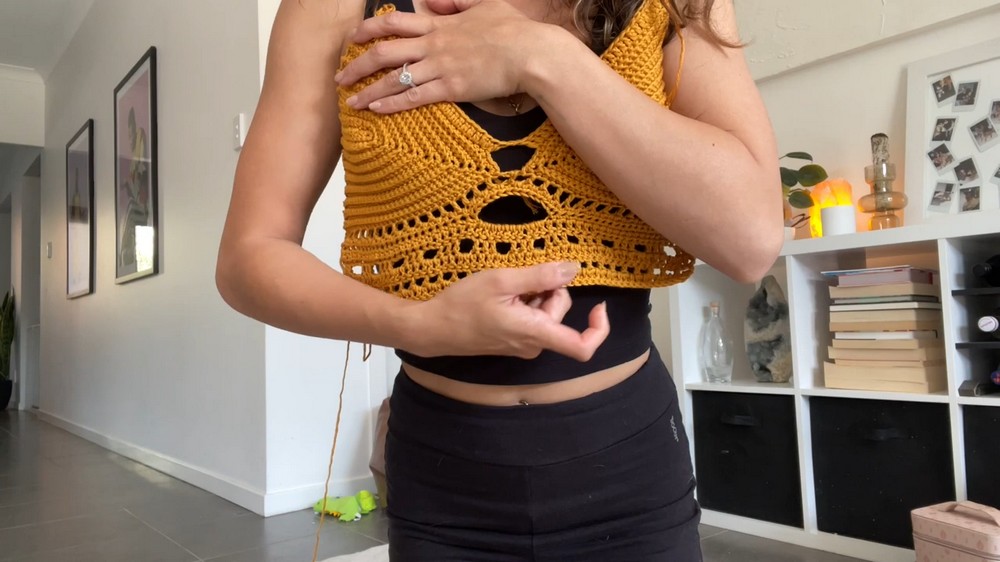
Conclusion
You have now created a stylish and unique Keyhole Cut-Out Aztec/Cleopatra Vibe Top, perfect for festivals, the beach, or a statement summer outfit! This pattern can be adapted for a range of sizes, and the motif offers plenty of opportunities for color-play and customization.