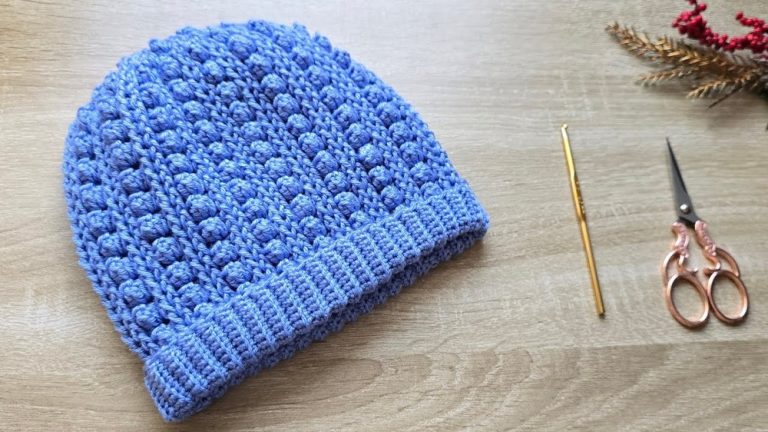
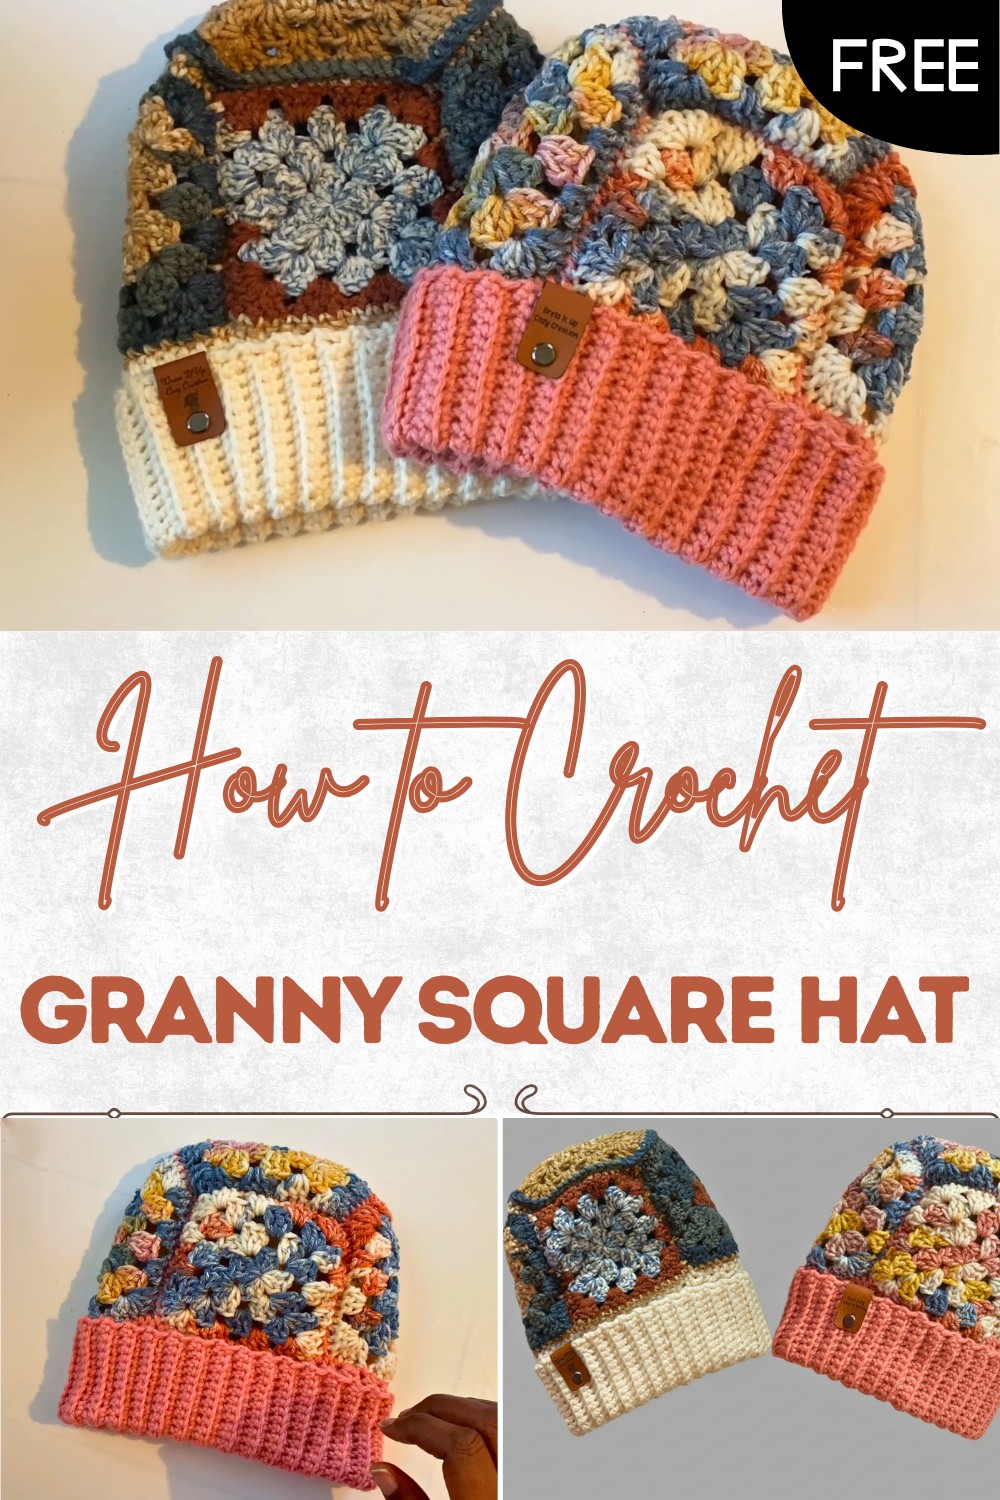
Colorful Granny Square Hat Free Crochet Pattern
Brighten your look with this free crochet granny square hat pattern, that offer cozy warmth highlights classic texture & completes any outfit.
Colorful blocks come together to form a hat that is playful and bright making each person feel unique. Putting together granny squares is simple and brings a fun touch to your wardrobe no matter your age. The crochet granny square hat pattern allows anyone to mix colors and enjoy making something that’s warm for cold days and full of personality. This pattern is easy to follow and gives your head extra comfort while showing off a bold look with cheerful squares.
Free Crochet Pattern for Trendy Granny Square Beanie
No need for fancy skills anyone can join in and make a hat that is special for themselves or to share as a thoughtful gift. Friends and family would be happy to wear such a hat that shows creativity and brings smiles everywhere you go. A granny square hat turns ordinary yarn into a colorful accent that makes every day feel brighter and cozier.
Crochet Granny Square Hat Pattern
Materials List
- Yarn: Worsted weight (#4) variegated yarn for the hat body, and a contrasting scrap yarn (similar weight) for the brim.
- Hook: 5.0 mm crochet hook (or size needed for gauge/fit).
- Notions: Yarn needle for sewing and weaving ends, scissors, stitch markers (optional), decorative tag (optional).
Key Abbreviations (US Terms)
- ch – chain
- sl st – slip stitch
- sc – single crochet
- dc – double crochet
- st(s) – stitch(es)
- BLO – back loop only
Special Notes
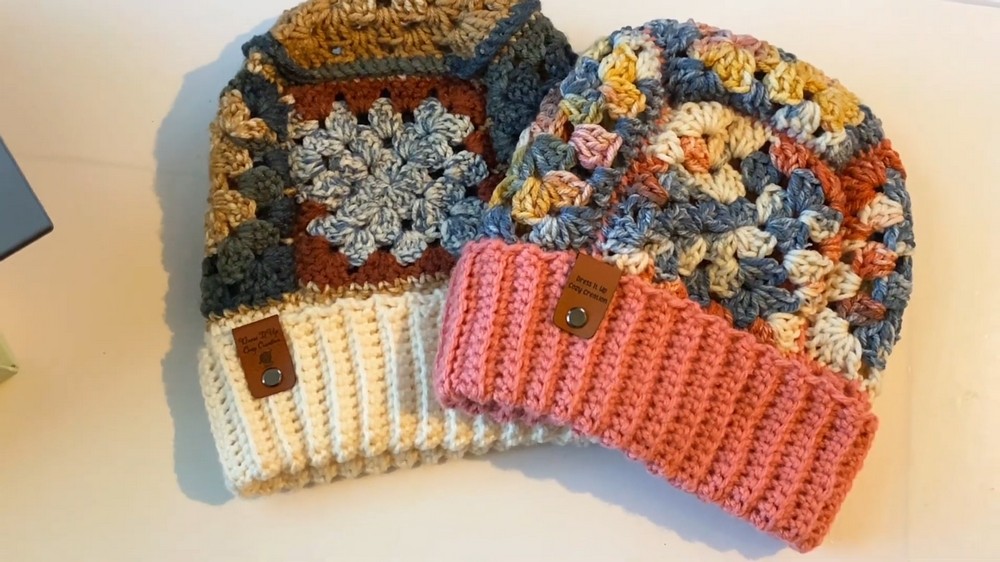
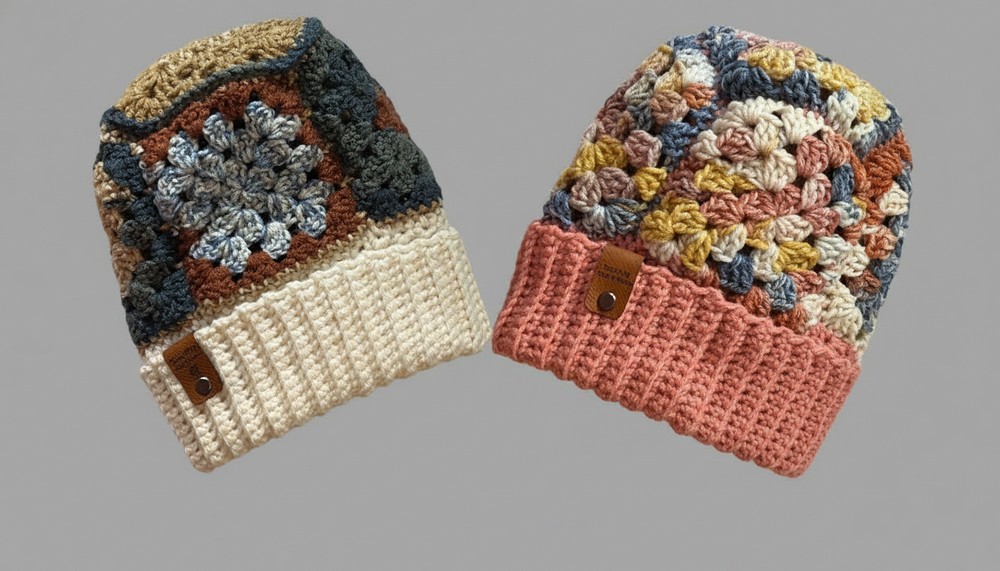
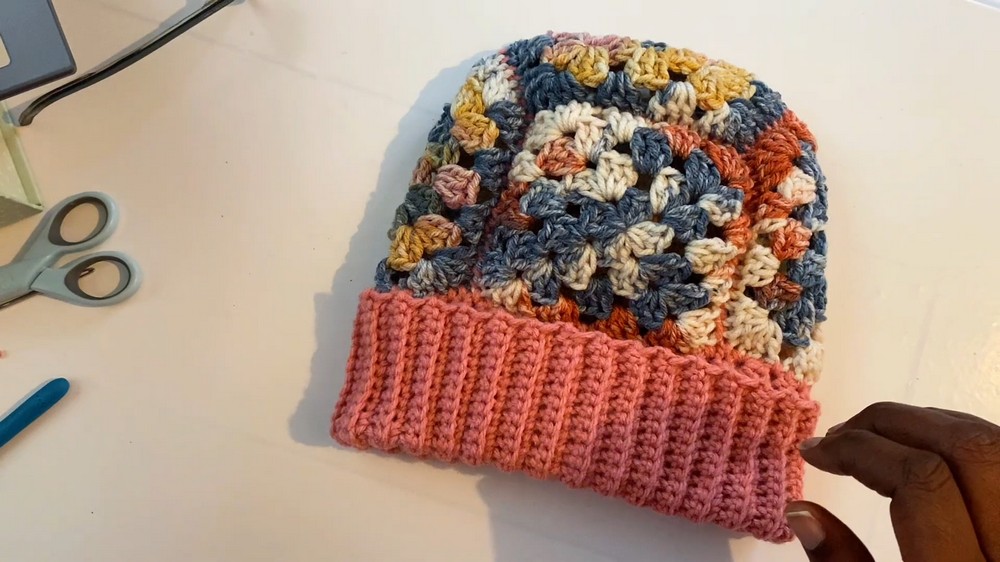
- The hat is assembled from five granny squares sewn together.
- The brim is worked in rows with a unique shaping technique for stretch and fit.
- The brim creates a thick, warm fold, ideal for extra ear warmth.
- Alternate joining methods can be used (single crochet seam or slip stitch seam).
Pattern Instructions
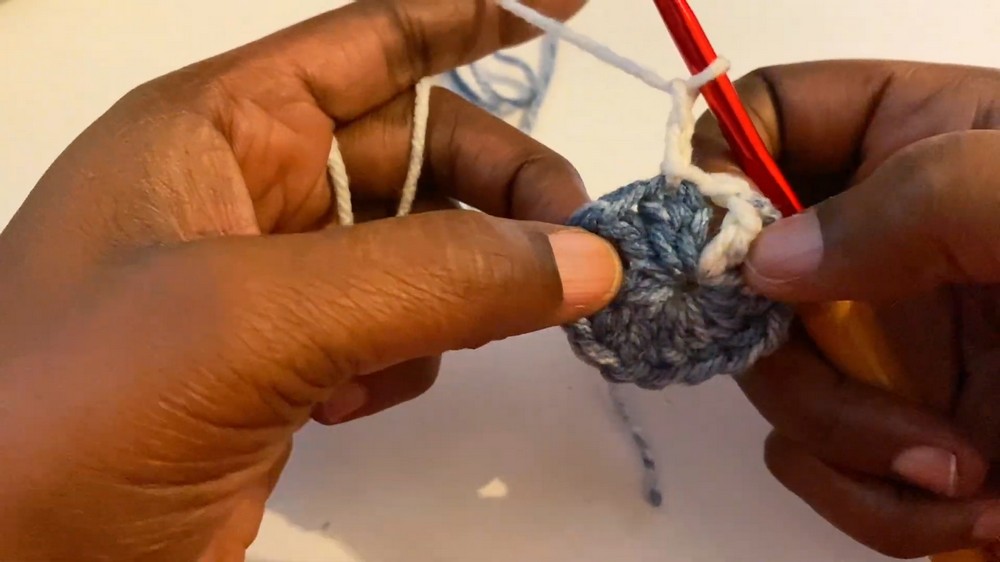
A. Granny Squares (Make 5)
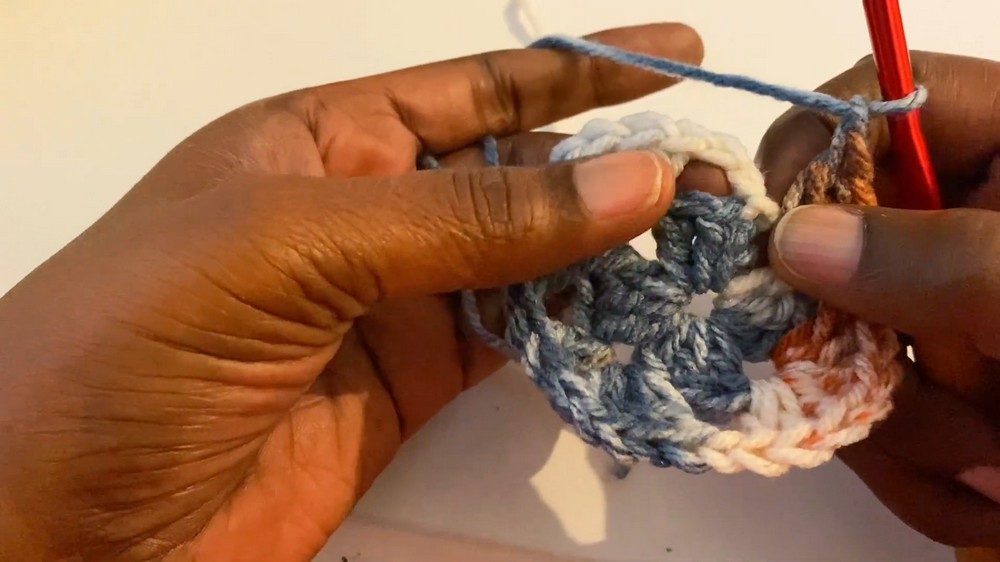
Round 1:
- Make a magic ring.
- [Ch 3 (counts as dc), 2 dc] in ring, ch 1.
- [3 dc in ring, ch 1] repeat three more times (4 clusters total).
- Pull ring tight. Join with sl st to top of starting ch-3.
- Fasten off or continue to next round.
Round 2:
- Ch 2. In each ch-1 corner space: [3 dc, ch 1, 3 dc, ch 1] (work two clusters in each space separated by ch 1, for four corners).
- After the last cluster, join with sl st to top of beginning ch-2.
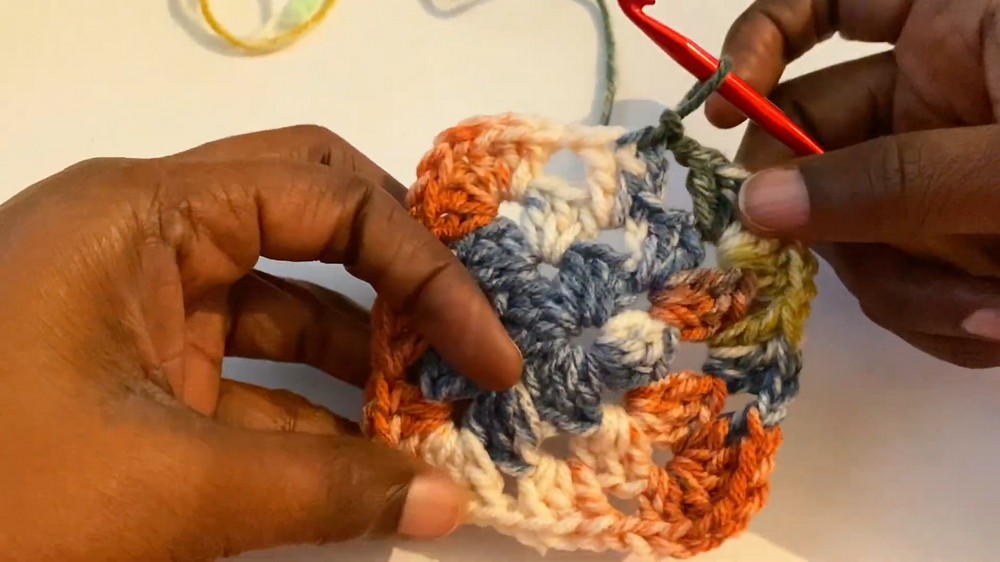
Round 3:
- Ch 2.
- In each corner ch-1 space: [3 dc, ch 1, 3 dc, ch 1] (two clusters in corner).
- In each side space between corners: [3 dc, ch 1] just once (single cluster).
- Continue to work corners/sides as established for a square.
- Join with sl st to top of ch-2.
Round 4: (Final Round)
- Repeat: In each corner ch-1 space: [3 dc, ch 1, 3 dc, ch 1]; in each side space: [3 dc, ch 1].
- Join to starting ch-2.
- Fasten off and weave in ends.
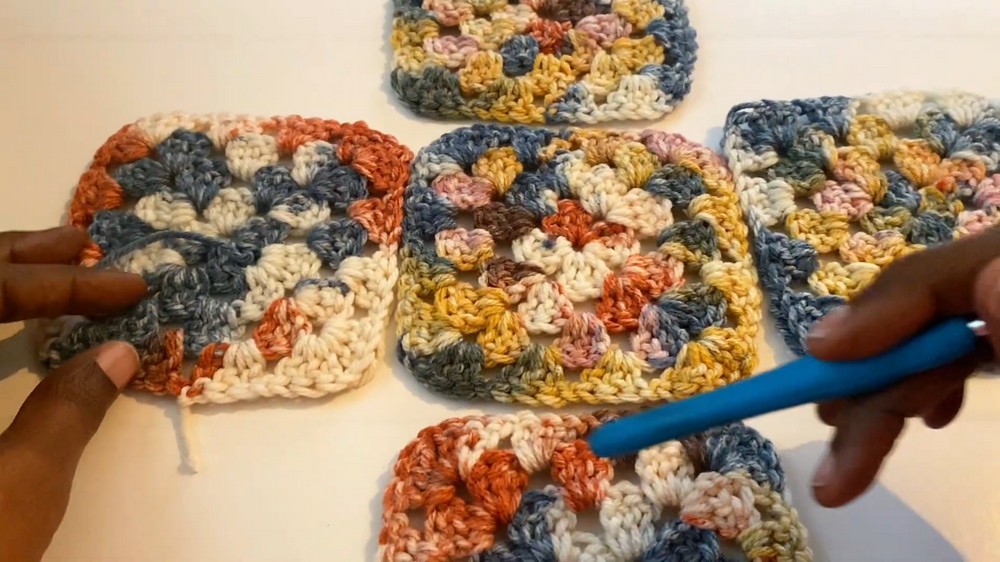
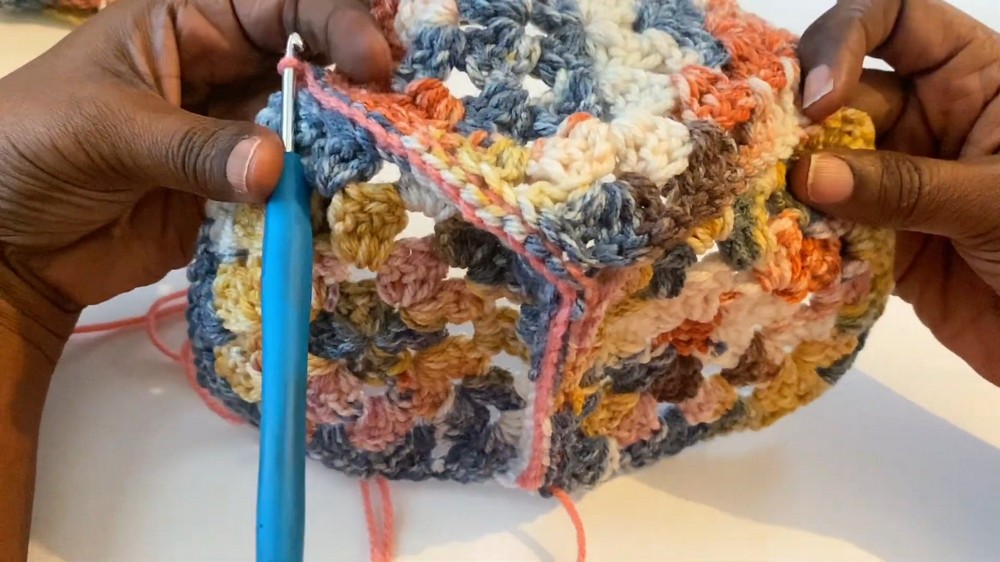
B. Join Granny Squares
- Lay out all 5 granny squares: 4 for sides, 1 for the top.
- With right sides together, join squares using slip stitch (sl st) seam—insert hook in BLO of one square and FLO of adjacent square, sl st to join.
- Seam all the way along sides, joining four sides to form a tube/crown and one on top for the cap.
- Continue joining all sides as needed, making sure all seams are neat and firm.
- Weave in all ends.
C. Brim (Worked Flat)
With contrasting color:
- Ch 26.
- Row 1: Sc in 2nd ch from hook and each ch across. (25 sc)
- Row 2: Ch 1, turn. Sc in first st (under both loops), sc BLO in next 23 sts, sc in both loops of last st. (25 sc)
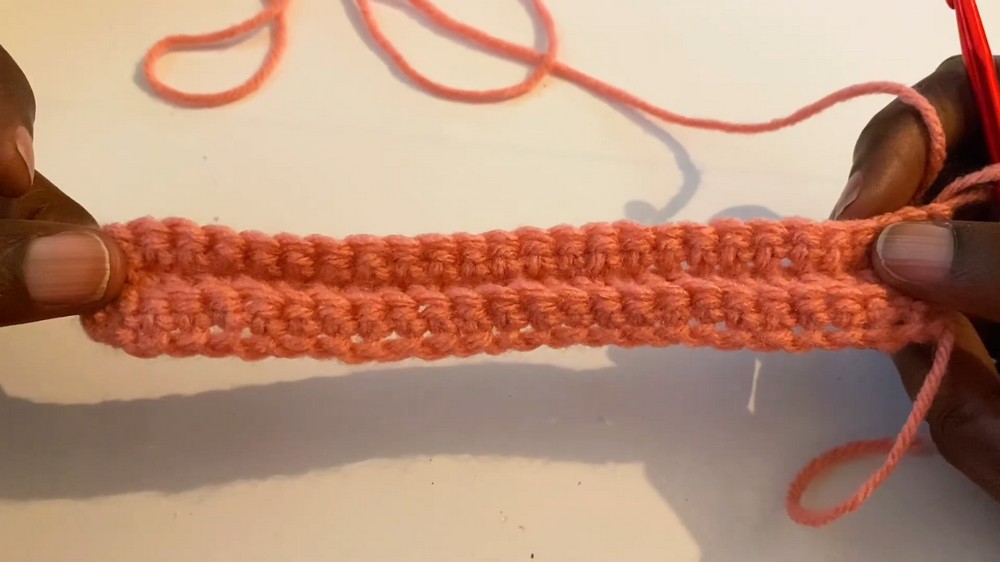
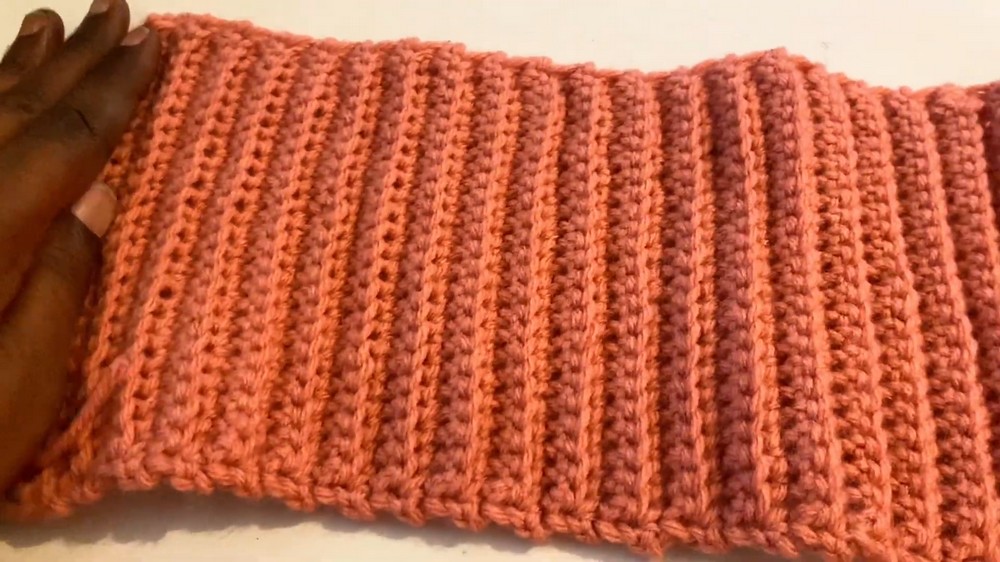
- Repeat Row 2 for a total of 60 rows (or to fit snugly around bottom edge of hat when slightly stretched).Note: Both edge stitches of each row are worked under both loops for easier assembly, the rest are worked in BLO for ribbing.
- When desired length is reached, fold brim in half, short ends together.
- Seam ends using sc across to form a tube/circle.
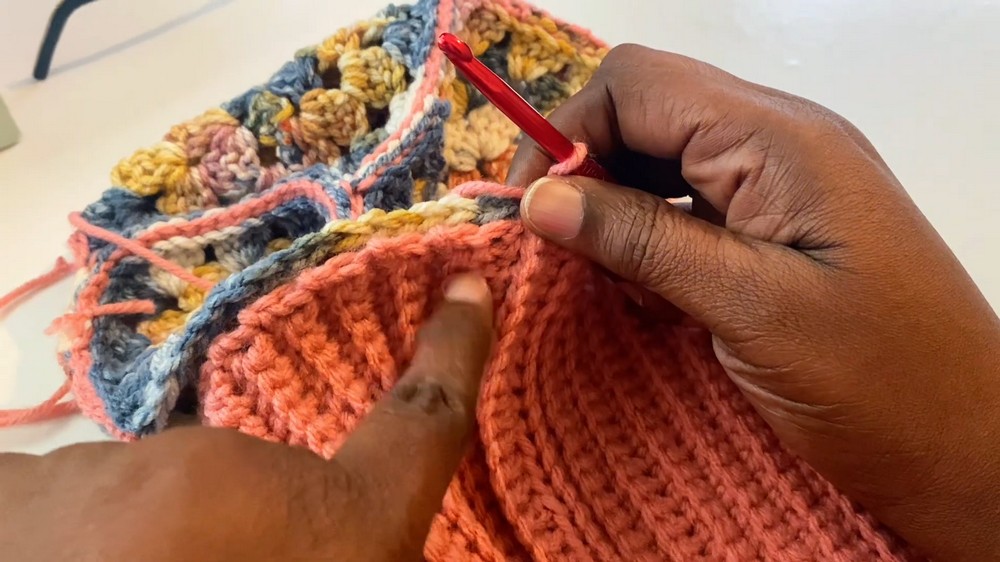
D. Attach Brim to Hat
- Place wrong sides together: align brim’s seam with a seam of the hat.
- With hat right side out, single crochet through both layers all the way around:
- Insert hook through edge loops of both hat and brim, sc to join evenly.
- You can alternate: one sc in the valley, one at peak, matching the number of rows/stitches to the edge of the hat.
- Sl st to first sc to join, fasten off, and weave in ends.
E. Finishing
- Turn hat right side out.
- Fold brim upward to double the thickness over the ears.
- Attach decorative tag if desired.
- Your hat is now complete!
Conclusion
You have created a unique, customizable, and warm granny square hat with a thick, stretchy brim. This beginner-friendly project is perfect for using up scrap or variegated yarns and makes a fantastic gift or personal accessory.
Pattern Corrections & Tips
- If you prefer a different join, use single crochet seams or tapestry needle whipstitch.
- For larger/smaller hats, adjust size by making larger/smaller squares, or change the number of brim rows.
- Stretch the brim slightly as you crochet it on for a snug fit.
- Both ends of the ribbing (brim) should always be worked through both loops for stability and easy seaming.
- Sew granny squares securely at all joins to prevent holes.