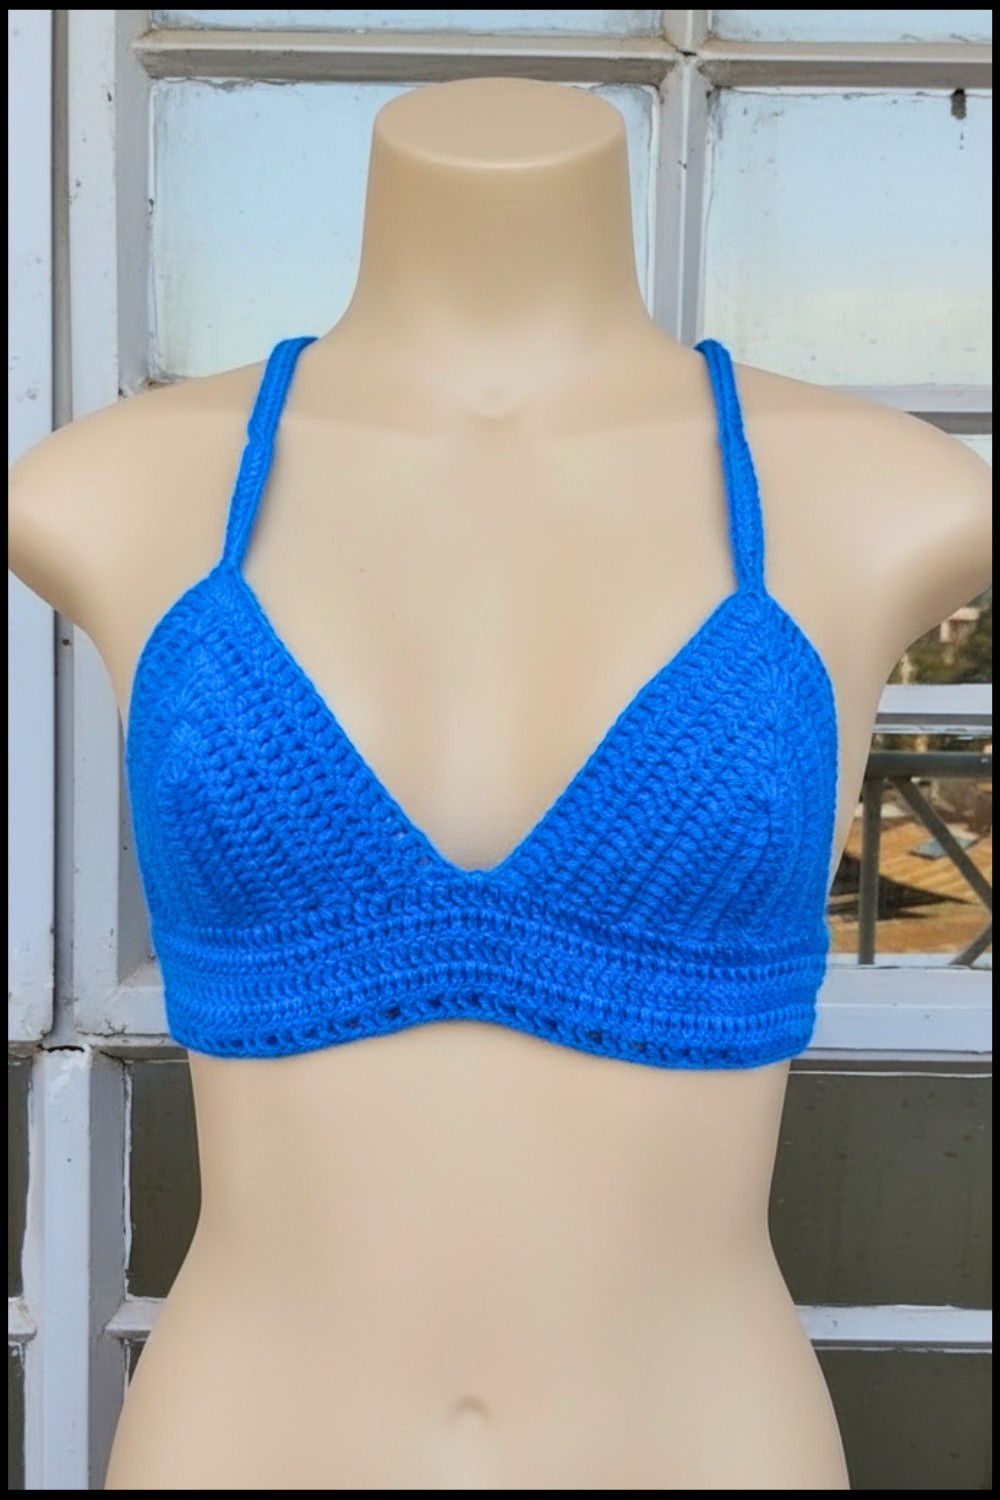
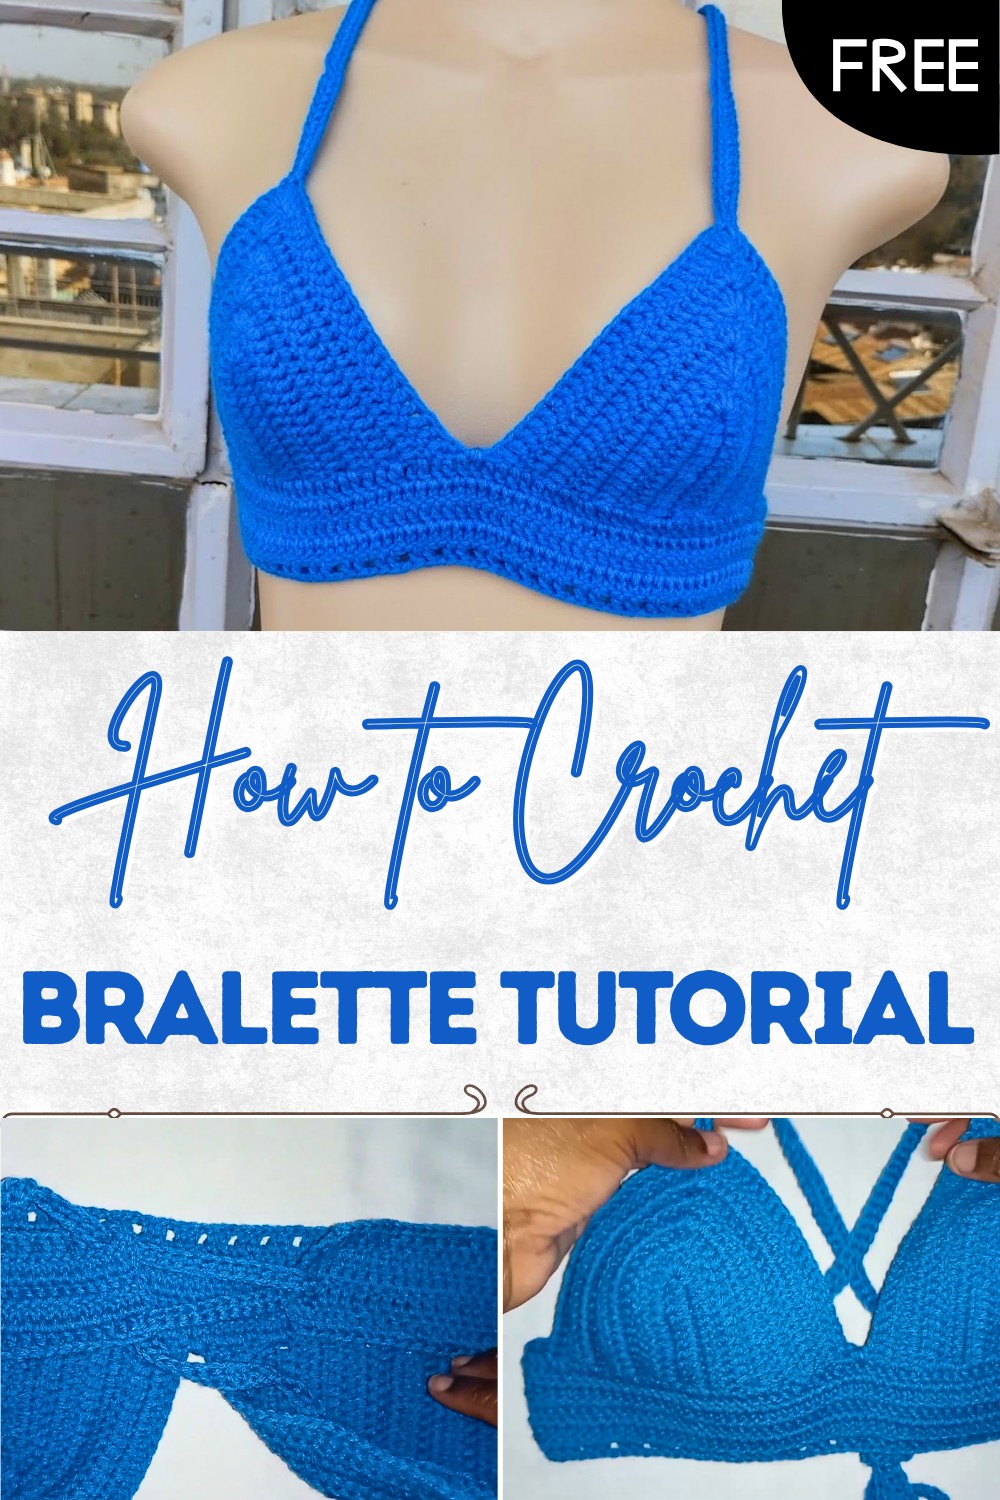
Trendy Free Crochet Bralette Pattern (Step-by-Step Guide)
Refresh your summer wardrobe with a free crochet bralette pattern that is perfect for all skill levels and adds comfort style and a handmade touch
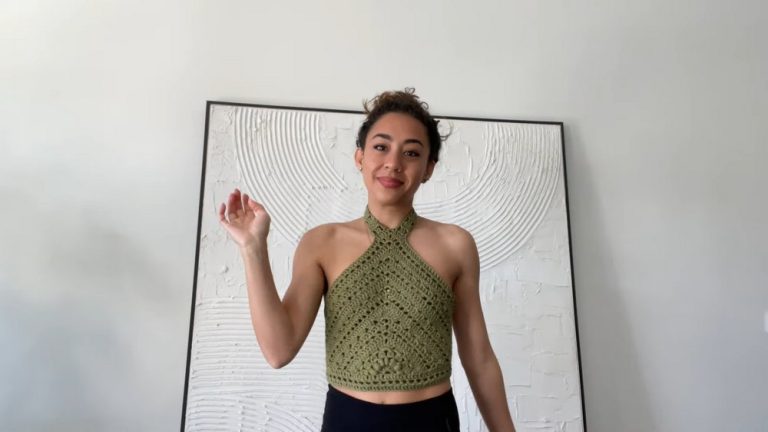
You see a pretty little top with delicate straps and a gentle shape calling you to touch its soft fabric. Color comes alive in bright shade or calm tone making each piece special to your hands and heart. Wearing a crochet bralette pattern gives you a fresh and beautiful look for a summer day or a cozy night at home. Its open design lets your skin breathe and feels light and airy on a hot afternoon. Perfect for a beach trip or layering under your favorite blouse it brings style and comfort together in a unique way.
Simple Crochet Bralette Pattern – Totally Free
The handmade detail makes every stitch feel warm and loving showing off your creativity without saying a word. There is happiness in making something simple and lovely for yourself or as a gift for a loved one. Give your wardrobe a gentle hug with an easy-to-follow crochet bralette pattern and discover how fun fashion can be with just yarn and care.
Crochet Bralette Step-by-Step Pattern
Materials
- Yarn: Medium-weight (worsted, #4) acrylic yarn
- Hook: 2.5 mm crochet hook
- Stitch markers (optional, for marking cup increases)
- Scissors
- Yarn needle (for weaving in ends)
- Measuring tape (for accurate fit)
Key Abbreviations
| Abbreviation | Stitch |
|---|---|
| ch | chain |
| st(s) | stitch(es) |
| dc | double crochet |
| sc | single crochet |
| sl st | slip stitch |
| rep | repeat |
| yo | yarn over |
Special Notes
- Adjustable sizing: The foundation chain is based on the length from nipple to just below your bust for custom fit.
- Technique for center increases: Five dc are worked into the center of the cup, with stitch marker on the third dc.
- Final row includes mesh sections (ch-1, skip 1).
- Straps and back band are worked with chains and reinforced with single crochet.
- Strap placement: Insert into the second stitch on the upper cup corners for stability.
Pattern Instructions
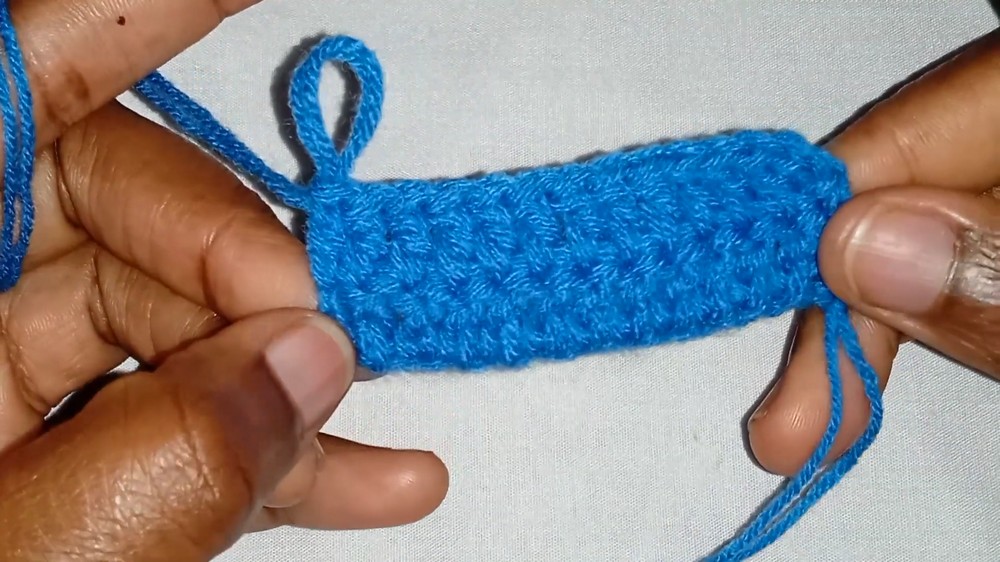
1. Bralette Cups (Make 2)
- Make a slip knot.
- Ch the number of chains to equal the distance from nipple to just below bust.
- Cup A in sample: approx. 2.5″ (chain number varies by tension; add 1 for turning).
- Row 1:
- Skip first 2 ch, dc in 3rd ch from hook and each ch across.
- Skip first 2 ch, dc in 3rd ch from hook and each ch across.
- Row 2:
- Ch 2, turn (counts as first dc),
- Skip first st, dc in next st and each st across to end.
- At last st: Work 5 dc into the final st, placing a stitch marker on the 3rd dc of these 5.
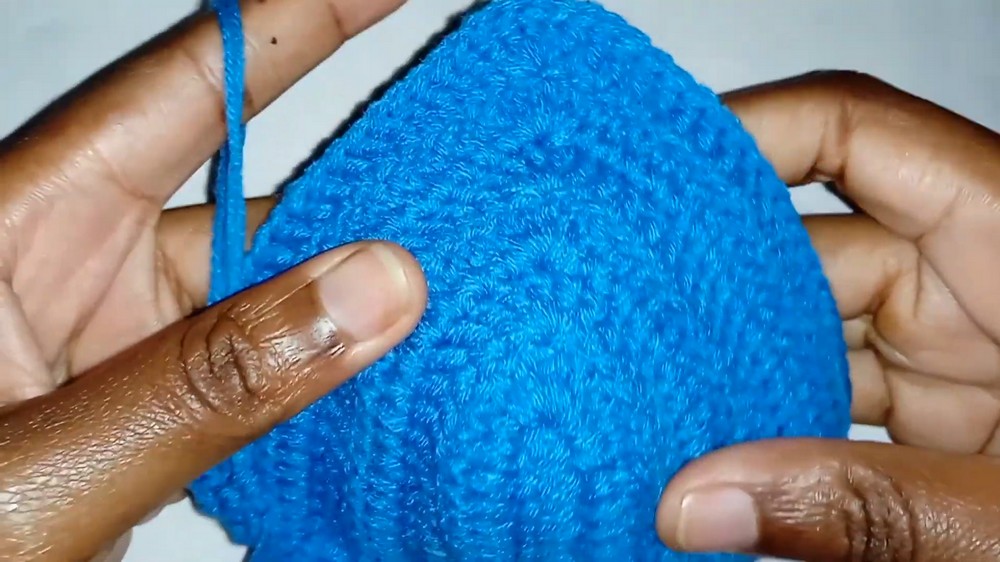
- Row 3:
- Dc in each st across up to center (stitch marker),
- At marker, work 5 dc in the marked st, mark center dc,
- Dc in each st to end.
- Repeat Row 3 until your desired cup height is reached (Sample: about 5” tall; add more rows for more coverage).
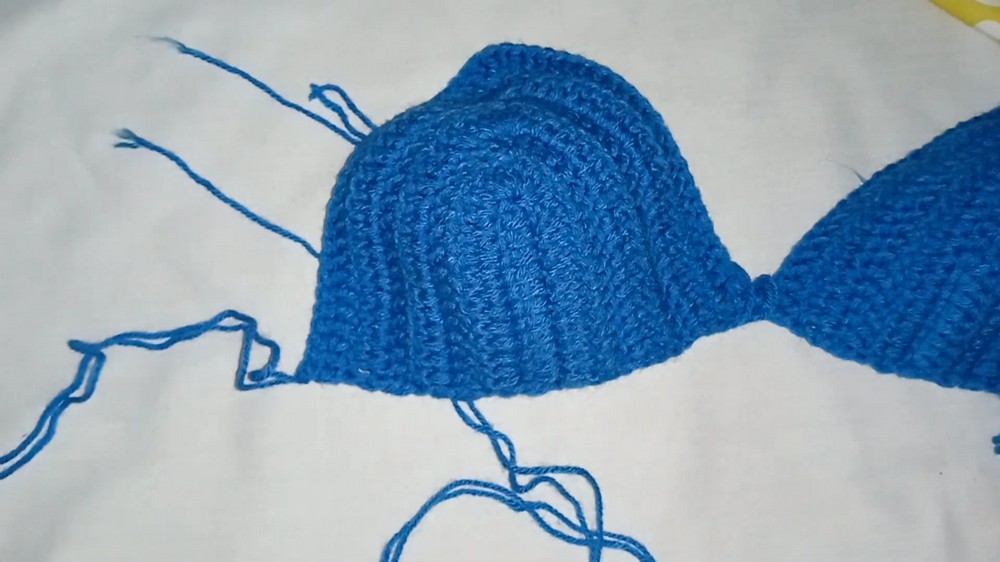
2. Joining the Cups
- Place both cups with RS facing, tip to tip.
- Sl st through the first st at the base of both cups to join.
- Ch 1, cut yarn and pull through to finish.
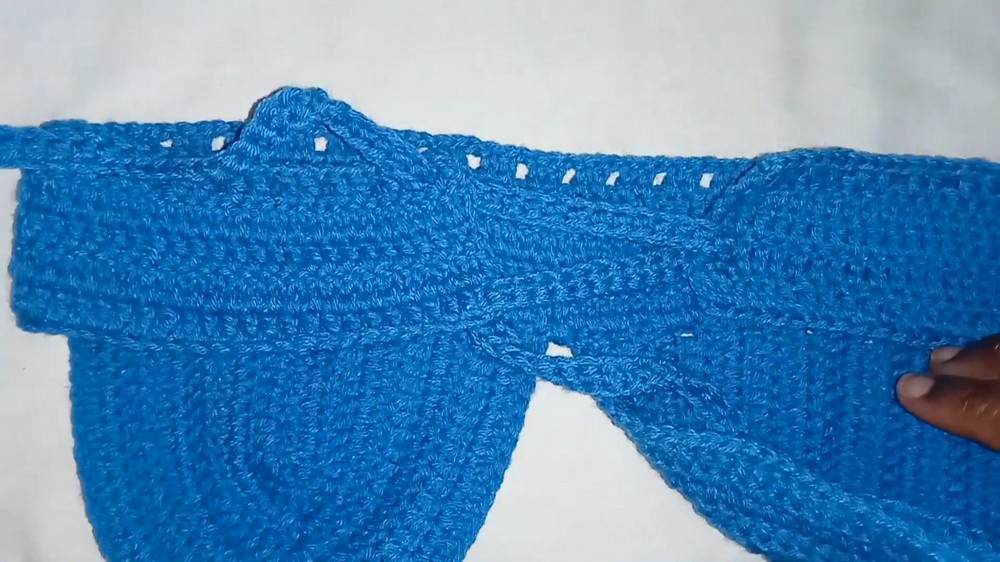
3. Back Band/Side Extensions
- Attach yarn to the outer bottom corner of the joined cups.
- Ch the number of stitches to create a band that plus the two cups will equal your waist minus 5” for negative ease (Sample: 27 chains ≈ 5”).
- Cut yarn, pull through to fasten off.
- Rep on the other side.
4. Band and Body Row
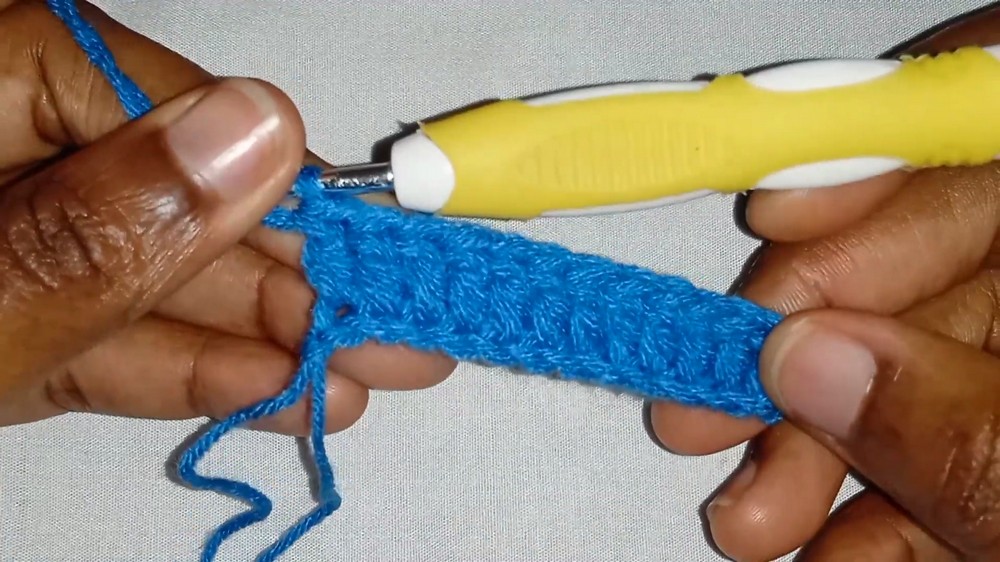
- On one side, add 2 more chains for turning, then dc in 3rd ch from hook and across all chains, over the base of both cups, and along the side chain extension.
- When working over the cup base, work 2 dc into each row-end stitch for strength.
- Hide yarn ends as you stitch by laying the short ends over the top of the work and crocheting over them.
- At end of row, repeat with second under-bust band if not already done.
5. Body Rows
- Continue in dc for desired number of rows for underbust coverage or preferred width (sample: 3–4 additional rows).
- Final row (mesh):
- Ch 2, turn. Skip 1 st, dc in next st, ch 1, skip 1 st, dc in next st.
- Repeat along the row for a decorative edge.
6. Straps
- Make a slip knot, attach to the second stitch in from the tip of the cup (NOT the very edge).
- Ch for strap length (sample: 50”).
- Skip first ch, sc in each ch to the end for a sturdy strap.
- Sl st into the corner of the cup to secure, ch 1, cut yarn.
- Repeat for the other cup to create two straps.
7. Finishing Touches
- Weave in all yarn ends with yarn needle.
- If desired, add a strap across the back for extra support.
- Try on and adjust as needed.
Conclusion
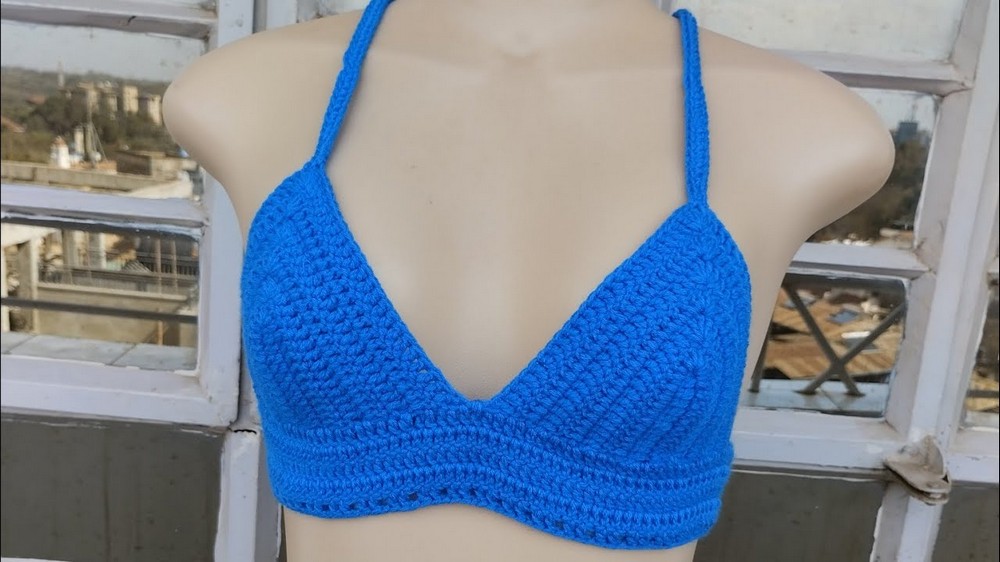
You have completed a customizable crochet bralette suitable for Cup A, but easily adapted to any size. This design features sturdy shaping, smooth cup transitions, a secure back, and comfortable straps. The middle “5 dc” increase creates a natural, flattering cup shape.
Pattern Corrections & Tips
- Pattern Correction: Ensure the five dc are always placed in the same center point (marked st) for symmetrical cups.
- Tip: Always insert straps into the second stitch, not the corner, for a more secure and comfortable fit.
- Tip: Hide your yarn ends as you work for a neater finish.
- Tip: Adjust the number of rows and chain length for other cup sizes or desired fit.
- Tip: When joining cups, ensure they align evenly before slip stitching.