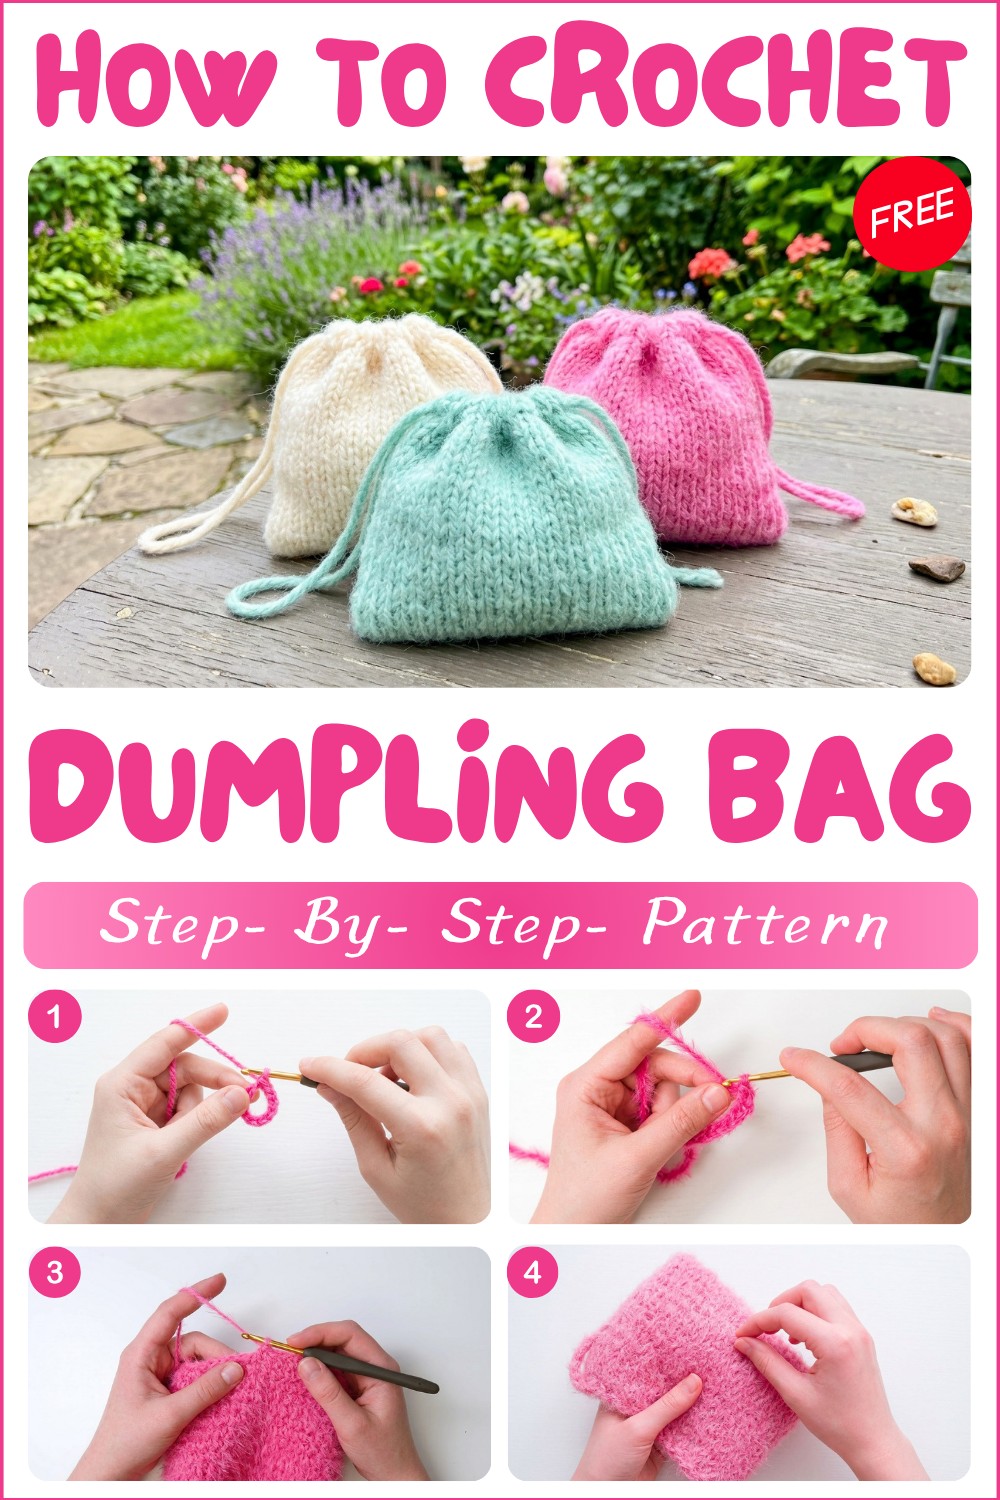
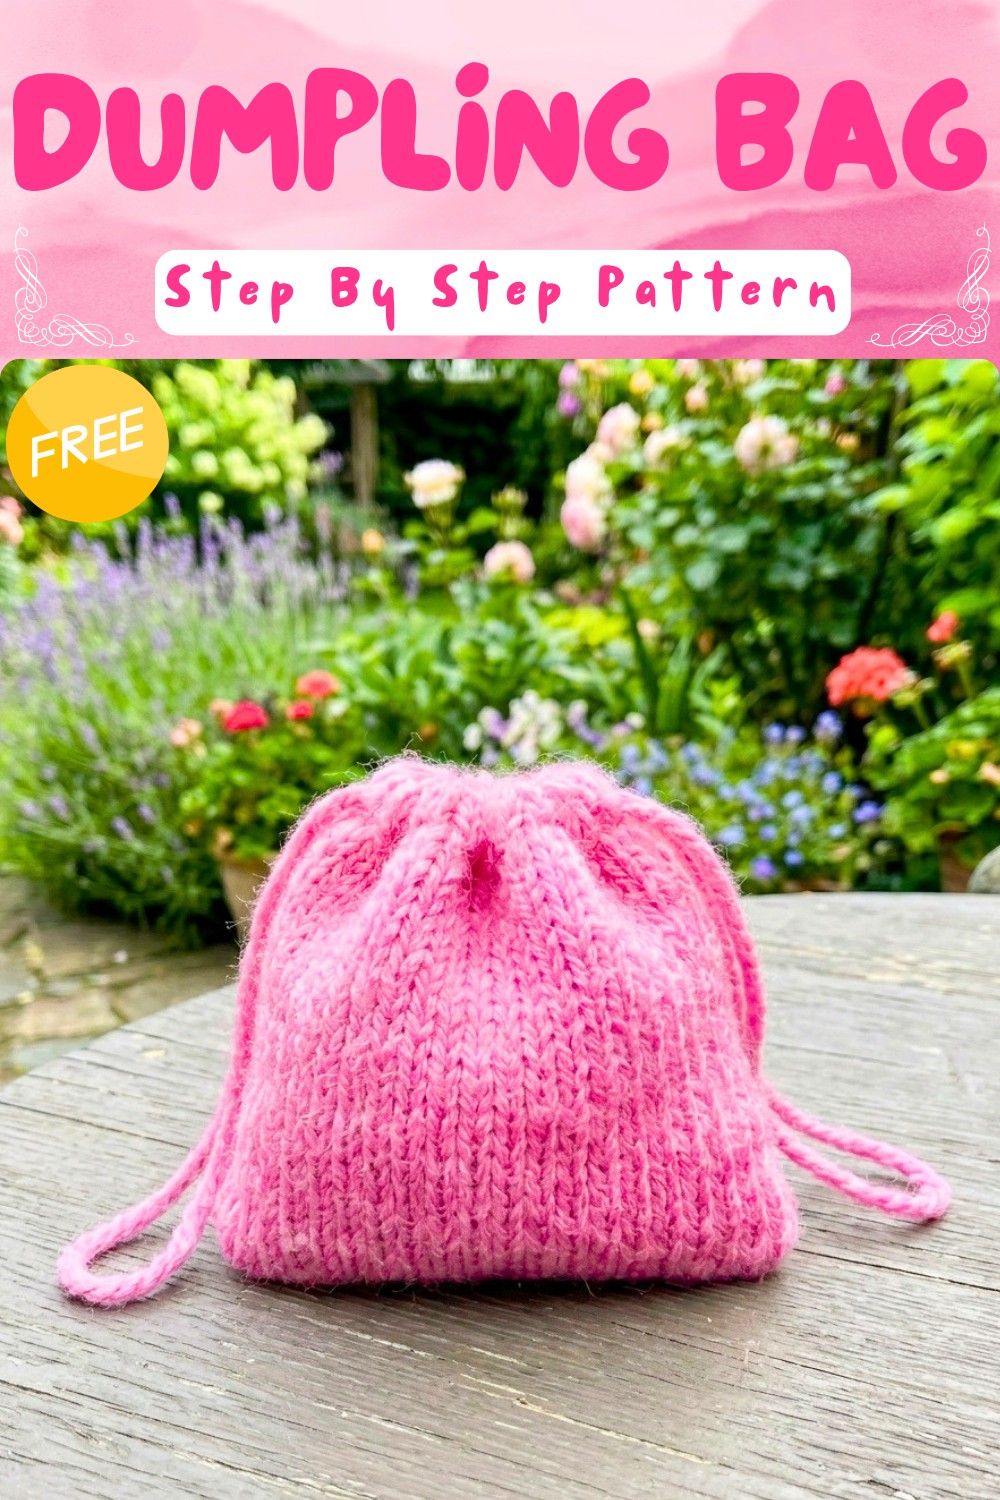
Dumpling Bag Free Crochet Pattern for Special Moments
Slip your favorite trinkets into a playful pouch with a crochet dumpling bag pattern perfect for adding a pop of style to everyday adventures.
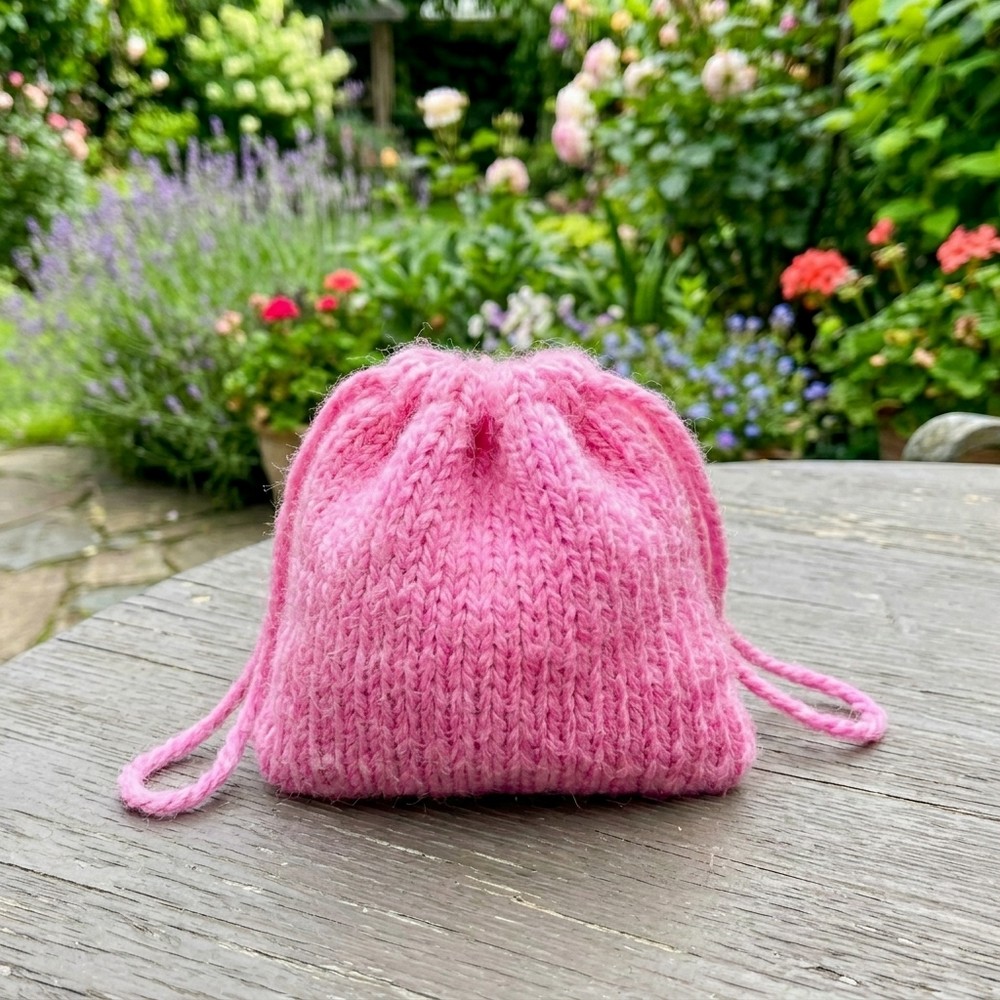
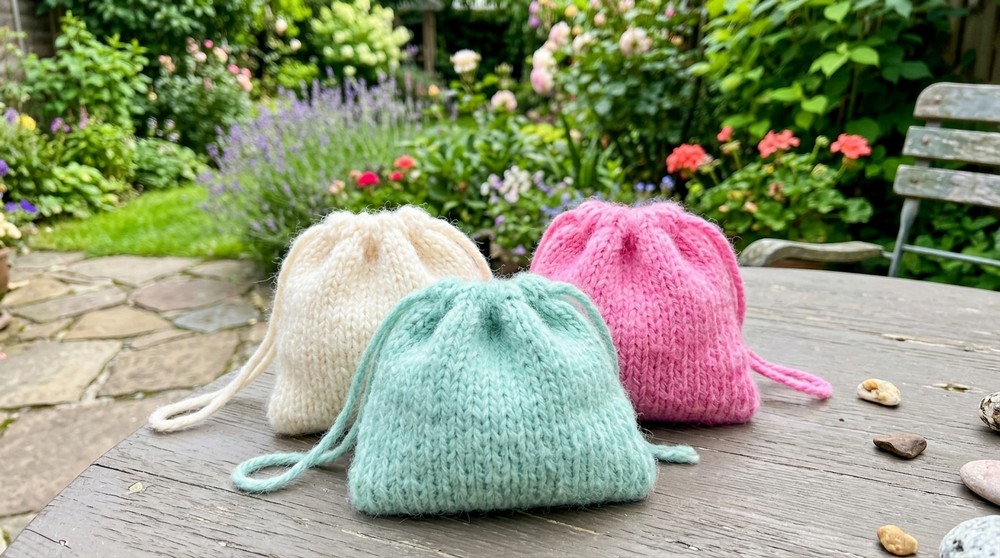
A cute little bag that looks soft and round like a dumpling. Its cozy shape makes it easy to hold in your hand or carry on your arm. People love the bright colors and beautiful stitches that make each bag unique. You can bring this lovely purse anywhere, when you go to the market, when you meet friends, or when you go for a walk. The crochet dumpling bag pattern helps you make a bag that keeps your favorite things safe and close to you.
Modern Crochet Dumpling Bag Pattern with a Fun Flair
Pattern Notes
- The entire bag is worked in continuous rounds after starting with an oval base.
- Stitches are made into spaces between posts, creating a neat texture and avoiding visible crown stitches at the top.
- Stitch count is crucial, especially in the first round; use markers to help track each section.
- The cord is made with triple the needed length and features a sturdy, chained look for durability.
- A label can be sewn on for added style, using matching or accent yarn.
- Fluffy, soft yarn is recommended for best results.
Dumpling Pouch – Crochet Pattern
This pattern guides you through the creation of a cozy dumpling-shaped pouch using just two balls of Daiso yarn. Ideal for beginners, this soft, fluffy bag features a rounded base, spacious interior, and drawstring closure. You can customize the strap for a short handle or a long shoulder strap. Add a fabric label for a professional touch and use your pouch for essentials, organizing your purse, or as a cute handbag. The instructions are detailed for a 22-stitch base, but the method adapts easily for other sizes.
Skill Level
Beginner
Perfect for those practicing chain stitches and double crochet, with simple increases and construction.
Materials
- 2 balls Daiso soft fluffy yarn (choose your colors)
- 4.0–5.0 mm crochet hook (adjust for yarn type)
- Stitch markers
- Scissors
- Yarn needle (tapestry needle)
- Tape measure or ruler
- Optional: label for pouch, sewing thread or yarn in matching/accent color
Measurements / Sizing
- Finished width: ~18 cm
- Finished height: ~14 cm
- Cord: 60–120 cm, depending on preference
Gauge
- Not essential, but aim for tight, even stitches to retain pouch shape.
Stitch Abbreviations
| Abbr. | Stitch |
|---|---|
| ch | chain |
| dc | double crochet |
| sl st | slip stitch |
| st(s) | stitch(es) |
| rep | repeat |
Special Stitches
Double Crochet (dc):
Yarn over, insert hook, yarn over, pull up a loop (3 loops on hook), yarn over, pull through 2 loops, yarn over, pull through remaining 2 loops.
Slip Stitch (sl st):
Insert hook, yarn over, pull through both loops on hook.
The Crochet Pattern
1. Bottom Base (Oval Foundation)
- Make a slip knot, ch 22. (For mini version ch 10, or adjust as desired.)
- Place a stitch marker at the last ch.
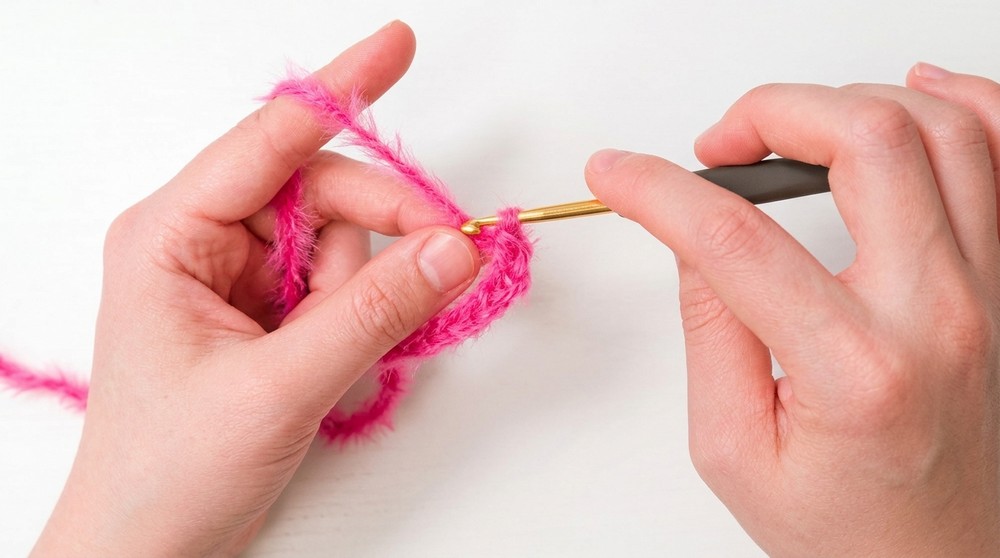
Foundation Row:
- Ch 2 (counts as turning chain).
- Into the same space as your marked chain, dc 3 times.
- Working down the chain, dc in each st across (20 dc after your 3 dc in corner).
- In the last chain before knot, dc 6 times in the same st (this creates the other rounded end).
- Pivot and begin working along the back of the foundation chain. Dc in each st across (20 dc).
- At the end of the row where you started, in the same st as the marked chain, add 3 dc to mirror the first side.
- Total stitch count: 52 (including corner increases)
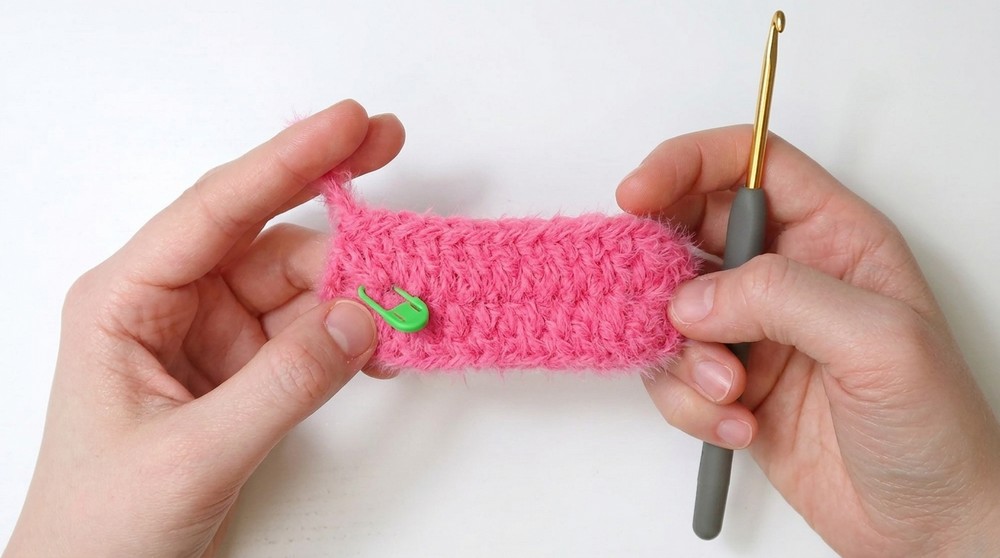
2. Continuous Rounds (Body)
- Place a stitch marker in your first stitch (where you began your dc increases).
- Do a sl st between posts (not in the top crown).
- Ch 2 (not counted in stitch total).
- For the next round and all subsequent rounds:
- Dc in space between posts all the way around.

- Repeat for each space.
- At end of each round, sl st between the posts at the start position, ch 2 (not counted), and begin next round.
- Dc in space between posts all the way around.
- Repeat for 13 rounds total, or until pouch measures 14 cm tall.
3. Drawstring Holes (Eyelet Round)
- At the start of the round, sl st between posts, ch 3.
- Skip 1 space, dc in next space, ch 1, skip 1 space, dc in next space;
- Continue this pattern all the way around — you’ll create chain spaces for inserting your cord.
- Finish round with a sl st.
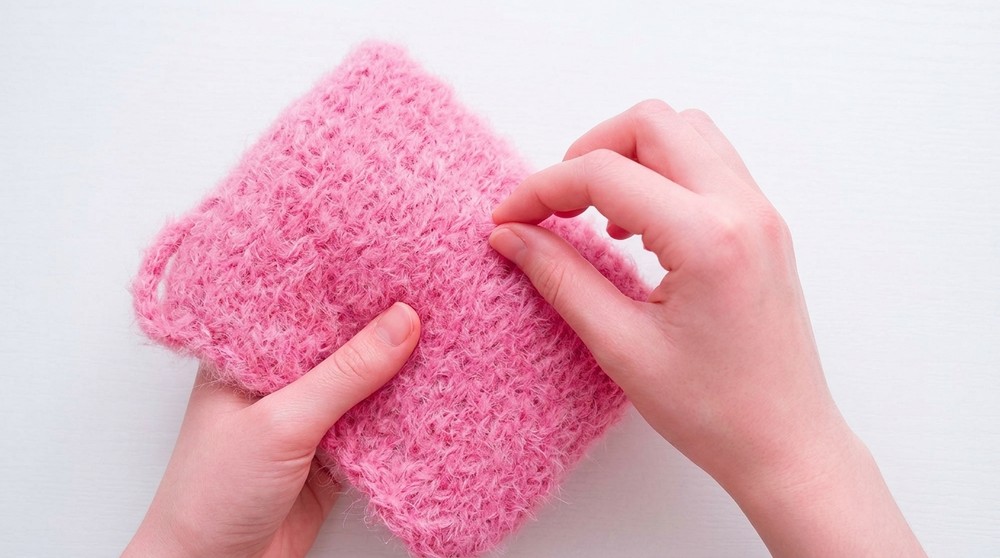
4. Finishing
- Fasten off and pull yarn upwards through the stitch so it doesn’t unravel.
- Use a yarn needle to weave ends neatly inside the pouch; the fluffy yarn makes this easy.
5. Cord/Strap Construction
- For a 60 cm strap, pull out 3 times your desired length (~180 cm).
- Using your hook, make a slip knot and begin chaining.
- Work chain to desired length.
- For a thicker cord, use two strands and chain or use a sturdy chain stitch method.
- Cut yarn, pull end through last loop to secure.
6. Cord Insertion
- Fold the cord in half and use the yarn needle (or hook) to thread through every eyelet/chain space around the top of the pouch.
- Weave through, alternating in and out for each space until the ends meet.
- Bring cord ends to the outside; knot them or add decorative finishes as desired.
7. Sewing the Label (Optional)
- Position label on the pouch (outside or inside, as you prefer).
- With matching or accent thread/yarn, loop around needle and secure label with small running or whip stitches, catching the back and folded edges to conceal knots.
- Anchor ends in the fabric layers, keeping stitches slightly loose so the label and pouch don’t gather.
Assembly & Finished Size
- Stitch markers help ensure symmetry and correct stitch count throughout.
- Total stitches per round: 52 (22 base chains expanded by increases to 52 stitches).
- Height: 14 cm
- Width: 18 cm
- Cord: 60–120 cm (customizable)
- Eyelet round is for drawstring; insert cord as desired.
- Label sewn to pouch edge or interior.
Customization Tips
- For a shoulder or crossbody pouch, make the cord ~120 cm.
- Shorten cord for a handbag or pouch style.
- Add fabric or crocheted label for unique style.
- Use contrasting yarn colors for stripes or color-blocking.
Final Checklist
- Pouch is rounded, with a fluffy, soft finish.
- Stitches are even and the base maintains its shape.
- Cord passes smoothly through eyelets, closing the pouch securely.
- Label is attached, ends are hidden within the fabric.
- Bag functions as a pouch or handbag as desired.