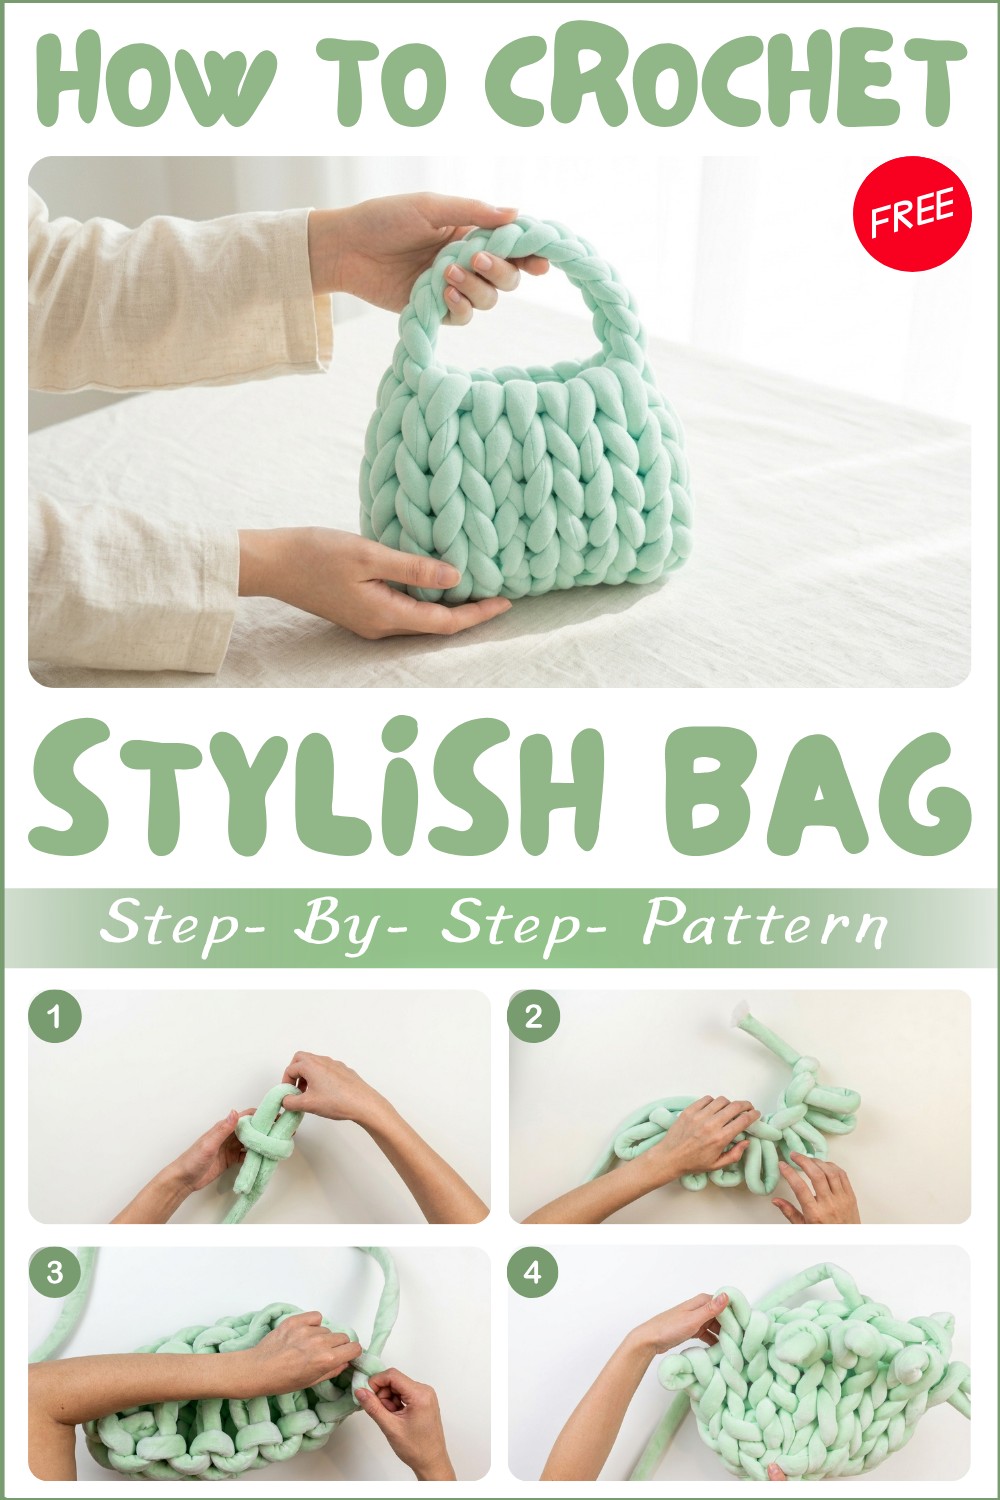
Free Crochet Bag Pattern Made With Chunky Yarn
Working with thick, soft yarn creates a unique feeling and texture that instantly drew me to this project. The item is a spacious, sturdy bag that can carry everyday essentials comfortably. By making small changes to the stitch or size, it’s easy to turn this basic design into a market tote, a beach bag, or even a stylish storage basket. The free crochet chunky yarn bag pattern offers a great starting point for anyone interested in crafting practical and attractive bags.
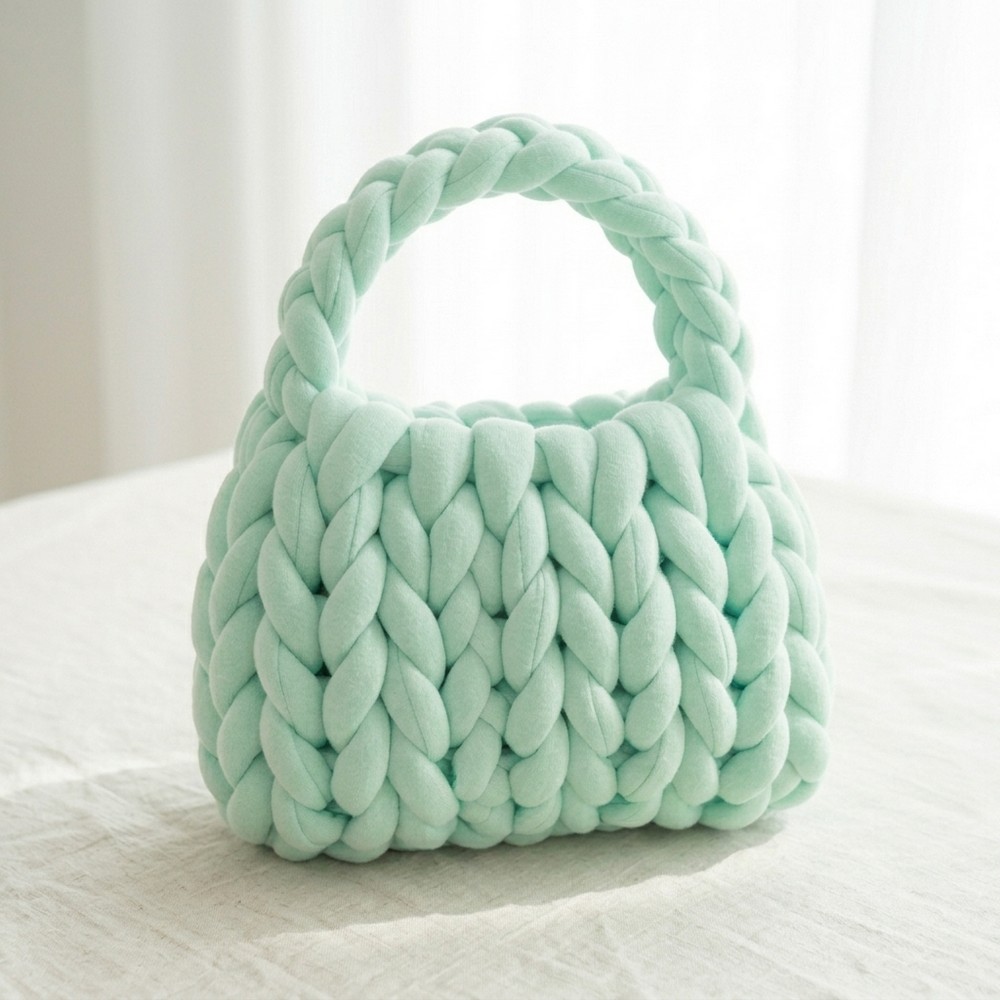
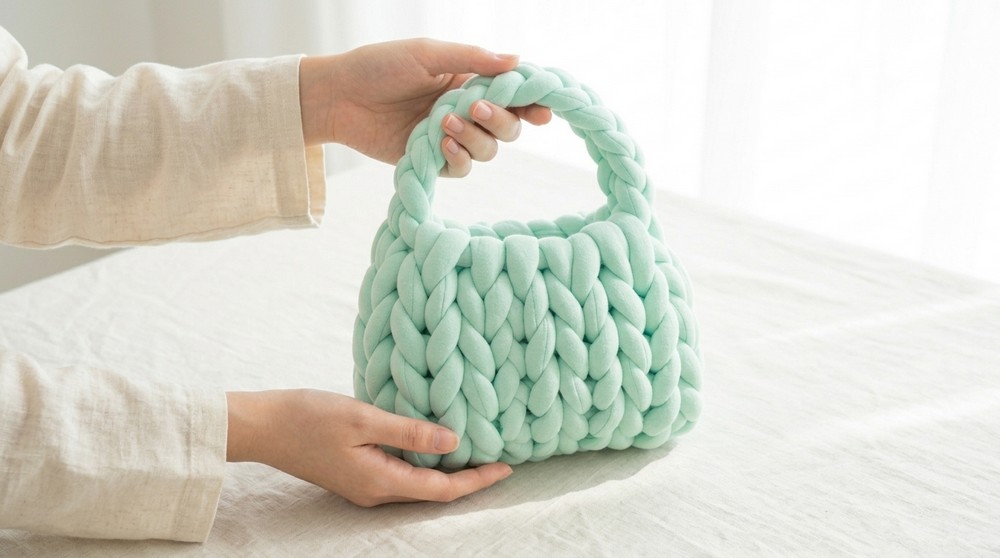
Chunky Crochet Bag Free Pattern For Stylish Look
This crochet bag stands out because of its bold, chunky texture and solid shape. The thick yarn gives it a plush, cozy appearance while making the bag extra strong and durable. The shape is typically simple and roomy, perfect for carrying groceries, books, or knitting supplies. The style is casual yet modern, with clean lines and a comfortable handle designed for easy carrying. Its standout feature is the thick stitch pattern, which not only looks good but also adds to the bag’s sturdy feel and long-lasting use.
This project is suitable for beginners and those with some crochet experience. The main stitch used is usually the single crochet or half-double crochet stitch, both known for creating dense, firm fabric ideal for bags. Since the bag is worked mainly in rounds or rows, it’s great for practicing basic crochet techniques like increasing, decreasing, and finishing edges. This pattern helps build confidence while creating something functional and stylish.
How I Made the Knit Pattern (Summary)
- Created a slipknot and “cast on” a row of loops for the bag’s base.
- Worked rows of hand-knitted stitches up both sides, adding height row by row.
- Flipped the bag inside out to reveal the “V” stitch pattern.
- Used leftover yarn to secure and weave the top edge.
- Attached a simple hand-knitted chained strap; adjusted length for preference.
- Tidied all loose yarn ends inside for a neat finish.
Beyond its practical uses, this crochet bag makes a wonderful handmade gift that friends or family will appreciate. It works as a decorative yet usable piece, and its durable nature means it can be used daily or saved as a collectible item. If you enjoy simple projects that combine usefulness and a cozy look, this free crochet chunky yarn bag pattern is a fantastic choice to try and enjoy.
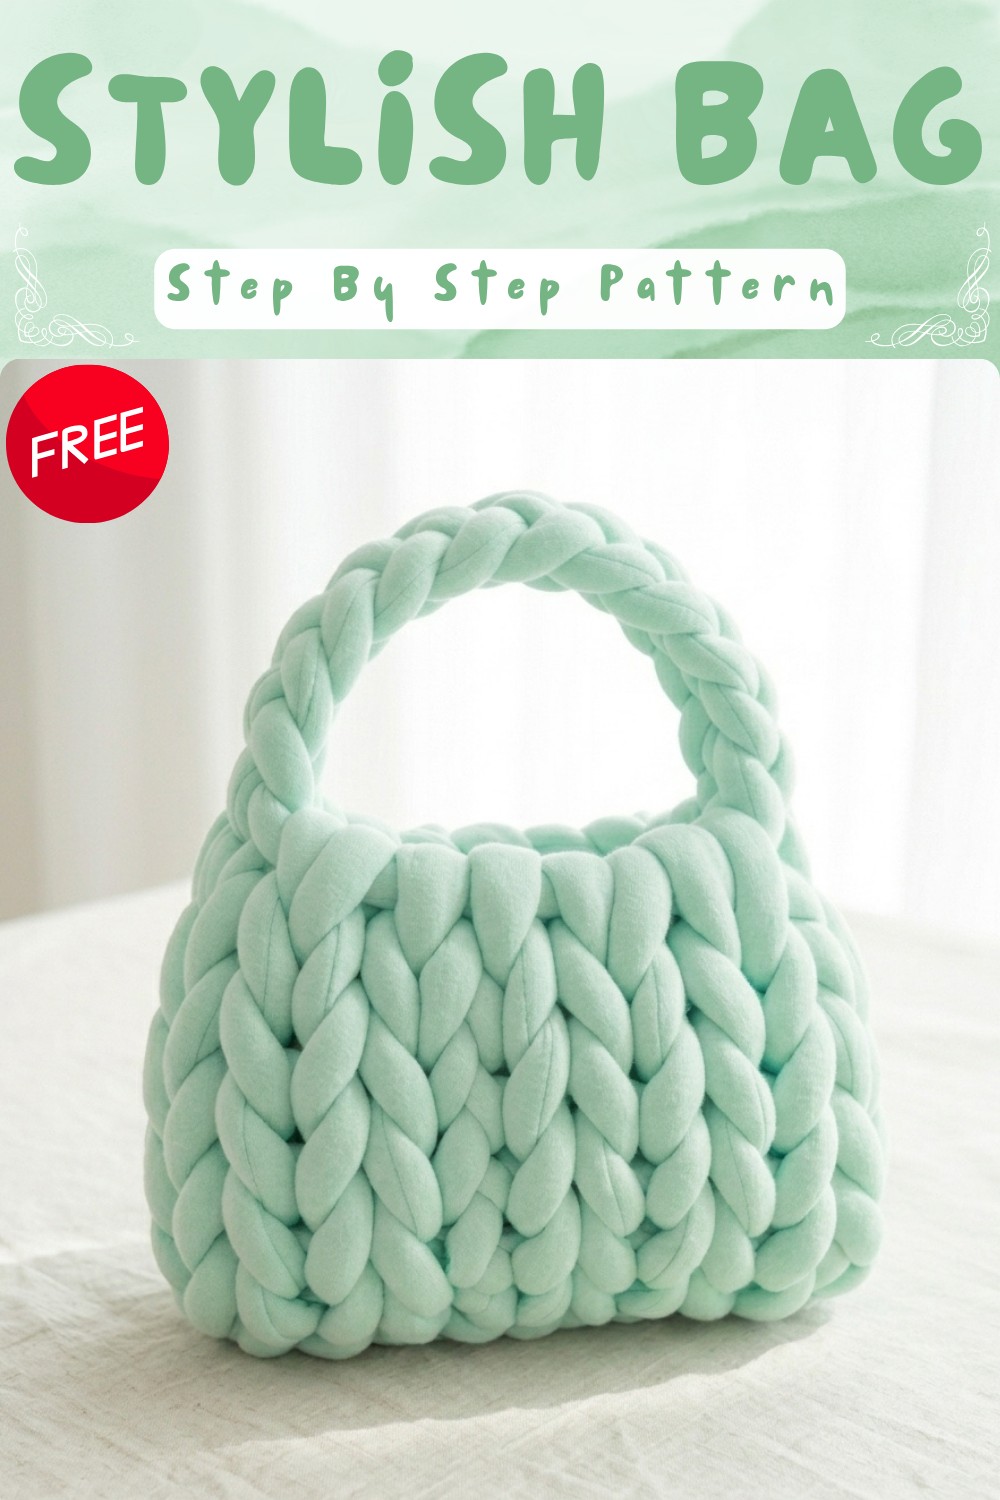
Hand-Made Crochet Chunky Yarn Bag Pattern
Make your own super-cute, chunky knit handbag using just your hands and a ball of yarn. This pattern is completely needle-free, fast, simple, and beginner friendly.
Pattern Notes
- This bag is hand-knitted; no needles or hooks required.
- Chunky yarn gives a plush, structured finish and works up quickly.
- Construction is essentially two-layer flat panel worked in continuous rounds with a slipknot and finger knitting.
- Both sides are worked together—no seaming required.
- Bag is flipped inside out for a clean “V” pattern.
- Finishing involves weaving in the top, adding a strap, and securing ends.
- Adjust size by adding/subtracting rows or stitches.
Skill Level
- True Beginner (never knit before)
Very friendly for first-timers—no tools, just your hands!
Finished Size
- About 8–10″ (20–25 cm) wide x 8″ (20 cm) tall not including the handle
Easily adjusted by changing width (stitches cast on) and height (number of rows).
Materials
- 1 ball of chunky, super bulky yarn (approx. 100–120g, more for longer straps or larger bag) Colour: pastel green
- Scissors
- Ruler or tape measure
- Your hands!
Measurements / Sizing (Optional Schematic)
- Base width: 6 stitches (each stitch approx. 1.25–1.5″ wide in chunky yarn)
- Bag height (without handle): 6 rows* (approx. 8″ for a small, cute bag)
- Strap length: Adjustable (aim for 8–16″ / 20–40 cm for a short handle)
*For a larger bag, add more rows
Gauge & Stitch Pattern
- Gauge is not critical. Just ensure stitches are even and not too loose (unless you prefer a floppier look).
- Stitch is: Simple Hand-knit chain (finger knitting or faux knitted V‘s).
Stitch Abbreviations
- st – stitch
- slk – slipknot
- ch – chain
- loop – the live working yarn in each “stitch” as you knit by hand
Special Stitches
- Finger-knitting stitch:
Insert two fingers through a loop, grab the working yarn, pull it through to create a new loop. - Hand chain (for strap): Make a slipknot, then using forefinger and thumb, pull the working yarn through each loop, repeating for desired length.
Before You Start
- Read through the entire pattern before beginning.
- Watch a basic hand-knitting tutorial if you are a very new knitter.
- Clear a flat, comfortable workspace.
- Ensure your hands are clean before working with chunky yarn.
- Give yourself plenty of time and patience, especially if this is your first project!
The Pattern!
Bottom Row (Bag Foundation)
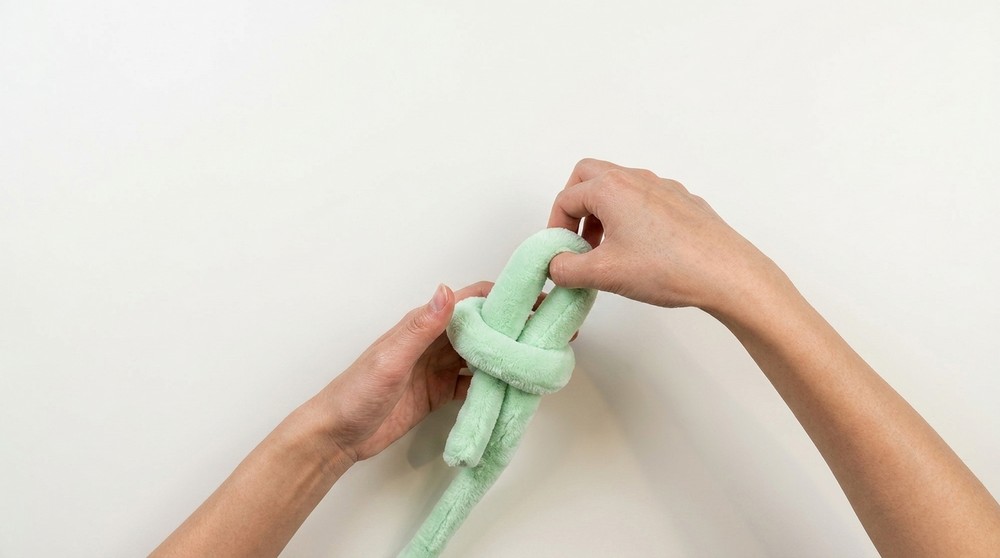
- Make a slipknot by laying the yarn tail underneath the working yarn, pulling the yarn up and through to create your first loop.
- Working with the yarn end closest to the ball, create your foundation row:
- Stick your two fingers through the slipknot loop, grab the working yarn in the back, pull a new loop through.
- Repeat 5 more times until you have 6 loops total (not including the slipknot).
- Make sure you count only the V shapes after the slipknot—do not count the slipknot as a stitch.
The bottom row forms the base edge of your bag. The loops should look like six neat V’s in a line, plus one extra loop at the end.
First Side (First Row Up)
- Rotate your row so the working yarn is on the right.
- Insert your two fingers into the nearest loop to the yarn ball, pull the working yarn through to make a new loop for the next row.
- Repeat for each of the 6 foundation loops.
- You should now have a new “row” of 6 loops above the first.
Each row is made by pulling yarn through existing loops. The key is to make all loops roughly the same size for a neat edge.
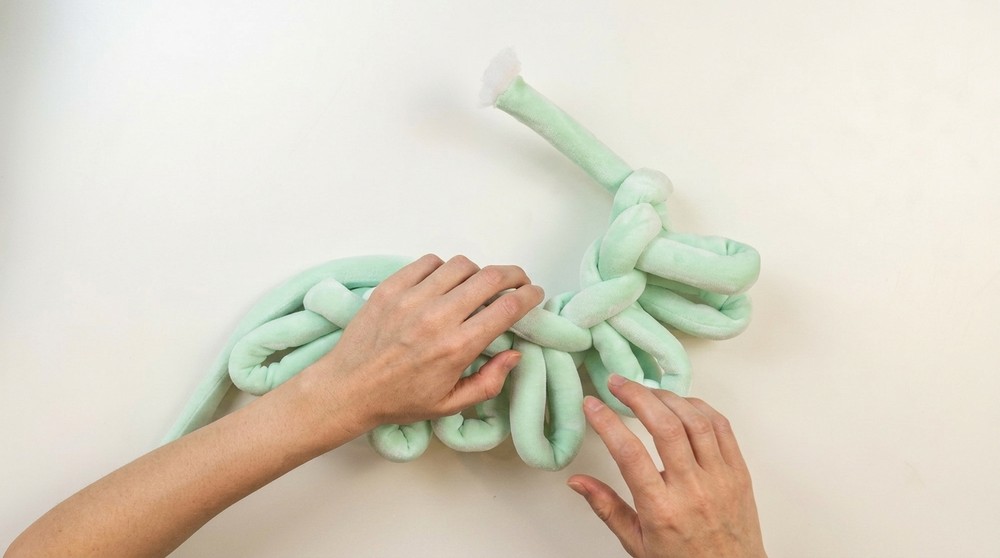
Second Side (Start Bag Tube)
- With your base row face-up, locate the “spiral” of yarn on the far side (not the initial slipknot).
- Insert fingers into this spiral/side loop, grab and pull a loop through.
- Repeat for each of the 6 side loops.
You should now have two mirrored sets of loops stacked along both sides of your work—this is the start of your bag’s tube.
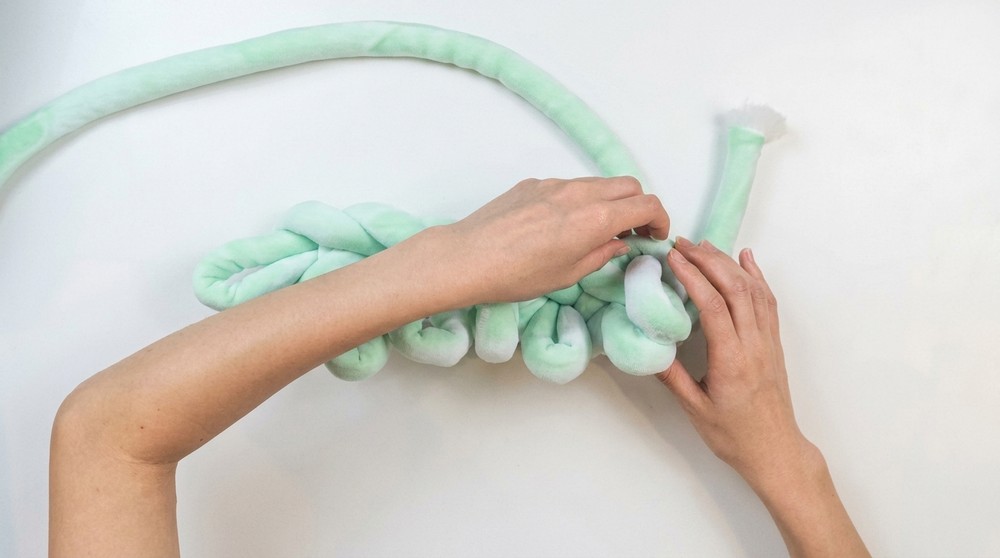
Building Height (Rows 3–6)
- To add height, continue turning the work 180°, insert fingers through each LIVE loop on top.
- Pull working yarn through each slit, making a new set of 6 loops per row.
- Turn and repeat for as many rows as you want height (common sizes: 6 rows).
- Always ensure you have the same number of loops on both sides—double-check as you go.
Continue “just knitting” around and up, row after row, until you reach the bag height you desire. Double-checking stitch count each row prevents uneven edges.
Bag Body Tips
- Don’t make loops too loose—smaller loops = tighter weave and less gap.
- If you lose track, count the V’s on both sides to make sure both are even.
Flipping the Bag (Shaping)
- Once you reach your desired height, set the work down.
- With both hands, gently push the bag inside out so the V’s—the classic knit “right side”—are now facing out.
- If a loop comes undone, don’t panic—simply pull it back through with your finger.
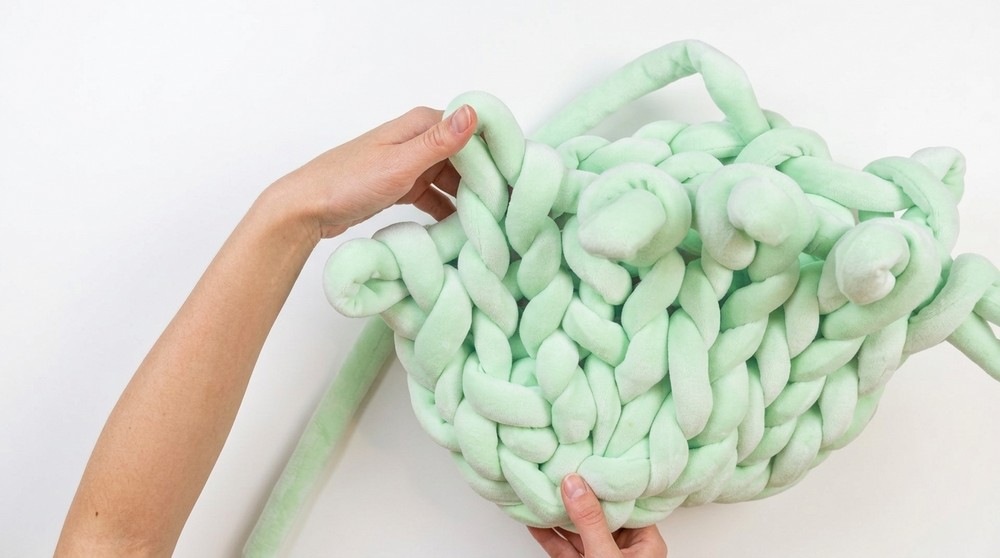
Flipping hides the bumps and leaves the beautiful stitches on the outside!
Finishing Top Edge
- Leave a long yarn tail (enough to go around the top edge of the bag).
- Cut the yarn.
- With your fingers or a yarn needle, weave the tail through all live loops at the top of the bag (like a drawstring), drawing them together slightly.
- Pull gently to secure, tuck the remaining tail inside your bag.
Weaving the tail through closes the top edge neatly and secures your stitches.
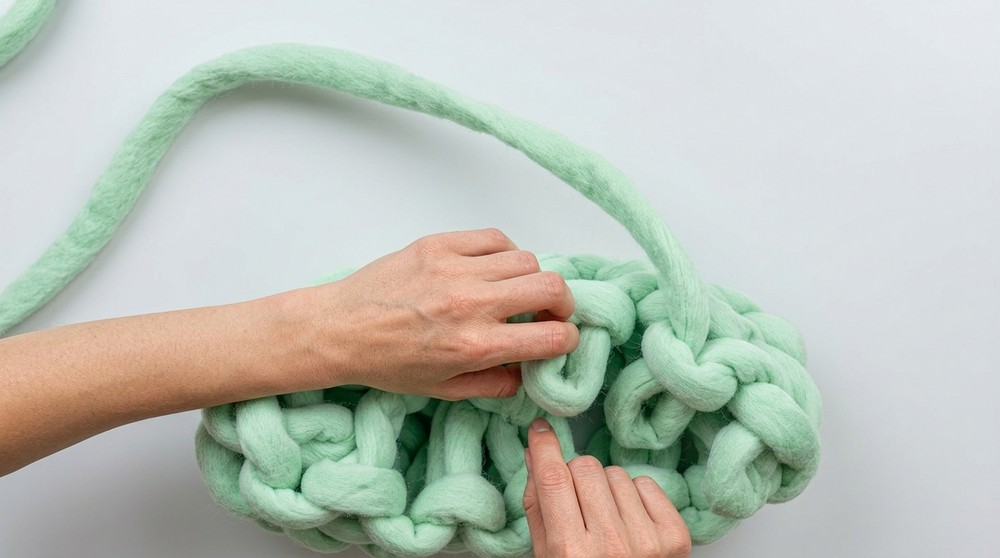
Bag Strap
- With a new yarn tail, insert it from inside through one side hole near the top, pull through and make a slipknot.
- Use finger-knitting to chain until your desired handle length (about 8–16″/20–40 cm).
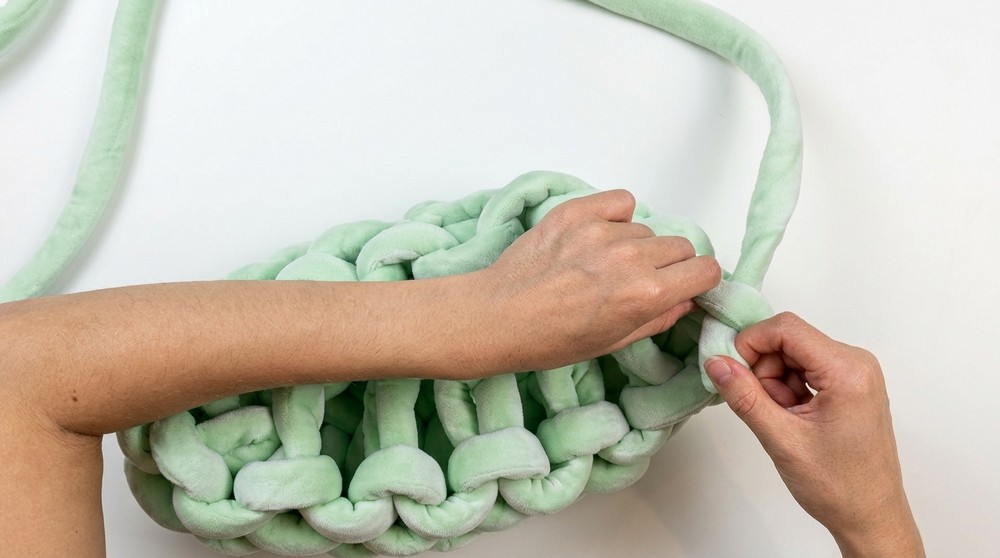
- Finish strap with a knot, secure it to the other side by threading through the opposite top hole; tie a strong double knot.
- Weave or tuck ends inside the bag.
Make your strap short for a handle or long for a shoulder bag. Try for balance so the bag hangs evenly.
Assembly & Finishing
- Weave in all yarn ends and tuck them inside the bag body.
- If the strap is too long, tie a knot or unpick and adjust before final securing.
- Adjust bag shape by hand—gently tug edges and base for a crisp rectangle or square.
- Lightly steam or press the bag if you wish to relax the stitches.
What You Can Make Using These Stitches
- Chunky yarn handbags and totes
- Storage baskets or plant holders
- Squishy pillows
- Cuddly pet beds (with extra-large base)
- Beginner-friendly gifts
- Fun fashion accessories for kids or adults
You’ve completed your first hand-knit chunky bag. Each attempt will get neater and easier. Customize the width, height, color, or embellishments as you wish—this method is perfect for playful creativity.