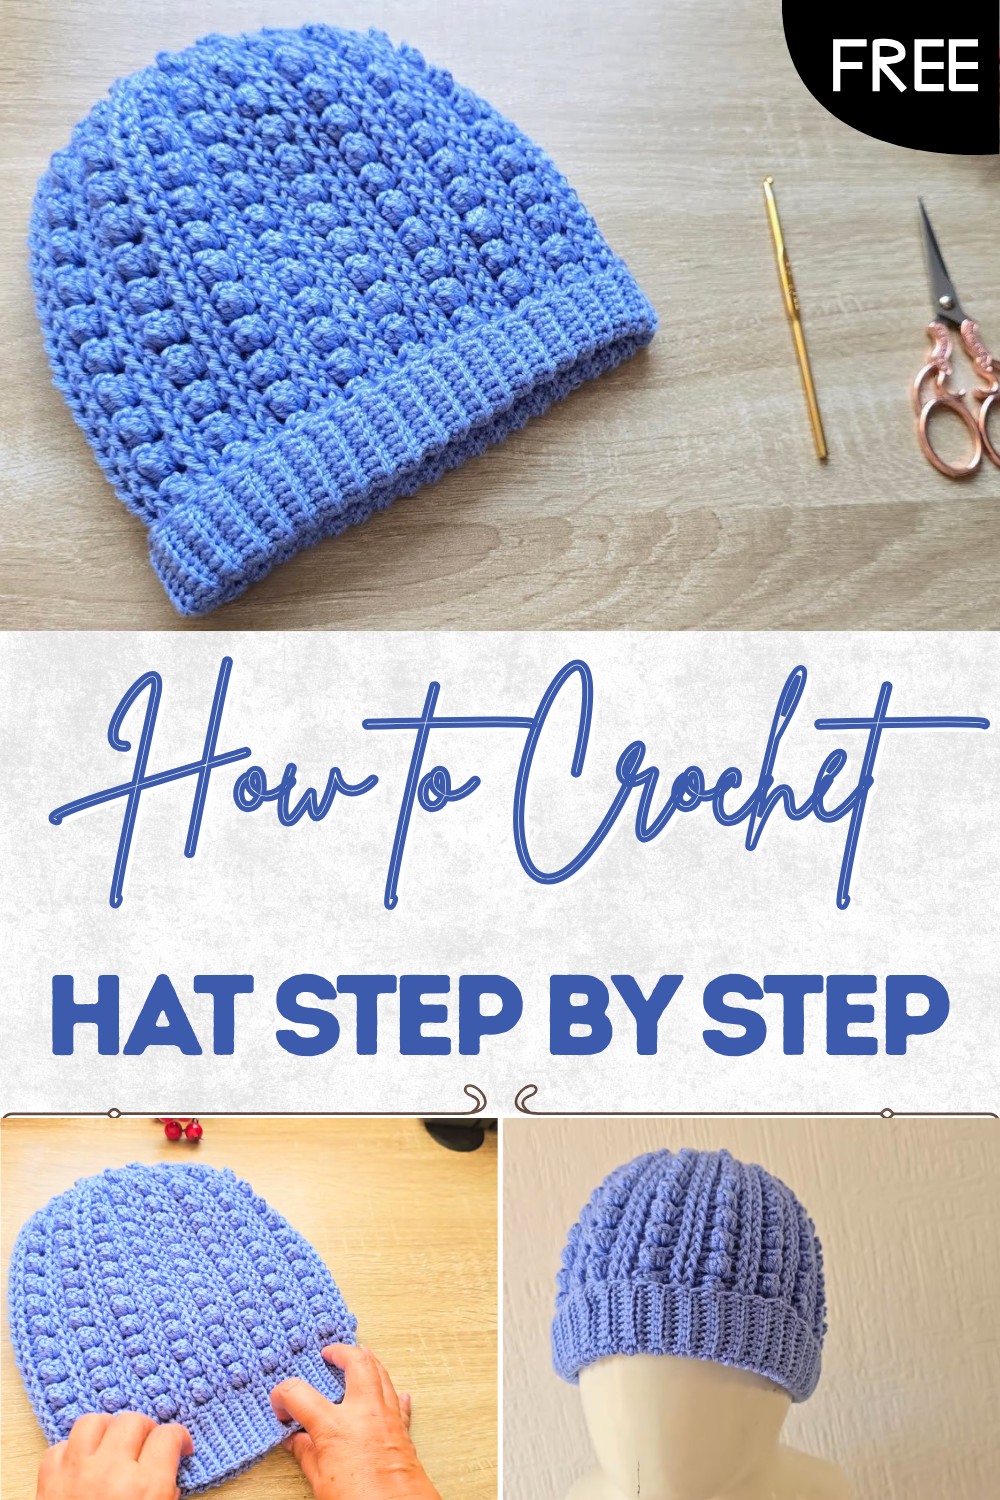
Free Crochet Hat Pattern for Unique Handmade Accessories
Soft comfort and stylish flair await as free crochet hat pattern that’s offers simple steps to create eye-catching project for every occasion.
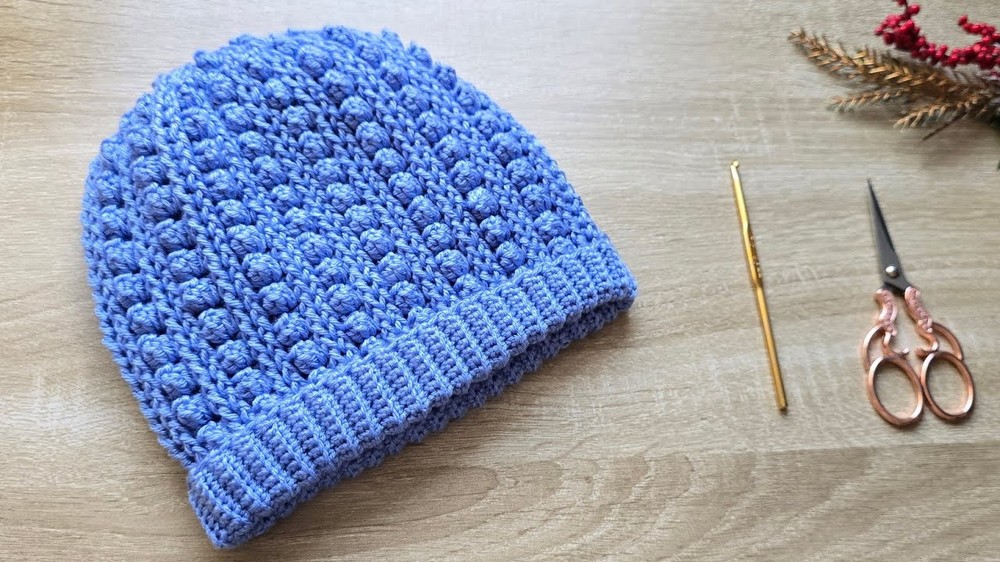
Sometimes all it takes is a simple ball of yarn and caring hands to shape something both useful and beautiful. With a crochet hat pattern, this yarn turns into a lovely hat full of color and warmth. It can be made big or small, with bright colors for a cheerful look or soft shades for a gentle touch. This hat keeps your head warm on cold days, gives shade from the bright sun, or adds something special to your everyday clothes.
Free Crochet Hat Pattern: Stay Warm in Style
Easy to make and even easier to wear, it stays strong during every use and feels soft for anyone who needs comfort. A crochet hat made with care brings a smile and a feeling of being loved. It’s a simple thing that makes each day a little warmer and brighter, whether you make it for yourself or as a thoughtful gift for someone you care about.
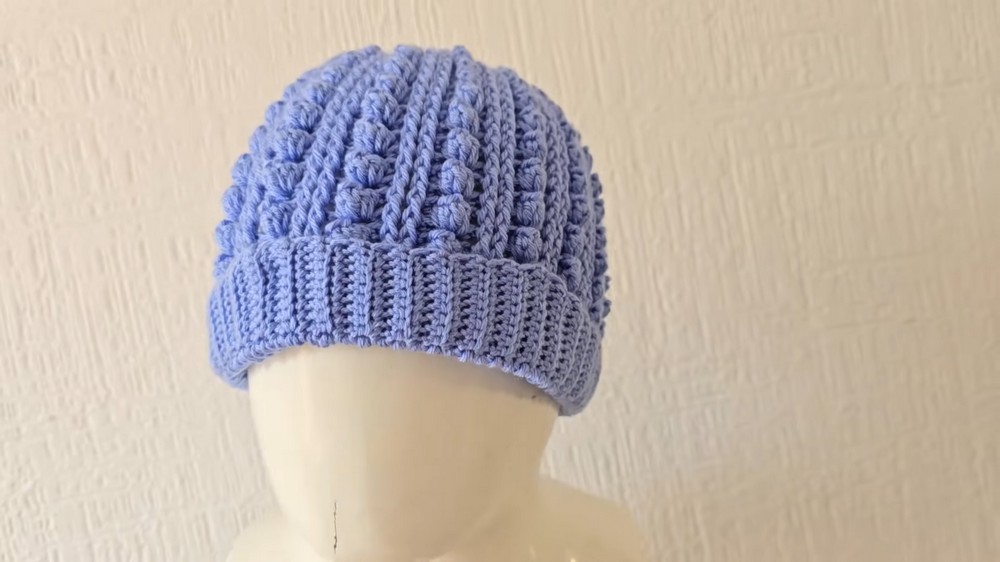
Free Crochet Textured Rib Beanie Pattern
Materials
- Yarn: #3 Light/DK Weight Yarn (Sample used wool)
- Hook: 3.5 mm crochet hook
- Tapestry needle (for seaming and weaving in ends)
- Scissors
- Optional: Pom-pom for the crown
Key Abbreviations
| Abbreviation | Stitch |
|---|---|
| ch | chain |
| st(s) | stitch(es) |
| sc | single crochet |
| sl st | slip stitch |
| dc | double crochet |
| BLO | back loop only |
| rep | repeat |
| yo | yarn over |
Special Notes
- Skill Level: Easy/Advanced Beginner
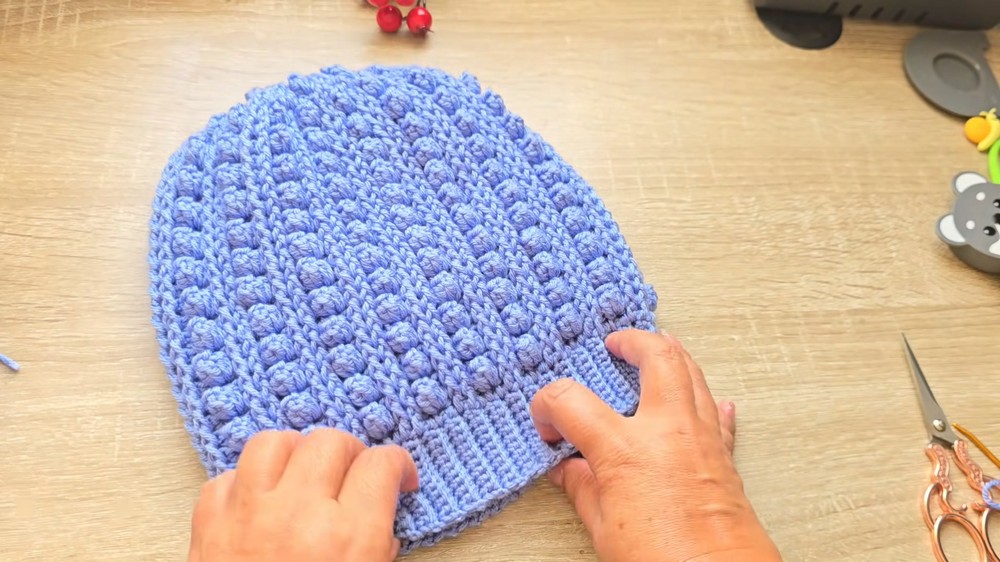
- Construction: Hat is worked sideways (brim to crown) and seamed into a tube. The crown is then closed together.
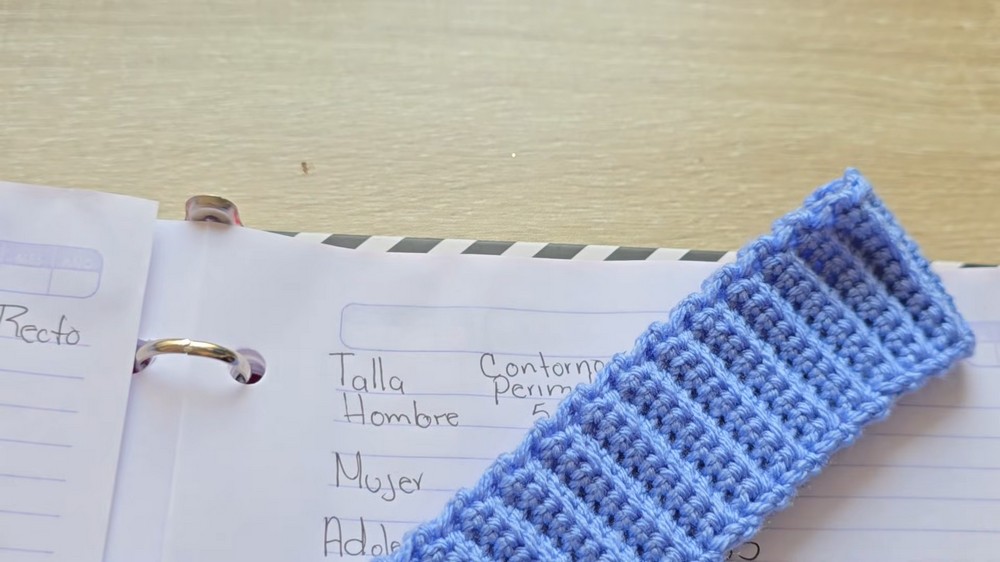
- CUSTOM SIZING: This pattern includes stitch and row counts as well as measurement options—choose based on recipient.
- MULTIPLE: Body of the beanie stitch pattern uses multiples of 5 stitches.
Size Chart
Adapt with Table or Measuring Tape:
- Premature: 28–30cm circumference, 45 rows, 9cm height
- Newborn: 32cm, 50 rows, 10cm height
- 1–3 mo: 34cm, 55 rows, 11cm height
- 3–6 mo: 37cm, 60 rows, 12cm height
- 6–12 mo: 38–39cm, 65 rows, 12–13cm height
- 18–24 mo: 41–43cm, 70 rows, 14–15cm height
- 2–5 yr: 45cm, 75 rows, 16cm height
- 5–10 yr: 48cm, 80 rows, 16cm height
- Teen: 51cm, 85 rows, 17cm height
- Adult Woman: 53cm, 85 rows, 17cm height
- Adult Man: 56cm, 90 rows, 18cm height
The Pattern
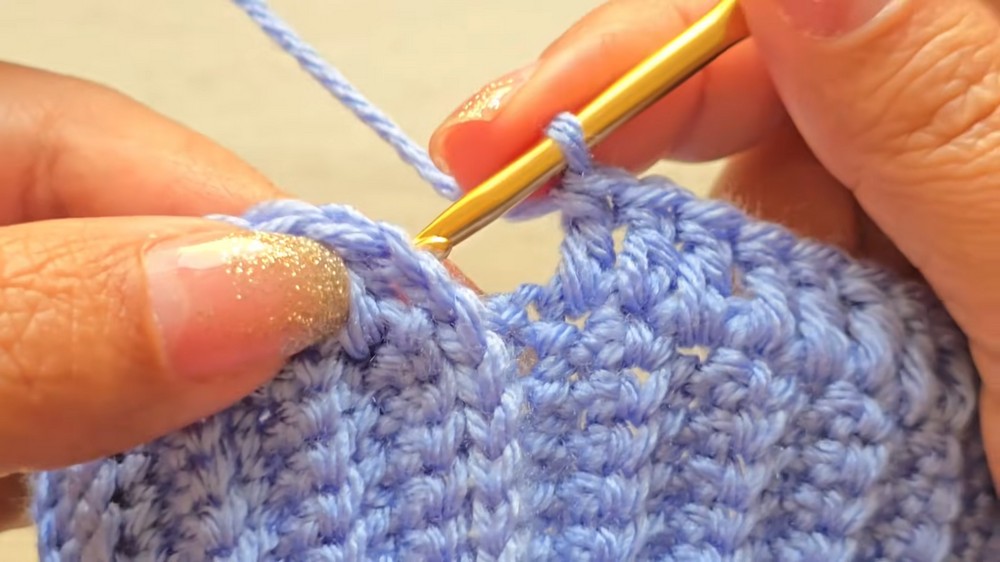
1. Brim (Worked Flat; Rows Become Circumference)
- Ch 11.
- (For other sizes, see notes; adjust number of chains for brim width as needed.)
- Row 1:
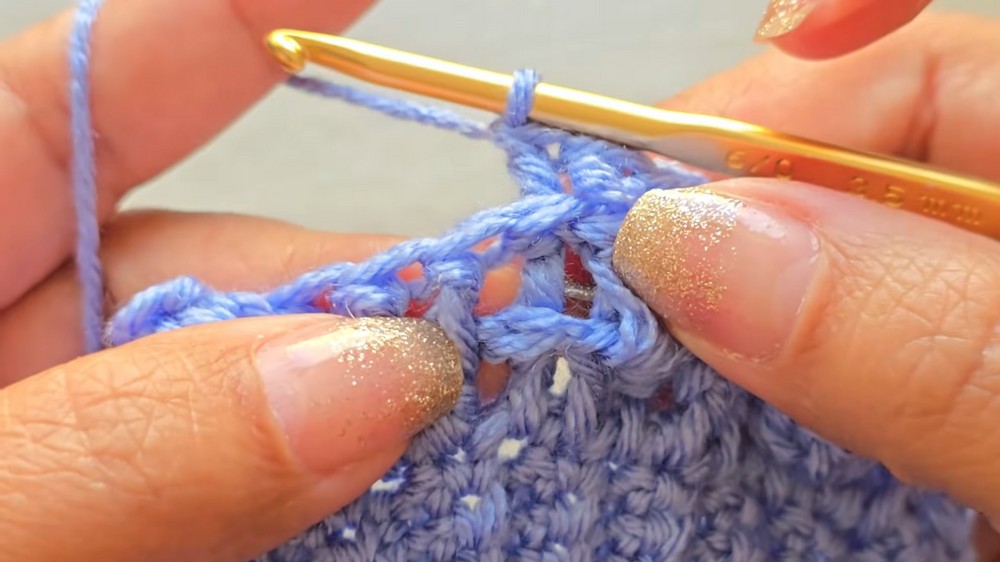
- Skip first ch, sc in each ch across (10 sc). Turn.
- Row 2:
- Ch 1, sc in BLO across until last st; in last st, sc through both loops. Turn.
- Repeat Row 2 until your strip reaches desired hat circumference or required number of rows for your size (see chart).
- Count your rows—each row equals one round of the hat.
- Count your rows—each row equals one round of the hat.
2. Join Brim & Prepare for Body
- Fold strip in half with right sides facing.
- Working through both layers, sl st or sc to join seam from bottom to top.
- Do NOT fasten off.
3. Hat Body (Textured Stitch Pattern in Rounds)
Set up for stitch pattern:
- Turn band so you can work along its edge.
- Work one sc in the edge of each row around (number matches rows/brim circumference). Sl st to join.
Body Rounds
Round 1 (Base):
- Ch 2 (does not count as st), dc in each st around, sl st to join round.
Round 2 (Pattern Setup):
- Ch 2, fptr (front post treble crochet) in next st, dc in next st, [5 dc in next st (shell/puff), dc in next st, fptr in next st, dc in next st]; rep around, sl st to join.
If your number of stitches does not fit the multiple at the end, adjust the placement of puff/shell, or fudge the last few stitches to maintain the look.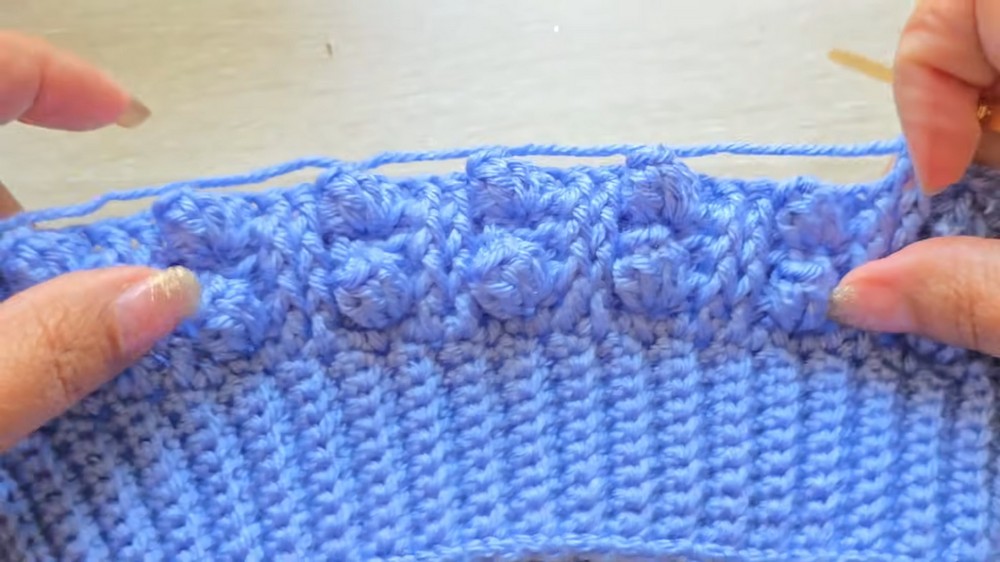
Round 3 and On (Pattern Repeat):
- Ch 2,
- Fptr in next st, dc in next st, [5 dc in next st, dc in next st, fptr in next st, dc in next st]; rep around,
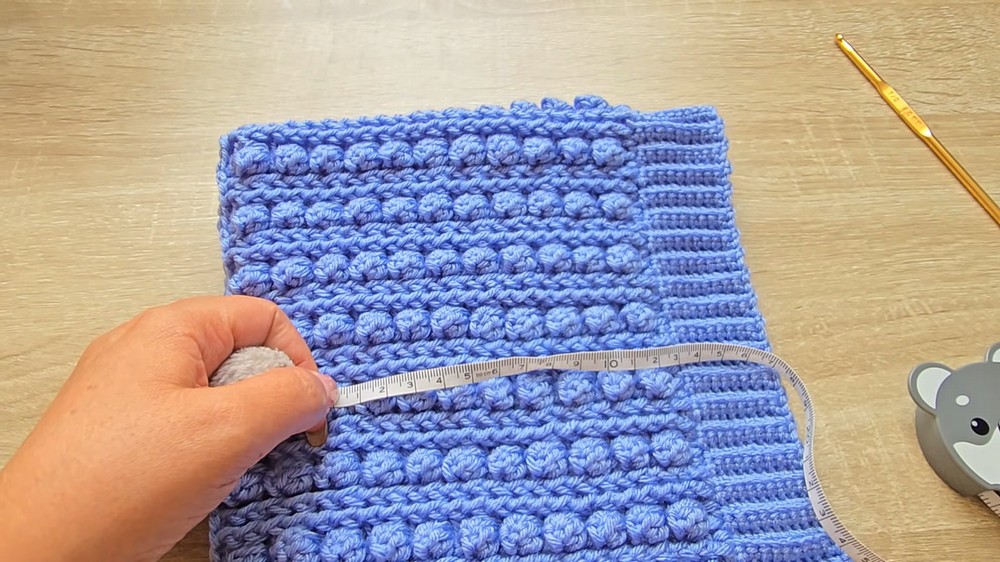
- Continue for length stated in sizing chart (see “Height”), or as long as desired.
- Try hat on or measure from band upward for accurate fit.
4. Decrease Crown
When hat measures total desired height (see size table), begin crown shaping:
First Decrease Round:
- Ch 2.
- Skip 1 st, 5 dc (shell) in next st, skip 1 st, dc in next two, fptr in next st, dc in next, rep to end.
Subsequent Decrease Rounds:
- Continue working as established,
- Work fewer shells and more skipped stitches—as your hat tapers, each round will have fewer shells/puffs.
- Alternate rounds of dc and fptr (front post treble crochet), working fewer in each to create a smooth crown.
- The number of decrease rounds varies by size; end when top is nearly closed (6–10 sts remain).
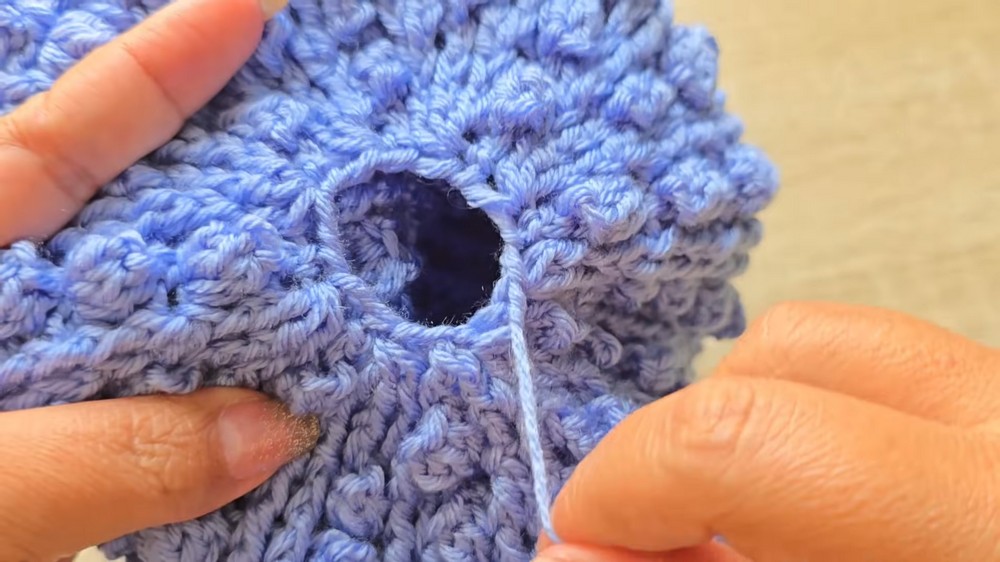
5. Close Hat
- Fasten off, leaving a long tail.
- With tapestry needle, weave through remaining stitches around crown, pull tight to close fully.
- Pass tail through several stitches to secure, weave in end on inside.
6. Finishing Touches
- Add a pom-pom to the top (optional).
- Weave in all remaining ends.
- Block lightly if desired.
Conclusion
You’ve now created a classic, textured, all-ages rib beanie using simple stitches, easy texture, and flexible sizing for babies through adults. The design lays smoothly, and the stitch pattern adds interest and warmth.
Pattern Corrections & Tips
- Correction: If your stitch count does not end exactly on pattern, fudge a stitch at the end of a round (e.g., combine two stitches, skip one) to avoid holes or an uneven pattern.
- Tip: When closing the top, make sure no holes remain for a clean look. Repeat pass of your needle if needed.
- Tip: For a slouchier style, add extra rounds before starting the crown decreases.
- Tip: For baby sizes, use softest yarn possible.