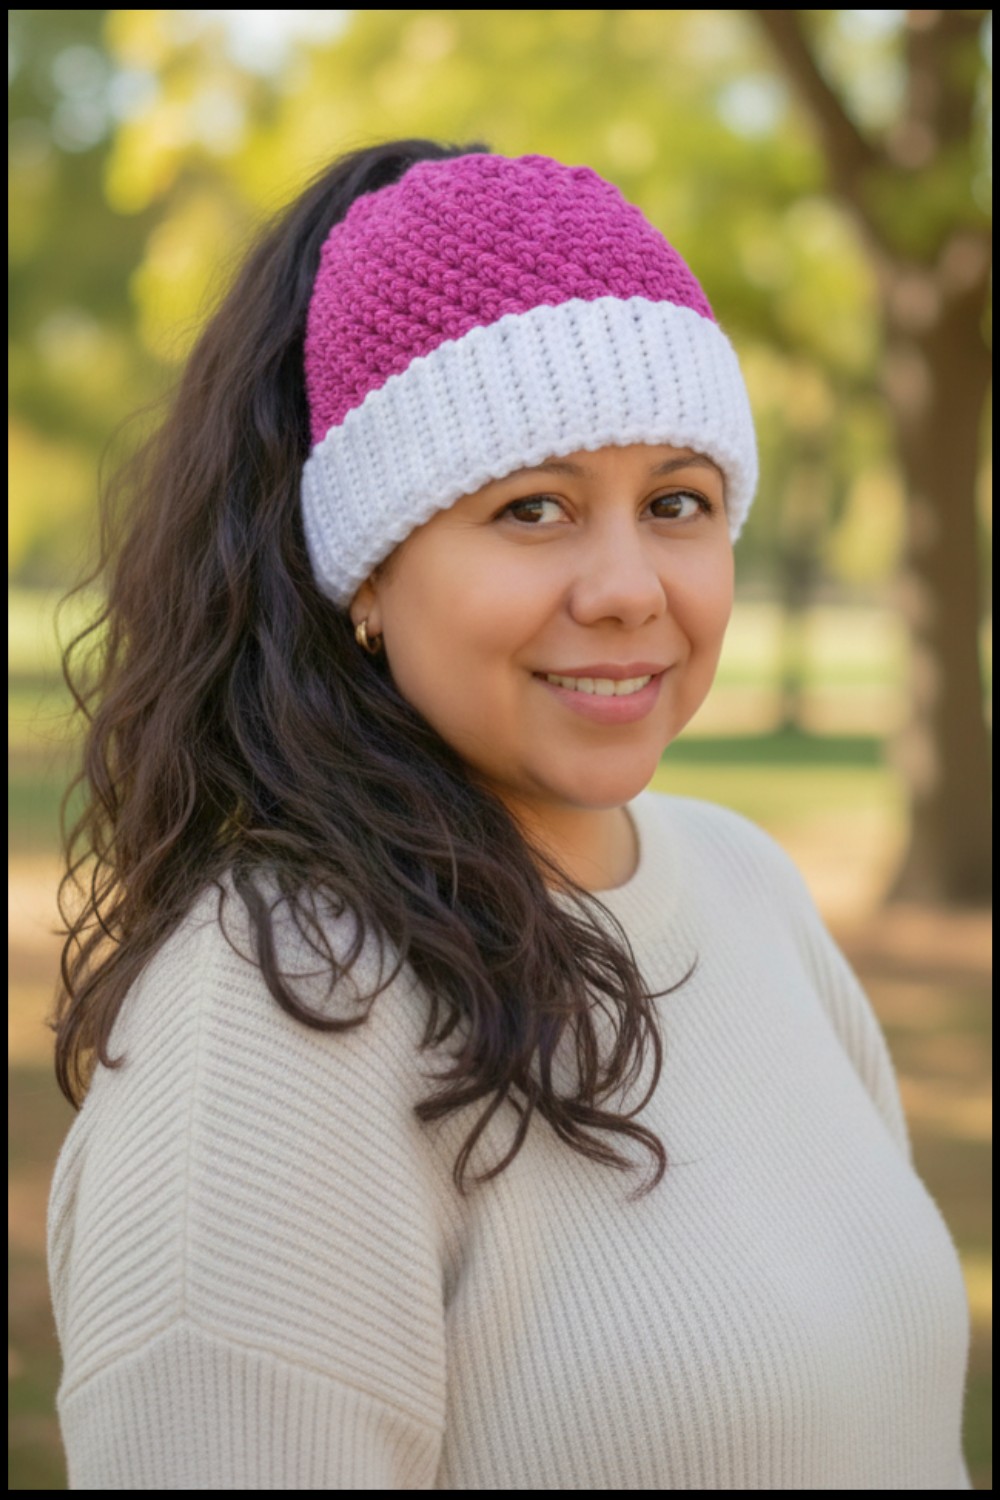
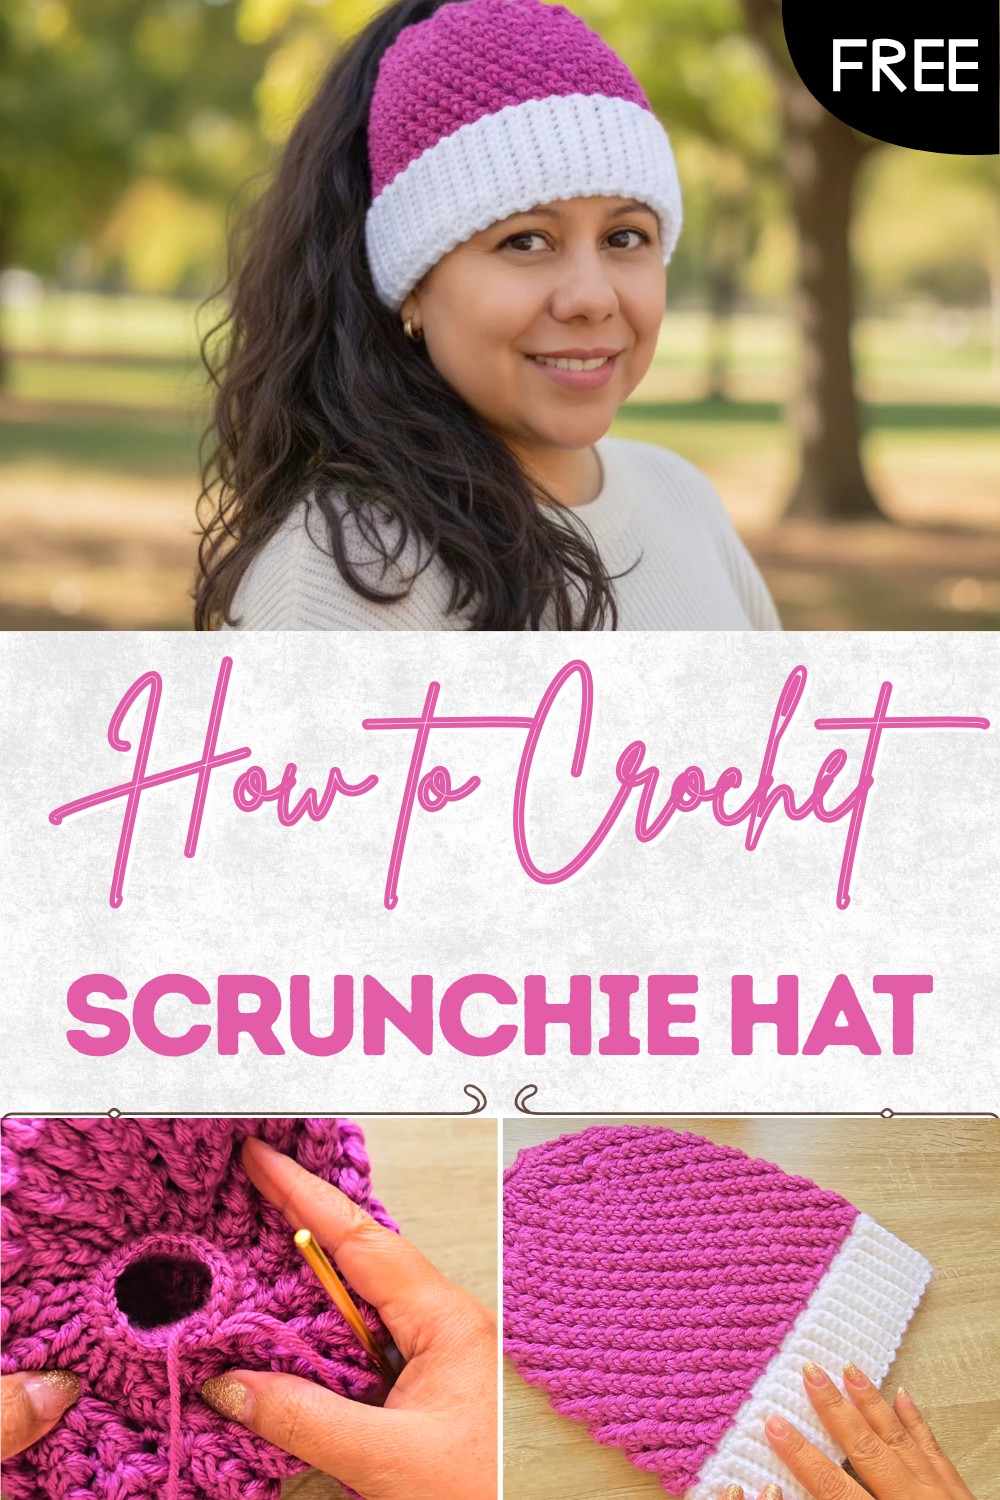
Stylish Scrunchie Hat Crochet Pattern – 100% Free
Feel the warmth and charm with this free crochet scrunchie hat pattern that offers easy instructions & stylish flair for every age & occasion.
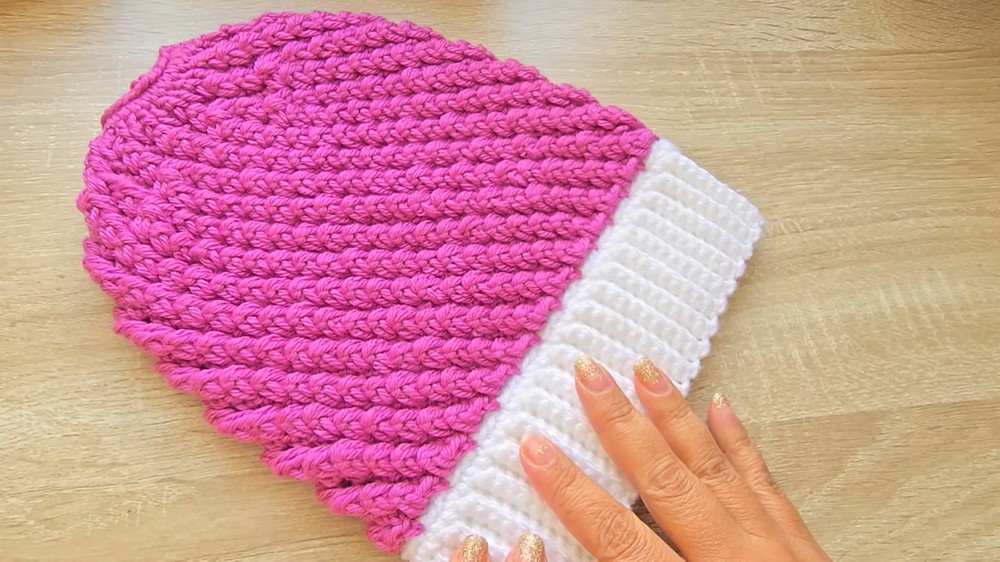
A bright burst of color sits atop your head, catching eyes and warming spirits wherever you go. Soft stitches stretch gently, making each piece feel like it was made just for you. The crochet scrunchie hat pattern adds a playful twist to a classic look, shining with a unique gathering at the brim that stands out in a crowd. Not only does it keep heads cozy and snug in cool weather, it’s also perfect for showing off your favorite shades or matching with outfits for special days.
Crochet Free Scrunchie Hat Pattern You’ll Love
Friends and family love receiving one as a hand-crocheted treat, and little ones adore the bouncy feel every time they put it on. Fashion and function come together, offering beauty and comfort in one clever design. With the crochet scrunchie hat pattern, each finished hat brings happiness, warmth, and a touch of style to every day.
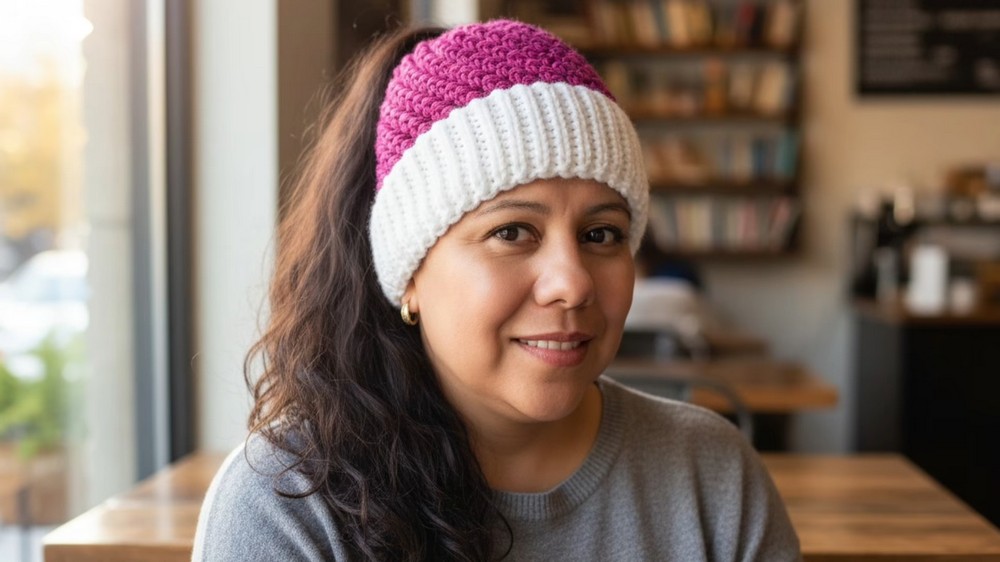
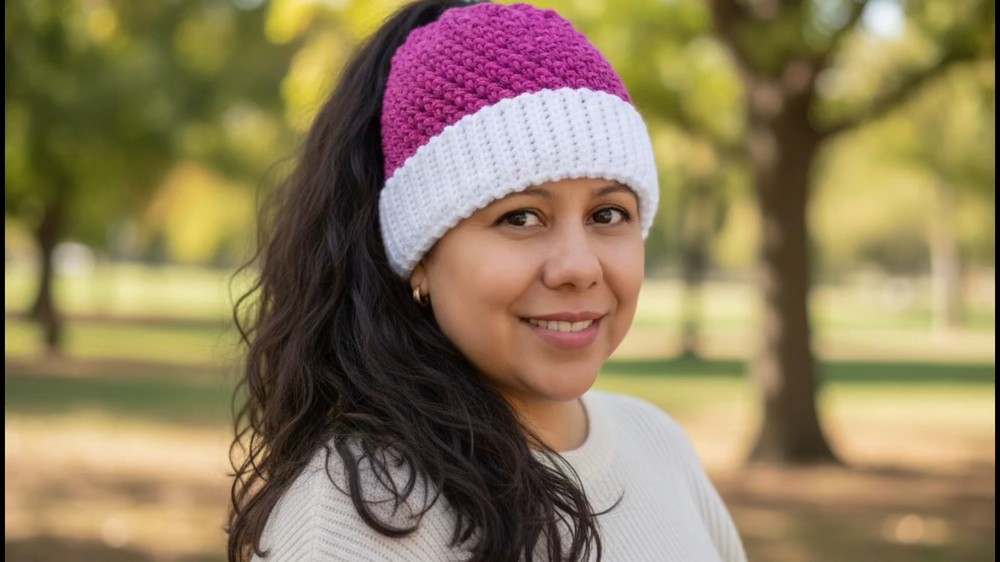
Crochet Ponytail Hat / Messy Bun Beanie With Scrunchie
Materials
- Yarn: #4 Worsted Weight (sample used “Pachoncito” 100% Acrylic, 200g/400m/437yds)
- 4.0 mm crochet hook
- Elastic band/scrunchie (Recommended: regular hair tie)
- Scissors
- Yarn/Tapestry needle
- Stitch marker (optional)
- Measuring tape (for checking circumference)
Key Abbreviations
| Abbreviation | Stitch |
|---|---|
| ch | chain |
| st(s) | stitch(es) |
| sc | single crochet |
| sl st | slip stitch |
| dc | double crochet |
| puff st | puff stitch (see below) |
| rep | repeat |
| approx. | approximately |
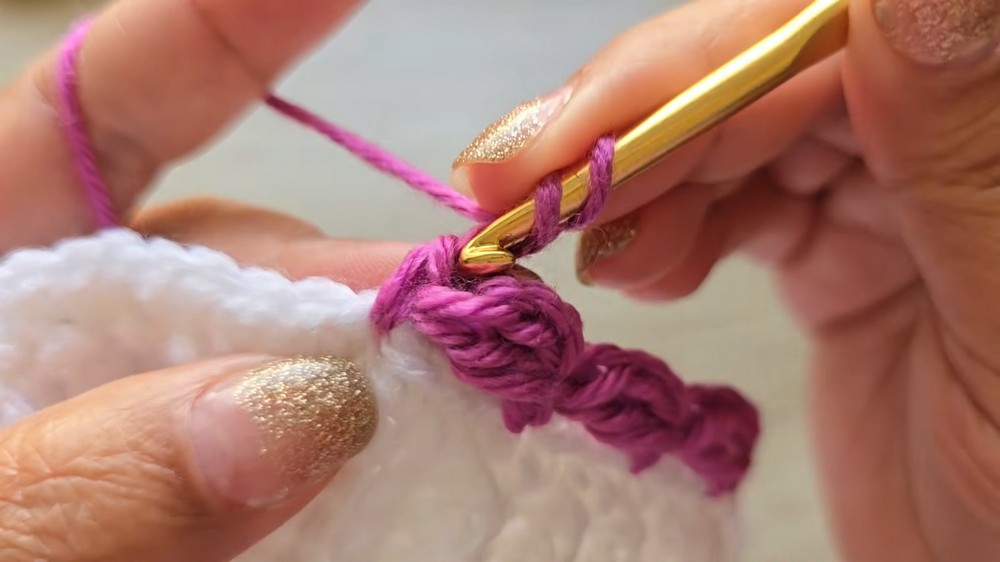
Puff Stitch (puff st)
- Yarn over, insert hook in indicated stitch, yarn over, pull up a loop (3 loops on hook).
- Yarn over, insert hook in same stitch, yarn over, pull up a loop (5 loops).
- Yarn over, insert in same stitch, yarn over, pull up a loop (7 loops).
- Yarn over, pull through all 7 loops. Chain 1 to secure the puff.
- (This version uses 3 yarn overs for a medium puff.)
Special Notes
- The pattern is worked bottom-up (from the brim to the crown).
- Sizing: You can follow the given rounds for each size, or work to your own desired circumference, adjusting as needed.
- Chains do not count as stitches unless specified.
- Brim is worked flat and then joined, body is worked in rounds.
- The opening for the ponytail/bun is adjustable and finished around a hair tie for stretch and strength.
- Pull all joins tight for a neat finish.
Hat Measurements & Sizing Guide
| Size | Circumference (cm) | Rounds (approx.) |
|---|---|---|
| Adult Men | 56 | 81 |
| Adult Women | 53 | 78 |
| Teenagers | 51 | 75 |
| 5–10 yrs | 48 | 72 |
| 2–5 yrs | 45 | 66 |
| 1–2 yrs | 43 | 60 |
| 9–12 mo | 39 | 54 |
| 6–9 mo | 38 | 51 |
| 3–6 mo | 37 | 48 |
| 1–3 mo | 34 | 42 |
| Newborn | 32 | 36 |
| Preemie | 28–30 | 33 |
Adjust circumference as needed for custom fit. The multiple for the stitch pattern is 3.
Instructions
1. Brim (worked flat)
- Ch 11 for adult size (see notes below for other ages/sizes).
- Under 1 yr: ch 7 (for 6 sc sts)
- 1–9 yrs: ch 9 (for 8 sc sts)
- 10+ yrs: ch 11 (for 10 sc sts)
- Row 1:
- Skip first ch from hook, working in back bump, sc in each ch across (10 sc for adult; 6 or 8 as needed).
- Turn.
- Row 2:
- Ch 1, sc in BLO in each st across until the last st.
- In last st, sc through both loops.
- Turn.
- Row 3 to End:
- Repeat Row 2 until piece measures desired circumference (see table above), or until you have the required number of rows (each row = 1 “round” in table).
- For the best fit, measure around the recipient’s head with a slight stretch.
- Tip: When changing colors, complete the last loop of the final sc with the new color.
- Seam brim:
- Fold brim with right sides together. Slip stitch through both layers to join and create a band.
- Do not fasten off.
2. Transition to Hat Body
- After joining brim, rotate to work along the long edge.
- Ch 1, work 1 sc in each row end around (matching number of brim “rounds”).
- Sl st to first sc to form a round. Cut yarn if changing color, or continue with same yarn.
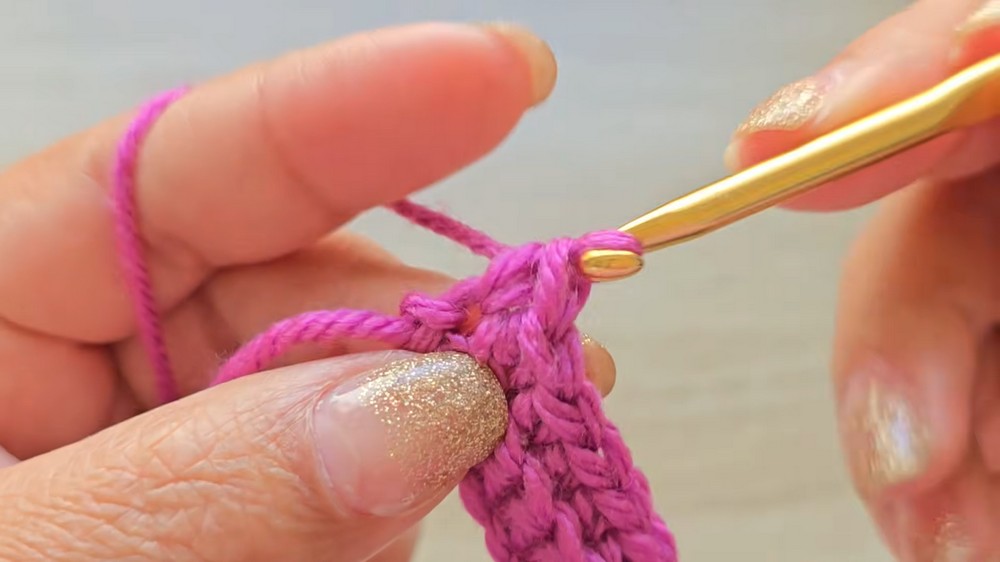
3. Main Body (Puff Stitch Pattern)
Note: The main body is worked in joined rounds.
Round 1: Puff Set-up Round
- Join new color (if desired) in any st, ch 1.
- [Sc, ch 2, dc] in same st, sk 2, sc in next st.
- Rep around, ending with sc, sl st to starting sc.
Round 2 (and all following): Puff Stitch Rounds
- Ch 2, sc in ch-2 sp, ch 2.
- In next dc (below from last round): Work 1 puff st (see definition above).
- Sc in next ch-2 sp, ch 2, puff st in next dc; rep around.
- Join with sl st to first sc or puff st.
- Place marker at start of each round if desired.
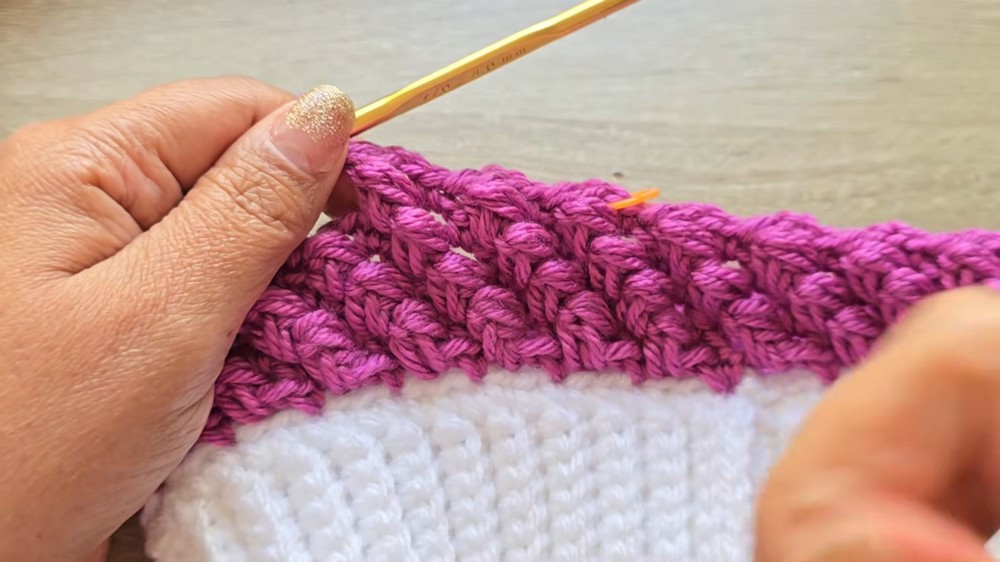
- Rep Round 2 to build the hat up to desired depth (see “Hat Height” chart below).
4. Hat Height Guide
| Size | Height (cm) |
|---|---|
| Adult Men | 14 |
| Adult Women | 13.5 |
| Teens | 13 |
| 5–10 yrs | 12.5 |
| 2–5 yrs | 12 |
| 18–24 mo | 11.5 |
| 12–18 mo | 11 |
| 9–12 mo | 11 |
| 6–9 mo | 10.5 |
| 3–6 mo | 10 |
| 1–3 mo | 9.5 |
| Newborn | 9 |
| Preemie | 8.5 |

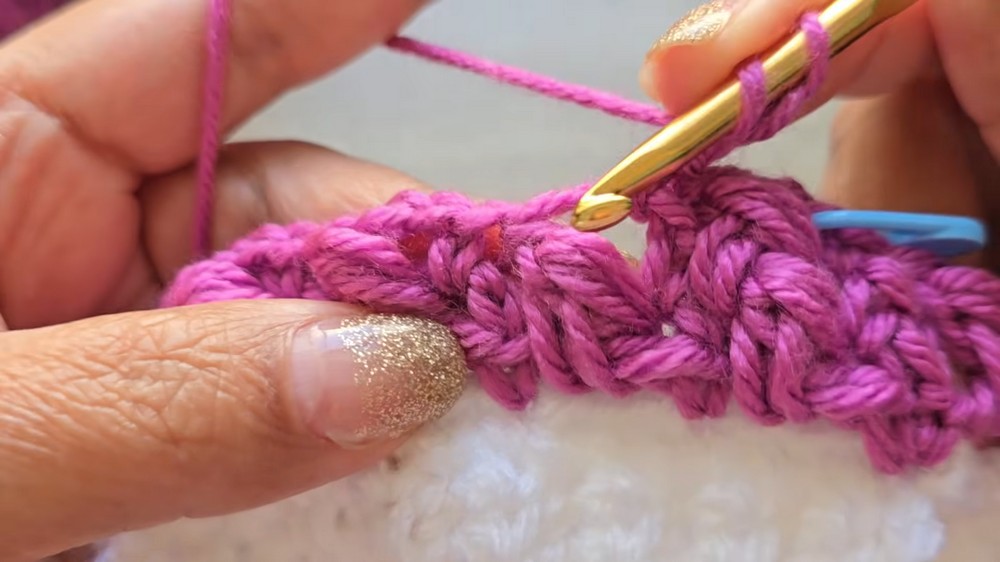
5. Shape the Crown (Decreases for Scrunchie Opening)
Begin decreases as follows, adjusting number as needed for your size (keep st count as close to a multiple of 3 as possible):
Decrease Sequence
- First decrease round: (Work 4 puff st, 1 decrease) around
- Second decrease round: (Work 3 puff st, 1 decrease) around
- Third decrease round: (Work 2 puff st, 1 decrease) around
Decrease (puff st decrease):
- Work 1 puff st (leaving last loop on hook), yarn over, work next puff st in next st, yarn over, pull through all loops until only 1 st remains, ch 1 to secure.
- For small sizes (esp. for babies under 3 months), omit some of the decrease rounds or stop earlier to keep opening appropriately small.
- After all decrease rounds, work 1 more round of 1 puff st in each st (no decreases).

6. Finishing the Opening: Attaching the Elastic/Scrunchie
- Join yarn at opening (where decreases finished).
- Holding the elastic hair band inside the hat, sc around the elastic, stitching through both the hat edge and the band.
- Continue evenly around until the opening is neat and snug.
- Join with sl st, fasten off, and weave in ends.
Conclusion
Your crochet ponytail hat is complete! The hat is fitted, stretchy, and perfect for ponytails or buns. The scrunchie opening makes it both practical and stylish, and the size is easily adjustable for babies, children, and adults. Enjoy personalizing with colors and yarns of your choice.
Pattern Corrections & Tips
- Puff Stitch Consistency: Keep your puff stitches even in size by maintaining the same tension and looping height.
- Decreasing: Space your decreases evenly around the crown for the neatest finish, and offset the first decrease of each round so they do not stack over each other (prevents visible lines).
- Elastic Attachment: Make sure to crochet snugly around the elastic so no gaps appear.
- Color Changes: Always finish the last pull-through of your last single crochet with the new color for a smoother transition.
Tip:
For babies and small children, you can close the top completely rather than leaving an opening for a bun if you wish.