Free Crochet Floppy Sun Hat Pattern (Step-By-Step)
Protect yourself in style with this free crochet floppy sun hat pattern that’s easy to follow for a cool and fashionable look all season long.
Sunshine feels gentle and safe when you have a beautiful wide-brim hat made just for you. With its big floppy edges and graceful design, this special accessory brings smiles and a touch of charm to anyone’s day. The crochet floppy sun hat pattern helps you make hats that keep your head cool and your eyes in the shade so you can play or relax outside without worry. Colors can be bright and bold or calm and natural, letting every person pick what suits them best.
Beautiful Floppy Sun Hat Free Crochet Pattern You’ll Love
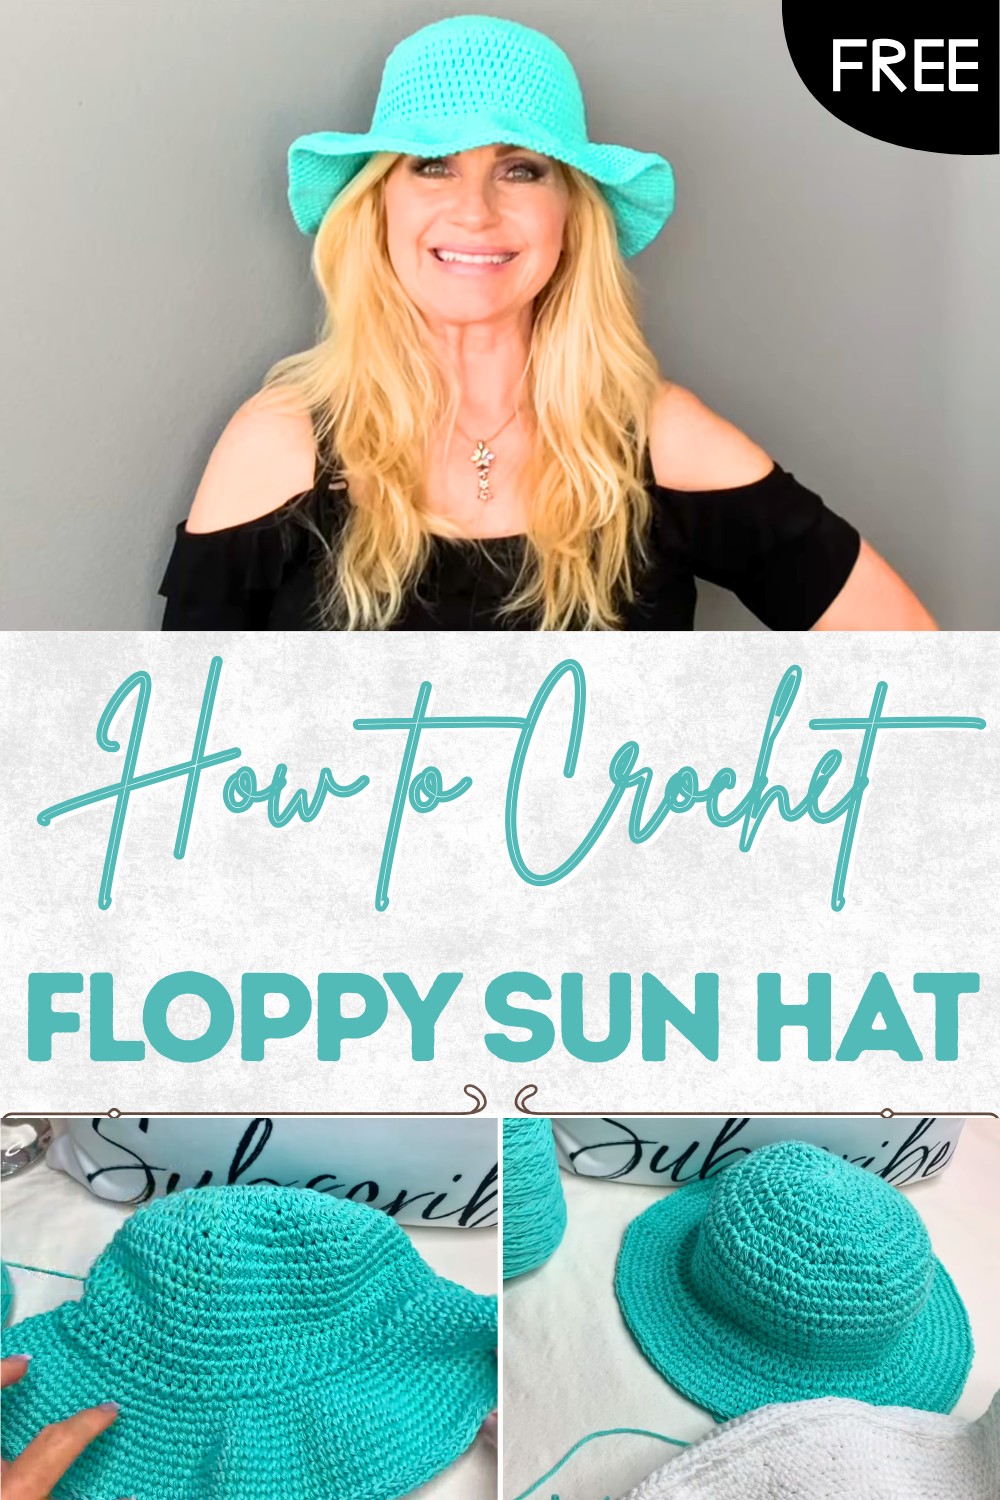
Lightweight and easy to fold, this hat is perfect to take along for walks, beach visits, or working in the garden. The pattern is simple to follow and turns yarn into a useful hat you will enjoy wearing again and again. A handmade floppy sun hat is more than just stylish – it is comfort, care, and protection all in one.

Free Crochet Floppy Sunhat Pattern
Materials
- Yarn: 100% cotton, medium (worsted) weight, category #4 (approx. 200–250g for adult size)
- Hook: US G/6 – 4.0 mm crochet hook
- Notions:
- Stitch marker
- Measuring tape
- Scissors
- Yarn needle
Key Abbreviations (US Terms)
- ch: chain
- sl st: slip stitch
- sc: single crochet
- hdc: half double crochet
- st(s): stitch(es)
- rep: repeat
- yo: yarn over
Special Notes
- Gauge: Not essential, but finished crown (top circle after increases) should measure about 7–7¼” (18–18.5 cm) in diameter for average adult fit.
- The hat is made in one piece, starting with a magic ring, worked in continuous spirals for a seamless look.
- Cotton yarn can split; crochet with care and even tension.
- Use a stitch marker to mark the first stitch of each round.
Pattern
Crown
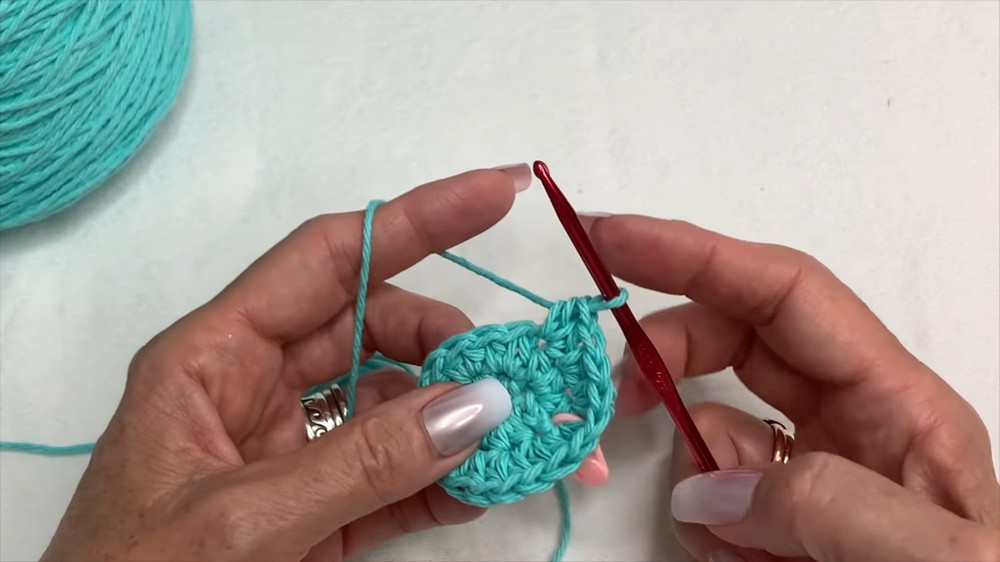
- Begin with a magic circle.
- Round 1: Ch 2 (counts as first hdc). Work 7 hdc into the ring (8 hdc total). Pull ring tight. Join with sl st to top of 2nd ch. (8 sts)
- Round 2: Do not ch 1. Immediately work 2 hdc in each st around. (16 sts). Use stitch marker in the first st.
- Round 3: 1 hdc in next st, 2 hdc in next st; rep from * around. (24 sts)
- Round 4: 1 hdc in each of next 2 sts, 2 hdc in next st; rep from * around. (32 sts)
- Round 5: 1 hdc in each of next 3 sts, 2 hdc in next st; rep from * around. (40 sts)
- Round 6: 1 hdc in each of next 4 sts, 2 hdc in next st; rep from * around. (48 sts)
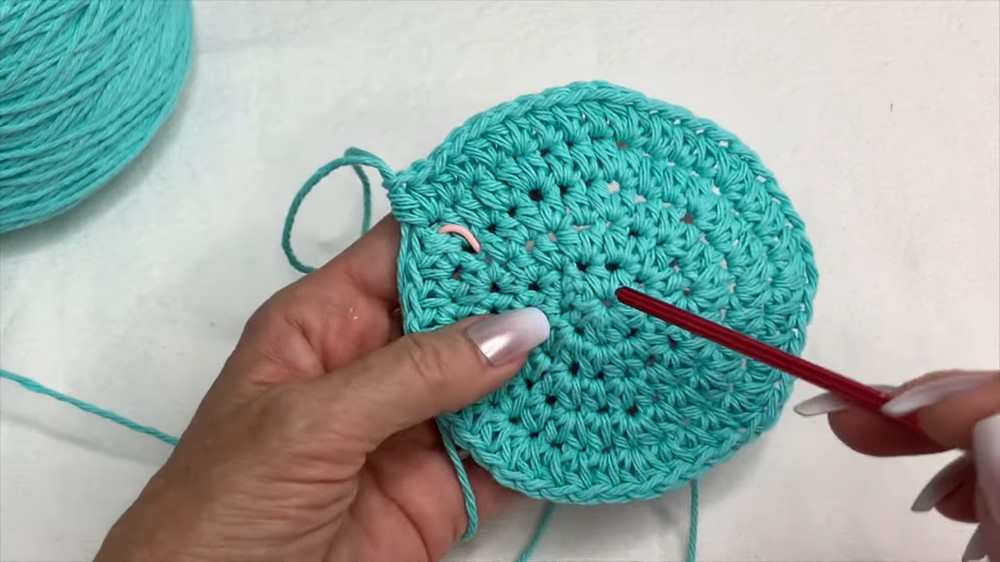
- Round 7: 1 hdc in each of next 5 sts, 2 hdc in next st; rep from * around. (56 sts)
- Round 8: 1 hdc in each of next 6 sts, 2 hdc in next st; rep from * around. (64 sts)
Fit Check: At this point your circle should be approx. 7–7¼” (18–18.5 cm) wide for adult size. If you’d like a smaller hat, stop increasing after round 7; for larger, add another increase round.
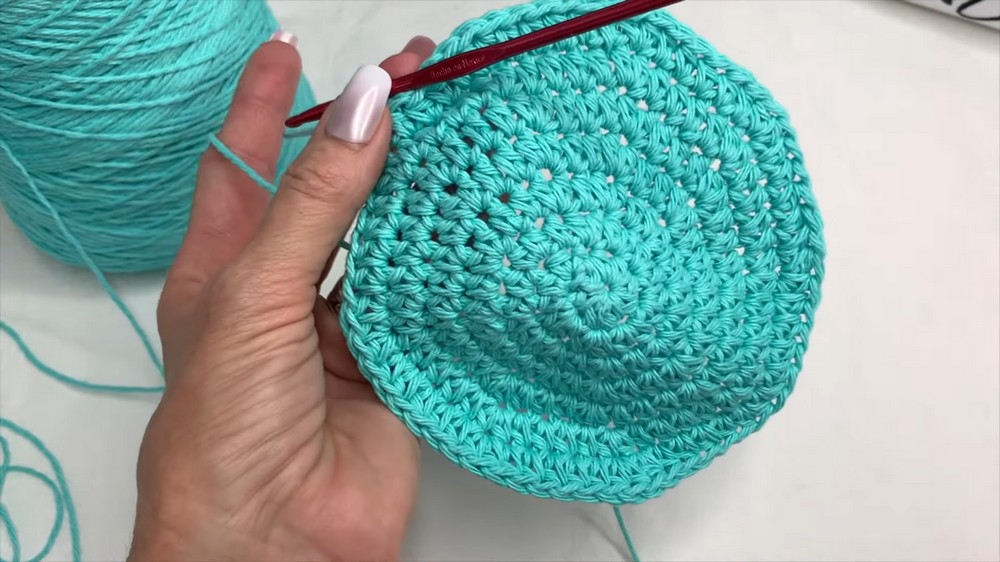
Sides (Body of Hat)
- Remove stitch marker.
- Work 8–9 rounds of 1 hdc in each stitch around (no increases), continuing in spiral. Replace stitch marker at each new round.
- Try on the hat after a few rounds. Top should fit snugly, sides should begin to extend downwards.
- Add more rounds for a deeper hat, fewer for a shallower fit.
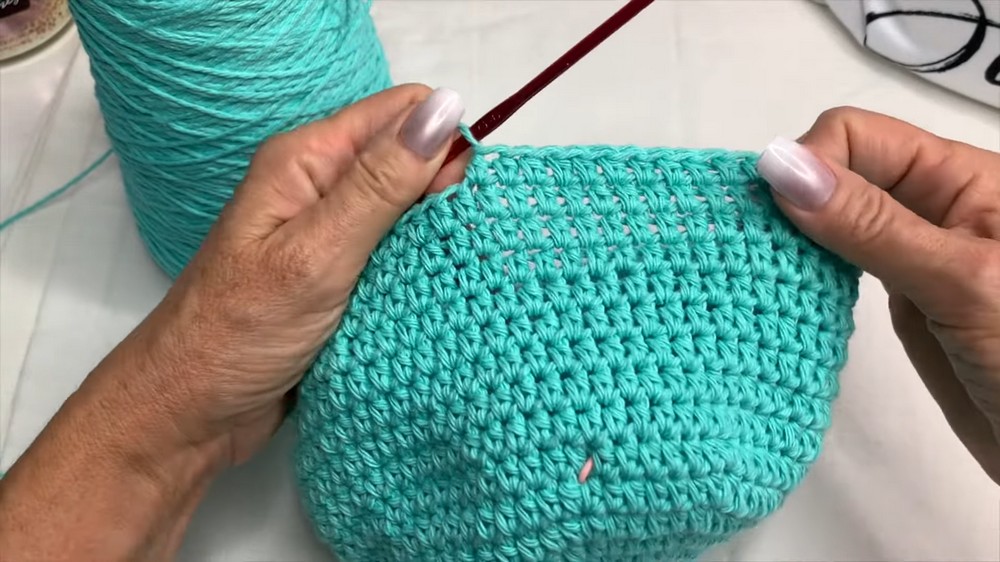
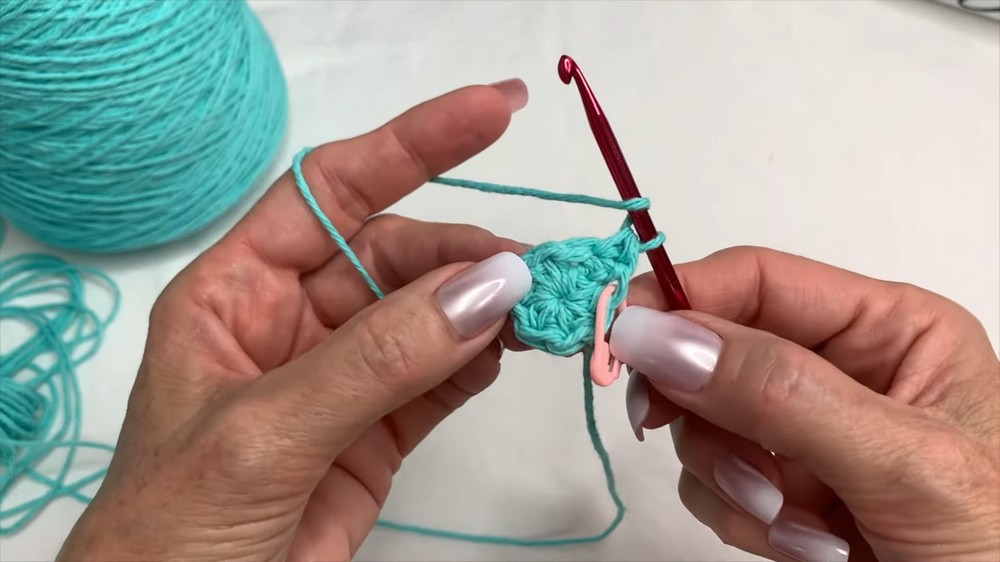
Brim
Rnd 1 (Transition & Fitted Band):
- Remove stitch marker. Slip st in each of the next 2 sts.
- Begin working loosely: Insert hook between posts of next 2 hdc, yo, pull up loop, pull through both loops (sl st). Rep between every hdc all the way around.
- Join with sl st. Try on for fit: if too tight, redo with even looser slip sts.
Rnd 2 (Brim Begins):
- Switch to single crochet (sc). (2 sc in next st, 1 sc in next st); rep around (increases).
- On following rounds—
- Rnd 3: 1 sc in each st around (no increases).
- Rnd 4: (2 sc in next st, 1 sc in each of next 4 sts); rep around.
- Rnd 5: 1 sc in each st around.
- Rnd 6: (2 sc in next st, 1 sc in each of next 6 sts); rep around.
Continue alternating an increase round (add 1 sc between each increase for each new increase round) with a plain round until your brim reaches the desired width—typically 10–13 rounds for a wide floppy sunhat.
Final Round (Brim Edging for Structure)
- When brim is finished, work 1 more round of sl st into the row below (into spaces between sts as before) for extra firmness.
- Fasten off and weave in all ends.

Conclusion
This classic cotton sunhat offers a blend of comfort, sun protection, and effortless style. The use of 100% cotton ensures durability and coolness, making it perfect for warm weather. Its seamless spiral construction and structured brim provide a polished finish.
Pattern Corrections & Tips
- Stitch Marker: Always keep a marker in your first stitch of the round for easier counting.
- Cotton Yarn: Work with smooth even tension and a slightly blunt hook to minimize splitting.
- Try On: Regular fit checks prevent making a hat that’s too large or small for your head.
- Brim Adjustments: For a stiffer brim, consider adding a second slip stitch round to the edge or use a thin wire in the final round (optional).
- Customization: To shorten or lengthen the hat, simply add or subtract side rounds before starting the brim.
- Blocking: Wet block the finished hat to shape the brim and crown nicely, if desired.