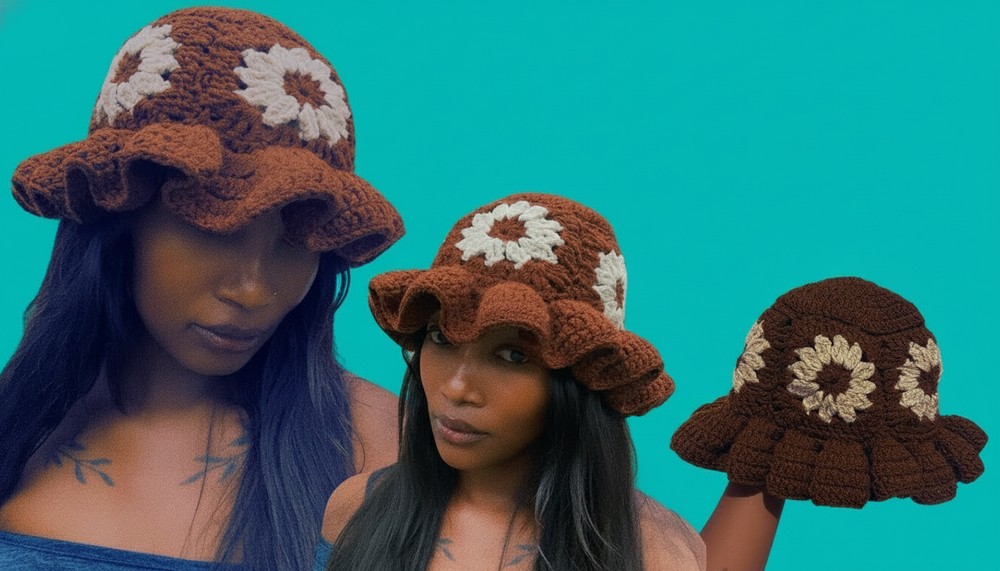
Free Crochet Ruffle Hat Pattern with Easy Instructions
Sweet ruffles bring playful style with this free crochet ruffle hat pattern, offering simple steps for everyone to enjoy special every day.
Children gathered in the yard wearing hats with gentle ruffles that danced in the breeze and all eyes sparkled with delight. The secret behind their joy was the crochet ruffle hat pattern a simple way to add beauty and fun to any day. This hat bring soft waves and bright colors making every head look special and full of life. People use them to protect from sunlight or add a playful touch to their outfits for celebrations and family pictures.
Easy Free Crochet Ruffle Hat Pattern for Kids and Adults
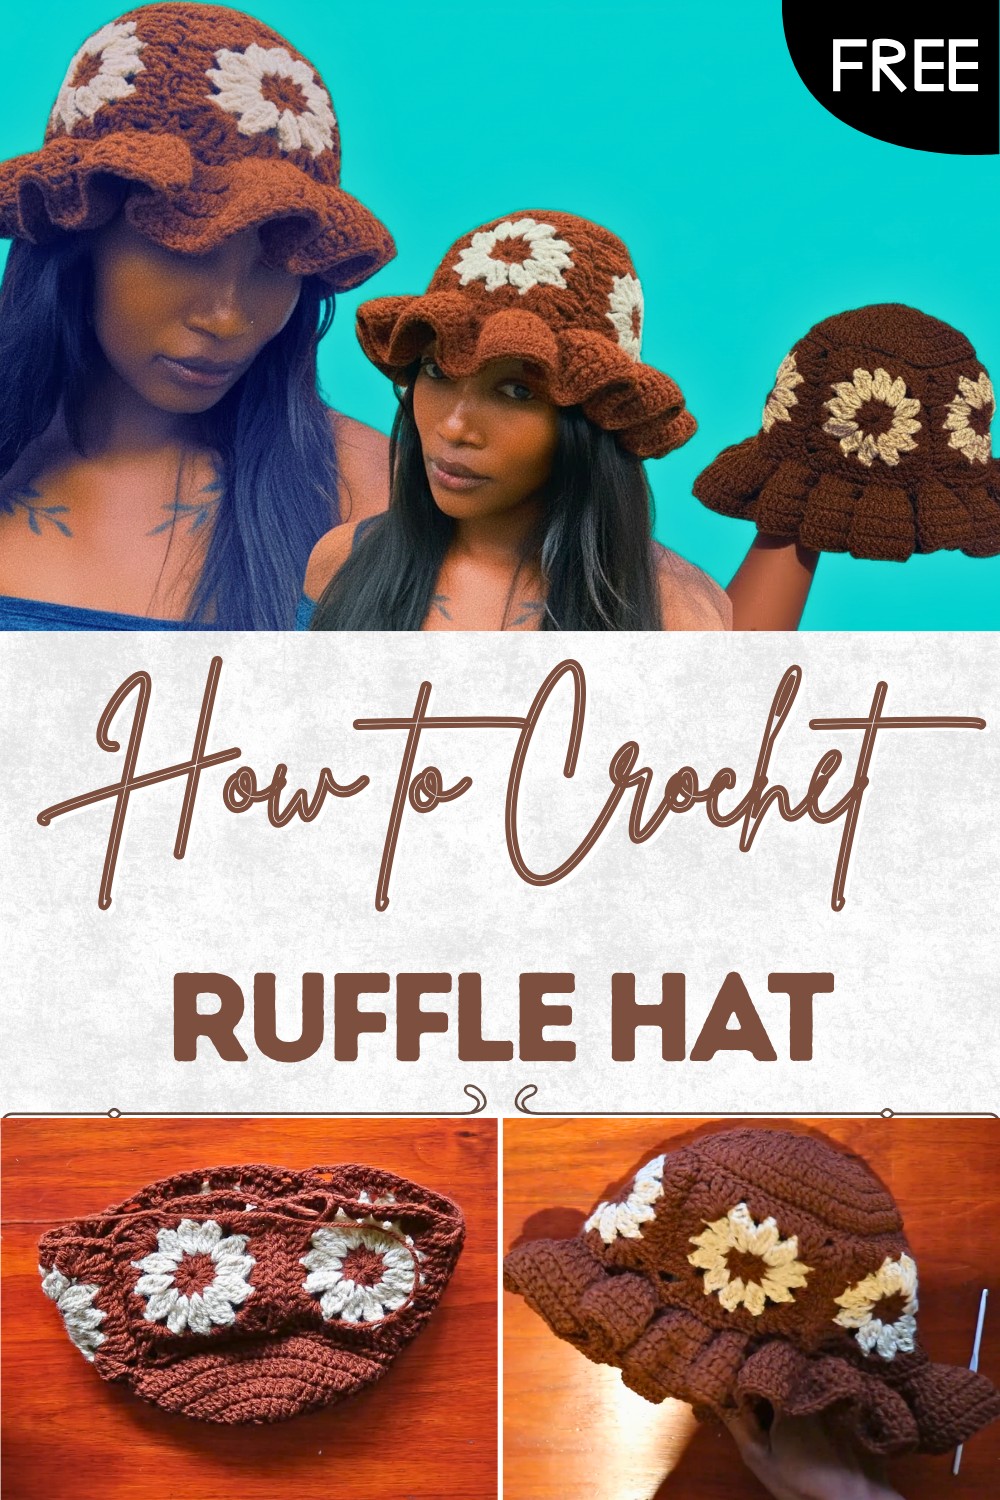
Each hat feels light and fits comfortably while keeping hair neat and secure even when the wind picks up. With the crochet ruffle hat pattern anyone can create a cover that offers warmth and style. Choosing different yarns and decorations lets every hat shine with its own story.
Free Crochet Ruffled Hat Pattern
Materials
- Yarn: DK weight, 100% acrylic, 100g skeins each of Color A (e.g., brown), Color B (e.g., light brown). Choose any two coordinating colors.
- Hook: 4.0 mm crochet hook (use 3.5 mm for tightening/seaming if desired).
- Other: Yarn needle for seaming & weaving in ends, scissors, measuring tape.
Abbreviations (US Crochet Terms)
- ch: chain
- sl st: slip stitch
- sc: single crochet
- dc: double crochet
- tr: treble crochet
- hdc: half double crochet
- sp: space
- st(s): stitch(es)
- rep: repeat
- yo: yarn over
Special Notes
- Gauge/tension: Not crucial; squares must fit together into a band that circles your head comfortably. Adjust hook/yarn or add squares if needed.
- Color changes: Always fasten off securely and weave in ends neatly.
- Petals/corners: Trebles are used for petal and corner shaping; read instructions closely for when to use tr or dc.
- This project consists of five flower squares, a circular top, and a ruffled hdc brim.
Pattern
Flower Square (Make 5)
Center of Square
- With Color A:
Make a slip knot, ch 3.
Work 12 dc in the first ch (the slip knot forms a ring).
Sl st to the top of beg ch 3. Fasten off.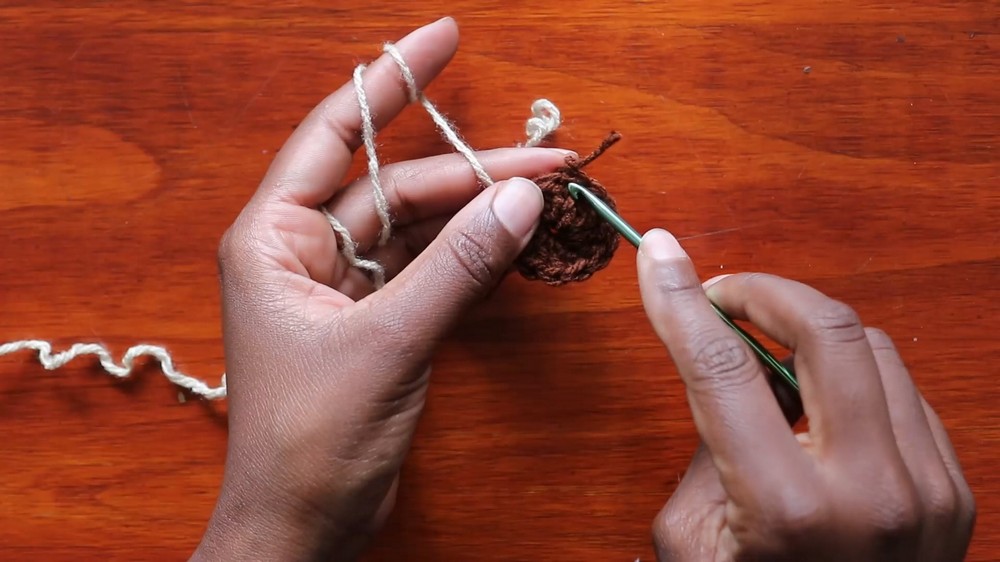
Petal Round
- With Color B:
Join with a knot between any two dc sts (work between stitches, not in the tops).- Ch 4 (counts as first tr).
- (Yo twice, insert in same sp, pull up lp, yo, draw through 2 lps) twice. You now have 3 partial tr.
- Yo, draw through all lps (makes a petal cluster).
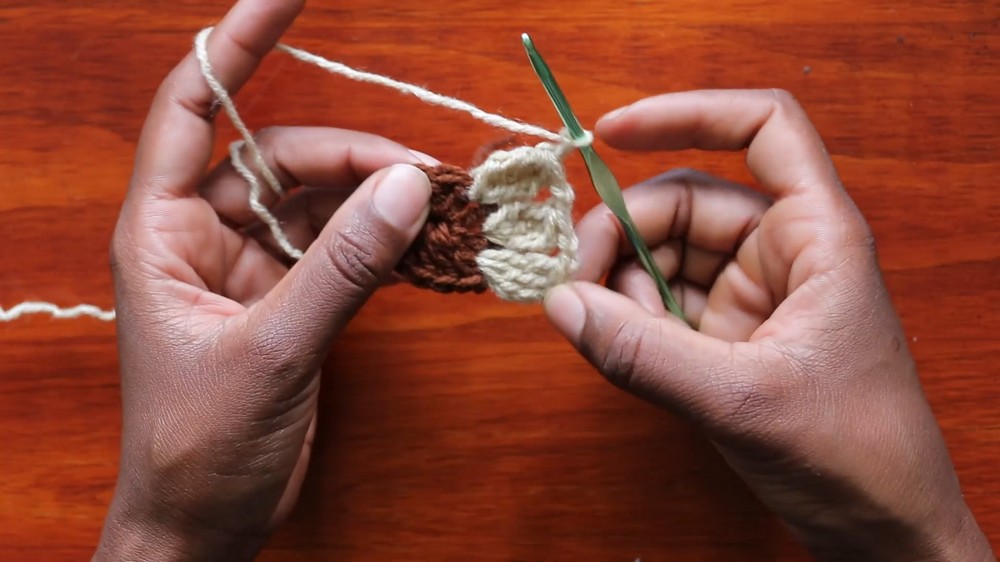
- Ch 2.
- [In next space] 3 tr (petal cluster as above), ch 2 – rep from * around until you have 12 petals.
- Sl st to complete the round, fasten off.
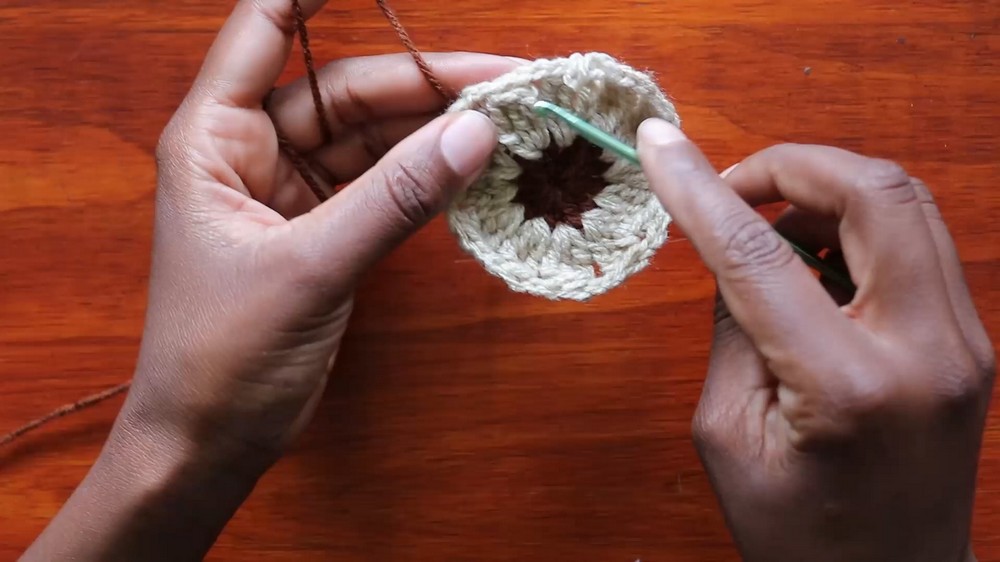
Square Shaping (Outer Round)
- With Color A:
Join into any ch-2 space with a knot.- Ch 4 (counts as first tr).
- Work 3 tr into the same space, ch 3 (corner), 3 tr in same space (first corner made).
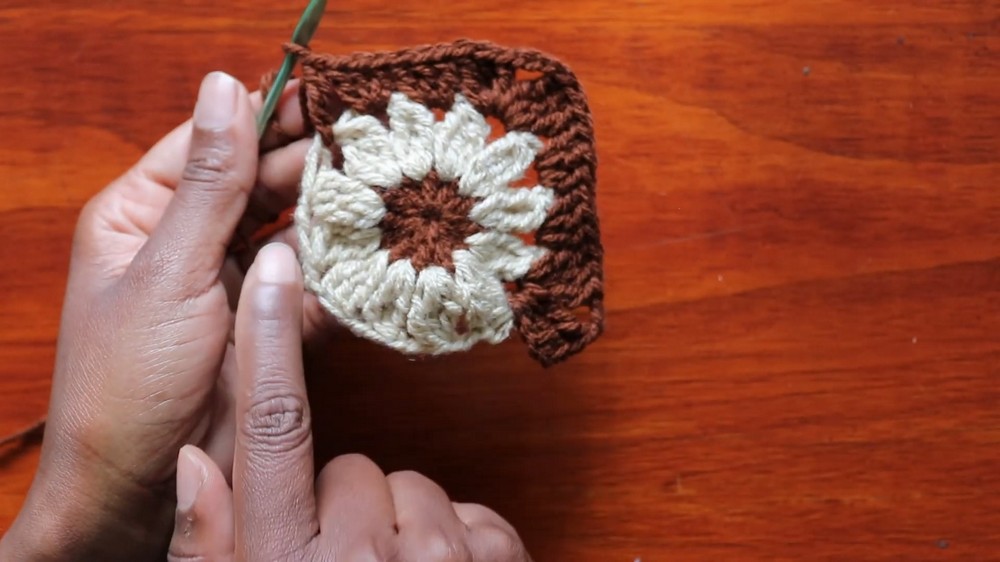
- 3 dc in next space (side), 3 dc in next space (side),
[corner] 3 tr in next space, ch 3, 3 tr in same space. - Rep * around, alternating [two sides]/[corner] until the square is complete (4 corners in total).
- Sl st to first tr to join, fasten off.
Top of Beanie (Crown)
- With Color A:
Make a slip knot, ch 3.
Work 12 dc in first ch, sl st to join. - Ch 3 (counts as dc), 2 dc in each dc around (24 sts total), sl st to join.
- Ch 3, skip 1 st, 2 dc in next st, rep * around (36 sts), sl st to join.
- Continue in this manner, working (3 dc, then 2 dc in the next) for the next round, and for each subsequent round, add 1 more dc between increases.
- Example: Round 4: dc in next 2 sts, 2 dc in next st; Round 5: dc in next 3 sts, 2 dc in next st, etc.
- Work 7 rounds total, or until the flat circle matches the width of your joined squares’ ring. (Approx. 6–6.5 inches/16–17 cm in diameter.)

Assembly
- Join the Squares:
With WS together, sew or crochet the sides of the five squares to form a closed ring. Use back loops for a nearly invisible seam. - Attach Top to Squares:
With squares ring RS facing, pin crown to the top edge, making sure to align stitches evenly.
Use a yarn needle or hook to join with sl st or sc seam, evenly distributing the circle.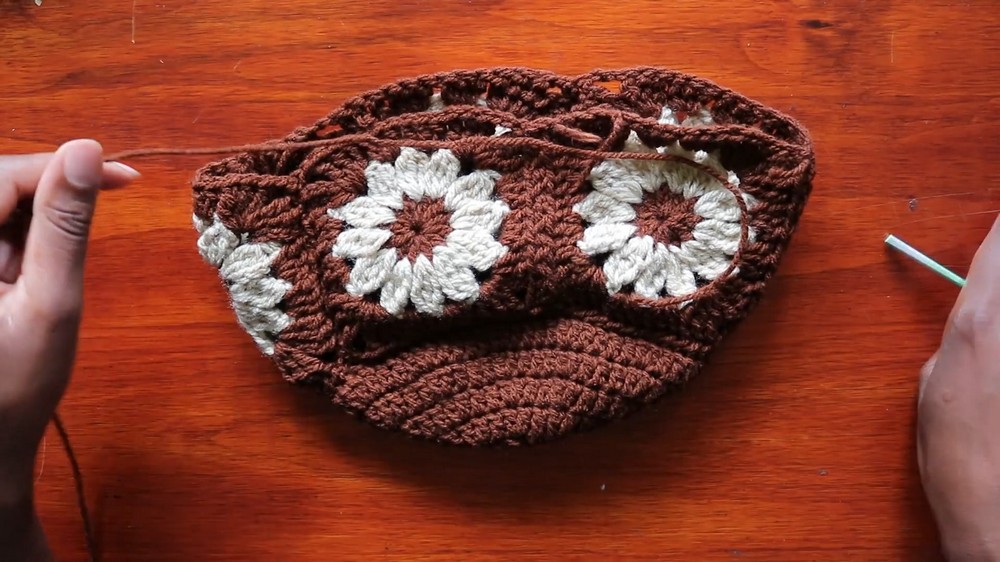
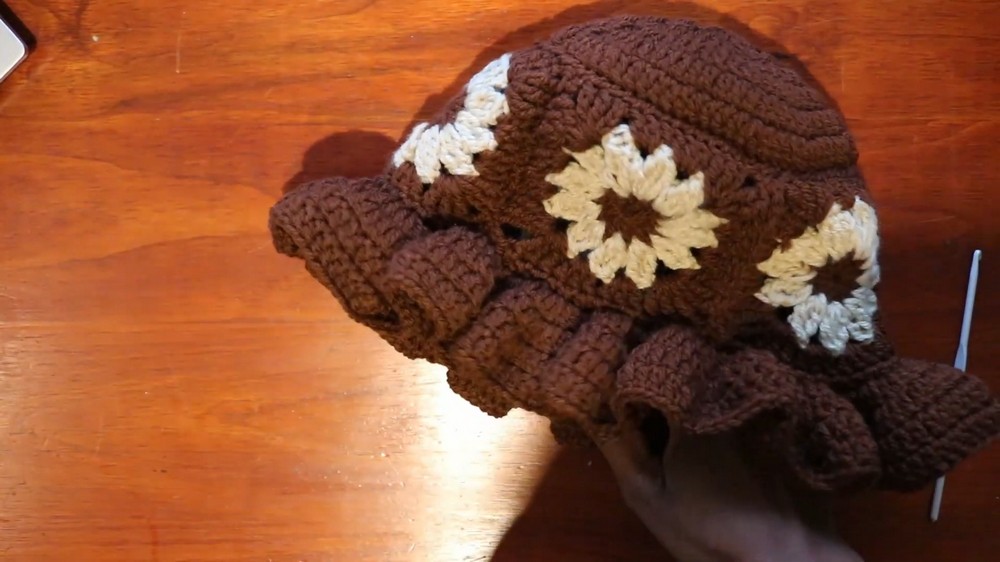
Brim (Ruffled Edge)
- Attach Yarn to Lower Edge:
Join Color B (or any color) to the lower edge of the squares ring.
Ch 1. - Foundation Round:
Hdc evenly around the edge, working 1 hdc in the end of each dc/tr row and 1 hdc in the sp between clusters. Sl st to join. - First Ruffle Round:
(Ch 3, 2 dc) in first hdc, (ch 3, 2 dc) in next hdc, … rep around.
Alternately, work [2 dc in next st, 3 dc in next st] around for increasing fullness (“2-3-2-3” pattern).
Sl st to join. - Second Ruffle Round:
[1 dc in next st, 2 dc in next st], rep around for a more gradual ruffle. Sl st to join. - Final Ruffle Rounds (Optional):
Work 1 dc in each st (no more increases) for 1–2 more rounds for wider brim. - Fasten off, weave in all ends.
Conclusion
This colorful beanie is a joyful and customizable project, using classic flower granny squares and basic shaping. The ruffled brim gives it a trendy finish, and you can swap colors for any aesthetic.
Pattern Correction & Tips
- Petals: Always work petals between stitches, not into stitch tops.
- Brim Ruffles: Adjust increase rate for more or less ruffle as desired; more increases = more ruffles.
- Fit: Check fit by wrapping unseamed squares around your head. Add or remove squares, or alter square size as needed.
- Crown Attachment: Count stitches so circles and squares match up or are eased gently together. Pinning helps.
- Color: Choose bold, high-contrast, or gradient colorways for unique effects.
- Ends: Always weave in all ends before blocking.