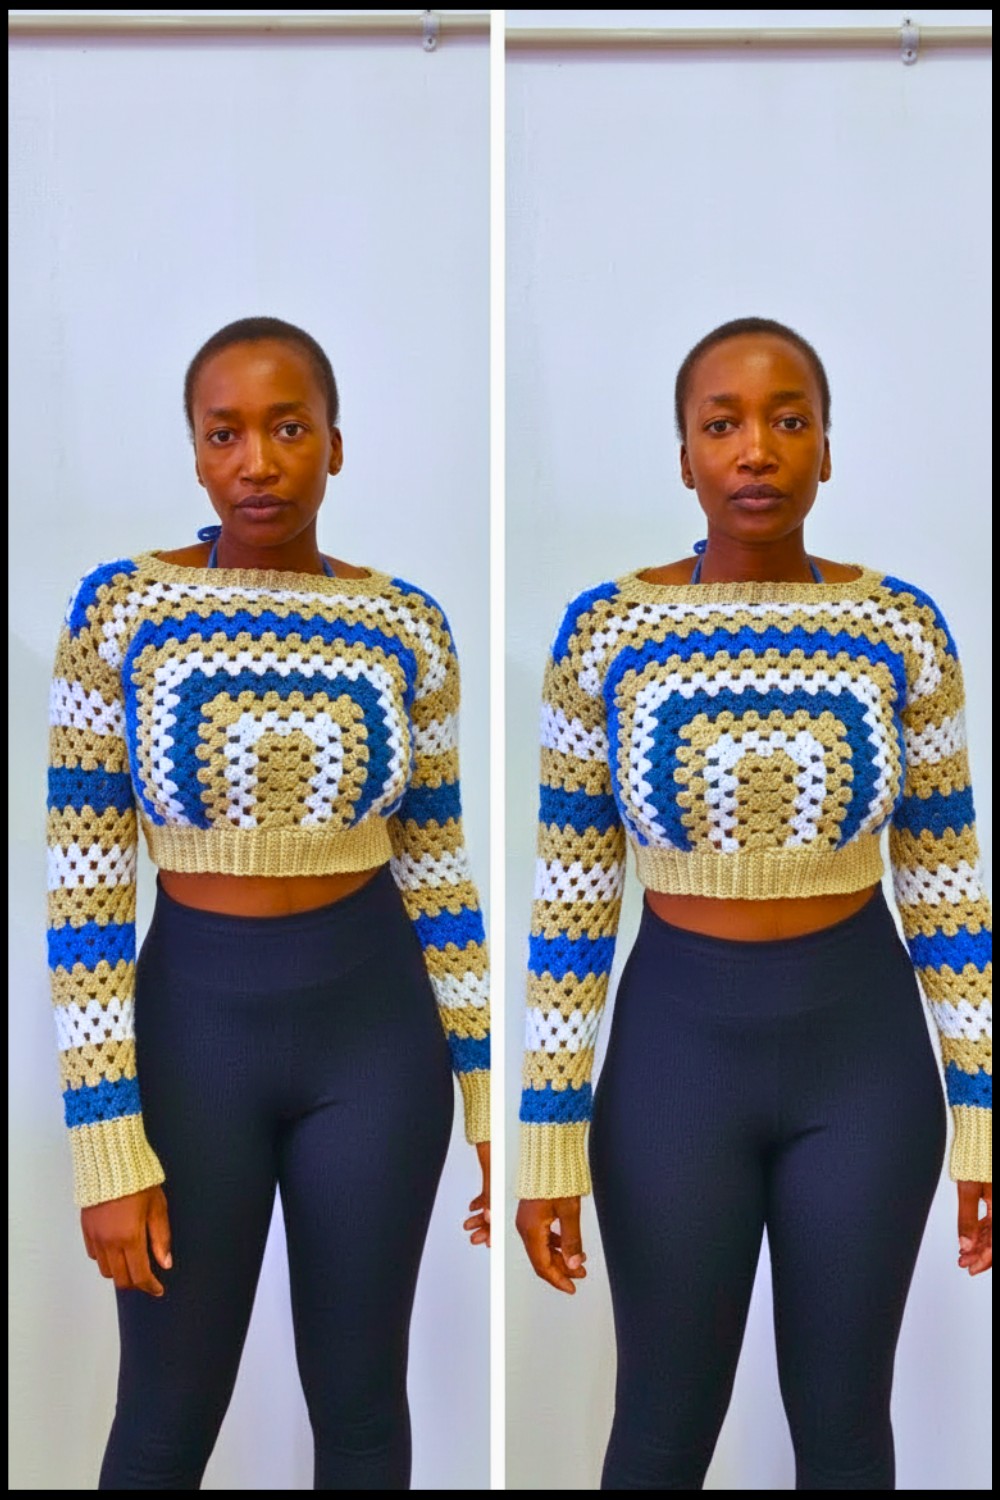
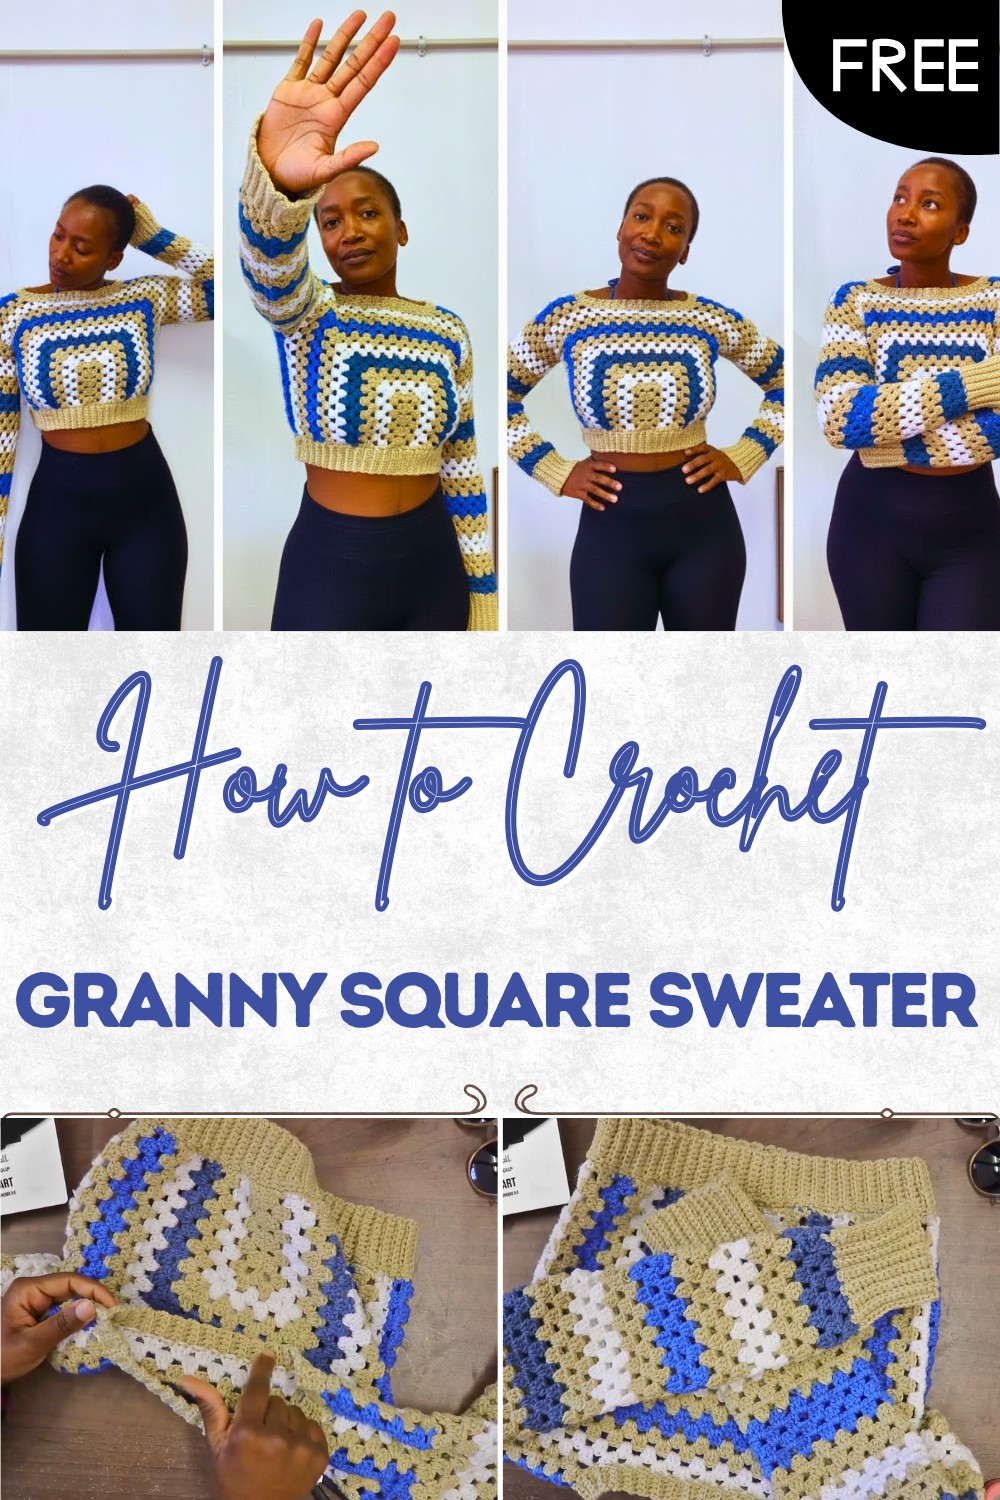
Free Crochet Granny Square Sweater Pattern for Stylish Looks
Sprinkle charm across your wardrobe with this free crochet granny square sweater pattern that offers easy instructions for a stylish look.
Sometimes sweaters lack excitement and warmth, leaving outfits feeling plain. With a crochet granny square sweater pattern, bright colors and soft yarn come together in a way that instantly lifts spirits. Vibrant squares join to create a lively design, turning simple yarn into a true work of wearable art. This sweater feels gentle against the skin, perfect for adding a warm touch on breezy days. The pattern encourages mixing favorite shades, bringing personality to every piece.
Granny Square Sweater – Free Crochet Pattern
Friends and family often notice the playful look, asking about the joyful patterns and color choices. It feels wonderful to slip into something both handmade and beautiful, a piece that shows off creativity and care. Ideal for treats or gifts, this special sweater brings style, comfort, and a sense of pride. Feel the happiness that shines from every colorful square, wrapping around like a soft, cheerful hug.
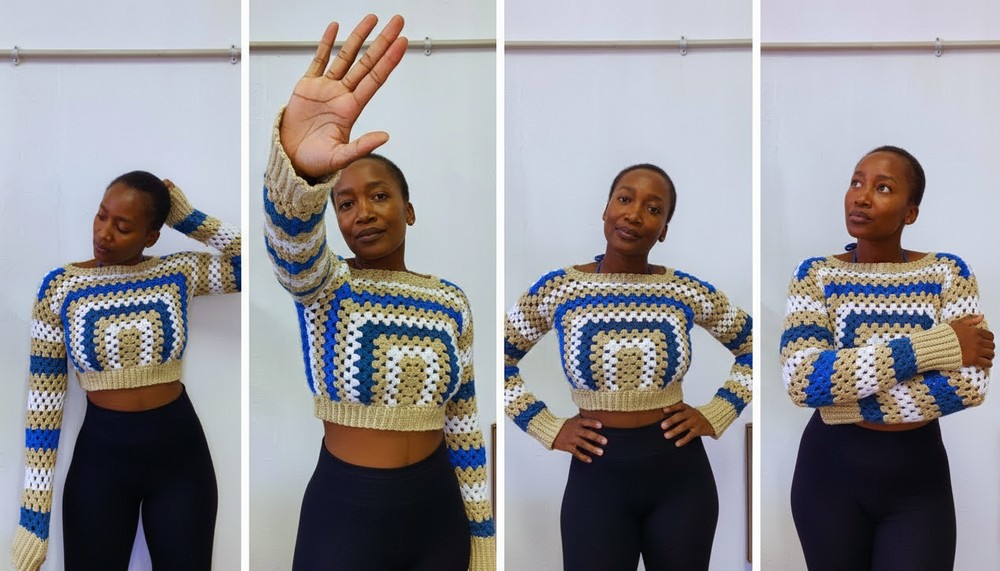
Crochet Color Block Granny Square Sweater Pattern
Materials
- Yarn: Four colors, DK weight (4 mm, “double knit”), 100% acrylic recommended
- Hook: 4 mm crochet hook
- Notions:
- Measuring tape
- Scissors
- Yarn needle (for seaming and weaving in ends)
- Optional: Stitch markers
Key Abbreviations (US Terms)
- ch: chain
- sl st: slip stitch
- sc: single crochet
- dc: double crochet
- rep: repeat
- st(s): stitch(es)
- sp: space
- RS/WS: right side/wrong side
- beg: beginning
- yo: yarn over
Special Notes
- Sweater is constructed from a large color block “granny rectangle” (front and back), with additional sections for the neck, arms, and cuffs.
- Change color every few rows as desired; always fasten off and tie a secure knot when changing color (follow instructions).
- Tension, number of rows, and arm width/length are easily adjusted for sizing; recommended for sizes Small–Medium (add more rows/repeats for larger sizes).
- Main stitch throughout body and sleeves is the granny cluster (3 double crochets).
- Corners and chain spaces keep work squared and provide room for increases.
Pattern
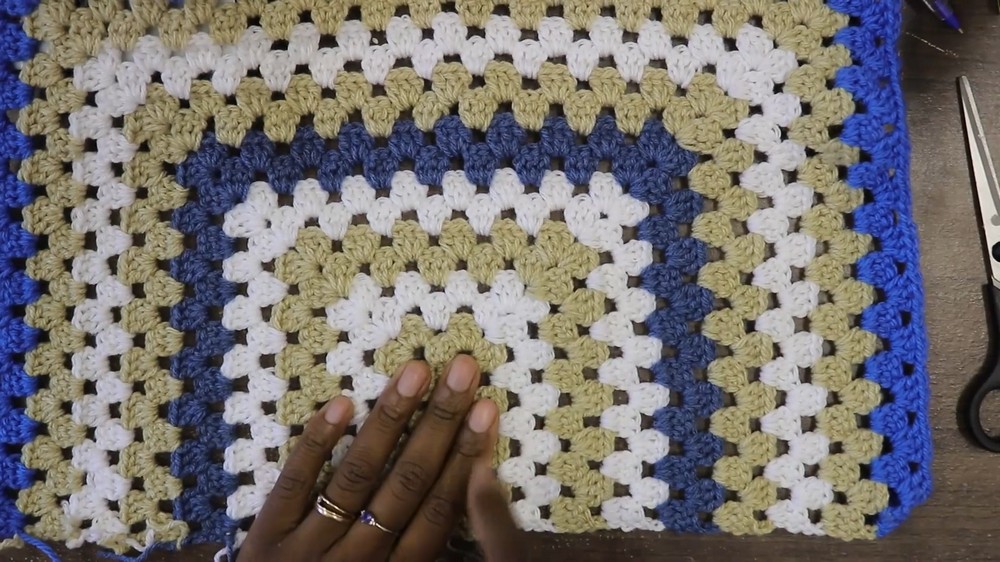
Body – Main Rectangle (Make 1 Piece)
Foundation:
- Using Color A, ch 15.
- (Designer tip: Ch14, then count your working loop as the first—confirm for your version.)
Row 1: Establishing Granny Clusters
- In the 4th ch from the hook, work 3 dc (counts as first Granny Cluster) into the same ch.
- Ch 1, skip 1 ch, 3 dc into next ch. Rep * to end.
- After last cluster, ch 1, turn.
Row 2: Working into Spaces
- Ch 3 (counts as 1 dc), 3 dc into first ch-1 sp (between clusters), ch 1, 3 dc into next ch-1 sp, ch 1; rep * across to last cluster.
- At the end, ch 3, turn.

Repeat Rows:
- Repeat Step 5 for each row, always ch 1 between clusters, 3 dc into every ch-1 sp across, ch 1 at end, ch 3 (turn).
- Change colors after your preferred number of rows (sample: every 2–3 rows). Fasten off and tie color changes securely.
- Work until you have 18 rows total (approximate; for your fit).
Tip: Each row stays the same length—adjust the number of foundation chains/rows to fit desired width/length.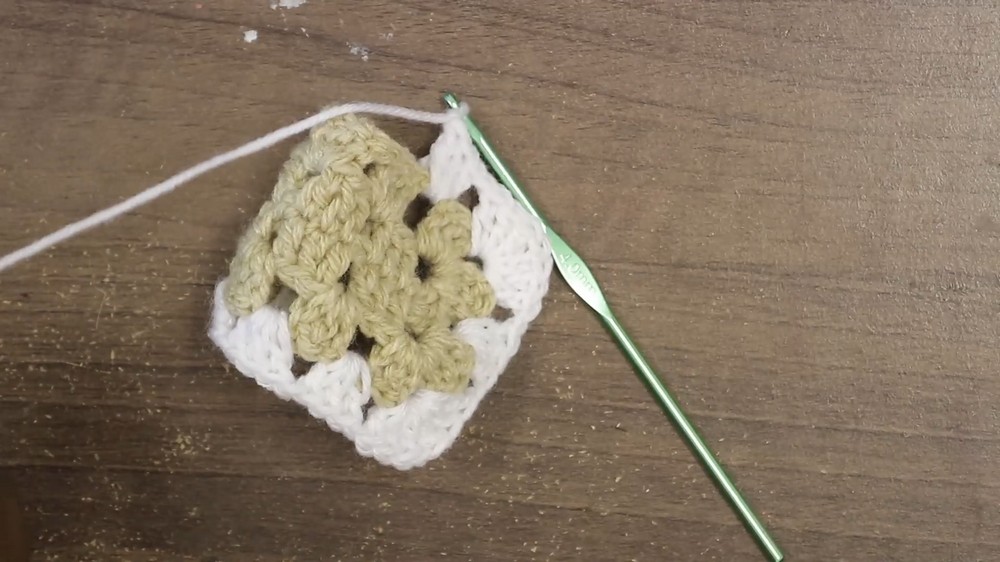
Shape the Top (Shoulders & Neck)
After 18 rows are completed:
- Divide work in half to determine shoulder width and neck opening.
- Fasten off last color, reattach at one top edge.
- Work clusters and ch-1 as before to the middle of one side (start of neck). Leave center open for the neck by skipping central clusters and chs, then continue clusters on other side for symmetry.
- Work desired number of rows (suggestion: 4–5) for shoulder shaping on each side of the neck. Fasten off.
Repeat for other shoulder.
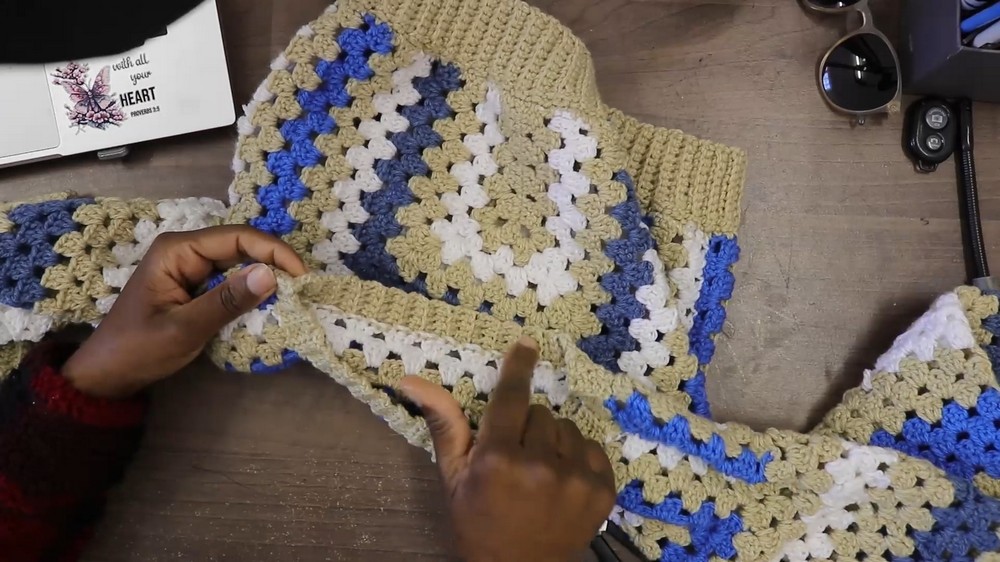
Seaming the Shoulders
- Using a yarn needle and matching yarn, seam together the top edges of the shoulders, leaving the neck opening in the center.
- Make sure both front and back panels are aligned and even.
Joining Sides (Body)
- With RS together, align front and back. Using yarn needle and matching yarn, seam up each side.
- Leave armholes open: try on and measure before closing seam—leave as much space as needed for a comfortable armhole (sample leaves about 6 rows’ worth of space).
- Fasten off and weave in ends.
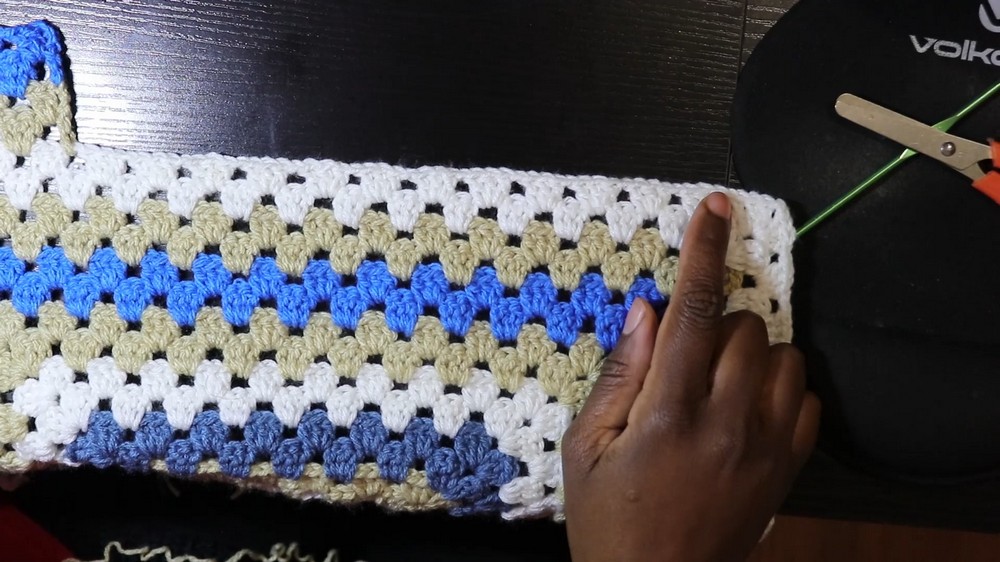
Sleeves
First Sleeve:
- With RS facing, attach yarn to armhole edge center-bottom (under the arm).
- Ch 4 (counts as first sp), work 3 dc in first armhole sp, ch 1, 3 dc in next sp, ch 1, rep around armhole. Join with sl st at top of beg ch-3.
- Turn.
- Ch 3, 3 dc in next sp, ch 1, rep around.
- Continue, changing colors as you like every 2–3 rows, for 12–13 rows or desired length.
- To decrease for a tapered sleeve (optional), in the final rows, occasionally skip a cluster space and work into the following space.
Repeat for opposite sleeve.
Cuffs
- At sleeve end, attach yarn.
- Ch 15 (or preferred width of cuff) for foundation.
- Sc in each ch back to arm edge.
- At the arm join, sl st in next arm edge st, turn. Sc in blo (back loop only) across. Turn.
- Rep: at end of each row, sl st in next arm edge st, ch 1, sc blo back.
- Continue working rows until cuff encircles wrist.
- Seam together foundation and last row of cuff with sl st or yarn needle.
Neckline
- Attach yarn to any neck edge.
- Ch 1, sc evenly around neck edge, join with sl st.
- Rep for 3–4 rounds for a neat finish.
- Fasten off; weave in any ends.

Conclusion
This colorful, comfortable sweater is constructed using basic granny clusters and simple seams, making it beginner-friendly and highly customizable. Mix and match colors for a statement look, and adjust sleeve/torso length for the perfect fit.
Pattern Corrections & Tips
- Color Changes: Always secure knots and weave in ends well at each color change.
- Measurements: Try on as you work (or use a favorite sweater as a template) for best fit.
- Seaming: Mattress stitch gives a neat finish; whip stitch or slip stitch also works.
- Sleeves: For larger or smaller arms, adjust armhole opening before seaming sides.
- Cuff: Adjust chain foundation for longer/wider cuffs.
- Blocking: Wet block the finished piece for best drape and shape.