Cozy Free Crochet Flower Sweater Pattern to Rock This Season

Bring style and comfort together with this airy crochet flower sweater pattern perfect for spring layering and warm weather outfits.
Spring is one of the most magical seasons, and what better way to celebrate it than creating a light, floral crochet sweater that’s perfect for breezy weather? With its floral pattern, this sweater combines beauty and practicality, making it ideal for layering over a camisole or wearing as a stylish statement piece. Using breathable cotton yarn, the sweater pattern is both airy and light, making it suitable even for warmer temperatures. The pattern is built on a foundation of simple yet creative crochet techniques, where the double crochet (dc) and treble crochet (tr) stitches come together to form delicate flower motifs.
Beautiful Crochet Flower Sweater Pattern for All Skill Levels
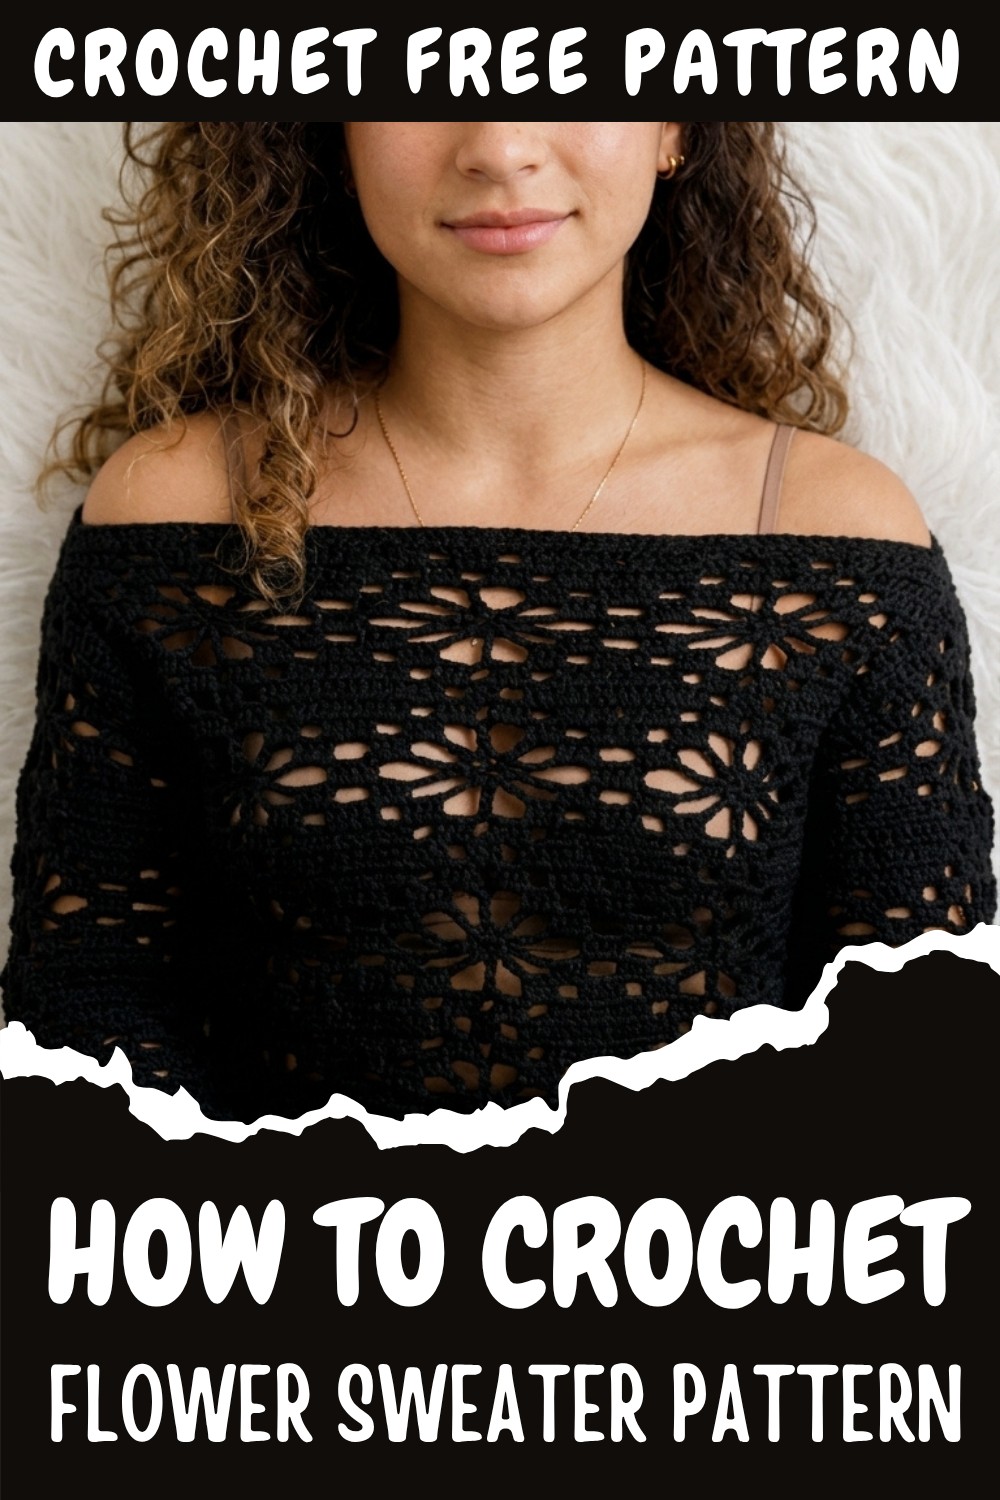
What sets this pattern apart is its modular design. You’ll crochet separate panels for the front, back, and sleeves, all using the same repetitive flower motif that’s easy to follow once you get the hang of it. The pattern can be customized entirely to your preferences by adjusting the number of flowers across or adding extra rows for length. Its pattern isn’t overly complicated, making it approachable for beginners who feel ready to level up their skills. Plus, the finished product offers plenty of room for creativity, you can leave a slit open in the sleeves for added flair or sew a personalized tag to make it uniquely yours.
Beyond learning how to crochet a stunning sweater, this pattern equips you with skills that will open doors to countless other projects. Once you gain confidence with the flower motif and the treble crochet stitch, you can use it to design matching items like boho-style tops, lightweight spring cardigans, or even summery accessories like bags. This project teaches the importance of counting stitches and working efficiently with gaps and motifs, skills that will prove invaluable as you grow your crochet expertise.
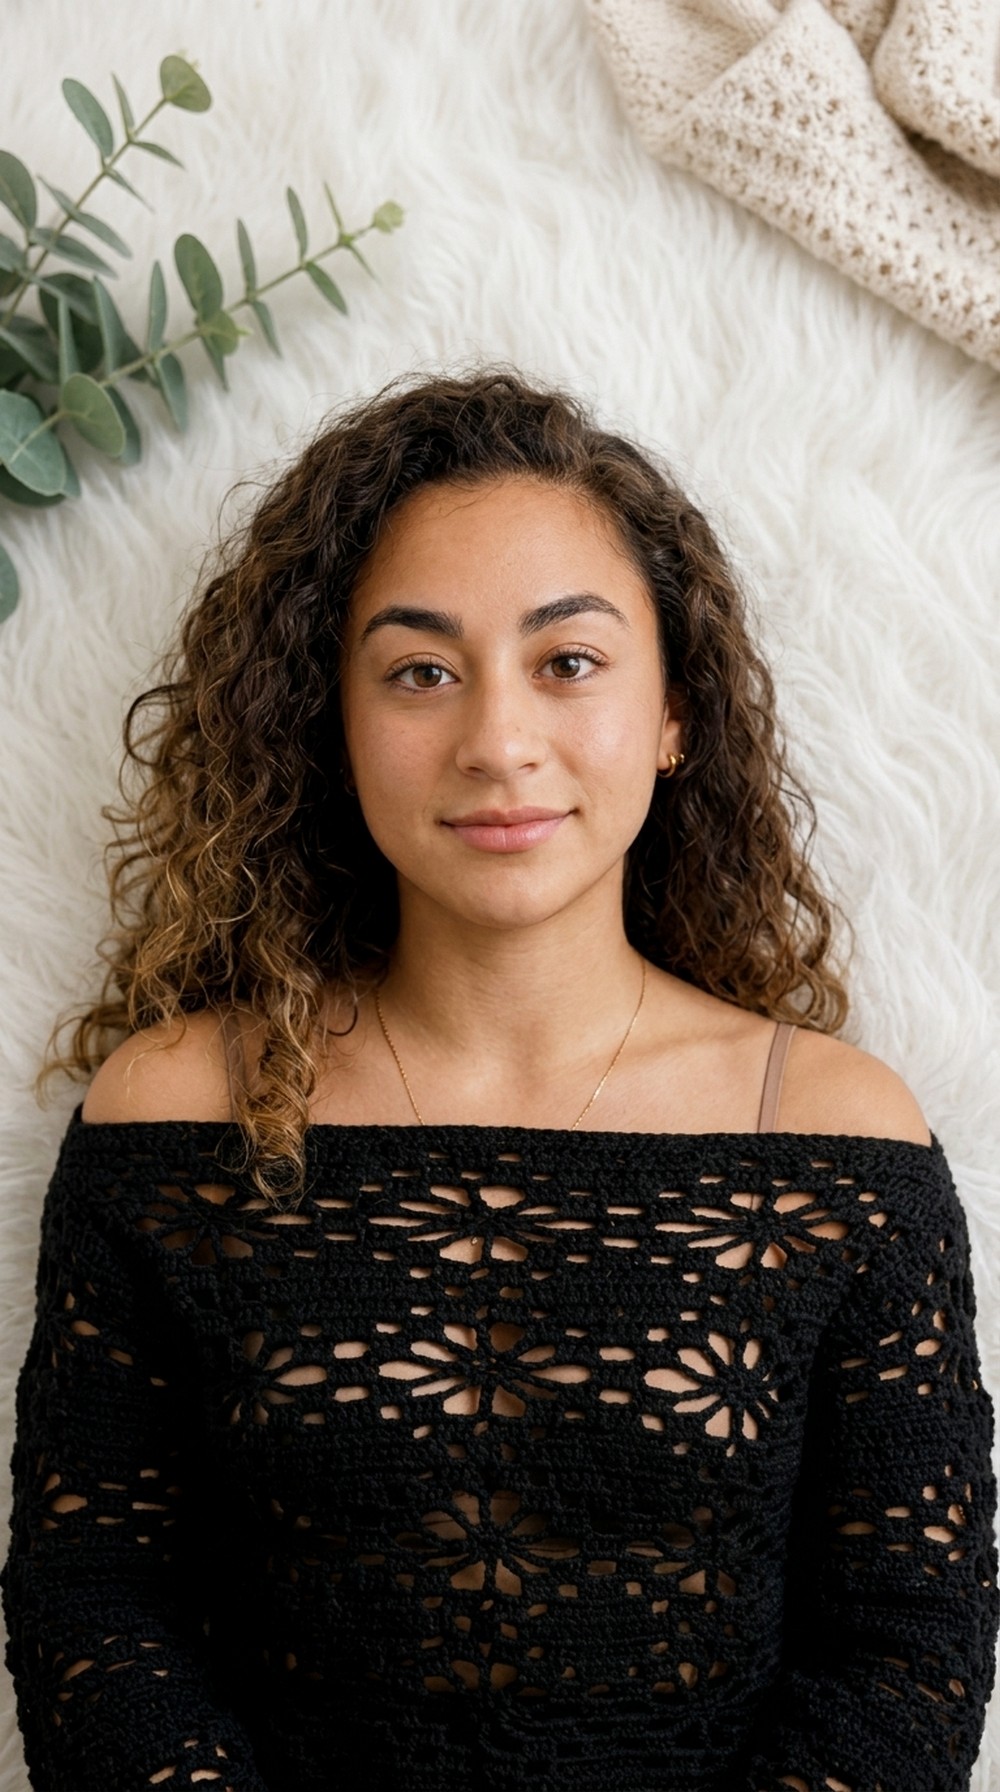
Floral Long-Sleeve Crochet Flower Sweater
This pattern creates a light, airy, floral long-sleeve sweater made from joined flower panels. It’s perfect for spring or warmer climates because it uses breathable cotton yarn and an open lacy design. The pattern is modular: you make flat panels of repeating flower motifs and then seam them into a front, back, and sleeves.
Special Features
- Floral lace motifs worked directly into a rectangular fabric (no separate motifs to sew).
- Modular construction:
- 1 front panel
- 1 back panel
- 2 sleeve panels
- Adjustable length and width by adding/removing flowers or rows.
- Airy cotton sweater: suitable for hot climates but still gives coverage.
- Customizable neckline and sleeve fit (you can choose how open or fitted you want them).
Skill Level
- Level: Confident Beginner to Intermediate
- You should be comfortable with:
- Chains, double crochet (dc), treble crochet (tr)
- Working into chains and stitch spaces
- Counting stitches and rows
- Seaming panels together (single crochet or sewing)
If you are a newer crocheter, you can still complete this by following the steps slowly and counting carefully.
Who This Pattern Is For
- Crocheters who:
- Want a lightweight spring top.
- Like floral / lacy textures.
- Are ready to go beyond basic blankets and scarves.
- Want to practice panel construction and seaming.
- Not ideal as a very first project, but excellent as a “first garment” if you already know basic stitches.
Abbreviations (US Terms)
- ch = chain
- ch-sp = chain space
- dc = double crochet
- tr = treble crochet
- sc = single crochet
- st(s) = stitch(es)
- sk = skip
- rep = repeat
- yo = yarn over
- RS = right side
- WS = wrong side
Materials
- Yarn: Light cotton yarn in black (DK / light worsted works well).
- Hook: Use a hook size that matches your yarn (often 3.5–4.5 mm for cotton DK).
- Tapestry needle (for weaving ends and optional sewing).
- Scissors
- Stitch markers (optional but very helpful).
- Optional: Custom label/tag for finishing.
Pattern Overview
You will:
- Make flower panels:
- Front panel (3 flowers wide).
- Back panel (slightly larger than the front; more rows/length).
- Two sleeve panels (3 flowers long per sleeve).
- Repeat a flower pattern block across each panel.
- Finish each panel with rows of double crochet.
- Join shoulders, then attach sleeves, then seam sides and sleeve undersides.
- Weave in ends and add your label or finishing touches.
Table of Contents
- Gauge and Sizing Notes
- General Flower Pattern Structure
- Front & Back Panels
- Chain foundation
- Row 1: Full double crochet
- Row 2: First gap row
- Row 3–9: Flower build-up and completion
- Repeating the flower pattern
- Sleeve Panels
- Adjusting Length & Width
- Assembly & Seaming
- Joining shoulder seams
- Attaching sleeves
- Seaming sides and sleeves
- Special Techniques Used
- Tutor’s Suggestions & Practical Uses
- Tips & Common Pitfalls
- Conclusion & Remarks
- What I Learned from This Pattern
Gauge and Sizing Notes
- Tutor example:
- Each flower uses 25 chains.
- Chain of 75 = 3 flowers across (sleeve example).
- For the front: she wanted 3 flowers wide.
- For the back: she made it slightly longer and larger for better fit (so the back doesn’t ride up).
You can adjust:
- Width: change how many sets of 25 ch you start with (2 flowers, 3 flowers, 4 flowers, etc.).
- Length: add or remove full flower repeats (block of rows) or add extra rows of double crochet at the bottom.
Step-by-Step Flower Pattern
Each flower is formed over a set number of rows:
- Row 1: Solid dc base.
- Row 2–3: Gaps/squares begin.
- Row 4–8: Petals grow, peak, and decrease.
- Row 9: Flowers completed and squared off with dc and gaps.
- Then the cycle repeats.
The tutor says:
“From here it’s just going to be a repetition from Row 3 to Row 6… then finish it off with three squares and two squares.”
For clarity, this written guide walks through one full flower cycle, then tells you where to repeat.
Front & Back Panels
Example given in video: Chain 75 for a strip that contains 3 flowers across (25 ch per flower).
You can use the same for:
- Front panel: e.g., 3 flowers wide
- Back panel: also 3 flowers wide, but with more rows for a longer back.
Note: Tutor sometimes adds extra dc stitches on the edges (two dc each side) to give a solid border. If you want that look, you’ll add 4 extra chains (2 edge dc on each side).
Below is the version without extra edge dc (flower starts at the edge). After the main pattern, I’ll explain how to add the border option.
CHAIN FOUNDATION
- For 3 flowers across:
- Chain 75 (25 chains per flower).
- For each additional flower, add 25 chains.
Tutor: “Each flower is going to take 25 chains… This is 75, it’s going to be a sleeve so it’s going to have three flowers on it.”
Row 1: Full Double Crochet
- After chaining 75, note your last stitch (the 75th chain).
- Chain 2 extra chains.
- Do NOT work into the last 2 chains you just added.
- Insert hook into the 75th chain, and make a dc.
- Continue:
- dc in each chain across the row.
- Total = 75 dc.
Tip: Count carefully, as she stresses:
“I do recommend that you go in and count every single one… it does matter.”
Row 2: First Gap Row
Goal: Create gaps (squares) which become the top/bottom of the flower sections.
- Ch 2, turn.
- This counts as first dc.
- Dc in next 9 sts (so you have 10 dc total at the start of the row).
- Ch 2, sk 2 sts, dc in the 3rd st.
- Dc 3 more times in next 3 sts (so you have 4 dc in a row after the gap).
- Ch 2, sk 2 sts, dc in 3rd st.
- This gives you two gaps (two ch-2 spaces) and a group of 4 dc between them.
- Next, 17 dc across:
- She says: “you want to have a total of 17 dc in between”.
- Repeat this sequence across the row:
- ch 2, sk 2, dc in 3rd + 3 more dc (4 dc total),
- ch 2, sk 2, dc in 3rd,
- then 17 dc between flower sections, etc., until the row is complete.
End of Row 2:
- Start of row: 10 dc.
- After last gap section: 7 dc at the end.
You must end with:
- 10 dc at start
- 2 gap sections per flower
- 7 dc at the end
Row 3: Three Gap Row
Goal: Add three gaps and build the framework around the future flower.
- Ch 2, turn.
- Counts as first dc.
- Dc across until you are 3 stitches before the first gap.
- She has 4 dc before starting the new gap.
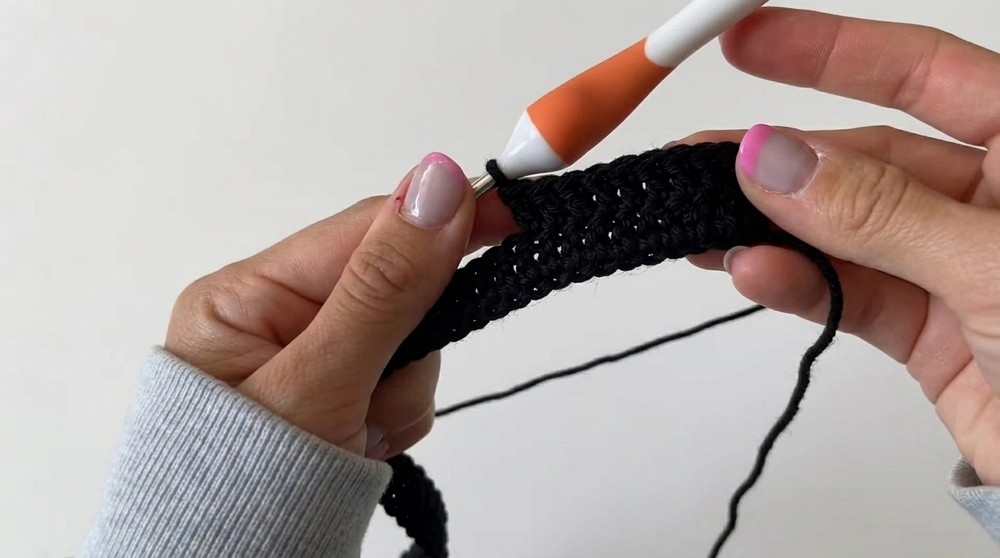
- She has 4 dc before starting the new gap.
- Ch 2, then:
- dc in the stitch immediately before the gap (the last dc before the ch-2 space).
- 2 dc in the ch-2 space (into the big gap).
- dc in the stitch after the gap.
- This creates a “block” of dc across the former gap.
- Ch 2, then:
- dc in the stitch before the next gap,
- 2 dc in gap,
- dc in next stitch.
- Ch 2, sk 2, dc in 3rd st to form another gap (if needed), then:
- Dc across the middle section again until you are 3 sts before the next gap.
- Repeat the above pattern across.
End of Row 3:
- You should end with 7 dc after your final “square” block.
- She warns:
- “It can be really easy to skip your last stitch. Make sure you get that last one.”
Row 4: First Petal Row
Goal: Create the first petals using treble crochet anchored in the middle gap.
- Ch 2, turn (counts as first dc).
- Dc until 3 sts before the next square, so you have 4 dc at the start.
- Ch 2, sk 2, dc in 3rd st (just before the gap).
- 2 dc in the square (ch-sp).
- Dc in the st after the square.
Now you start the first petal:
- Ch 4.
- Make 1 tr in the middle square:
- Wrap yarn twice (yo twice),
- Insert into the center gap,
- Pull up a loop,
- Yo, pull through 2 loops (repeat until all loops are worked off, as shown in video).
- Ch 4 again.
- Dc into the space before the next square, then:
- 2 dc in the square,
- dc in the st after the square.
- Ch 2, sk 2, dc in 3rd st.
- Dc across until you are again 3 sts before the next square and repeat the above petal sequence for each flower.
End of row:
- You end with 1 dc after your final square.
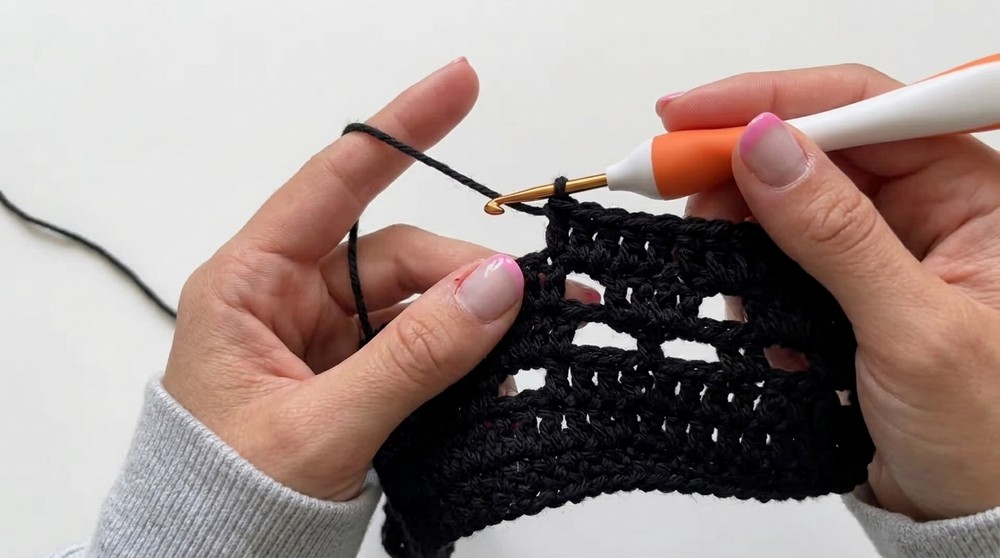
Row 5: Middle Petal, Chain Arches
Goal: Add chain-5 arches over the first petals and build up the flower.
- Ch 2, turn.
- Counts as dc.
- 2 dc in the square,
- dc in the st after the square.
- You now have 4 dc in total at the start.
- Ch 5.
- Place:
- sc in first petal,
- sc in the treble “V” (top of tr),
- sc in the second petal.
- Total: 3 sc across the petal group.
- Ch 5 again.
- Dc in the stitch before the square,
- 2 dc in square,
- dc in st after square.
- Ch 3,
- Dc into the stitch just before the next square.
- Repeat across for each flower:
- 2 dc in square + 1 dc after (4 dc cluster),
- ch 5, sc across 3 points (petal, tr, petal),
- ch 5, dc before square, 2 dc in square, 1 dc after,
- ch 3, dc before next square, etc.
You should see your flower shape forming more clearly now.
Row 6: Largest Petal Row
Goal: Form the largest petal loop for each flower.
- Ch 2, turn.
- Counts as dc.
- 2 dc in square,
- dc after square.
- Total: 4 dc at start.
- Ch 6.
- Into the first petal of the previous row:
- sc in petal.
- Then:
- sc in each of the 3 sc from previous row (so total 3 more sc).
- sc in the last petal.
- You now have 5 sc across the petal group (one in each petal plus the 3 in the center).
- Ch 6.
- Dc in the space before the square.
- Recall this square had ch-3 previously:
- 3 dc in square,
- dc after square.
- Total: 5 dc in this cluster.
- Repeat:
- ch 6, sc across petal group (5 sc),
- ch 6, dc before square, 3 dc in square, dc after,
- across all flowers.
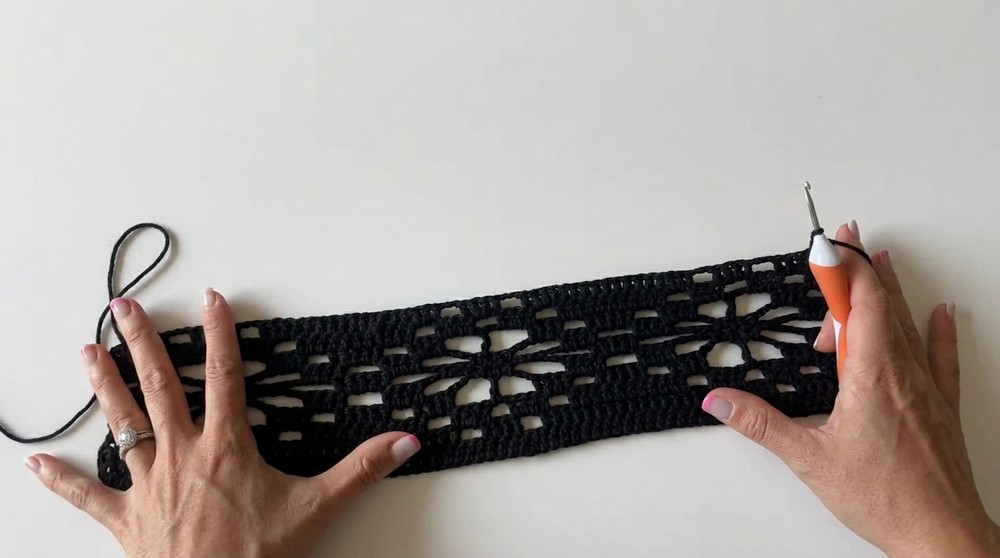
Row 7: First Decrease Row
Goal: Start reducing petals (two smaller petal loops).
- Ch 2, turn.
- Counts as dc.
- 3 dc into first petal (the big loop),
- Combined with the ch-2 dc, this gives 4 dc total.
- Ch 5.
- Find the row of 5 sc from previous row:
- Skip the first sc,
- sc in the next 3 sc,
- Skip the last sc.
- This forms a tighter circle.
- Ch 5.
- 3 dc in the large petal,
- dc in the next stitch after (makes total 4 dc again).
- Ch 3.
- Dc in stitch just before next petal.
- Repeat for each flower:
- 3 dc in petal + 1 dc after (4 dc cluster),
- ch 5, sc in 3 center sc (skip first and last),
- ch 5, 3 dc in big petal, 1 dc after,
- ch 3, dc before petal, etc.
At end of this row, she notes:
- You’ll finish with 3 dc into petal + 1 dc in the V of dc,
- Then a square and one dc.
Row 8: Final Petal Tips
Goal: Form small top petals (two treble petals) and bring in squares.
- Ch 2, turn (counts as dc).
- 2 dc in square,
- dc after square.
- 4 dc total at start.
- Ch 2,
- Dc in 3rd stitch (just before petal),
- 3 dc in petal (so with dc before, 4 dc total).
- Ch 4,
- Tr into the middle sc of the 3-center sc (second sc).
- Ch 4,
- Dc into petal,
- 2 more dc into petal (3 dc in petal),
- Dc after petal (total 4 dc).
- Ch 2,
- Dc in 3rd stitch before next square,
- 3 dc in square (because it was ch-3),
- Dc after square (5 dc total).
Repeat for each flower:
- Ch 2, dc before petal,
- 3 dc in petal, ch 4, tr in center sc, ch 4,
- 3 dc in petal + dc after,
- Ch 2, dc before square,
- 3 dc in square + dc after.
End of row:
- You finish on a square plus a dc, and she stresses counting the last dc carefully.
Row 9: Three Squares Above Flower
Goal: Create three squares above each flower and flatten the pattern to restart.
- Ch 2, turn (counts as dc).
- 2 dc in square,
- dc after square.
- 4 dc total.
- Ch 2,
- Dc in 3rd stitch before petal,
- 3 dc in petal (total 4 dc).
- Ch 2,
- Dc in stitch after treble (you can go straight into next petal),
- 3 dc in petal,
- Dc after petal (4 dc cluster).
- Ch 2,
- Dc in stitch before square,
- 2 dc in square,
- Dc after square.
- From here:
- Dc across all the way until you’re 3 sts before the next petal,
- Repeating the pattern across all flowers.
End of row:
- Each flower now shows three small squares above it.
- You should end with 7 dc at the end of the row.
Returning to Start of Flower Pattern
After Row 9 (three squares above each flower), the tutor says:
“From here it’s just going to be a repetition from your Row three to Row six… then finish it off with three squares and two squares.”
In simpler terms:
- Once you have:
- Row with 3 squares above the flower,
- Next row with 2 squares,
- You are back to the “base” structure (similar to Row 2-3) and can repeat the sequence to grow new flowers above.
So for each panel:
- Begin with Row 1 full dc.
- Build gaps, petals, largest petals, and reductions as shown.
- End with 3-square + 2-square rows to reset.
- Repeat until your panel is the desired length.
Edge-Double-Crochet Version (Optional)
Tutor shows a version where she adds:
“Two double crochets along the whole edge… so the flower is not right at the edge.”
To do this:
- Add 4 extra chains to your starting chain:
- Example: For 3 flowers (75 ch) + 4 extra = 79 chains.
- Treat the first and last 2 dc of each row as edge stitches:
- Always dc in first 2 sts and last 2 sts of every row.
- The flower blocks stay in the center with a solid dc border on each side.
Use whichever version you prefer.
Sleeve Panels
Sleeves in the video are:
- 3 flowers long (chain 75) for each sleeve panel.
- She later realizes the sleeve is too long and removes one flower (frogs one motif section).
Steps:
- Make a panel 3 flowers wide (chain 75, follow same row pattern as for body panels).
- Check length by holding it to your arm.
- If too long, remove a flower block:
- Unravel rows until one full flower repeat is removed.
You can:
- Add a small slit/opening at the sleeve bottom (as the tutor did with open flower at bottom).
- Leave some motifs unseamed at the bottom for style.
Adjusting Length & Width
- To widen:
- Add more flowers across:
- Chain = 25 × number of flowers (+ 4 if edges).
- Add more flowers across:
- To lengthen:
- Add more full flower repeats (repeat rows 3–9).
- Add extra rows of dc at the bottom of the panel (as the tutor did for the back).
Tutor’s approach:
- Back panel is bigger/longer than front:
- She adds extra rows at the bottom and sides for comfort so it doesn’t ride up.
Assembly & Seaming
1. Prepare Front and Back Lay out:
-
- Back piece
- Front piece
Check:
- Which side is RS (outside) vs WS (inside).
- She notes: one side looks flatter/neater – that should be the outside.
2. Join Shoulder Seams
- Place front and back panels together with RS facing each other (WS facing out).
- Align the top corners of both panels.
- Attach yarn at corner.
- Single crochet (sc) through both layers along the shoulder area:
- She only seams about 5 stitches on each side to keep neckline wide and off-shoulder.
- She does not close the whole top, just enough to hold it.
- Secure with a few extra chains so you can test fit before finalizing.
- Repeat on the other shoulder.
She suggests trying it on and adjusting how open you want the neckline.
3. Attach Sleeves
- Turn the sweater so you’re looking at the inside.
- Identify the inside of the sleeve panel (where you want seams to be).
- Position the middle of the sleeve top at the shoulder seam area, aligning flower rows.
- Using same method:
- Attach yarn at starting point,
- Single crochet along the armhole opening, joining sleeve to body edge.
Tutor:
- She closes two flowers worth at the front of the sleeve when attaching (custom choice).
- You can use sc or sewing with a yarn needle.
4. Seam Side and Sleeve Underside
- After sleeve is attached, fold sweater so front and back are still RS facing each other.
- Align underarm seam and side edges.
- Single crochet seam (or whipstitch):
- From the bottom of the sweater up to underarm,
- Then continue along the underside of the sleeve to the cuff.
Tutor variation:
- She leaves a flower open near the bottom of the sleeve for a slit-like look.
- Repeat for the other side.
5. Adjust Sleeve Length (If Needed)
Tutor’s experience:
- After seaming one sleeve, she tried it on and found it too long.
- She then:
- Frogged (unraveled) the seam on one side of the sleeve,
- Removed one entire flower (by frogging rows),
- Did the same on the second sleeve before attaching.
So:
- Don’t be afraid to remove or add a flower motif to get the perfect length.
Special Techniques Used
- Treble crochet petals:
- Tr stitches worked into a square/gap or center sc create the vertical petal.
- Working into chain spaces (ch-sp):
- 2–3 dc worked directly into a gap to build squares and petals.
- Shaping with chain arches:
- ch-4 and ch-5, ch-6 loops form the petal outlines.
- Single crochet joining:
- Simple sc seam for strong but easy joining.
- Frogging (unraveling):
- Used intentionally to adjust sleeve length.
Tutor’s Suggestions & Important Uses
From the transcript, key practical suggestions:
- Use cotton yarn for a breathable, light top.
- Count stitches carefully (especially the 75 dc row and edge stitches).
- Try on as you go:
- Check back length so it doesn’t ride up.
- Check sleeve length before finalizing seams.
- Adjust flower count rather than forcing a size that doesn’t fit:
- She chose 3 flowers across in front for sizing.
- She made the back slightly longer and larger for comfort.
Uses of this Sweater:
- Perfect for:
- Spring or warm-weather layering.
- Over a camisole or bralette.
- Casual or slightly dressy occasions due to floral, lacy look.
Tips & Common Pitfalls
- Always count your starting dc row.
- If Row 1 is off, the flower pattern won’t line up.
- Mark the beginning of each flower repeat.
- Use stitch markers at every 25 chains (one flower block).
- Do not skip the last stitch of a row.
- Tutor points this out multiple times. Your edge will shrink if you do.
- Check fit after completing one flower repeat on the body and sleeves.
- You can adjust early instead of after many rows.
- Use the same tension throughout.
- Loose or tight rows can distort the flower shapes.
- Plan your neckline openness from the start.
- Decide how many stitches you want to seam at shoulders (e.g., 5 stitches each side) for an off-shoulder style.
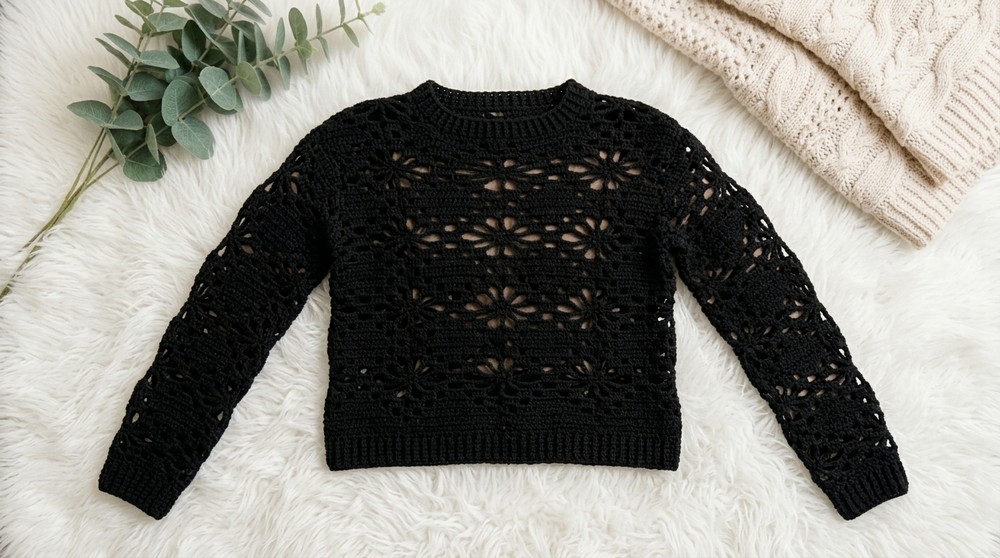
- Back piece can be longer.
- Add extra rows or flowers to make the back more comfortable and prevent riding up.
- Add extra rows or flowers to make the back more comfortable and prevent riding up.
Conclusion & Remarks
This pattern is a beautiful blend of structure and lace, building floral motifs directly into a rectangular fabric. It’s modular, adaptable, and very wearable.
Key strengths:
- Visually striking but logically repetitive once you understand the flower rows.
- Highly customizable in width, length, and neckline style.
- Encourages you to fit as you go: adding/removing flowers and rows as needed.
It’s an excellent project if you want to move from simple squares into more artistic garments. The pattern teaches patience, counting, and shaping, while still being accessible for a confident beginner.
What I Learned from This Pattern
From this pattern/tutorial, these lessons stand out:
- Modular crochet is powerful:
- Repeating a flower unit across panels makes both design and sizing easier.
- Fit matters as much as stitch pattern:
- The tutor adjusts the back length and sleeve length mid-project, showing that a good fit often means altering the original plan.
- Lace doesn’t have to be complicated:
- With just dc, tr, and ch, you can build very intricate-looking floral motifs.
- Counting is critical in lace projects:
- Each gap and square must align. The consistent emphasis on counting proves how vital accuracy is.
- Seaming style changes the look:
- Single crochet seams, partial shoulder joins, and leaving certain flowers open (e.g., at sleeves) can dramatically change the overall aesthetic.
- Flexibility is part of the design process:
- Frogging a flower from the sleeve shows that adjusting, not perfection from the start, is how a garment truly becomes “yours.”