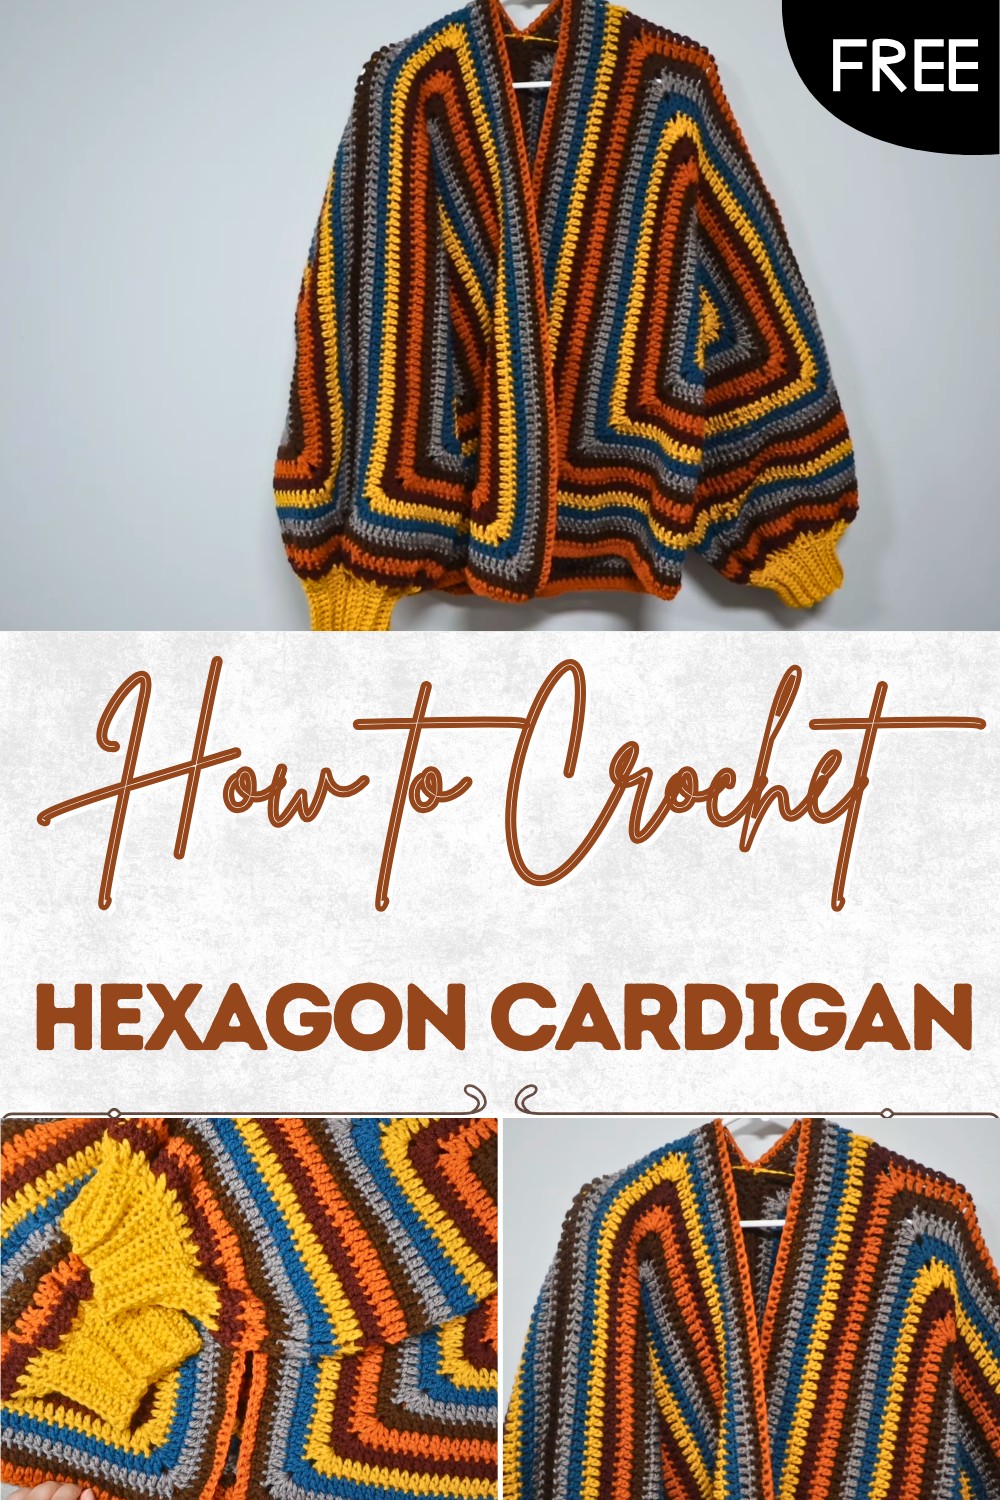
Crochet Hexagon Cardigan Free Step by Step Pattern
Stay cozy and stylish with this free crochet hexagon cardigan pattern, that offers comfortable wear and versatile charm for any occasion.
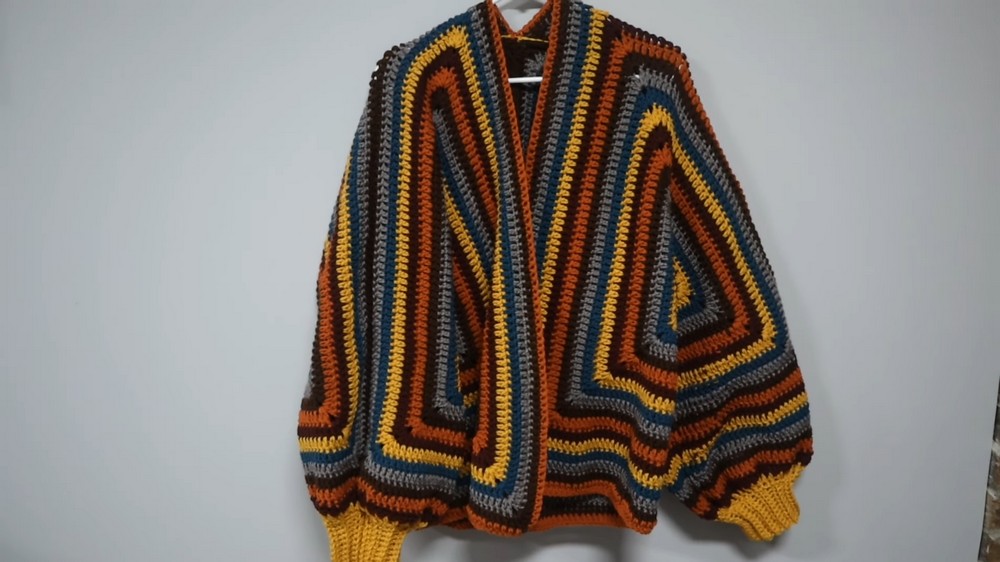
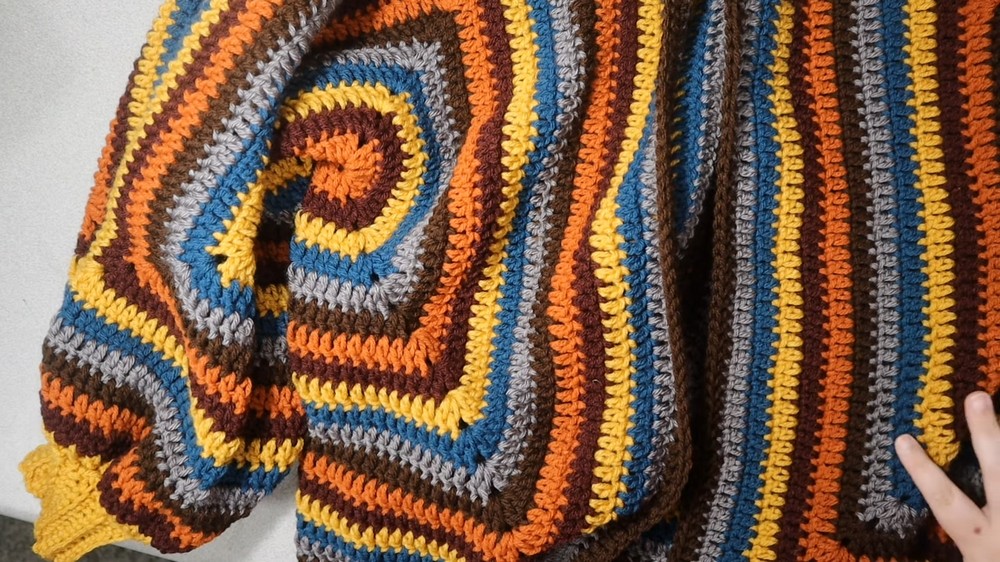
Have you ever wished for a piece of clothing that feels as special as it looks? Colorful shapes come together to make a cozy and eye-catching cardigan that feels like wearing art. Each side has a special pattern, and soft yarn makes it warm and smooth on the skin. Using a crochet hexagon cardigan pattern, you can mix many bright colors or choose soft, gentle tones to fit any mood. The cardigan looks different from a plain sweater because the shapes join to form a beautiful design that stands out.
Cozy Crochet Hexagon Cardigan – Free Pattern Guide
Many people love wearing this piece at home or outside because it is light, but also keeps you warm. The pattern is simple to follow and does not need extra tools, which makes it perfect even for a first try. You can make the sleeves long or short, and add buttons if you like. This cardigan can add style to any outfit and give a feeling of joy and comfort every time you put it on. It is a gift that wraps anyone in smiles and care.
Free Crochet Hexagon Cardigan Pattern
Materials List
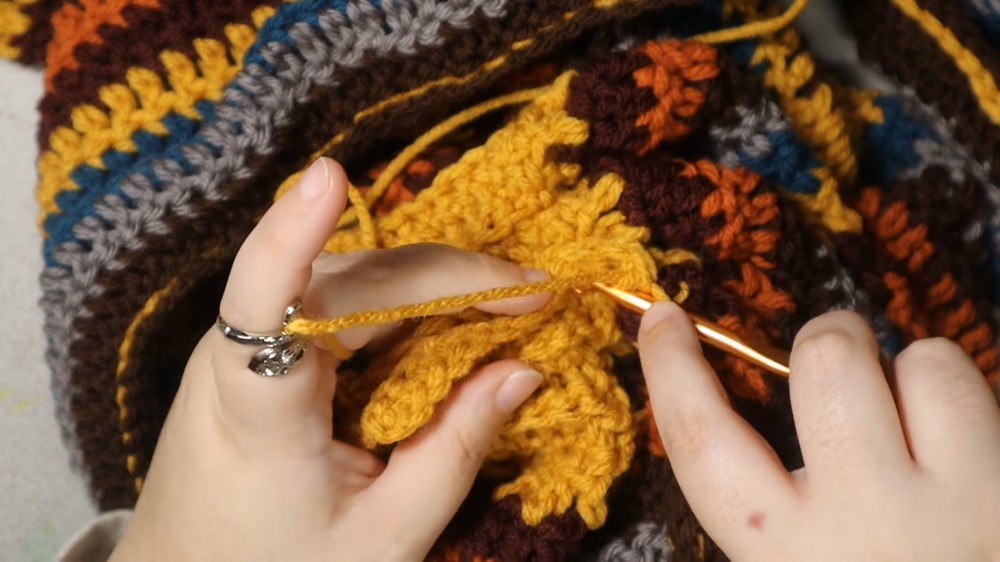
- Yarn: Worsted weight (#4) yarn, any brand or color.
- Hook: 5.25mm – 5.75mm (US I-9 to J-10); 5.5mm recommended for loose, comfortable fit.
- Notions:
- Scissors
- Tapestry needle (for sewing and weaving in ends)
- Stitch markers (optional, for marking rounds and corners)
Key Abbreviations (US Terms)
- ch: chain
- sc: single crochet
- dc: double crochet
- sl st: slip stitch
- BL: back loop only
- st(s): stitch(es)
- sk: skip
Special Notes
- These guidelines apply to both granny hexagon cardigans and solid hexagon cardigans.
- Row counts are based on corner holes; do not count the center ring hole.
- Final fit also depends on yarn thickness and hook size—follow recommendations for accurate sizing.
- Length and cuffs are customizable.
Pattern Guideline
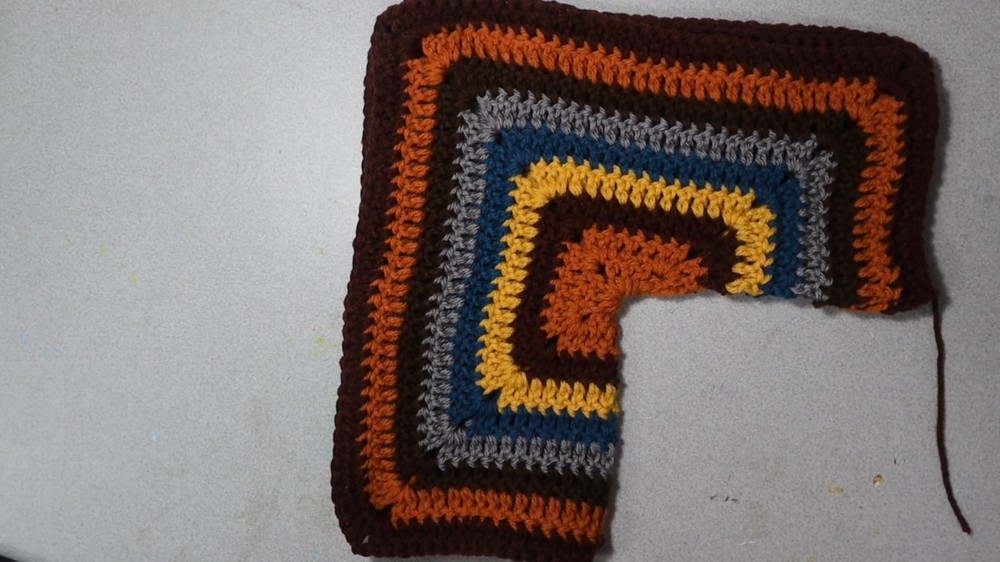
1. Sizing Your Hexagon Cardigan (Panel/Body Rows)
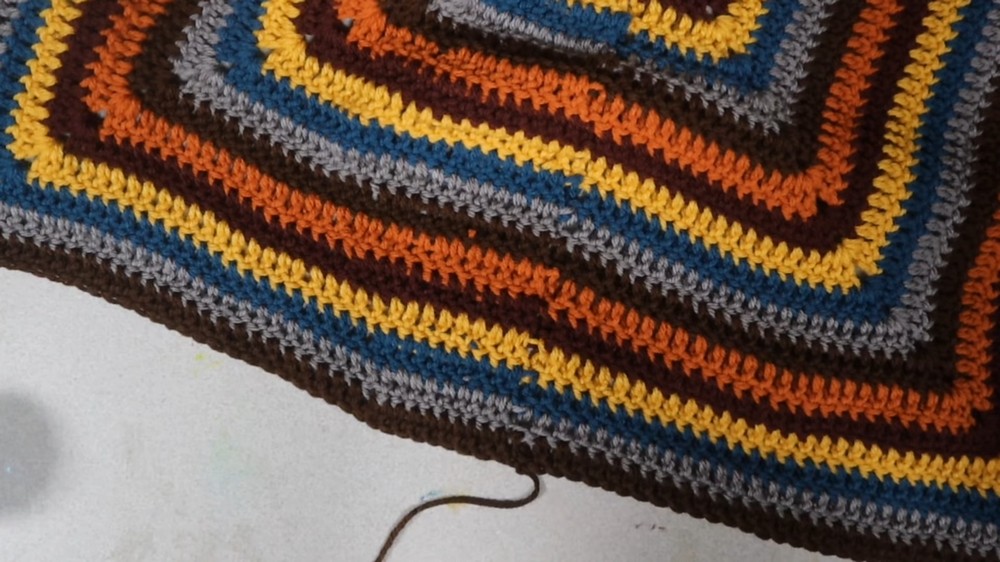
Count your panel rows diagonally by the corner holes, excluding the starting center ring.
Row Count by Size:
- XS: 15 rows
- S: 16 rows
- M: 17 rows
- L: 18 rows
- XL: 19 rows
- 2X: 20 rows
- 3X: 21 rows
- 4X: 22 rows
- Increase by one row per size.
Tip: For a more petite fit, aim for 20 rows. For tall or long-armed fit, aim for 24–25 total rows (see “Sleeve Length” below).
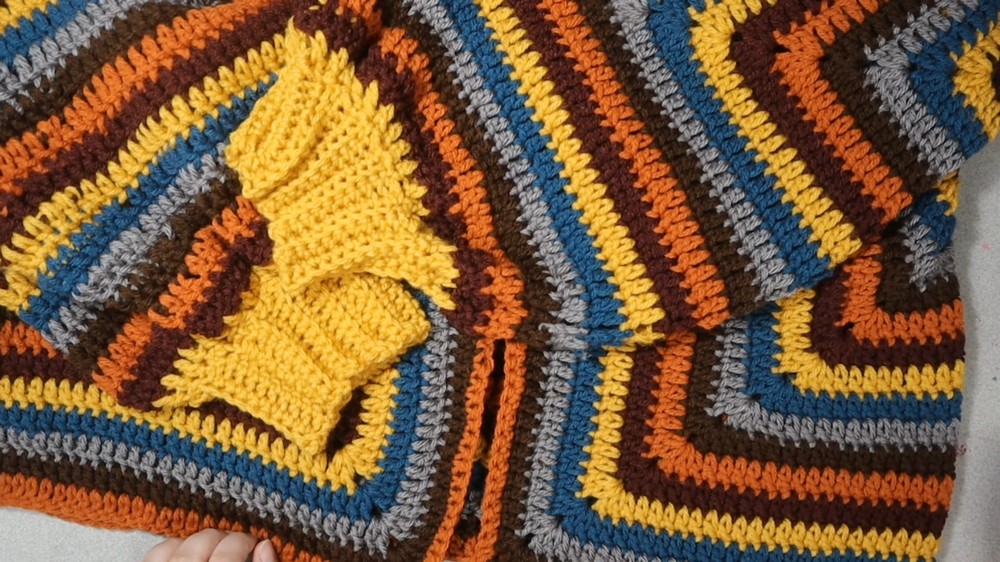
2. Adding Sleeve Length:
After finished panel rows:
- For average fit: Add rows up to a total of 22 rows (panel rows + sleeve extension rows).
- Example: Size XL (19 panel rows) + 3 sleeve rows = 22 total.
- For petite: Aim for 20 rows.
- For tall/long sleeves: Aim for 24–25 rows; add extra rows before or after sewing.
How to Add Sleeve Rows:
- Attach yarn at sleeve edge after folding panel at row’s end (where your tail is).
- Row(s): Work dc across every st, back and forth, for needed total rows.
- Last (final) row: Work dc, sk every other st (dc, sk 1 st, dc), to cinch the sleeve for cuff.
For sizes already at 20+ rows:
- Work one row of sc, skipping every other stitch (sc, sk 1 st), for cinching without adding length.
3. Assembly (Panel Joining):
- Fold each hexagon exactly where the tail is (end of your last panel/sleeve row) to shape the sleeve/body.
- Sew or slip stitch along the edge and across the top to join panels.
- At first, slip stitch into the sides (random spaces), then slip stitch into the regular dc stitches when top edge meets.
- At first, slip stitch into the sides (random spaces), then slip stitch into the regular dc stitches when top edge meets.
4. Sleeve Cuff (Ribbed Cuff):
- With yarn attached at sleeve opening, ch 11 (adjust for cuff height).
- Row 1: sc in 2nd ch from hook and across (10 sc total).
- Row 2: sl st into each of next 3 sleeve stitches (makes cuff tighter); turn.
- Row 3: sc in back loop only (BL) across (10 sc); ch 1, turn.
- Repeat Rows 2–3 around sleeve opening, slip stitching into sleeve edge each time, until cuff is complete.
- At end, join cuff edges with sl st or sc.
- Fasten off and weave in ends.
Tip: You should have roughly 24–26 cuff rows. If you end with two or four stitches instead of three, simply slip stitch them and finish cuff as needed.
5. Sewing the Back:
- Join cardigan panels at the back, sewing down the center with tapestry needle or slip stitching with hook.
- Turn cardigan inside out so seam is hidden. Weave in all ends.
6. Optional Border and Added Length:
- To add a border: Start at lower corner and sc up the front opening, around the neck, down the other front, returning to the bottom corner.
- For granny cardigans: If you encounter gaps, you can either sc directly into clusters or add ch 1 between gaps for cleaner look.
- For granny cardigans: If you encounter gaps, you can either sc directly into clusters or add ch 1 between gaps for cleaner look.
- To add length: Attach yarn at lower edge of cardigan and dc across. Work several rows for desired extra length (from 1 to 8+ rows, as you like).
- Finish off, weave in ends.
- Finish off, weave in ends.
Conclusion
These guidelines allow accurate sizing and easy customization for your hexagon cardigan regardless of stitch style. Use this method to size for average, petite, or tall fits. The ribbed cuffs and optional border/bottom rows make personalized finishing touches simple and stylish.
Pattern Correction & Tips
- Count rows diagonally by corner holes; do not count the center ring hole.
- Always fold at the panel’s tail end for proper cardigan shape.
- For cuffs, slip stitch into three sleeve sts for optimal cinch; adjust if rows do not line up perfectly.
- Use acrylic yarn for stretch; cotton for structure.
- Mix colors for fun borders and cuffs.
- Try on cardigan after assembly to ensure fit before adding border or extra bottom rows.
- Petite sizing: Stop at 20 rows. Tall: Add extra sleeve extension and/or cuff rows.