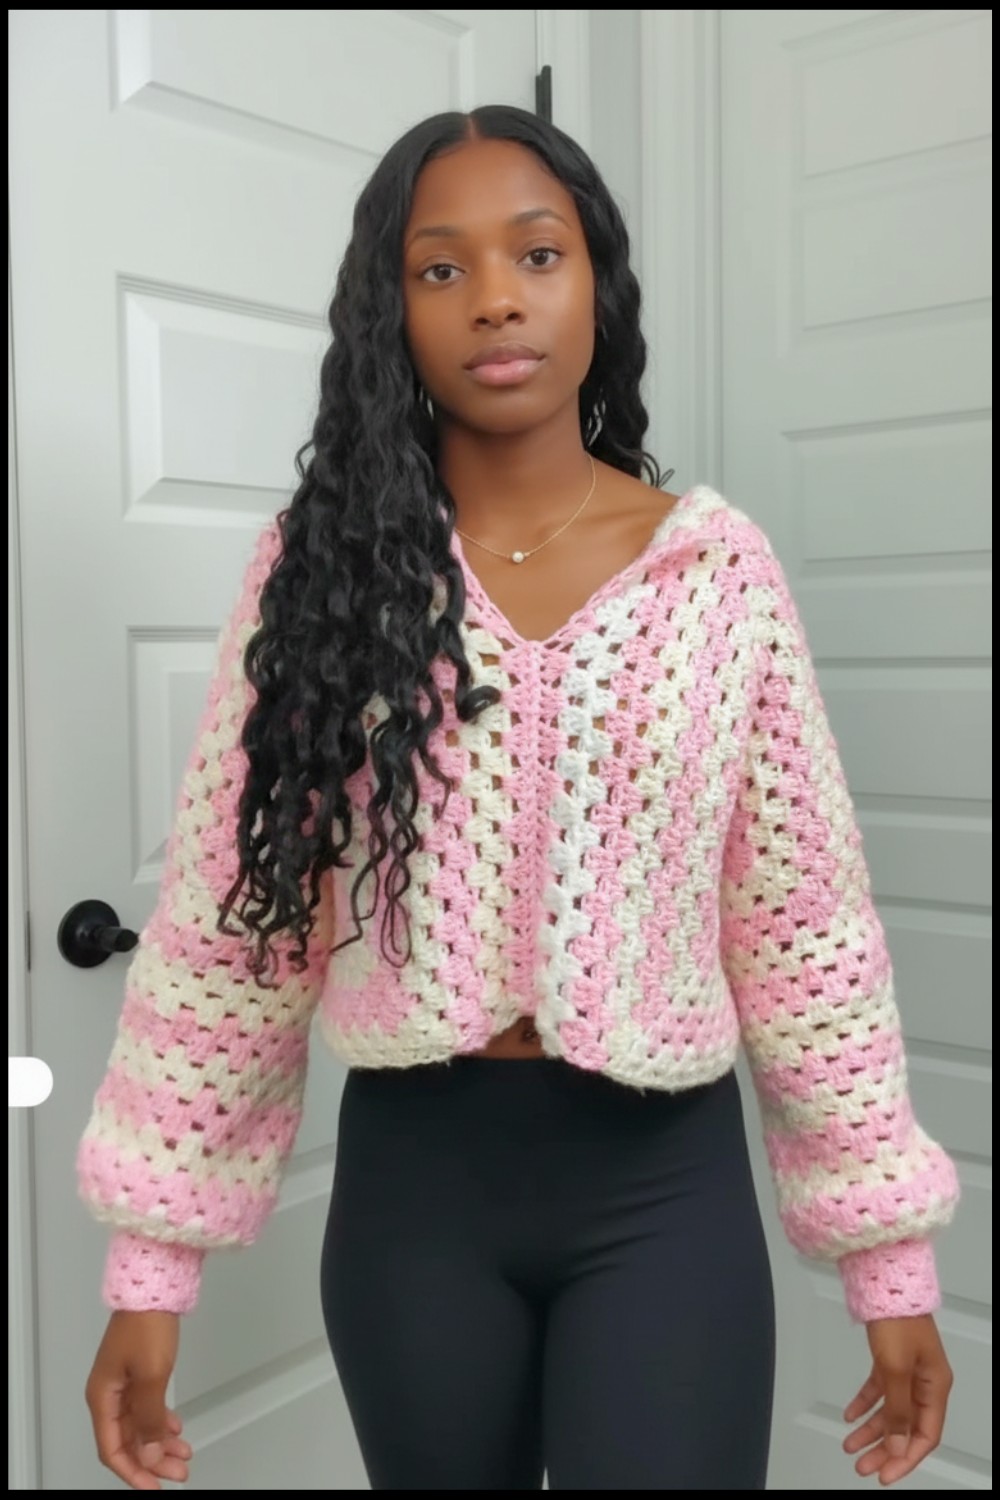
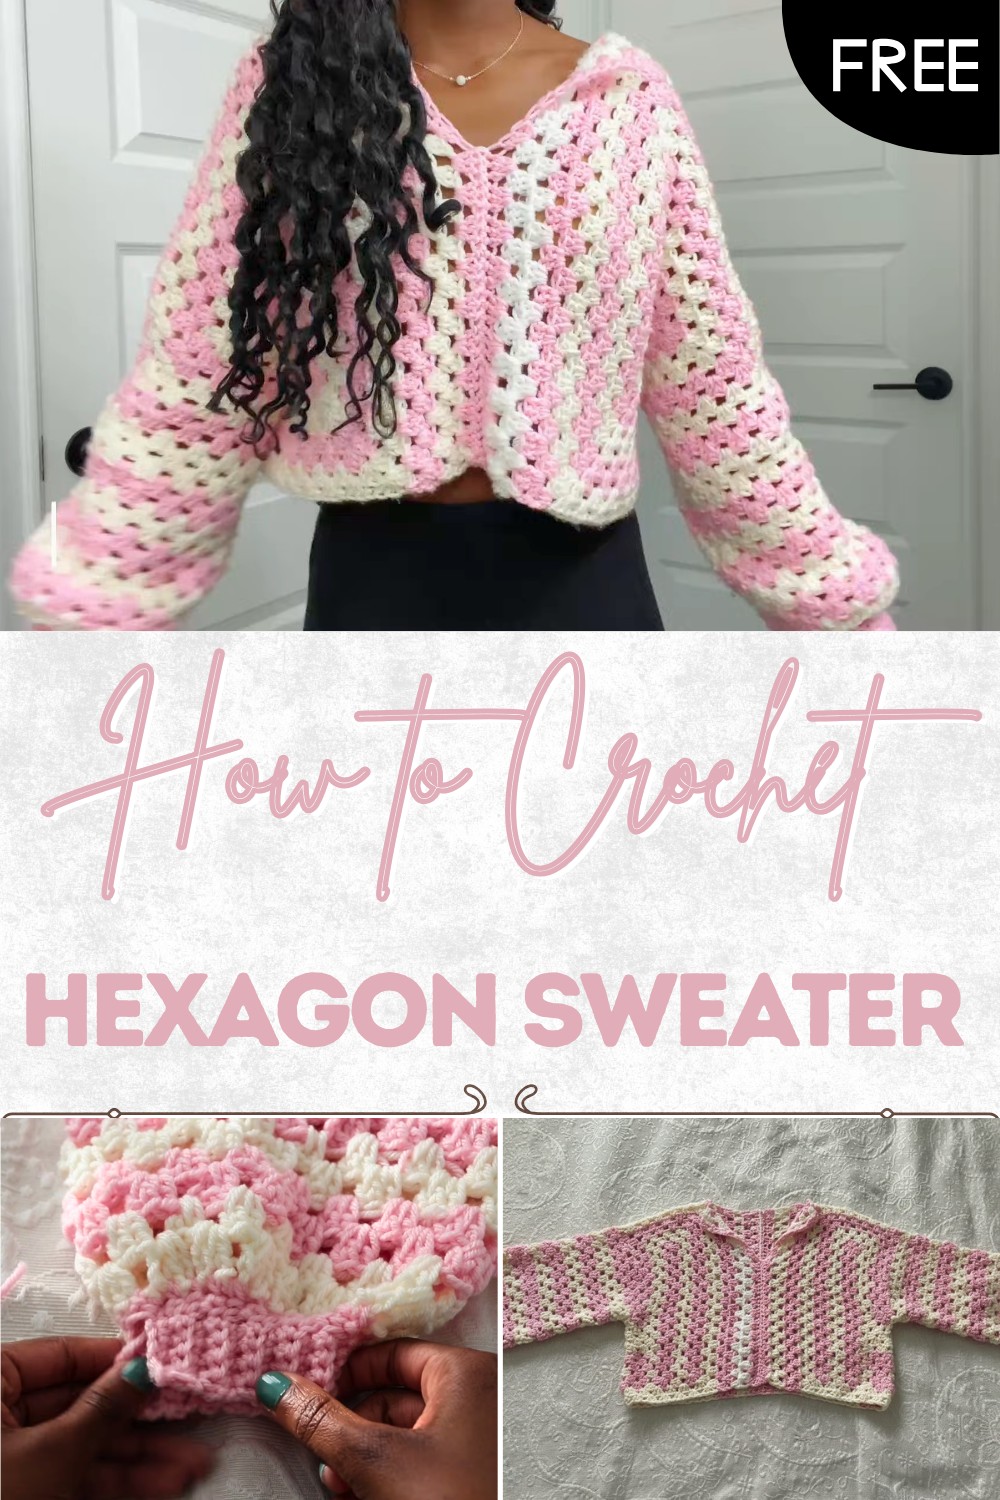
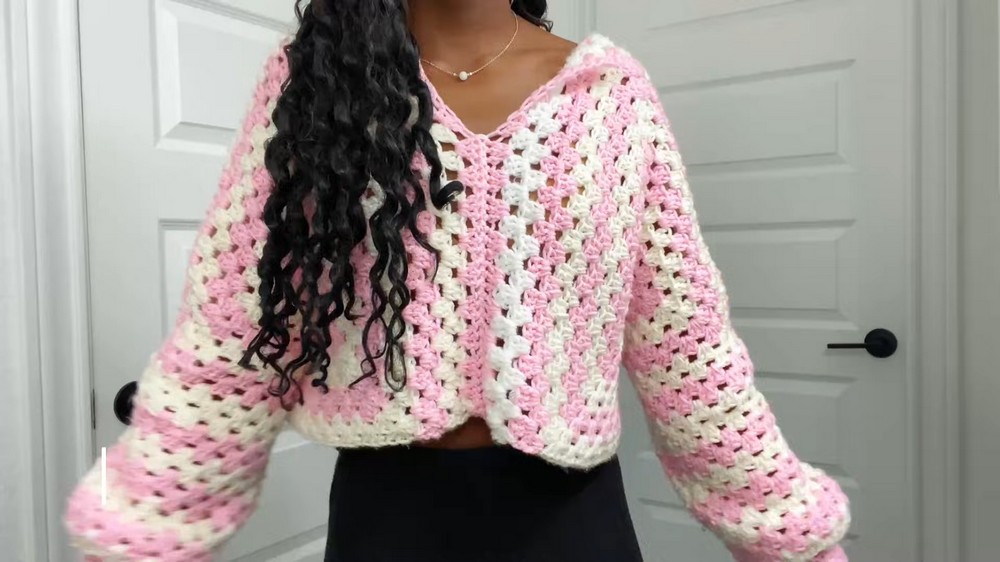
Stylish Crochet Hexagon Sweater Free Pattern
Upgrade your wardrobe with this free crochet hexagon sweater pattern that offers cozy warmth showcases geometric style & suits everyday wear.
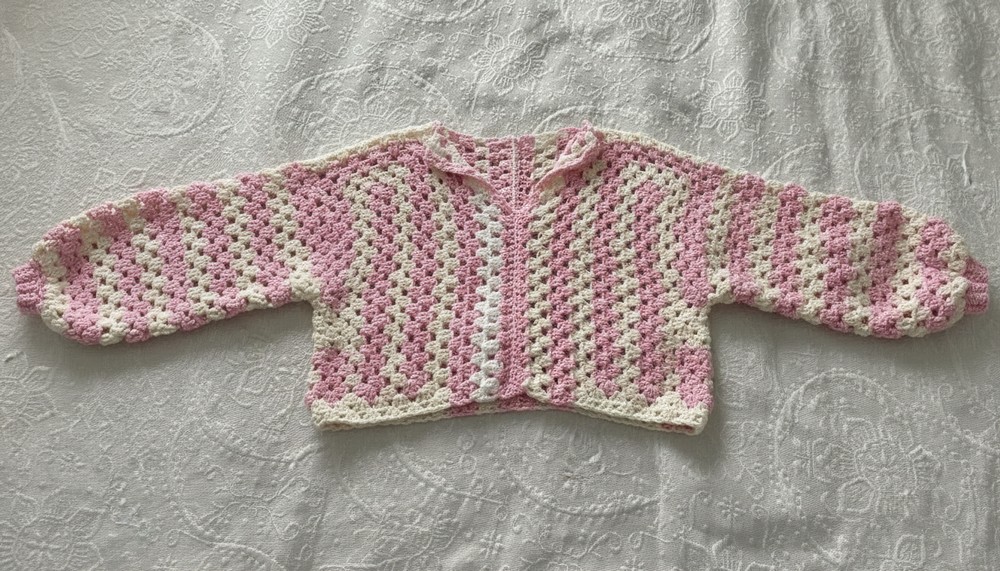
Cozy warmth and playful pops of color blend together to make a sweater you’ll love to keep close, no matter the season. With the Crochet Hexagon Sweater pattern, every piece is made from pretty hexagon shapes connected like a patchwork blanket that always fits just right. The look is eye-catching and cheerful, turning scrap yarns or favorite colors into a sweater that’s as personal as it is practical.
Free Crochet Hexagon Sweater Pattern for Trendy Look
This clever design is full of flexibility; try bold shades for a fun style or soft hues for a calming effect, the choice is always yours. Anyone can enjoy making and using this pattern, no matter their skill or reading level, as it’s easy to follow and forgiving in size. The finished sweater feels like a daily hug, perfect for layering over shirts on breezy days or adding comfort any time you need. With this crochet hexagon sweater pattern, beauty and usefulness go hand in hand.
Crochet Hexagon Granny Square Sweater
Materials List
- Yarn: Worsted weight (#4) acrylic yarn
- Recommended: “I Love This Yarn” by Hobby Lobby or similar
- Amount: At least two skeins per color (if using two colors)
- Hook: 5.75 mm crochet hook for body, 5 mm crochet hook for ribbing (optional, but recommended for neater cuffs)
- Notions:
- Tapestry/yarn needle
- Scissors
- Stitch markers (optional)
Key Abbreviations (US Terms)
- ch – chain
- sl st – slip stitch
- sc – single crochet
- dc – double crochet
- st(s) – stitch(es)
- sp – space
- inc – increase
Special Notes
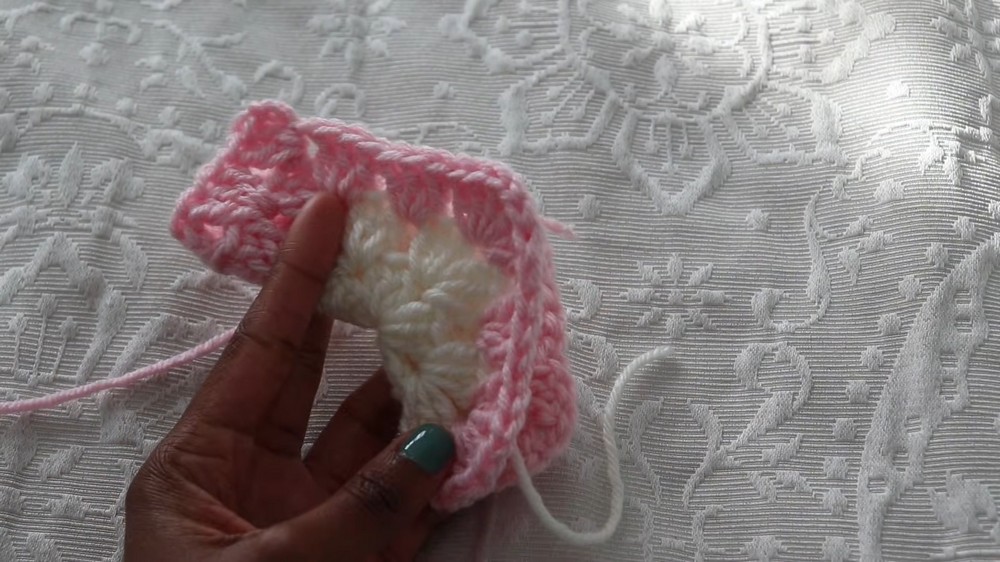
- The sweater is based on two hexagon granny squares that are folded and seamed to form the body and sleeves.
- This project is beginner-friendly; basic sewing and color change knowledge is helpful.
- Number of rounds per hexagon determines sweater and sleeve length—try on as you go.
Pattern
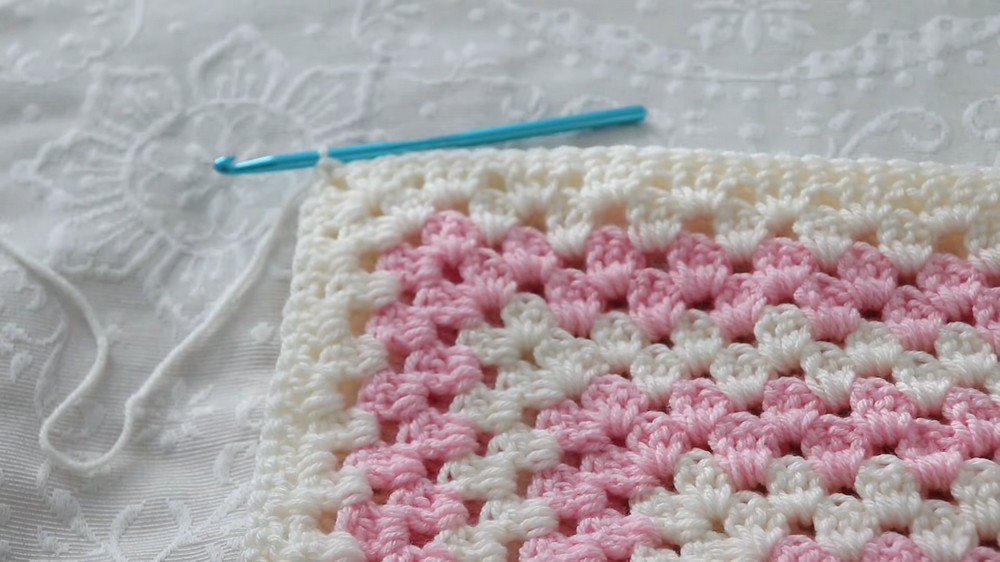
1. Hexagon Granny Square (Make 2)
Foundational Magic Ring
- Make a magic ring.
- Ch 3 (counts as first dc).
- Work 2 dc into ring, ch 1 (forms first cluster & corner).
- *[3 dc, ch 1] repeat from * four more times; total 6 clusters of 3 dc each and 6 ch-1 corner spaces.
- Join with sl st to top of starting ch-3. Pull ring closed tightly.
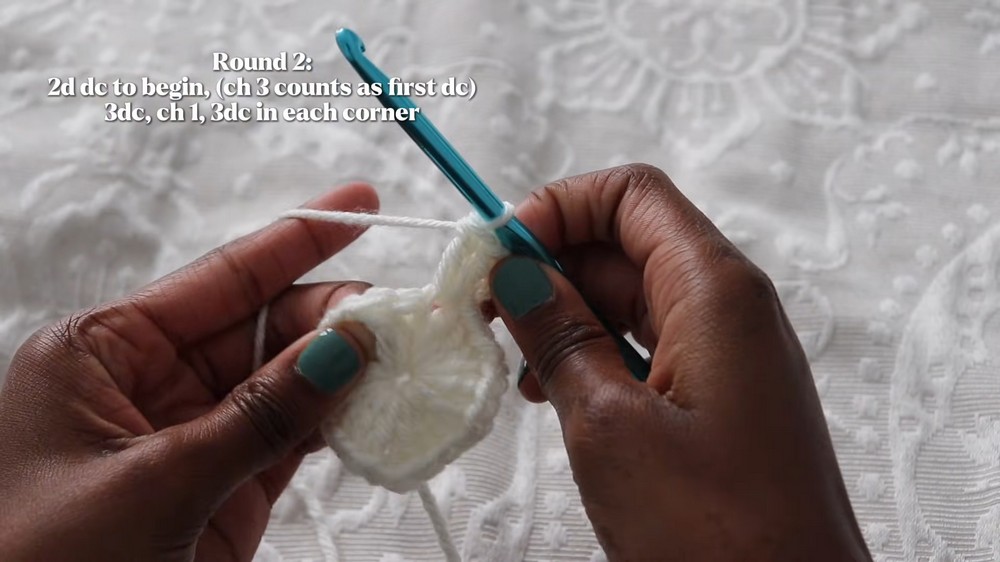
Round 2 and Onward
- Ch 3, work 2 dc in the first space (under ch-1).
- In corner ch-1 space:
- 3 dc, ch 1, 3 dc (all in the same space).
- In each side space (between the corners):
- 3 dc (no ch-1 after side clusters).
- 3 dc (no ch-1 after side clusters).
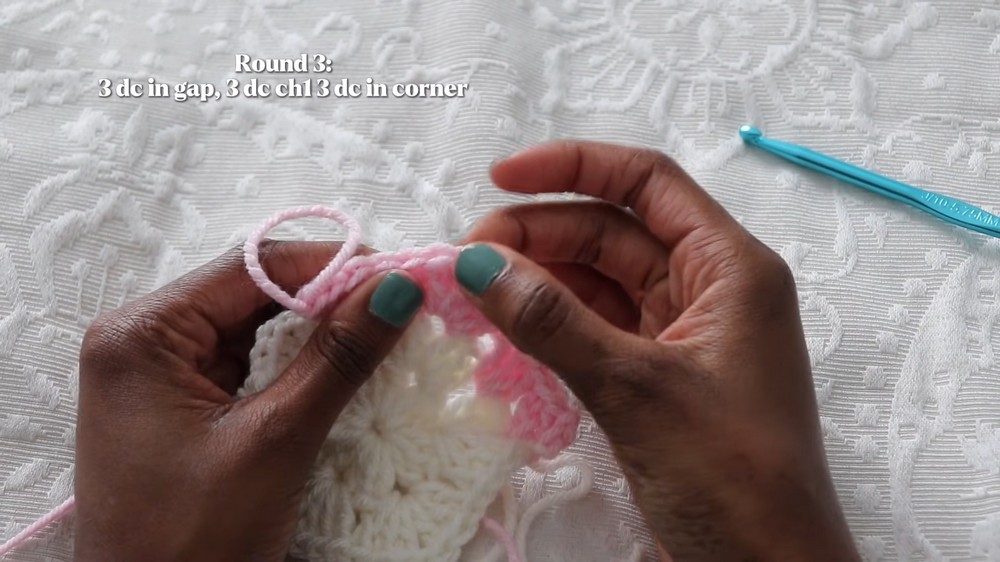
- Continue: Work (3 dc, ch 1, 3 dc) in each corner; (3 dc) in each side space.
- Join with sl st at end of round to top of ch-3.
- Change color at any end-of-round for striping as desired.
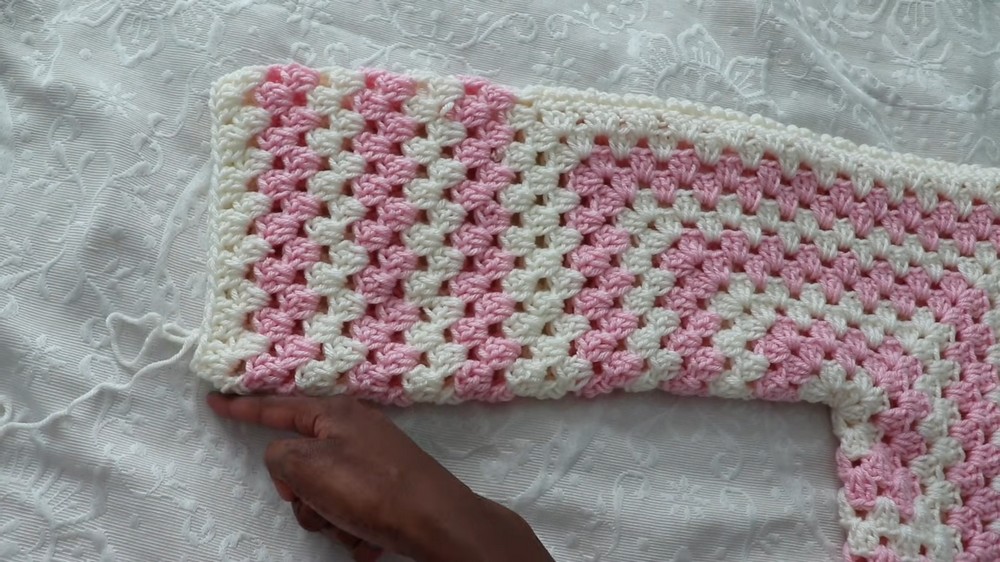
Continue working in rounds until your hexagon (folded as demonstrated) comfortably covers one arm (from side of neck to wrist or desired sleeve length).
Recommended: 14 rounds for a standard fit (customize as you wish, trying on as you go).
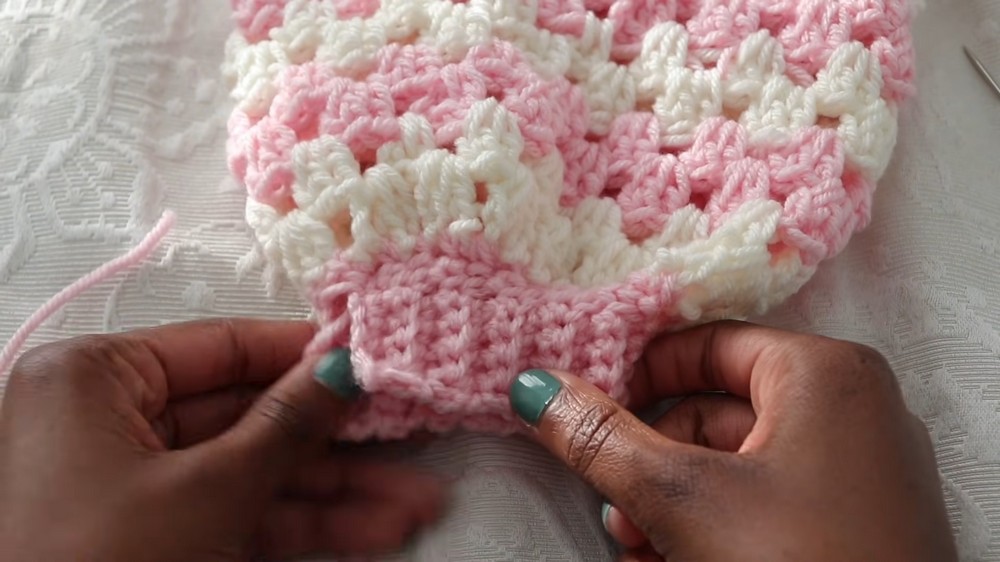
2. Fold and Seam Each Hexagon
- Fold hexagon so that two edges meet to form an “L” (sleeve and body).
- Turn work wrong side out (for invisible seaming).
- Seam the sleeve and side seam using a single crochet seam:
- Align stitch to stitch or space to space.
- Sc through both layers along sleeve and side (leave appropriate opening for body).
- Repeat for second hexagon.
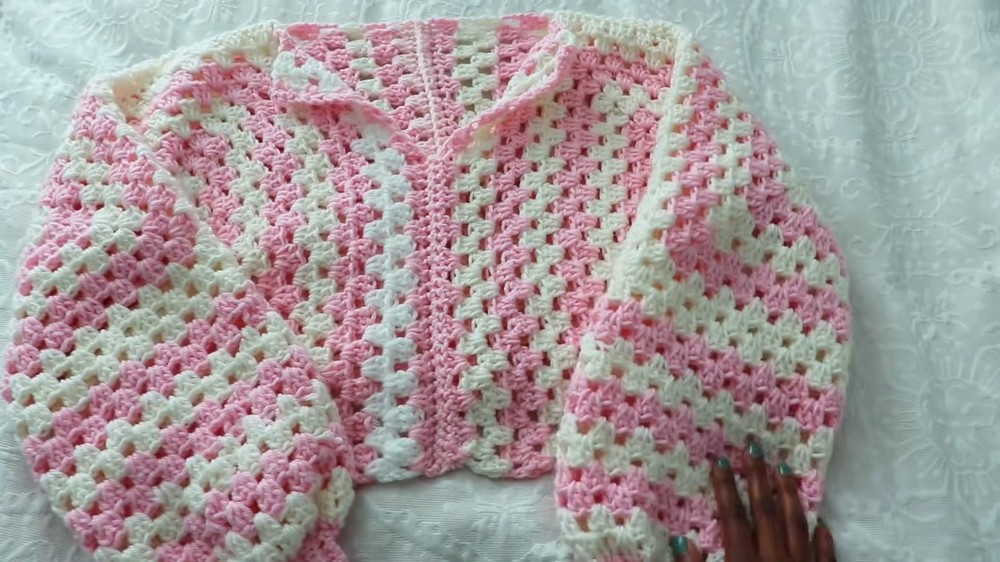
3. Join the Two Hexagons (Body)
- With wrong sides still together, align the two hexagons (now “L”s) at “shoulders/back.”
- Seam the back from wrist, down sleeve, across shoulder/back, and partway down body—leave open part in front for a pullover/neck opening.
- For the front, seam only up to desired neck depth (try on to check fit).
4. Sleeves
- Without fastening off (or attach yarn to cuff opening):
- Ch 3 (counts as first dc).
- In each gap, work 3 dc; continue around the sleeve opening.
- Sl st to join at end of each round.
- Repeat for a total of 13 rounds or adjust for desired sleeve length.
- Change colors as you like.
5. Sleeve Cuff
- With smaller hook (5 mm recommended), join new color (if desired) at cuff edge.
- Work a round of single crochet decreases all the way around to taper the sleeve:
- (Insert hook in next st, yarn over, pull up loop; insert in following st, yarn over, pull up loop; yarn over, pull through all loops)
– repeat around. - Sl st to join.
- (Insert hook in next st, yarn over, pull up loop; insert in following st, yarn over, pull up loop; yarn over, pull through all loops)
Cuff Ribbing:
- Ch 6 (for a 5-row cuff; adjust for preferred cuff length).
- Working back loop only (blo) sc:
- Sc in 2nd ch from hook and across (5 sc).
- Sl st in next 2 sts on cuff edge to attach row.
- Turn, sk the 2 sl sts, sc in blo across cuff.
- Repeat until you circle the cuff; sew or sl st ends together.
6. Optional Body Extension (“Hem”)
- For extra length:
- Attach yarn to hem edge, ch 3.
- Work (3 dc) in each space around, ch 1 in corners (as previous hex round).
- Continue in rounds until desired length.
7. Finishing
- Sew in all loose ends.
- Block/steam the sweater for best drape (especially with acrylic).
- Try on and adjust.
Conclusion
You have completed a color-blocked, cozy, and customizable hexagon granny square sweater! Perfect for layering, easy to adjust, and a wonderful introduction to modular crochet garments.
Pattern Correction & Tips
- Check fit as you go: Pause and try on before seaming and after a few rounds to adjust for body/sleeve size.
- Color changes: Always join new color at end-of-round for neatest look.
- Weaving tails: Leave long ends at color changes for secure weaving.
- Seaming: Sc seams provide structure; whip stitch or slip stitch can also be used if preferred.
- For neater cuffs, size down your hook for ribbing.
- For a looser fit, add more rounds to both the hexagon and the cuff.
- Do not skip the blocking/steaming: It will soften acrylic and relax stitches.
- When seaming body, leave enough neckline opening to fit comfortably over the head!