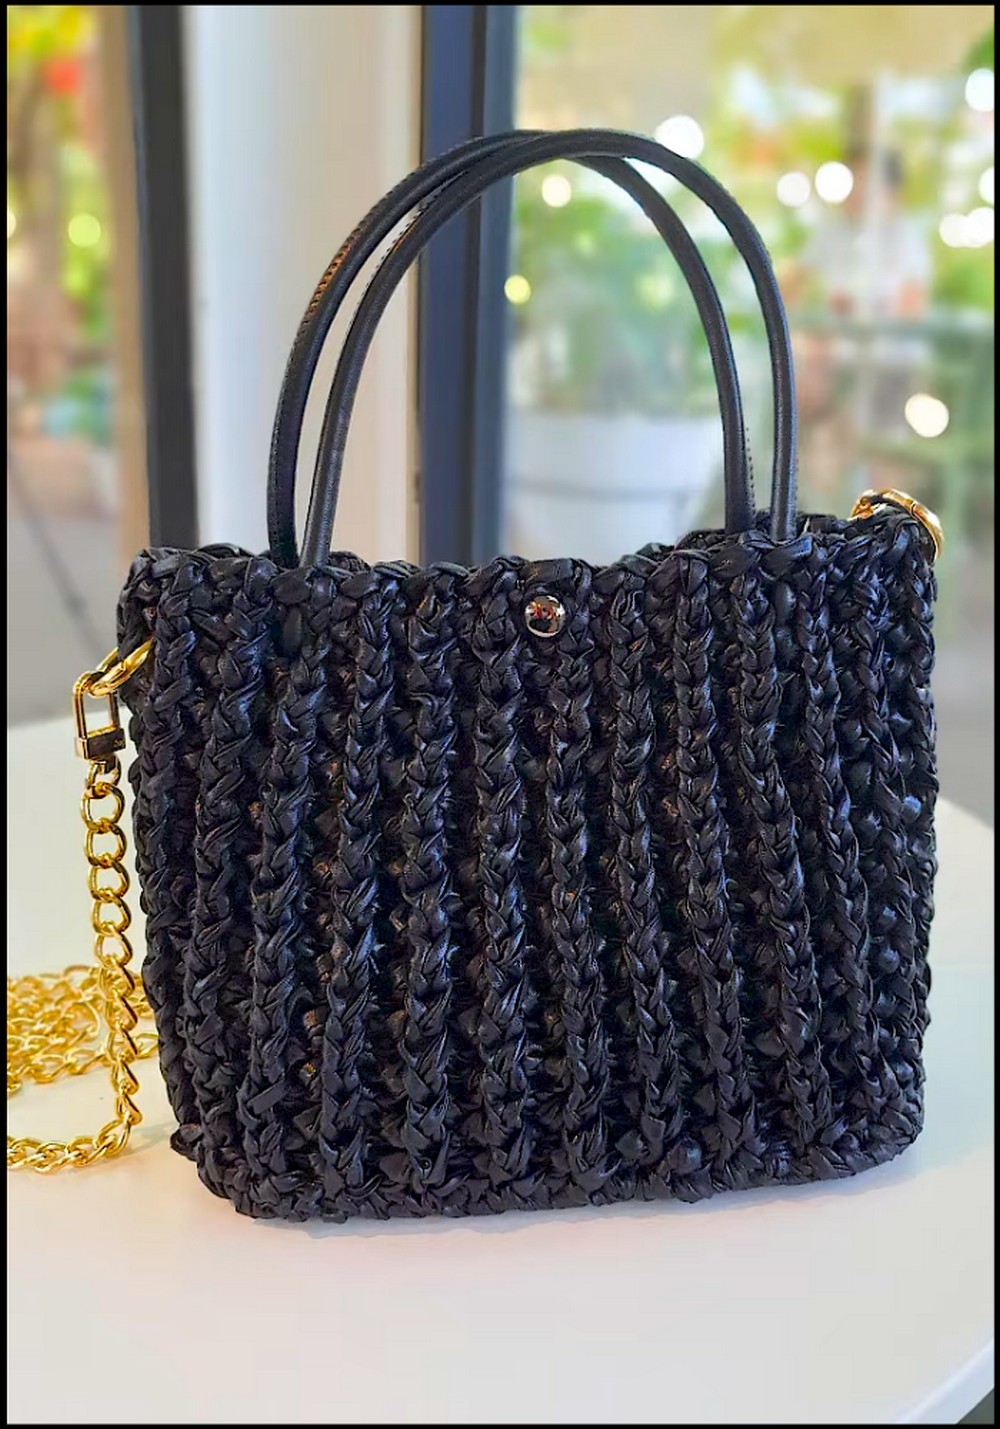
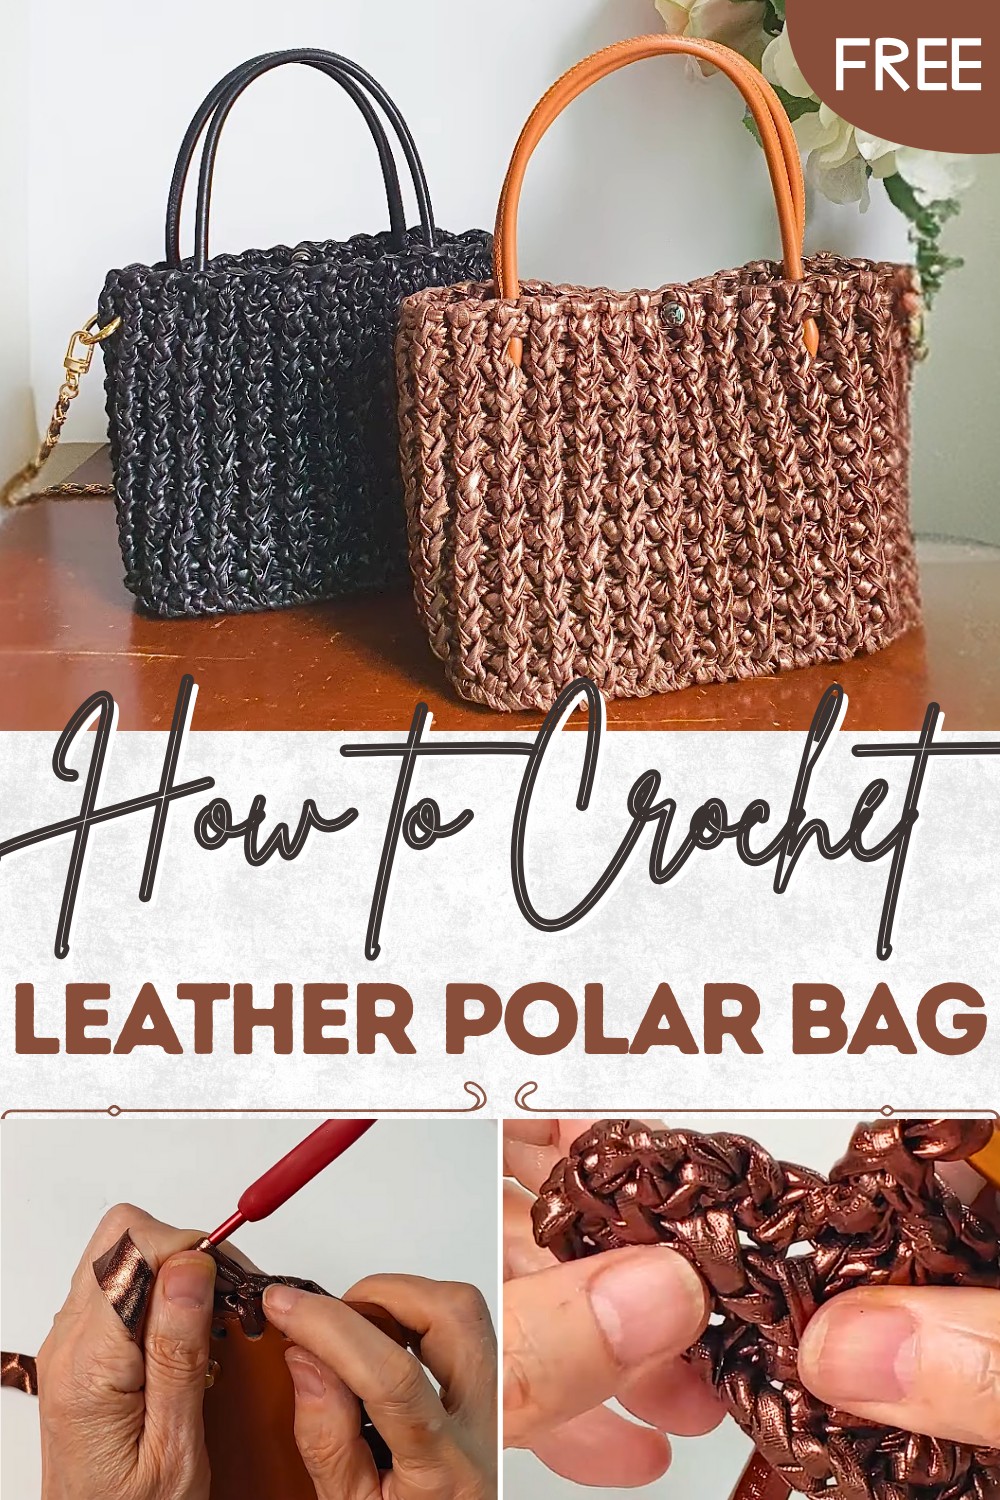
Luxe Crochet Leather Polar Bag Pattern for Chic Everyday Use
Experience effortless style with this Free Crochet Leather Polar Bag Pattern perfect for keeping your essentials close on every adventure.
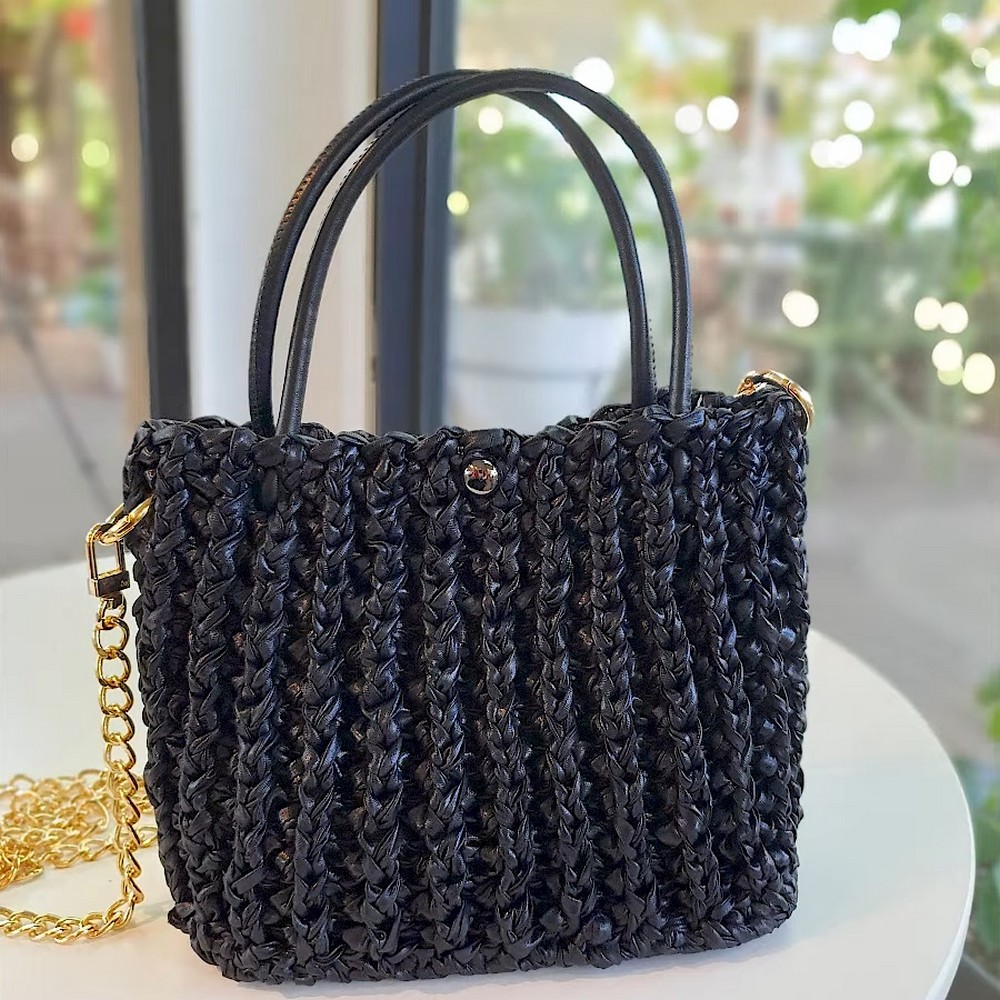
There is something special about holding a bag made from crochet and leather, blending soft yarn with strong leather for a perfect match. The beauty of this bag shines through every detail, from its polar shape to its sturdy handles, making it a favorite for everyone. You can take it to the market, use it for shopping, or carry it when visiting friends. Using the Crochet Leather Polar Bag pattern gives you a chance to create an accessory that looks stylish and is built to last.
Boho Crochet Leather Polar Bag Pattern with a Festival Twist
Each stitch adds charm, turning a simple outing into a special event. This bag brings a sense of pride and happiness, showing off your creativity. It’s easy to use and enjoy every day, making it a practical and beautiful choice for any occasion.
Materials
- Yarn: Vegan Red Seal Glow Ray Dia (matte or glossy, ribbon-style, leather-look)
- Hook: 6.0 mm and 10.0 mm crochet hooks (US J/10 and N/15)
- Bag base: Pre-made stiff rectangular/leather sole with 42 pre-punched holes (or similar size; referenced in pattern)
- Handles/Straps:
- 2 round leather handles, ~45cm each, or
- Chain strap(s) for shoulder/crossbody use (110cm and 88cm lengths referenced)
- Notions:
- Tapestry needle
- Scissors
- Lock (salt ledge or twist closure, 12mm)
- O-rings for strap attachment (optional)
- Stitch markers
Abbreviations (US Terms)
| Abbreviation | Meaning |
|---|---|
| ch | chain |
| sc | single crochet |
| sl st | slip stitch |
| st(s) | stitch(es) |
| inc | increase (work 2 sc in 1 st) |
| RS/WS | right/wrong side |
Special Notes
- Construction is modular: Bag base is worked first (pre-made or self made), body is worked flat, side seam sewn, then attached to base.
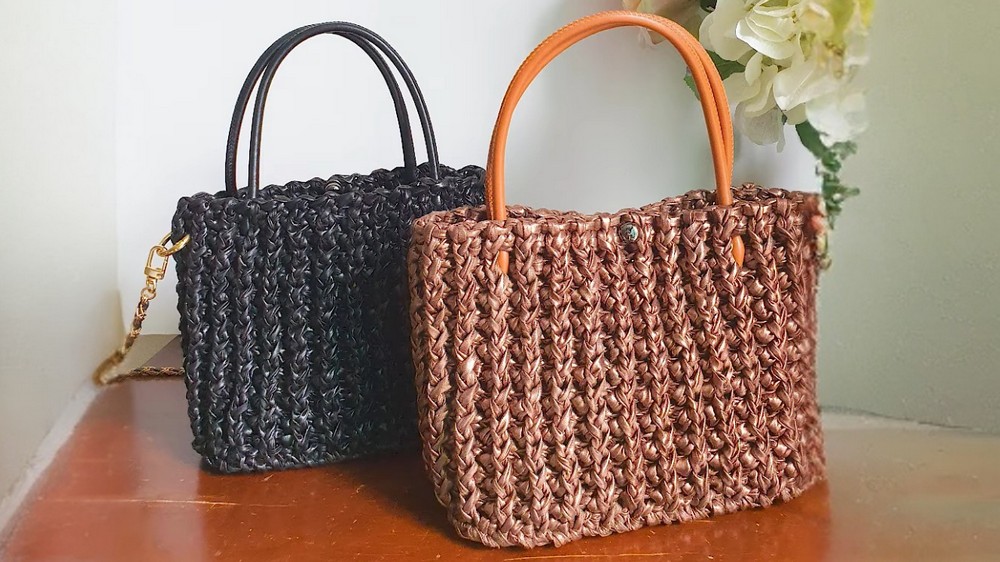
- A unique, graphic solid/embossed chain pattern is formed by alternating sc and sl st.
- Handles and closure are not crocheted but assembled with purchased hardware/leather.
- Tension tip: Ribbon yarn is firm and a bit stiff; keep a relaxed grip and do not pull stitches tightly.
Pattern Instructions
1. Prepare Base
If using pre-made base:
- Identify the 42 pre-punched holes around the base.
- Place stitch markers at all 4 corners.
- With 6.0mm hook and ribbon yarn, join yarn to any hole with a standing sc (see notes below).
If making your own base:
- Cut stiff leather/vegan leather to desired size.
- Punch 42 evenly-spaced holes around the edge.
2. Outline Base With Single Crochet
- Work 1 sc into each hole.
- At each corner hole, work 2 sc for an increase.
- Along straight edges, alternate:
- Work 3 sc between increases (see video for distribution).
- Work 3 sc between increases (see video for distribution).
- Continue evenly around; when all holes are filled, 42 + 8 corners + 6 extra increases = 56 total sc around.
- After last st, sl st to first sc.
- Leave a long tail for final sewing (to attach body to base).
3. Body – Create Main Panel
With 10.0mm hook:
- Foundation: Ch 25 (for standard bag; use odd number to increase size).
- Row 1: Working into 3rd ch from hook, sc to end.
- (Repeat: sc in next ch, ch 1, sk 1) for a firm, neat selvedge edge.
- Row 2 (Pattern Row):
- Ch 2 (acts as turning + side chain).
- Sc into base of turning ch; ch 1; sc in next st; ch 1…Repeat to last st.
- Subsequent Rows:
- Always turn in same direction each row.
- Odd rows: (RS) Sc into base of turning ch, work across as established.
- Even rows: (WS) Always skip first st, sc in next st, ch 1 as above.
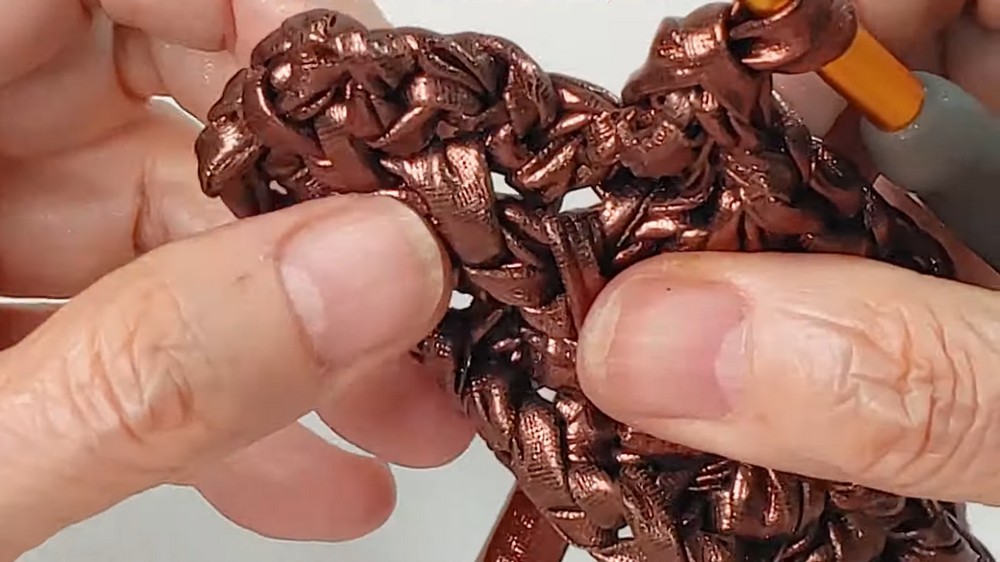
- Stitch Anatomy:
- For the distinct pattern, insert hook under only one strand at the back (“bottom bump” or below the “shiotja/시옷,” a sideways V formed in the row below).
- Keep chain spaces visible: This maintains neat, striped chain pattern.
- TIP: Don’t tighten chains or sc, as the ribbon yarn is low-stretch.
- Continue until you have 60 rows (30 visible ridges on each edge; easily adjustable for desired bag height).
4. Panel Joining (Make Cylinder)
- Fold body piece in half, RS together.
- Use the tail left on the body, thread tapestry needle.
- Whip stitch or mattress seam the edges together, match up pattern exactly (see “shiotja” details).
- Go back and forth on critical selvedge stitches for firm join.
- Weave in and hide tail using tapestry needle in a zigzag through several rows.
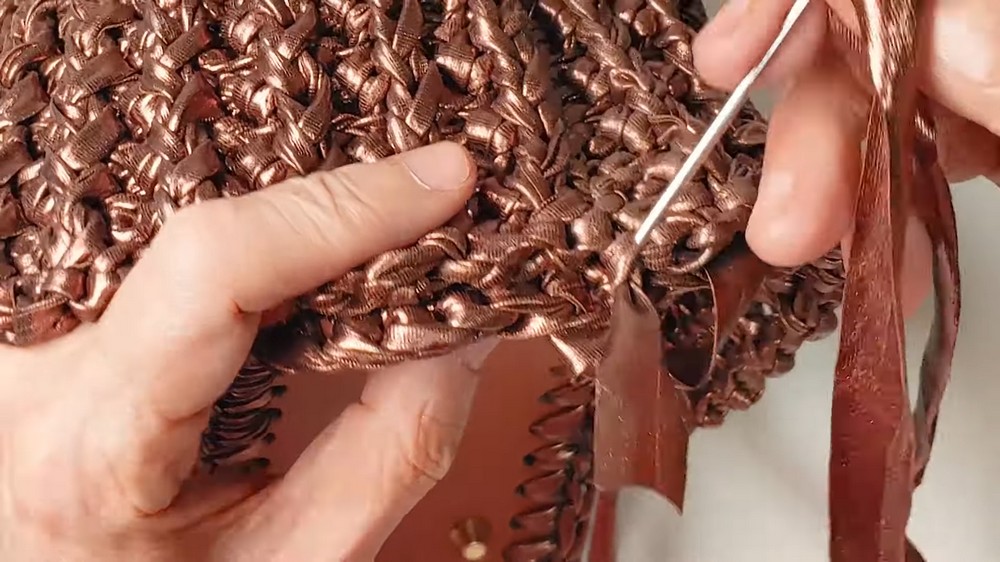
5. Attach Cylinder to Bag Base
- Align bag body’s seam to one short side of the base.
- With tapestry needle and the long tail left on the base,
- Sew each sc edge of the body to the sc stitches on the base edge.
- For corners and slight curve, occasionally use 2 body sts to 1 base st (especially at sharper curves or round corners).
- For straight runs, join 1 st: 1 st.
- TIP: Keep seam visible on inside for a professional look.
- Secure and weave in ends.
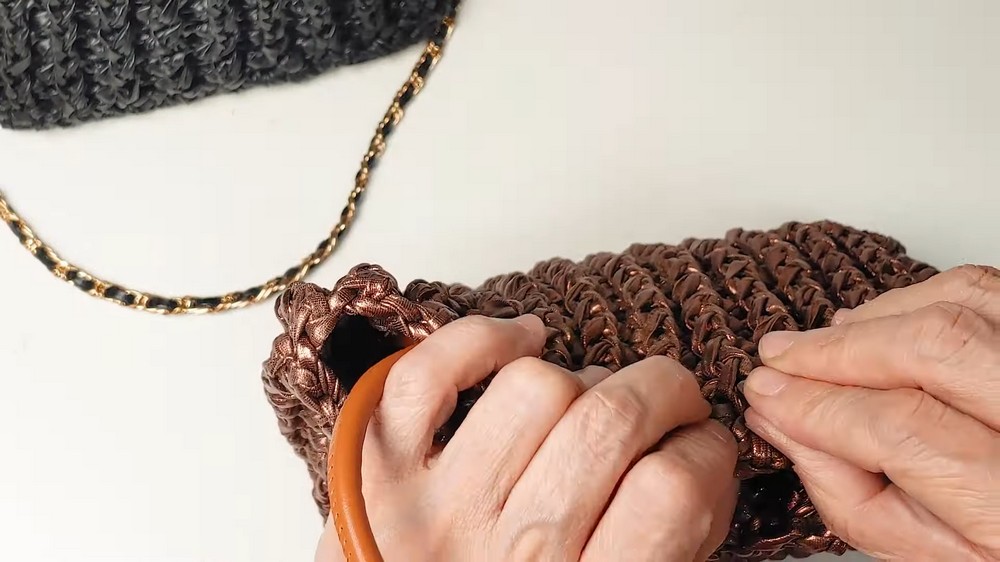
6. Attach Handles and Closure
For round leather handles:
- (Optional) Use an awl to pierce just enough for knot to feed through.
- Remove ~7cm of the handle’s inner cording at each end for flexibility.
- Tie basic knots at both ends of handle, insert at marked points on bag edge (8 chain spaces apart).
- Hide knots inside bag for neat look.
For removable strap:
- Attach O-ring to marked points or hardware loops at bag sides.
- Clip on desired chain strap (shoulder or crossbody length).
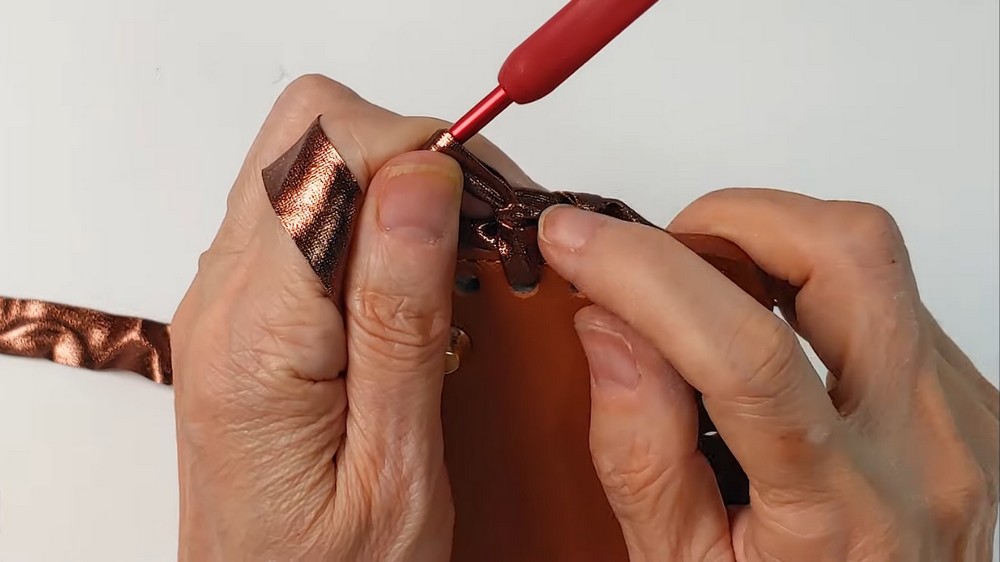
For closure:
- Center the “male” side of lock on inside, between the two handle attachment points.
- Use tapestry needle/awl or small scissors to make a small slit for screw.
- Attach “female” (front) side to desired chain hole on top edge, choosing a tight-fitting chain space.
7. Finishing Touches
- Hide all yarn ends using tapestry needle on the inside.
- Use a soft damp cloth to wipe bag of handling marks.
- Bag is ready for use!
Conclusion
This versatile, modern handbag pattern uses glossy or matt vegan ribbon for a striking leather look with high durability. The modular construction allows for easy assembly, color variation, and personalization with different handles and hardware. The unique “shiotja” chain/embossed stitch produces a professional, structured finish.
Pattern Corrections & Tips
- Pattern Correction:
- If your sc along the base edge do not match exactly, adjust by working “2:1” or “1:2” ratio at corners.
- Always ensure chain spaces are not pulled tight for neatness.
- Accurate edge counting, and matching the “V” (“shiotja”) patterns when seaming is crucial for a balanced look.
- Tips:
- Don’t skip blocking! If panel edge curls, lightly block or steam before finishing to correct shape.
- Keep ribbon flat for chain handle sewing—split or twisted ribbon appears messy.
- Handles: Remove inner cording from handle ends to knot with less bulk. Hide knots inside.
- Sizing: To make bag taller, simply increase foundation chain and number of body rows.
- Straps: Chain lengths are easily swapped for longer/shorter wear.