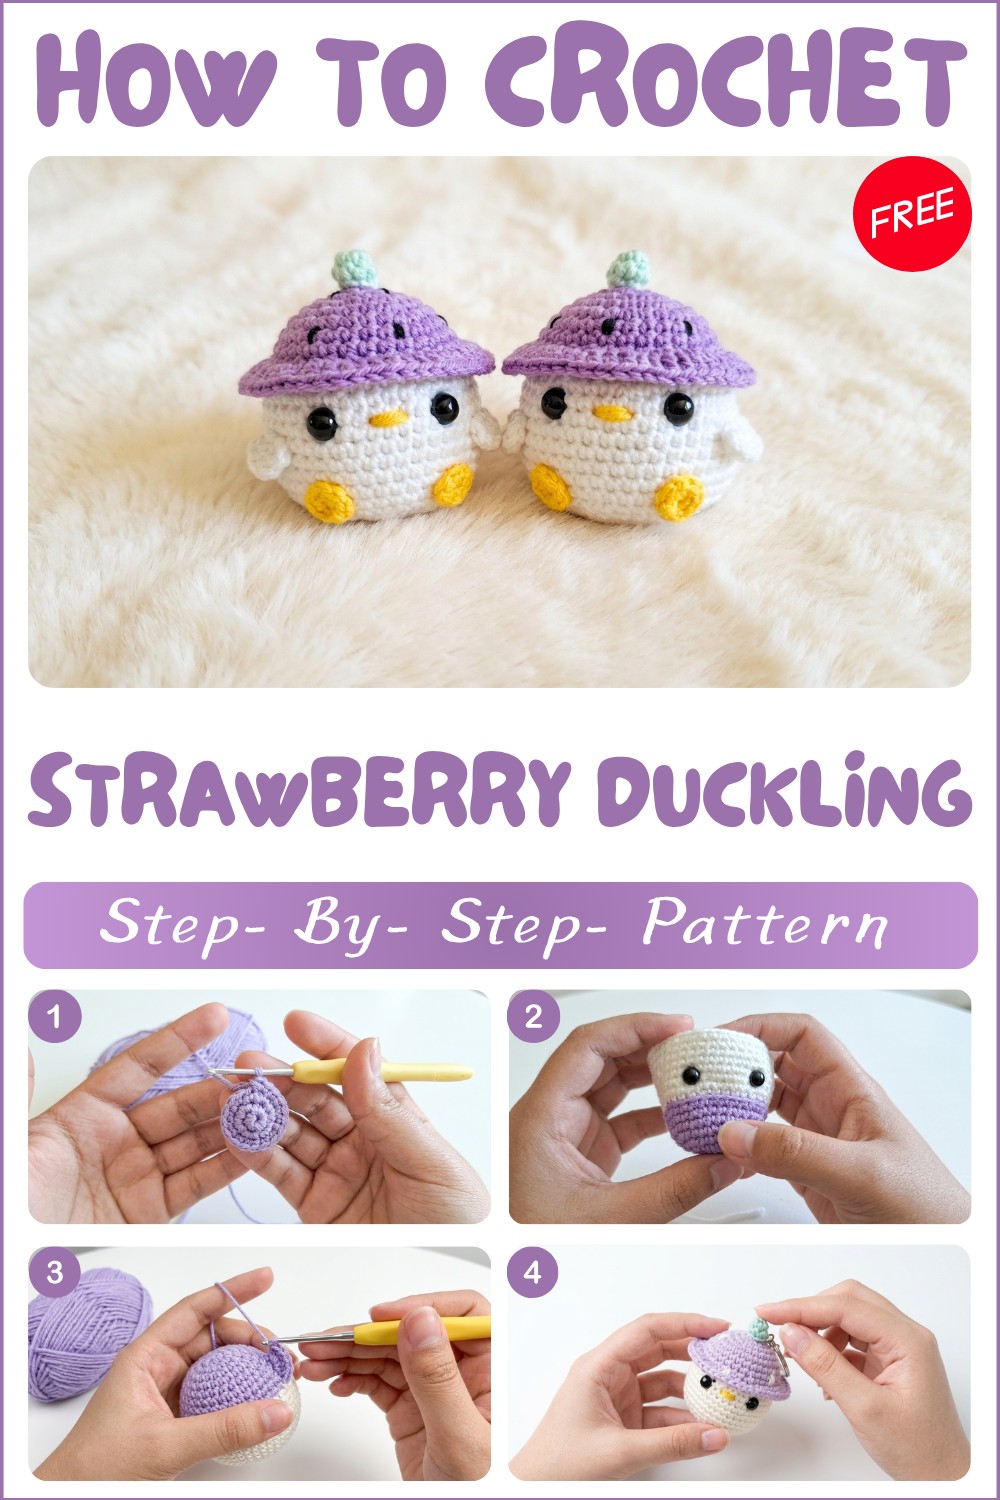
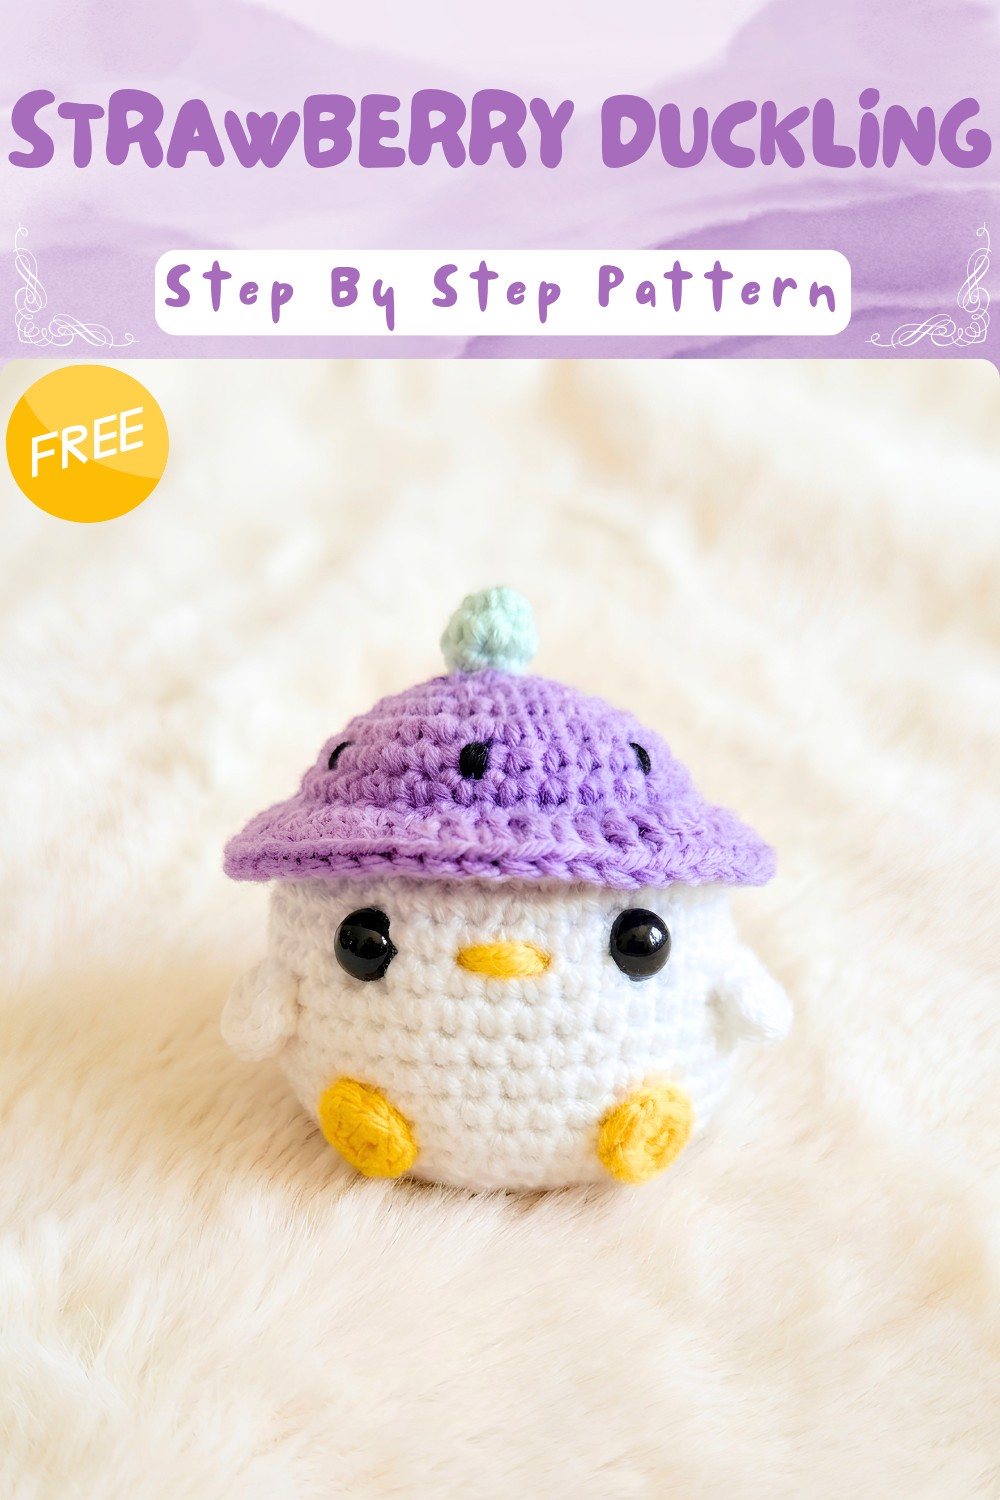
Strawberry Duckling Free Crochet Pattern for Special Moments
Brighten any space with this Crochet Strawberry Duckling Pattern for a sweet and simple project that brings smiles and charm to gifts or decor.
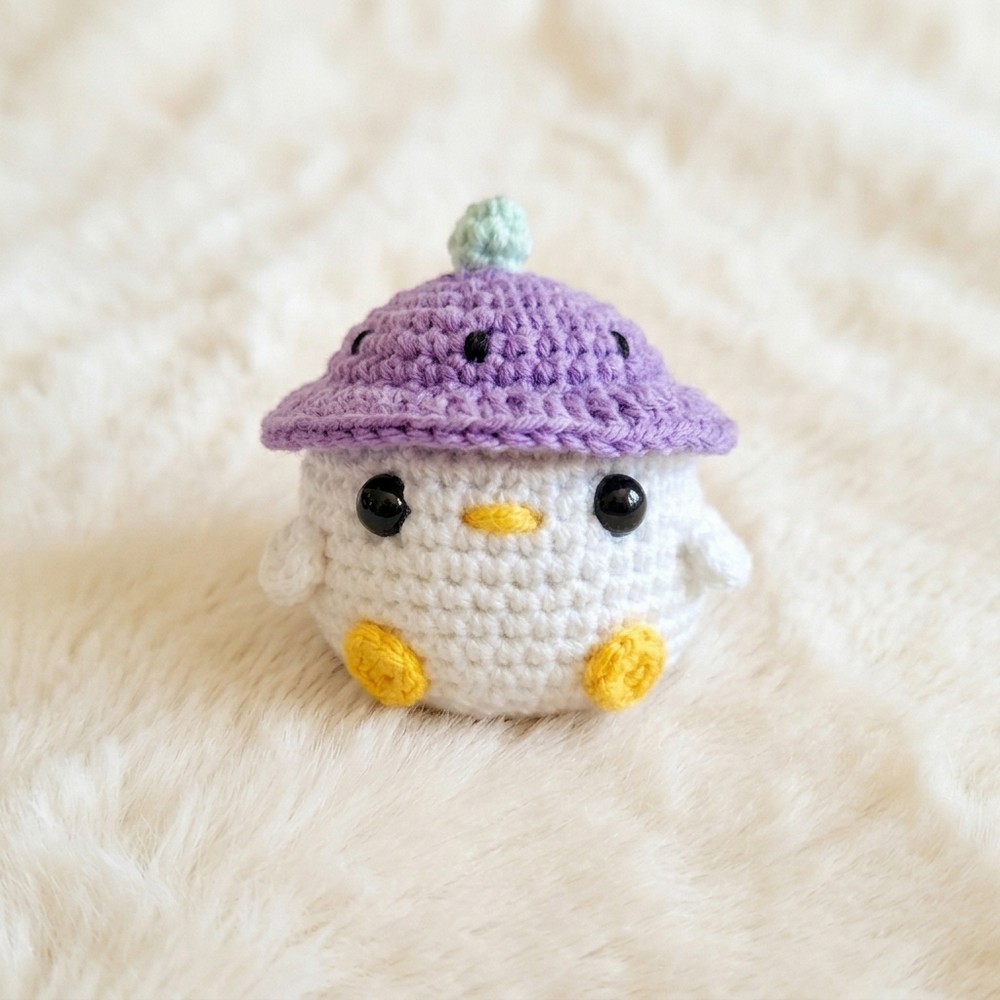
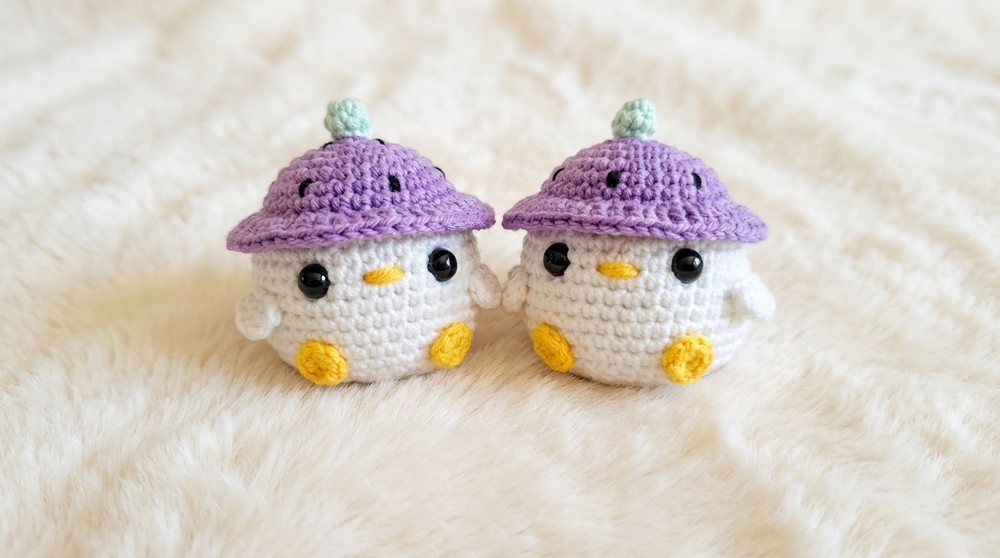
Little ducklings with sweet strawberry hats bring happiness to any room. Each one is soft and bright with colors that remind people of fun and joy. When you see these cute toys you feel like smiling because they are simple and friendly. People can use these for keychains hang them on bags or put them near pillows to add a touch of cheer. Some friends like to gift them for birthdays or special days because they show love in a small and easy way.
Colorful Crochet Strawberry Duckling Pattern for Joyful Decor
Summary
Crochet a charming duck with a plump body and a whimsical strawberry hat. This easy amigurumi features simple shaping, bright color changes, and fun details like wings, little feet, and embroidered strawberry seeds. The result is a cuddly, playful plush toy that’s adorable for kids, gifts, or décor. Pattern is approachable for beginners and fun for experienced crafters who enjoy amigurumi projects.
Even people who never made toys before can try this crochet strawberry duckling pattern because the steps are simple and pictures help. A finished duckling is not just a toy. It becomes a favorite friend and a small thing that makes big smiles. You can keep one or share it. The pattern makes it easy to add a bit of happiness to your everyday life.
Strawberry Hat Duck Amigurumi Crochet Pattern
Pattern Notes
- This amigurumi is worked in the round, in a continuous spiral.
- Always mark the first stitch of each round with a stitch marker.
- Parts include: main duck body, wings, legs, beak, strawberry hat, strawberry top, and embroidered seeds.
- Stuff lightly as you go for a plump, rounded look.
- All instructions are in US crochet terms.
- Use your preferred method to attach safety eyes and secure all pieces well for durability.
Materials
- Acrylic yarn, 4-ply/worsted, in:
- Lavender: cap
- Yellow: Legs
- Green (for strawberry leaf)
- White (for body and Wings)
- Black (small amount for seeds)
- 5 mm crochet hook
- Yarn needle and scissors
- Stitch marker (recommended)
- Stuffing (polyester fiberfill)
- Two safety eyes (size to preference, ~7–10 mm)
- Hot glue or fabric glue (optional, for some attachments)
Skill Level
Beginner/Advanced Beginner
This makes use of basic stitches and simple color changes, and is suitable for those familiar with amigurumi basics.
Gauge (and Stitch Pattern)
- Gauge is not crucial for amigurumi, but your stitches should be tight so stuffing does not show through.
- The duck is made with single crochet stitches, worked in the round.
- Adjust hook size if necessary for a firm fabric.
Stitch Abbreviations
- MR = magic ring
- sc = single crochet
- inc = increase (2 sc in same stitch)
- dec = decrease (single crochet 2 together)
- hdc = half double crochet
- sl st = slip stitch
- ch = chain
- st = stitch(es)
- rep = repeat
Measurements / Sizing (Optional Schematic)
- Finished duck: Approximately 10–12 cm (4–4.7”) tall, depending on yarn, stuffing, and tension.
- Proportions: Chubby and cute, perfect as a plush or desk buddy.
Special Stitches
- Invisible decrease: Insert hook under the front loop of two stitches, yarn over, pull through both, yarn over, pull through remaining loops on hook.
- Work in back loop only (BLO) where specified to create a color transition line (hat brim).
The Crochet Pattern!
1. Duck Body & Head
With Lavender:
- MR, 6 sc in ring (6)
- Round 2: inc in each st around (12)
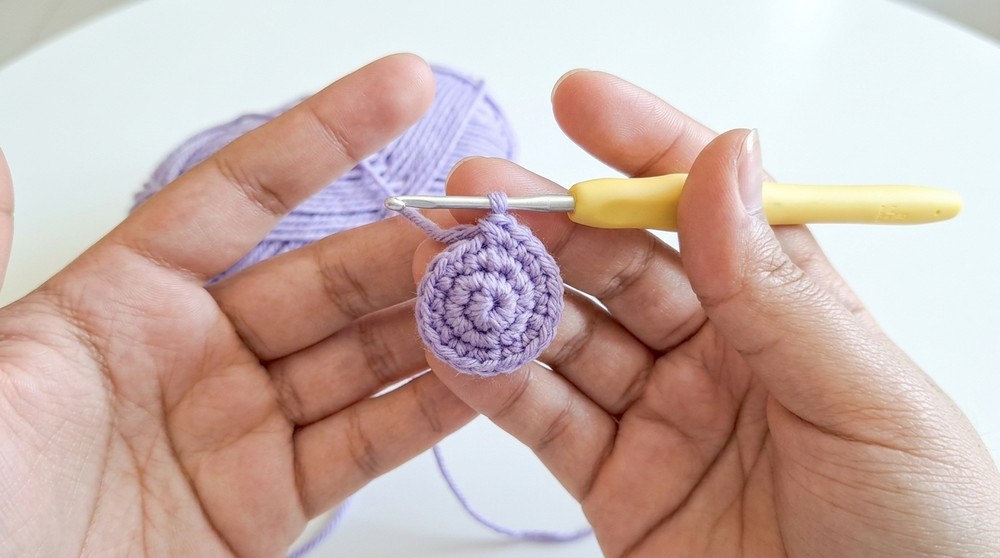
- Round 3: sc in next st, inc in next; rep around (18)
- Round 4: sc in next 2 st, inc in next; rep around (24)
- Round 5: sc in next 3 st, inc in next; rep around (30)
- Rounds 6–7: sc in each st around (30)
- Round 8: sc in next 9 st, inc in next; rep 3 times (33)
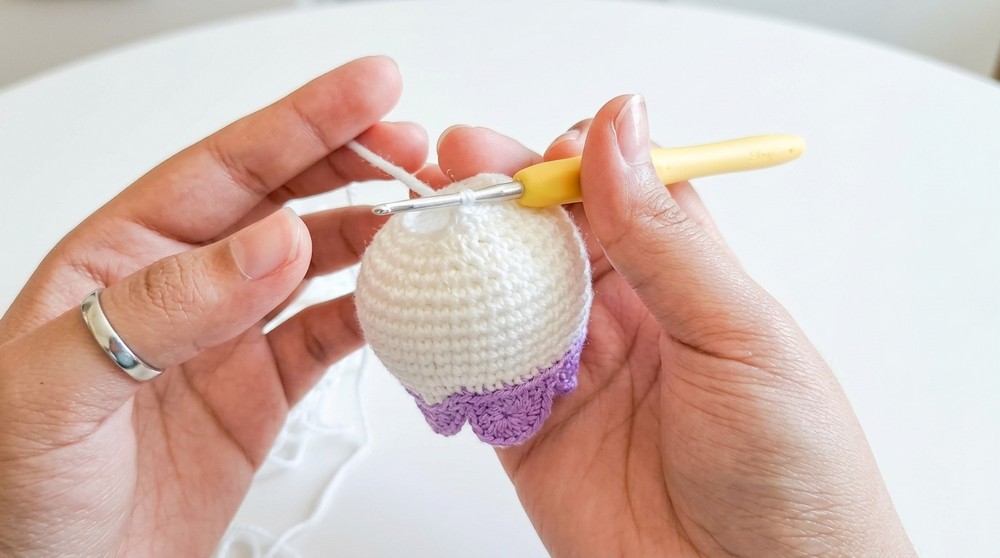
- COLOR CHANGE TO WHITE (strawberry brim):
In back loop only (BLO): Join white at the last step of the last stitch of previous round.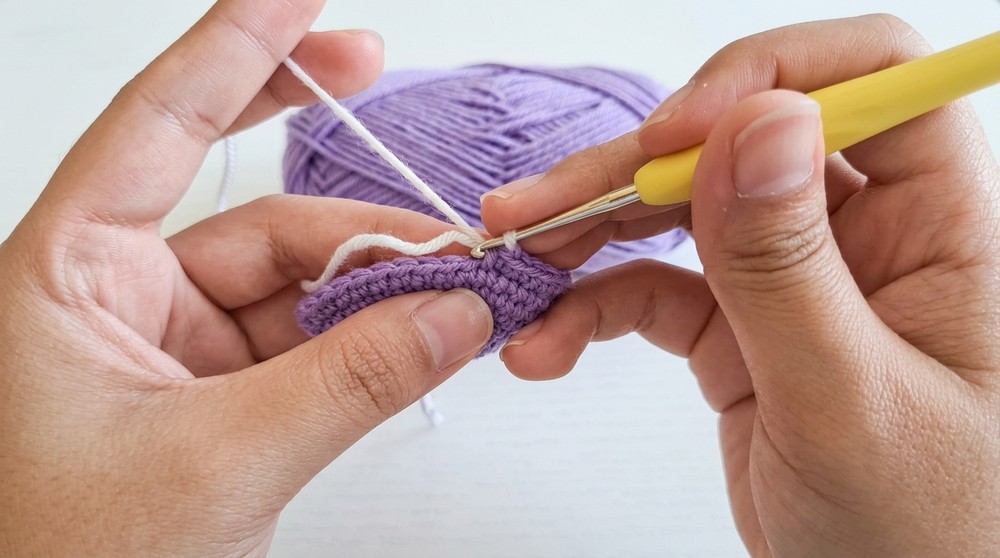
sc in next 5 st, inc in next; rep 3 times (36) - Round 10: sc in next 5 st, inc in next; rep 6 times (42)
- Rounds 11–16: sc in each st around (42)

(Place safety eyes between rounds 11 & 12, spaced about 8 stitches apart.)
2. Face: Beak
With yellow or orange:
- Embroider the beak centered between the eyes, between rounds 11–12 (as a small oval or triangle).
3. Head Decreases
- Round 17: sc in next 5 st, dec; rep 6 times (36)
- Round 18: sc in next 2 st, dec in next, sc in next 2 st; rep 6 times (30)
- Round 19: sc in next 3 st, dec; rep 6 times (24)
- Begin stuffing the body firmly as you decrease.
- Round 20: sc in next st, dec, sc in next st; rep 6 times (18)
- Round 21: sc in next st, dec; rep 6 times (12)
(Stuff generously but don’t overstretch the stitches.) - Round 22: dec in every st (6)
- Finish stuffing. Fasten off, thread yarn needle through the final 6 sts, pull tight to close, and weave in the end.
- Finish stuffing. Fasten off, thread yarn needle through the final 6 sts, pull tight to close, and weave in the end.
4. Strawberry “Hat” Brim
With Lavender Yarn:
- Join yarn to front loops of BLO round from step 8 (color change round).
- Ch 2, dc in same st, next st inc (2 dc in st), next st hdc, next st inc (2 hdc in st).
- Repeat similar sequence around to slightly ruffle brim (work a hdc, inc, hdc, inc pattern for a whimsical, uneven ruffle).
- Fasten off, weave in ends neatly to inside of hat.
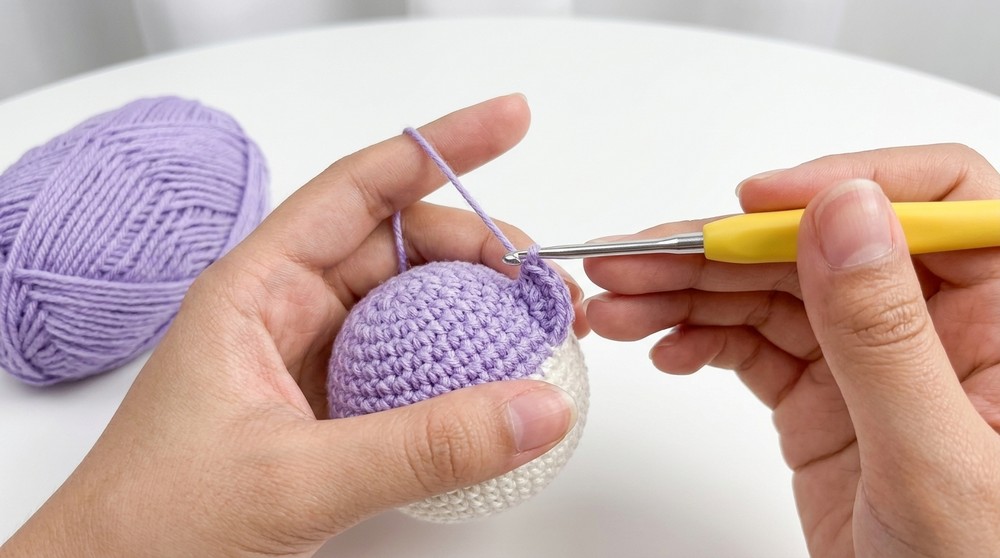
5. Strawberry Top
With green:
- MR, 6 sc in ring (6)
- Round 2: sc in each st around (6)
- Sl st to finish, cut yarn, leaving a tail.
- Sew centered on top of hat with yarn needle or glue in place.
6. Wings (Make 2)
With white:
- MR, 4 hdc in ring
- Pull ring tightly closed. Ch 1, sl st into center, cut yarn, leaving tail for sewing.
- Sew each wing between rounds 12–13, about 1–2 stitches away from side of each eye.
7. Legs (Make 2)
With yellow:
- MR, 6 sc in ring (6)
- Fasten off, leaving tail for sewing.
- Flatten to form tiny feet and sew (or glue) directly under the body, beneath the wings.
8. Strawberry Seeds
With black:
- Embroider small “V” or straight stitches randomly on the hat/brim to imitate strawberry seeds.
Assembly & Finished Size (Bullets)
- Insert and secure safety eyes AFTER round 10 and before stuffing.
- Embroider or glue the beak centered between the eyes.
- Attach/embroider the wings to the sides between rounds 12–13.
- Sew on both feet directly beneath the front of the duck.
- Attach the green top (strawberry crown) to the center of the head/hat.
- Embroider strawberry seeds for added detail.
- Weave in all ends securely.
- Finished duck stands about 10–12 cm tall; adjust size by using smaller/larger hook.
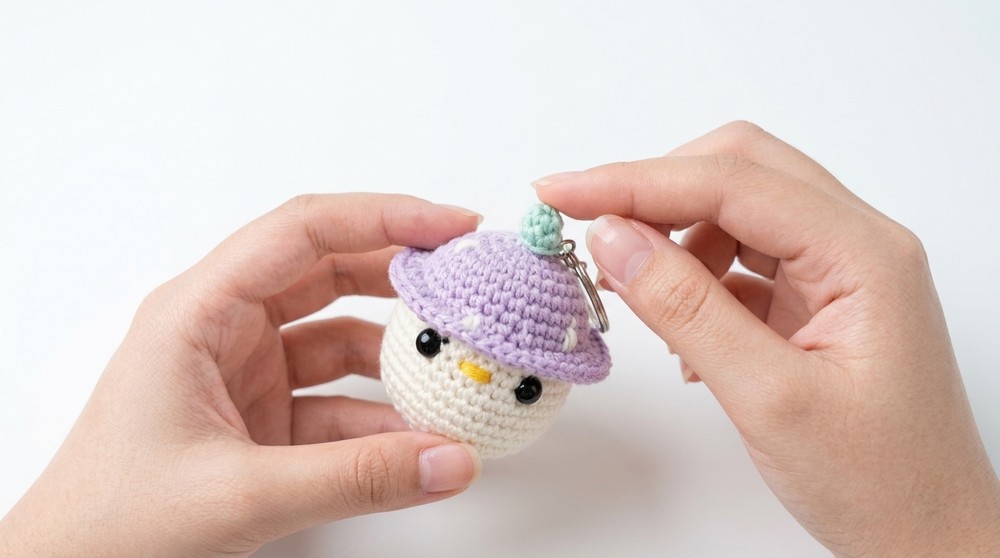
Congratulations!
Your chubby little duck with a strawberry hat is completed. Make several in assorted fruit colors for even more fun! Perfect as a plush, gift, or seasonal décor.