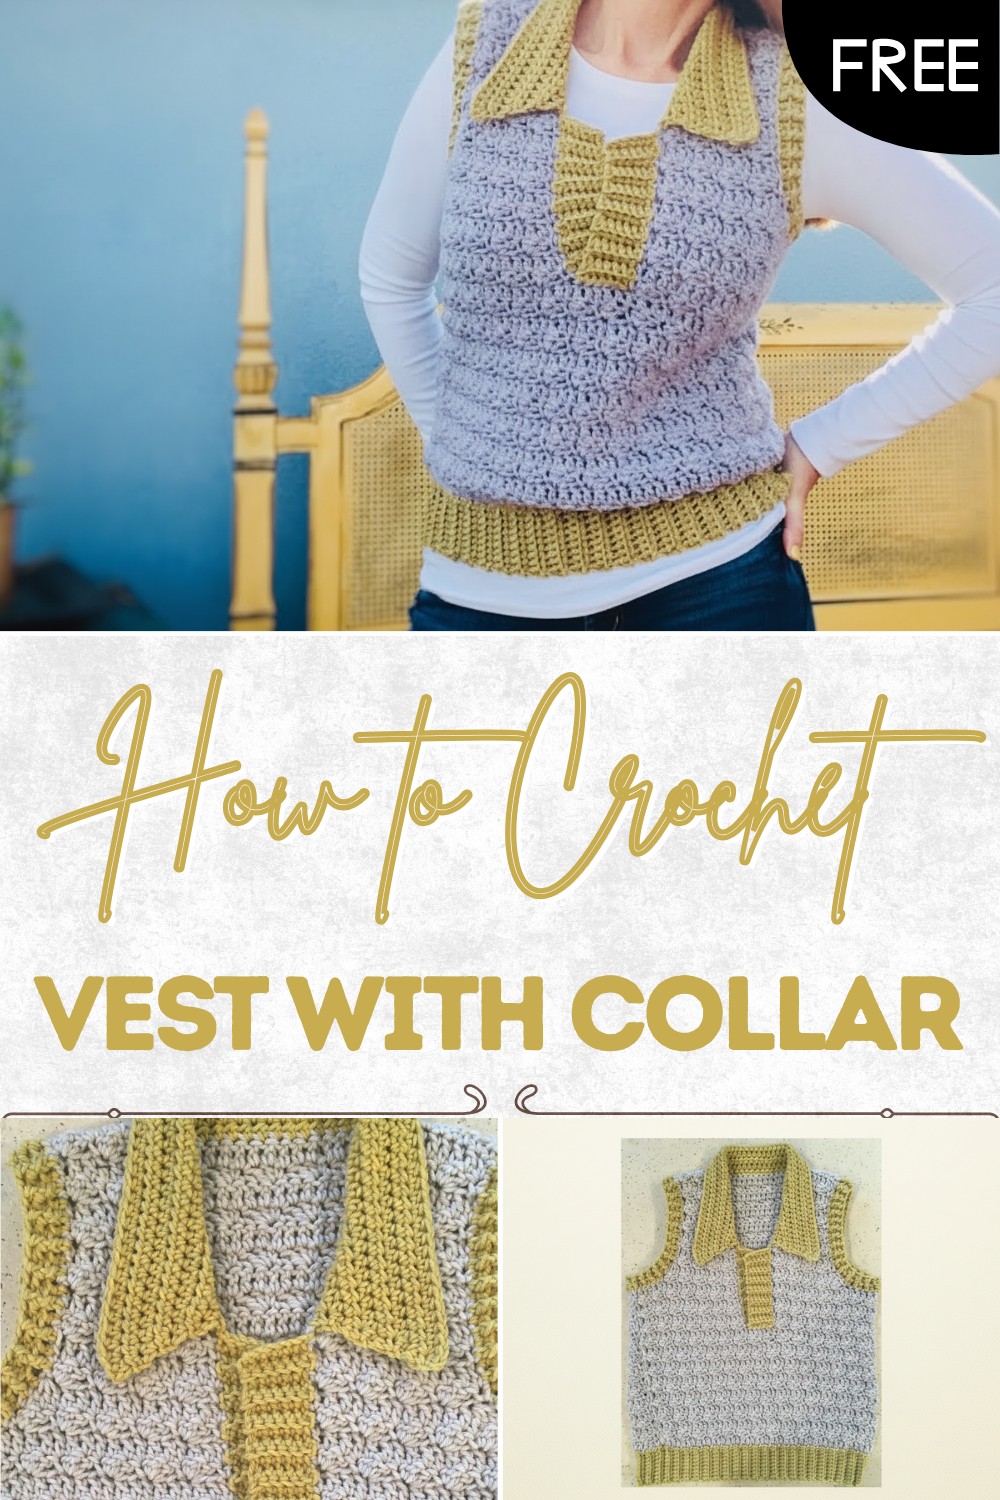
Free Crochet Vest With Collar Pattern for Autumn Layering
Elevate every stylish outfit with free crochet vest with collar pattern, because it brings elegance and flair while adding warmth for all.
A thick and cozy wrap feels wonderful against your skin as you wear a warm garment that keeps your chest snug while leaving your arms free. This pretty piece of clothing has a tall neck part that stands up high to block the cold wind from touching your throat. A crochet vest with collar pattern helps you create a sturdy jacket that looks very smart and keeps you comfortable in any weather. It works well for a busy day of work in the garden or a quiet time sitting by a glowing fire.
How to Crochet Polished Free Crochet Vest With Collar Pattern
The heavy loops make the fabric look like a soft field of clouds from a happy dream. This special item is great because it fits easily over any shirt and makes you feel very safe and tucked in. A helpful feature is that the big neck piece can fold down to look like a fancy coat or stay up for extra heat. This single vest can turn a simple outfit into something very grand and beautiful. It stays strong and keeps you feeling happy and very neat.
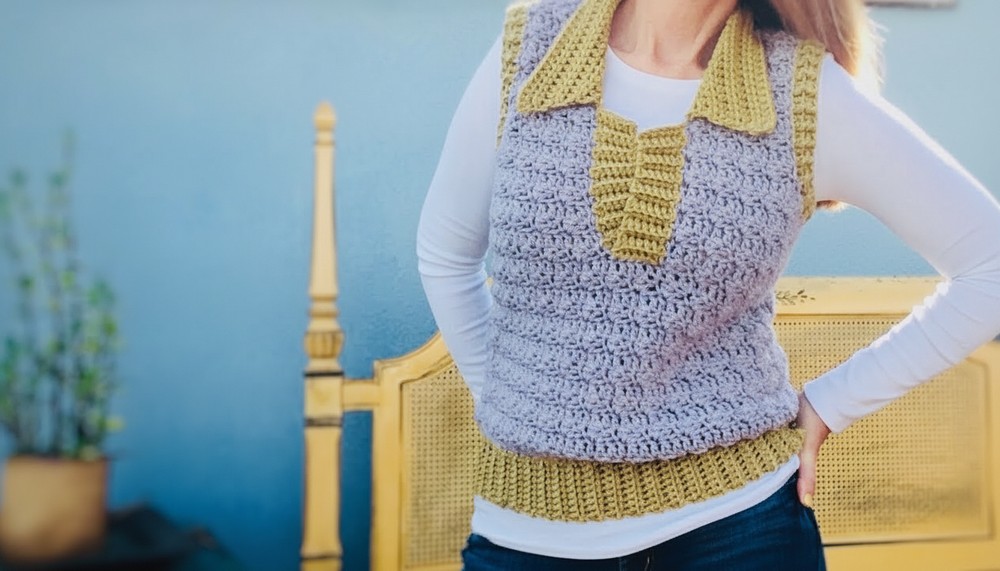
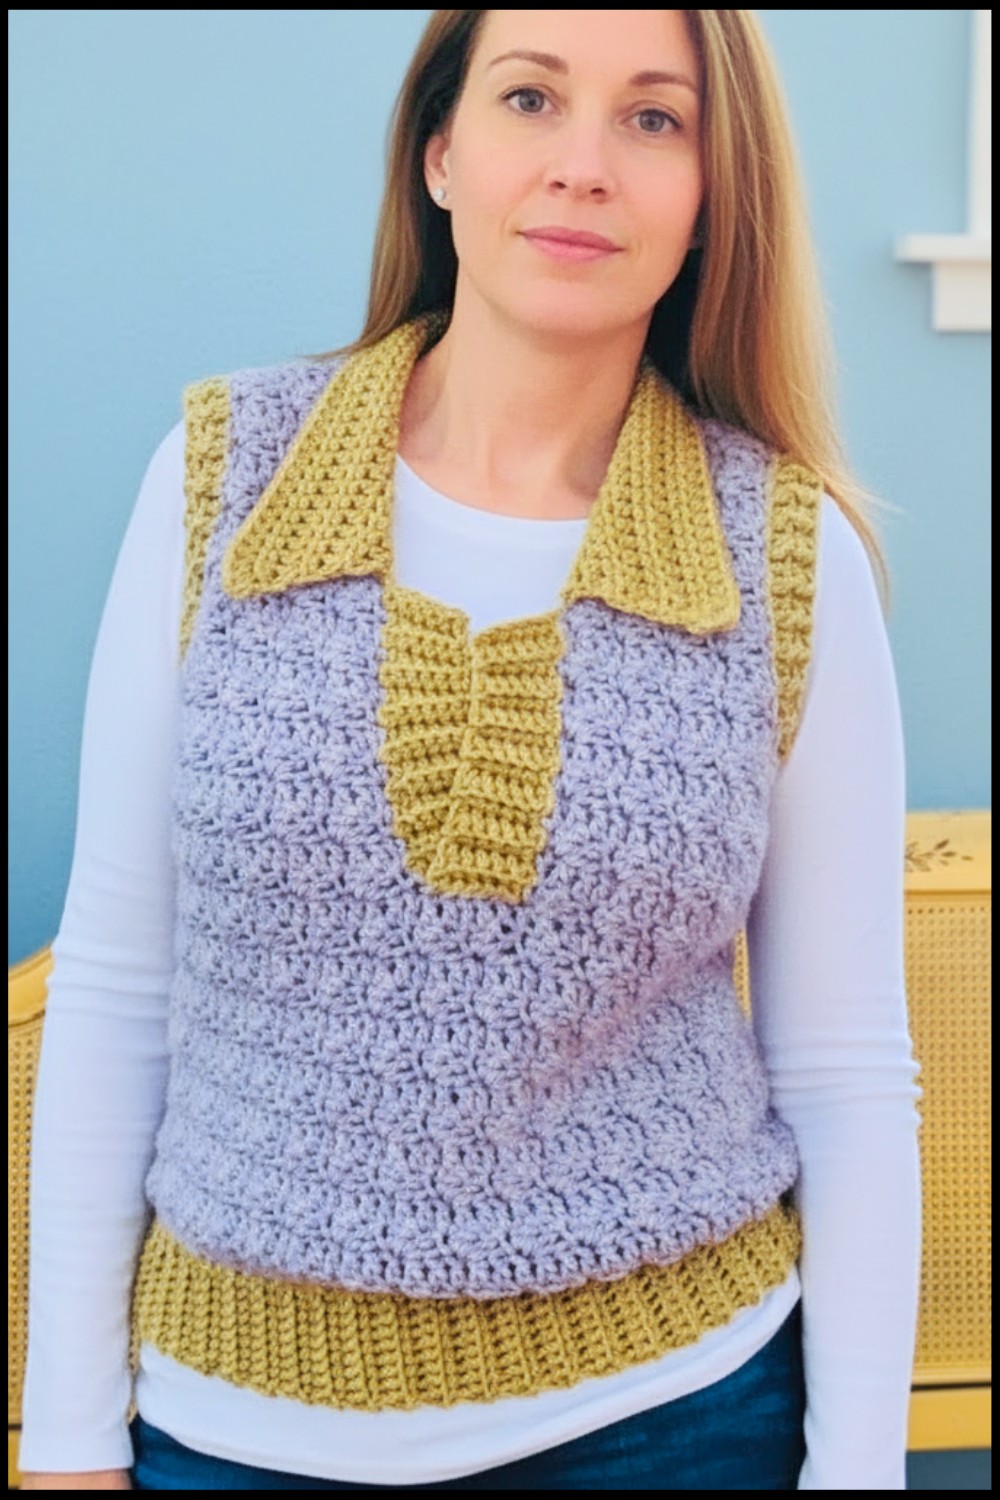
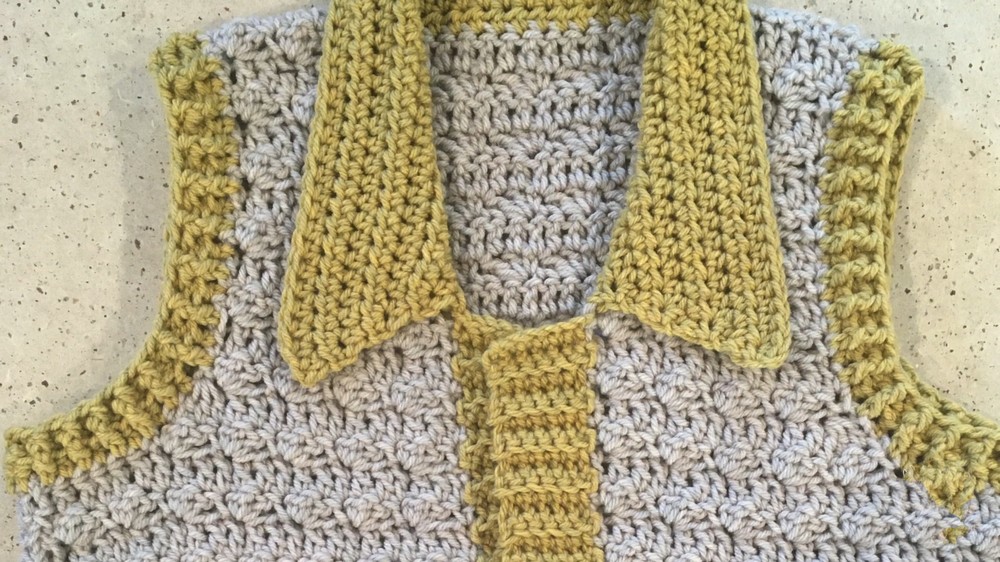
Classic Crochet Vest with Textured Stitch and Statement Collar
Materials
- Yarn: Size 4 (worsted weight) yarn
- Approx. 2 balls (main color), 1 ball (contrast color)
- Sample colors: Lavender (main), Yellow (contrast)
- Hooks:
- Size J (6.0 mm) for body
- Size H or I (5.0–5.5 mm) for ribbing and finishing (optional for a tighter edge)
- Yarn needle (for seaming and weaving in ends)
- Stitch markers
- Measuring tape
- Scissors
Key Abbreviations (US Terminology)
| Abbreviation | Meaning |
|---|---|
| ch | chain |
| sc | single crochet |
| dc | double crochet |
| hdc | half double crochet |
| sl st | slip stitch |
| rep | repeat |
| st(s) | stitch(es) |
| BLO | back loop only |
| FP/BP hdc | front/back post half double crochet |
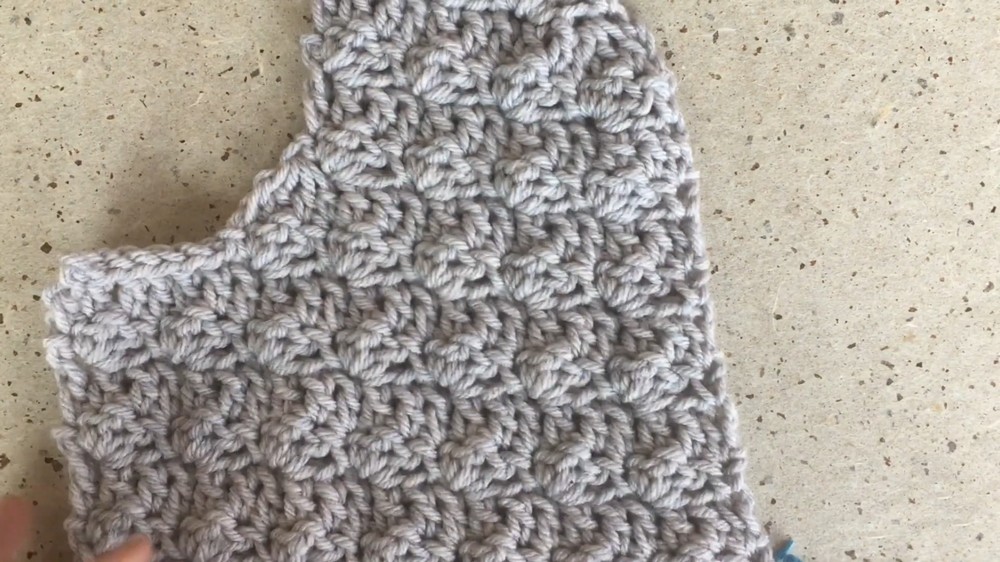
Special Stitches
- Stacked Single Crochet (replaces ch-3/dc at row start):
- Sc in st, rotate work, sc in 2 side loops of previous sc (makes a more solid start to dc rows).
- Silt Stitch:
- (sc, 2 dc) in one st, skip 2 sts, rep to end.
Sizing
Work from the number in sequence according to size.
(e.g., XS/S (1st), M/L (2nd), XL (3rd), 2X (4th))
- Starting Chains: 50 (XS/S), next number M/L, then XL, 2X, etc.
- Stitch counts and decrease points follow this order throughout.
Pattern
BODY (Fronts and Back are worked flat, then seamed)
1. FOUNDATION CHAIN
- With main color and J/6mm hook,
- Ch:
- XS/S: 50
- M/L: (refer to chart in video or as supplied)
- XL
- 2X
2. ROW 1 – ESTABLISH BASE
- Turn, stacked sc (see above) in 2nd ch from hook.
- Dc in each chain to end.
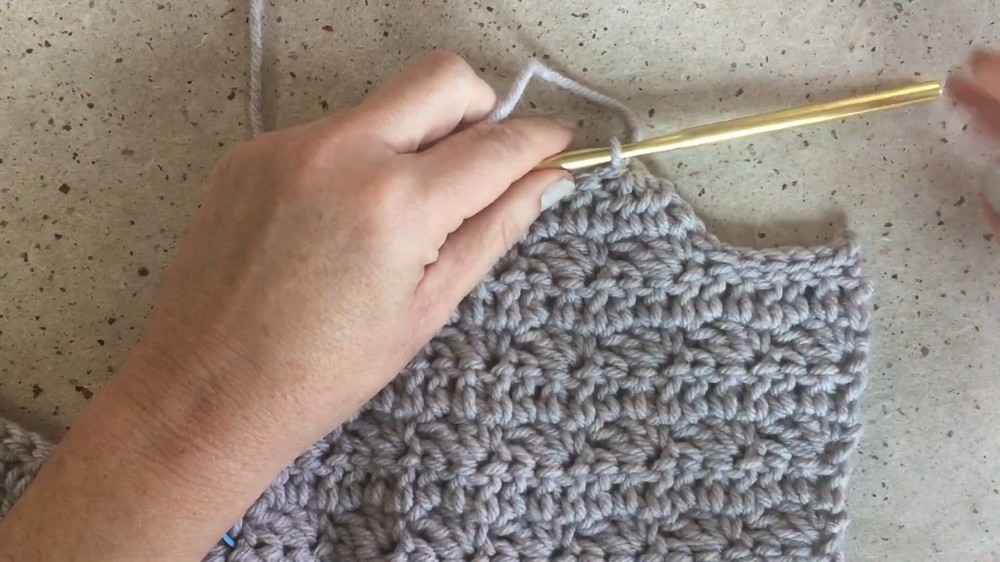
3. ROW 2 – Silt Stitch
- Ch 1, turn. *(sc, 2 dc) in first st, skip 2 sts; rep from * across, ending with sc in last st.
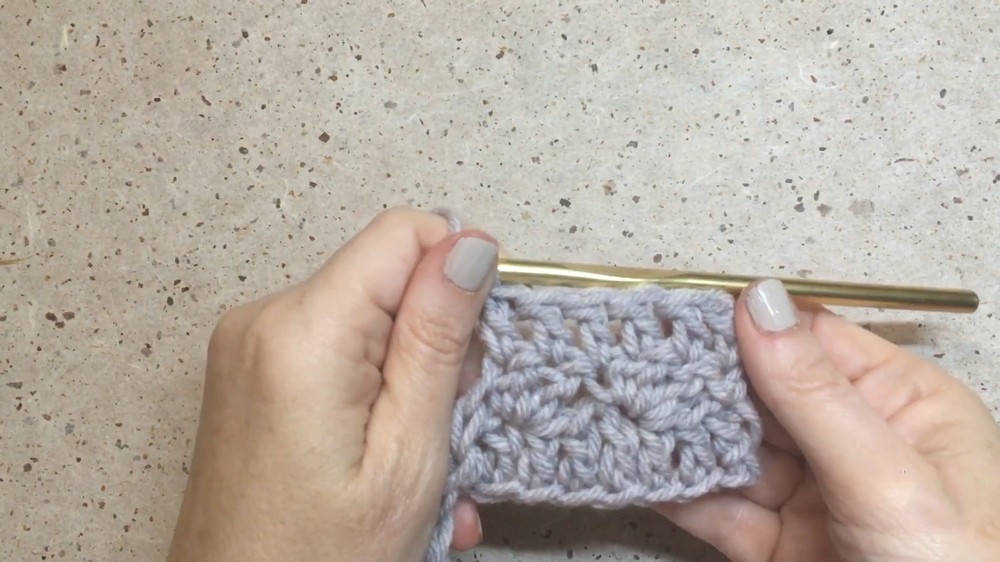
4. ROW 3 – Dc Row
- Turn (no extra ch), stacked sc/dc in first st, dc across to end, ensuring last dc goes into last sc of previous row.
5. Repeat ROWS 2 & 3 (for length)
- Continue alternating Silt Stitch and Dc rows for total 15 rows (about 11 in/28 cm from armhole to ribbing for XS/S).
- End with a dc row.
Tip: Add/omit rows as needed for desired length; always end with a dc row.
DIVIDE FOR FRONTS
- Place a marker at appropriate stitch count for your size (e.g. 22nd st for XS/S); skip 5 sts, place marker at next st.
LEFT FRONT
- Ch 1, turn. Work silt stitch to first marker, ending with sc at marker. (This shapes armhole.)
- Next row: Stacked sc/dc, dc across row.
- Repeat alternating silt & dc rows per size chart, until ARMHOLE shaping.
ARMHOLE SHAPING
- At armhole row:
- Ch 1, turn, sl st across required number of sts (size-specific), ch 1, silt stitch to end.
- Ch 1, turn, sl st across required number of sts (size-specific), ch 1, silt stitch to end.
Next row:
- Stacked sc/dc in first st, dc across until 4 sts remain.
- Work dc4tog (double crochet 4 together) over last 4 sts.
- Ch 1, turn, silt stitch row.
- Repeat 1 dc row, 1 silt stitch row, as established for 2 more rows (alternating).
- Next, decrease over next 3 sts (dc3tog), dc to end.
Continue alternating pattern, working decreases as described to create armhole and neckline shaping V.
After neckline shaping, work 6 more rows (XS/S) or 8 more rows (XL/2X), maintaining pattern.
RIGHT FRONT
- Attach yarn at second marker (opposite side).
- Mirror left front: silt stitch to end, repeat pattern/row counts as for left front, including armhole and neckline shaping decreases.
BACK
- Work as for front, but ignore neckline shaping—only work armhole decreases on both sides, matching length to fronts.
JOIN SHOULDERS AND SIDES
- With WS together, seam shoulder and side seams to armhole.
FINISHING
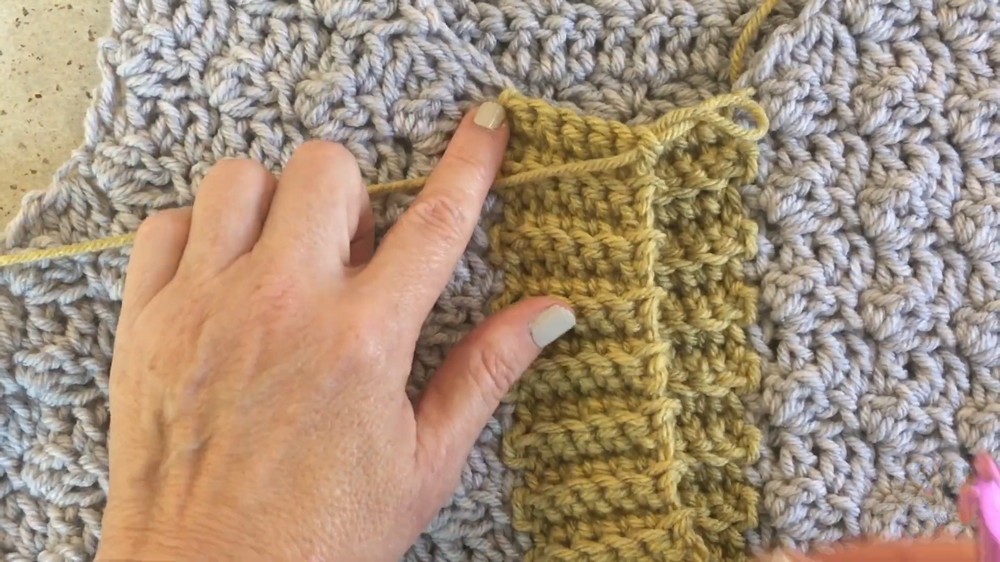
FRONT RIBBING
- With contrast color and finer hook, join at one lower corner.
- Ch 7, sc in 2nd ch from hook and each ch to end (6 sc).
- Working perpendicular to vest edge:
- Sl st into next 2 garment edge sts.
- Turn, skip sl sts, sc BLO across rib.
- Repeat to other corner/marker, forming a front band.
- Repeat on opposite front.
- Overlap ribbing at top/bottom as desired. Seam together.
COLLAR
- With ribbing yarn (contrast), join at neck.
- Ch 1, hdc evenly around neck edge.
- Repeat turning rows: Ch 1, 2 hdc in first st, hdc across neck, 2 hdc in last st.
- Work total 8 hdc rows (collar is 8 rows wide).
BOTTOM RIBBING
- Join at side seam, ch 10, sc in 2nd ch and each to end (9 sc).
- Working up to edge: Sl st into edge, turn, skip sl sts, sc BLO to edge.
- Rep around bottom edge. Seam ribbing join.
ARMHOLE EDGING
- With ribbing color and finer hook, join at armhole seam.
- Row 1: Hdc evenly around.
- Row 2: Ch 1, FP-hdc around next st, BP-hdc around next st; rep around, join, turn.
- Row 3: Ch 1, work FP/BP hdc as they appear, join.
- Repeat edging for both armholes.
Conclusion
This classic vest works up quickly with textured interest, a stylish collar, and well-defined ribbing. The construction is simple and the fit flattering—a wardrobe essential with scope for personal color choices!
Pattern Corrections & Tips
- Correction: Make sure to match stitch counts across fronts and back, especially for armholes and neckline shaping. Don’t skip those tricky single crochets at row ends!
- Tips:
- Place markers for clarity on increases, decreases, and row counts.
- Use a stacked single crochet instead of ch-3 to start dc rows for a neater edge.
- Adjust ribbing length or width as needed for fit.
- Seaming ribbing through front loops gives a subtle, almost invisible finish.