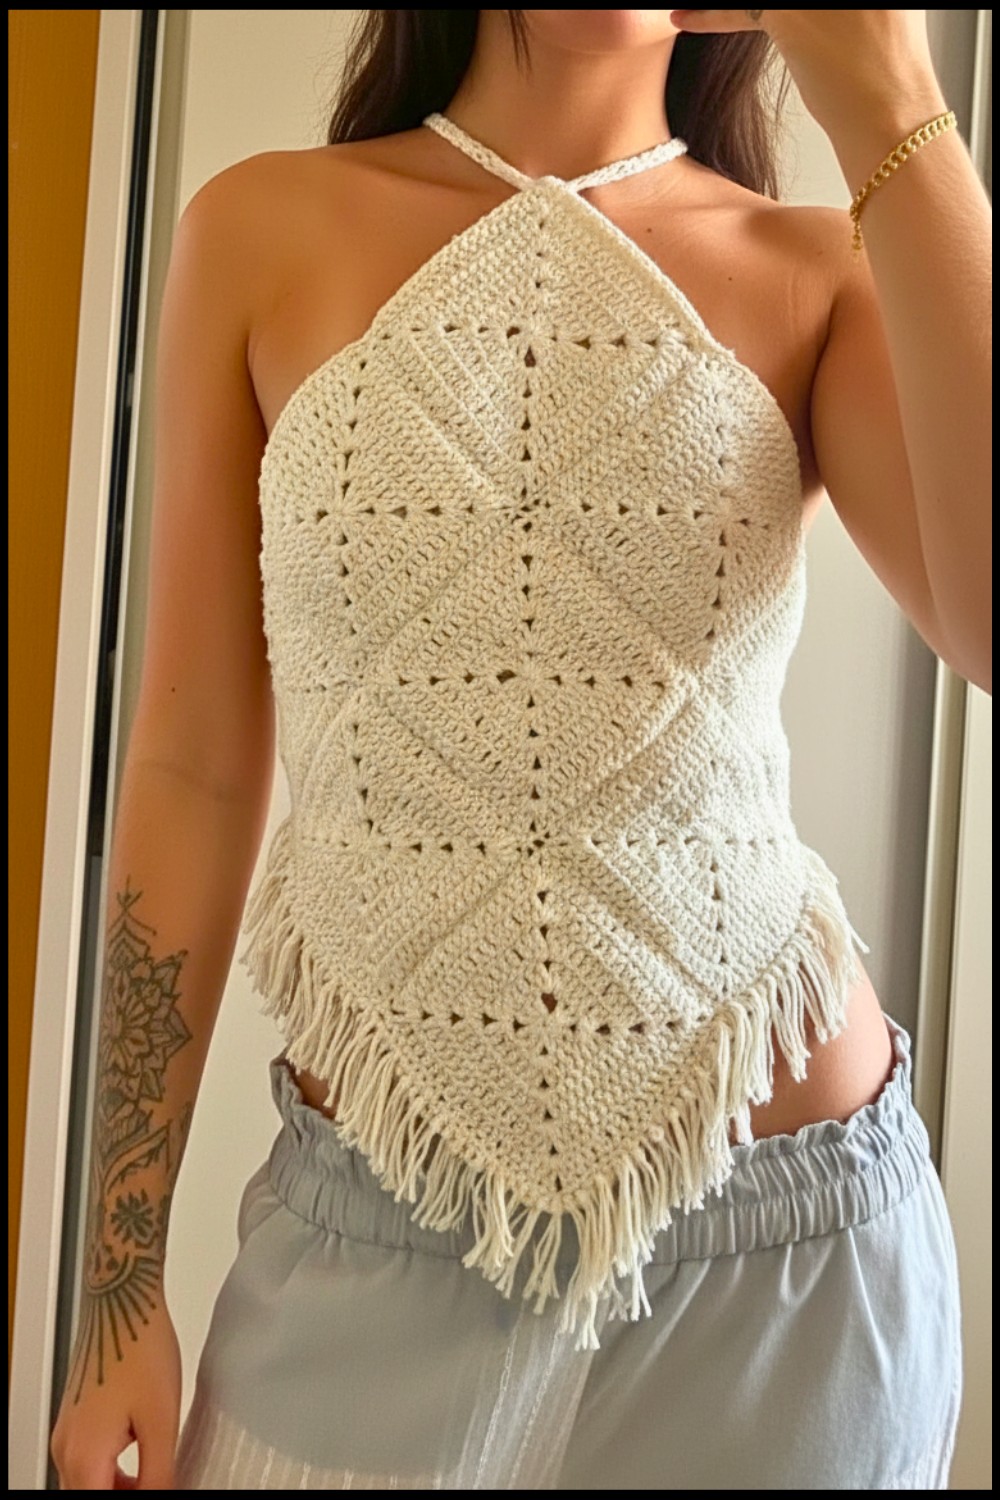
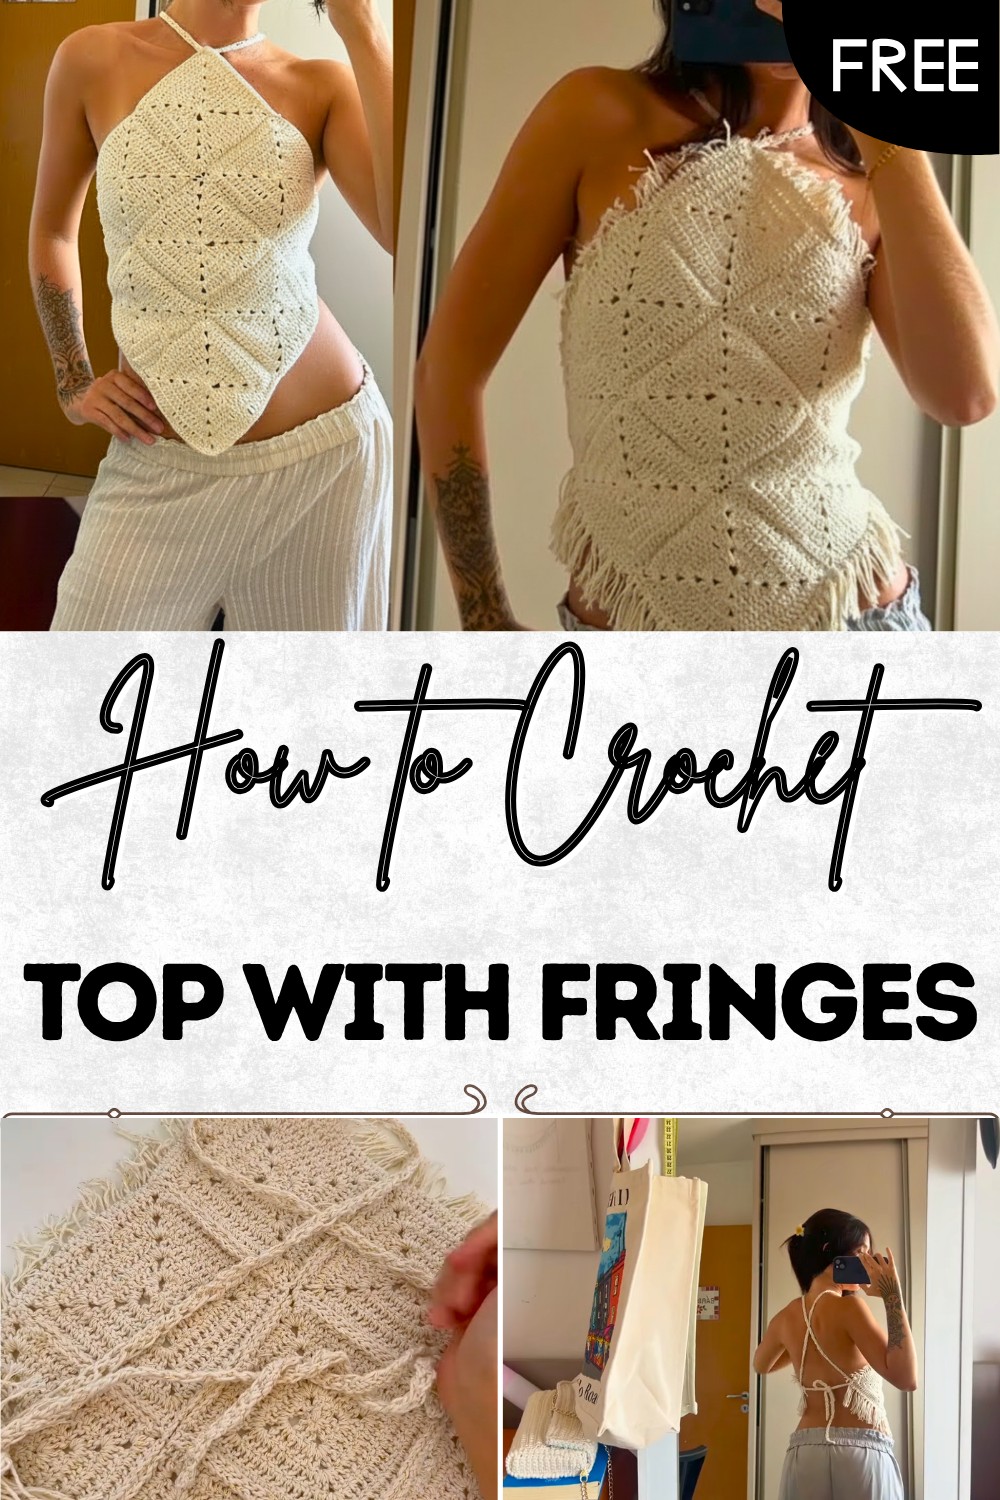
Free Crochet Top With Fringes Pattern—Step Into Boho Fashion
Enjoy making a stylish free crochet top with fringes pattern, that is simple to follow and perfect for adding joy to your everyday outfits.
Wearing something that feels as carefree as the wind and brings a bright smile to your face as you touch the soft yarn. This beautiful top is special because it has fun fringes that move as you walk and dance bringing a joyful spirit to any day. The crochet top with fringes pattern helps you make a piece that is light and comfortable perfect for sunny weather or layering over other clothes.
Free Crochet Top With Fringes Pattern for Festivals and Beach
Bright colors and soft materials make this top look amazing on everyone while the fringes add a playful charm that draws happy eyes. With easy steps you can create your own stylish top and show it off at picnics, family get-togethers or even just at home. The pattern is simple to follow and gives you something one of a kind that you will love to wear again and again. Enjoy making and wearing your own creation full of warmth and happiness.
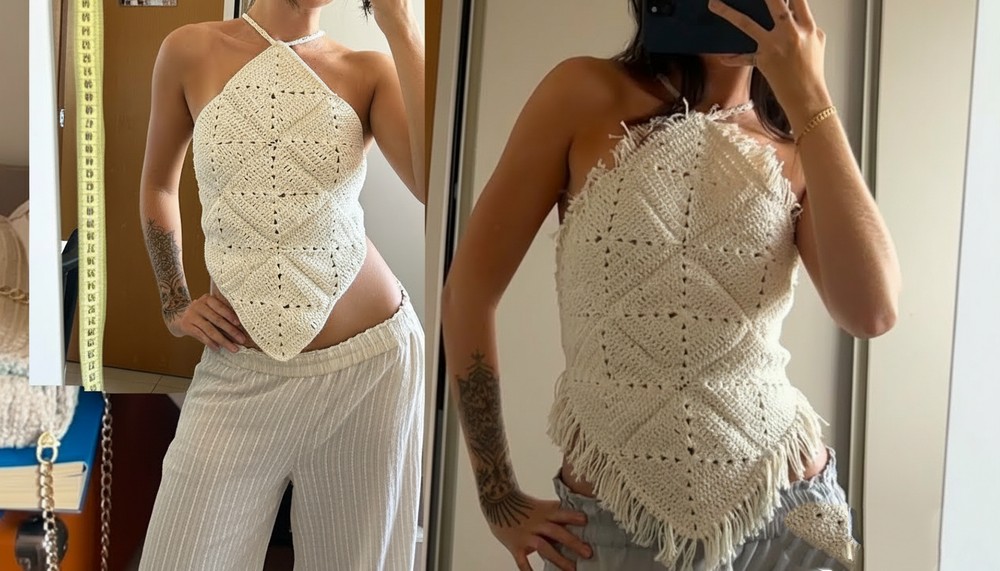
Crochet Square Motif Halter Top with Fringe
Materials
- Yarn:
- Medium weight yarn (#4)
- Sample yarns: Nativo by João Têxtil (cotton with metallic glitter), Círculo Barroco, or Charme doubled.
- Note: Do not use yarn heavier than #4 for the correct density and drape.
- Medium weight yarn (#4)
- Hook:
- 3 mm crochet hook (or size suitable for your chosen yarn for moderate tension)
- Tapestry needle (plastic or metal, for sewing and weaving in ends)
- Scissors
- Measuring tape or ruler (for fringe and chain tie length)
- Small book or sturdy cardboard (for wrapping fringe)
Abbreviations (US Terms)
- ch = chain
- sc = single crochet
- dc = double crochet
- sl st = slip stitch
- st(s) = stitch(es)
- sp = space
Special Notes
- Pattern is written to create nine (9) identical squares, joined in a 3 x 3 grid.
- Squares may use the recommended X-hole motif or any other granny square you prefer.
- Adjust the square size, number of rows, or overall grid size to fit your measurements.
- Fringes and straps can be customized in thickness and length.
- Use a fairly tight gauge to avoid the need for lining—motifs should be solid enough for coverage.
Instructions
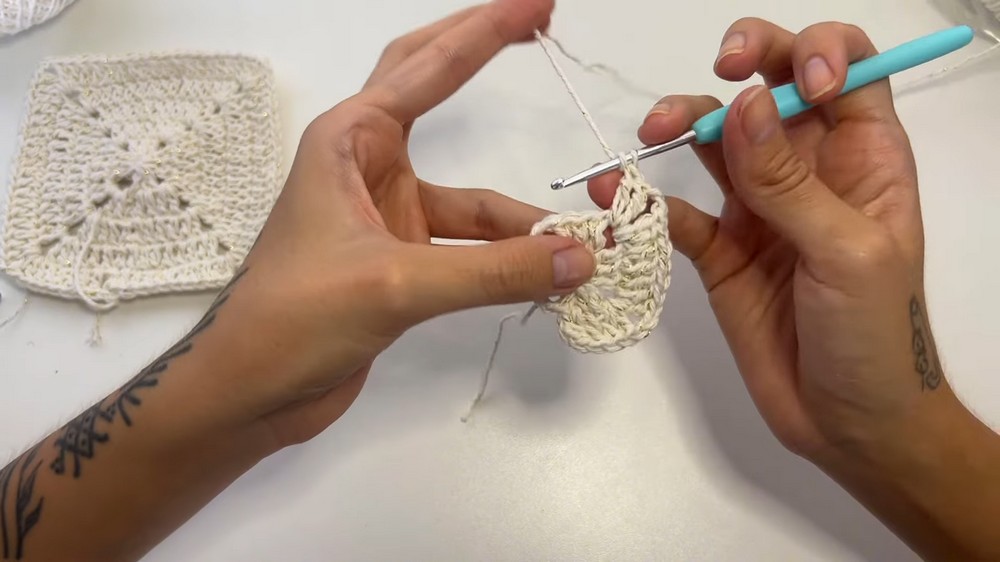
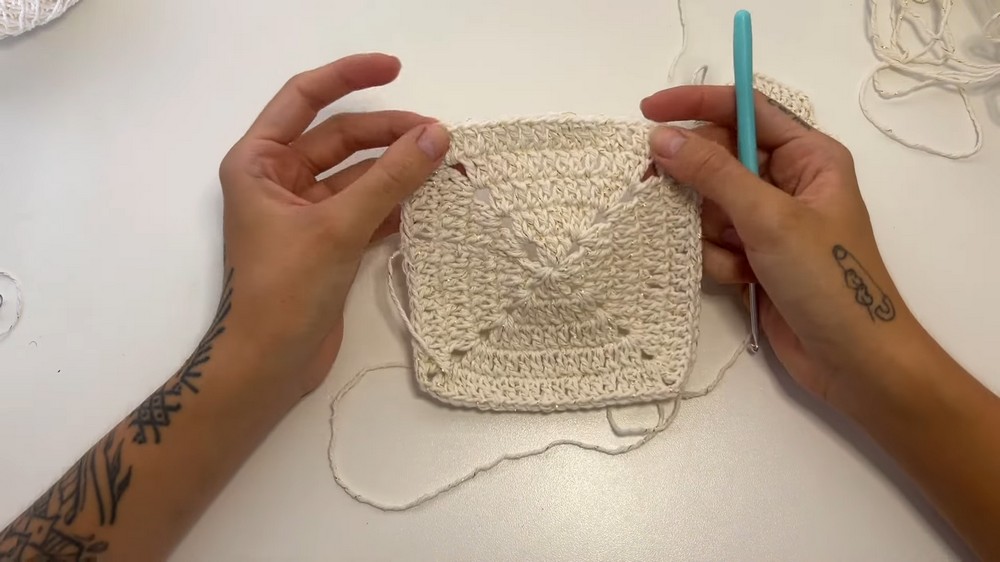
1. Make the Square Motifs (Make 9)
Each Square:
Round 1: (Magic Ring & Foundation)
- Wrap yarn around two fingers to form a loop (magic ring).
- Insert hook into loop, pull up a loop, ch 2 (counts as 1 dc).
- 2 dc into ring.
- Ch 2 (corner chain).
- Repeat: 3 dc, ch 2 three more times — you’ll have four 3-dc clusters, each separated by ch-2 spaces.
- Pull yarn tail to close the ring tightly.
- Join with sl st to the top of the starting ch-2. You should have a square: 4 corners, 4 sides.
Round 2:
- Ch 2 (counts as 1 dc), dc in the next two dc.
- (Corner) In the next corner sp: (2 dc, ch 2, 2 dc)
- Dc in each dc across to next corner.
- Repeat (Corner) in each corner sp.
- Join with sl st to starting ch-2.
Rounds 3–5:
- Continue in the established pattern:
- Ch 2, dc in each dc across to corner sp.
- In each corner sp: (2 dc, ch 2, 2 dc)
- Dc in each dc across sides.
- Each round adds additional dc between corners as the square grows.
- Finish with a total of 5 rounds (or desired size for your fit).
If a larger or smaller square is desired, adjust the number of rounds accordingly. Each top in the sample uses nine 5-round squares.
Fasten off at the end of each square and weave in the ends using a tapestry needle. Repeat for all 9 squares.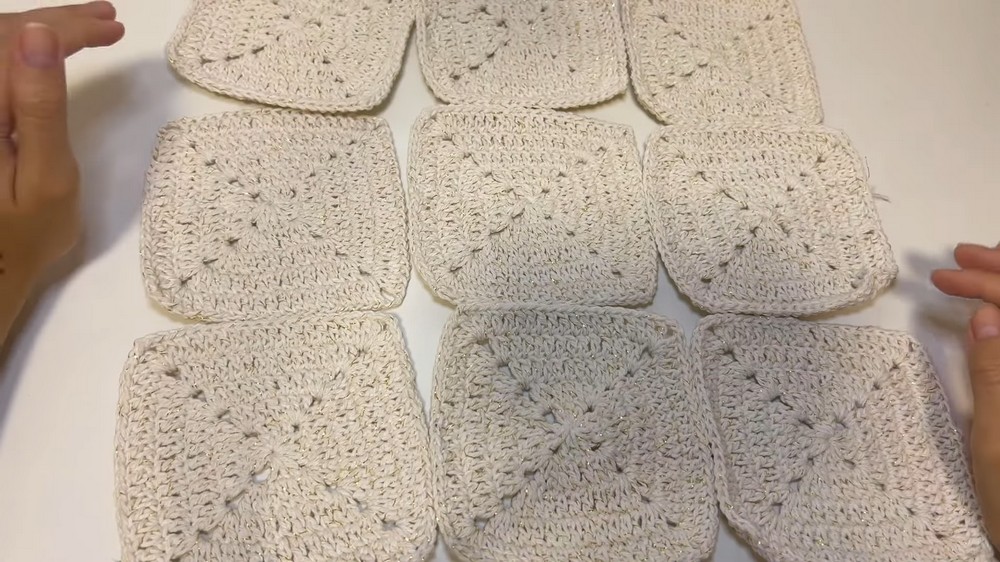
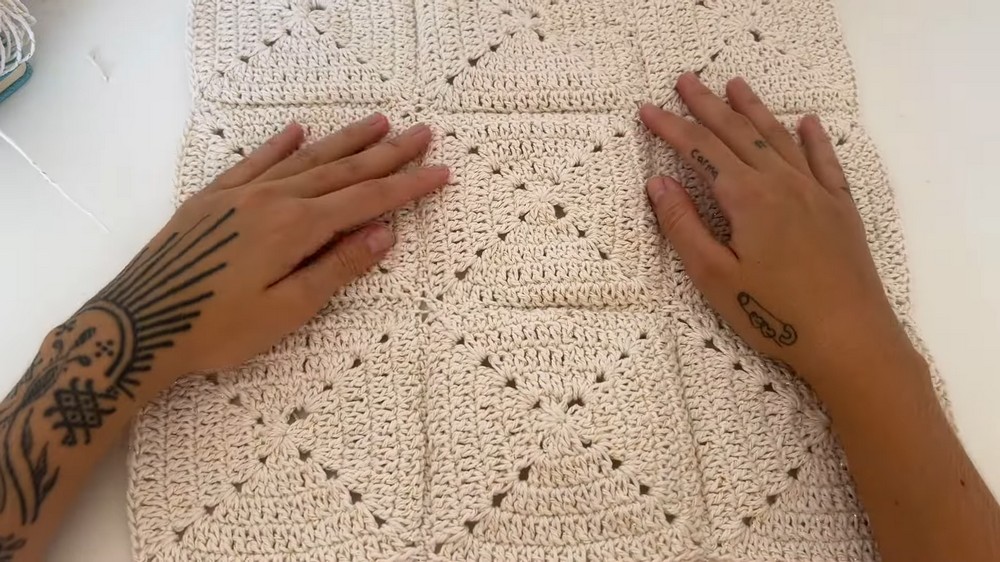
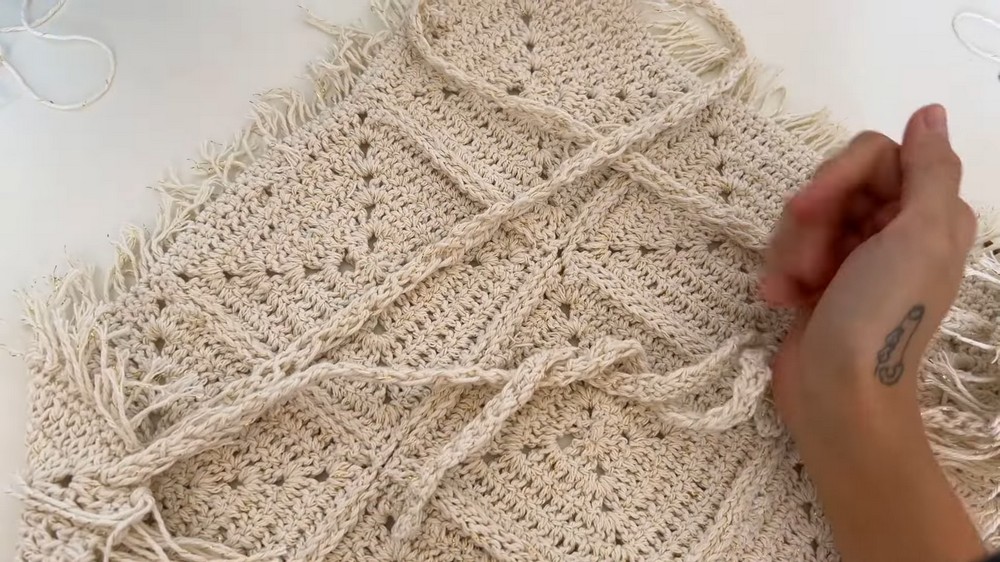
2. Join the Squares
- Arrange the squares in a 3×3 grid (three rows of three).
- Place squares wrong sides facing out when sewing to have a neat finish on the outside (scar/seam is on the inside).
Sew Squares Together:
- With matching yarn and tapestry needle:
- Align two squares, joining through the outermost loop (little braid just past the dc stitches).
- Sew using a whip stitch, back and forth through the corresponding stitches on each square, from one edge to the other.
- Secure with a knot and weave in the ends.
- Assemble three rows of three squares each.
- Then, sew the rows together in the same way, ensuring the seams all face the wrong side for a consistent look.
3. Edging for a Clean Finish
- Attach yarn at any edge.
- Sc evenly around the perimeter of the joined squares to neaten and stabilize edges.
- At each corner (ch-2 sp from motif), work 2 sc in the corner.
- Continue for one round (add additional rows of sc or use hdc/dc for more coverage as desired).
- Join with sl st to first sc and fasten off.
4. Make the Tie Straps
Halter and Back Ties:
- With yarn, ch long enough for a tie (sample: 160–170 cm for halter), or as desired to tie comfortably around the neck and back.
- For a more durable, less stretchy tie:
- Row 1: Ch desired length.
- Row 2: Sc in each ch across, ch 1, turn.
- Continue adding 1-2 rows of sc for a thicker cord, or stop after one row.
- Finish off, leaving a tail to weave in.
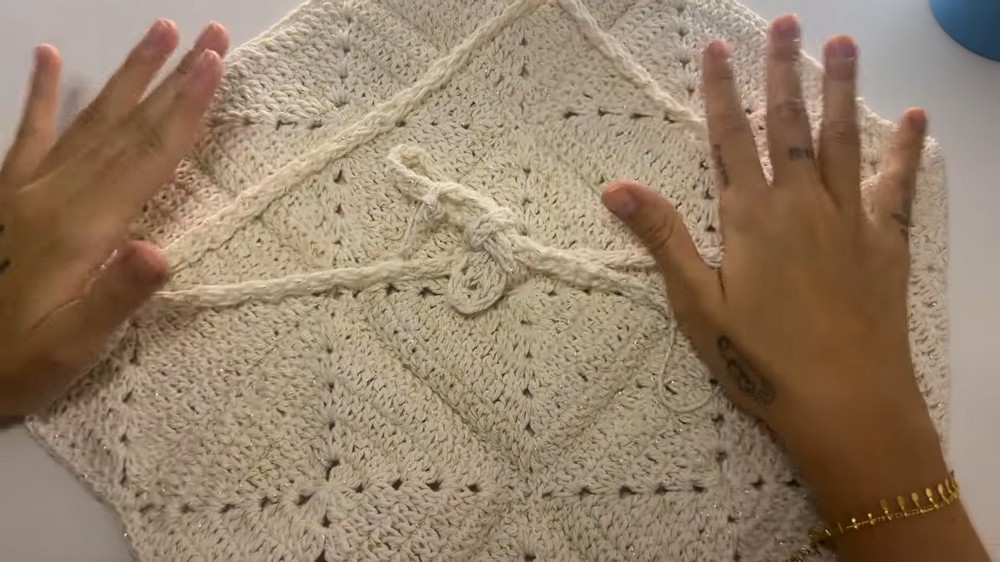
Attach Ties:
- Securely attach ties at the top corners for halter/neck ties and at the bottom for the back.
- Weave in ends.
5. (Optional) Add Fringe
- Cut several lengths of yarn, double the desired finished fringe length (e.g., for 5 cm fringe, cut 10 cm lengths).
- Use a book or cardboard to wrap yarn and cut evenly.
- Using the sc edge, fold 1-2 strands in half, insert hook into edge st, pull fold through to make a loop, pull yarn ends through loop, tighten.
- Space fringe as desired around the base and sides of the top.
- For denser fringe, use more strands per knot.
6. Secure All Ends
- Weave in all remaining yarn tails using a tapestry needle.
- Trim fringe to even length as needed.
Pattern Correction & Tips
- Gauge/Size:
- Adjust square size or number of rounds for your preferred coverage or to fit bust size.
- The top as written fits most XS–S frames; customize the grid and motif size for larger/smaller fits.
- Sewing:
- Keep careful alignment on seams for a neat finish.
- Always sew with wrong sides together so “scars” are hidden inside.
- Fringe:
- Mix thin and thick fringe bundles for visual interest, or keep all even.
- Always trim fringes at the final step for uniform length.
- Ties:
- For extra strength, add more rows of sc to the ties.
- Cross halter ties at the neck, feed through side corners, and tie at the back for secure fit.
Conclusion
This dazzling crochet square halter top is as charming as it is versatile. Simple square motifs, joined cleanly and finished with playful fringe, create a piece that’s both custom-fitted and full of personality. Adjust motif size, fringe length, or tie placement for your perfect fit and style. With clear instructions and a modular assembly, this project is suitable for adventurous beginners and beyond.