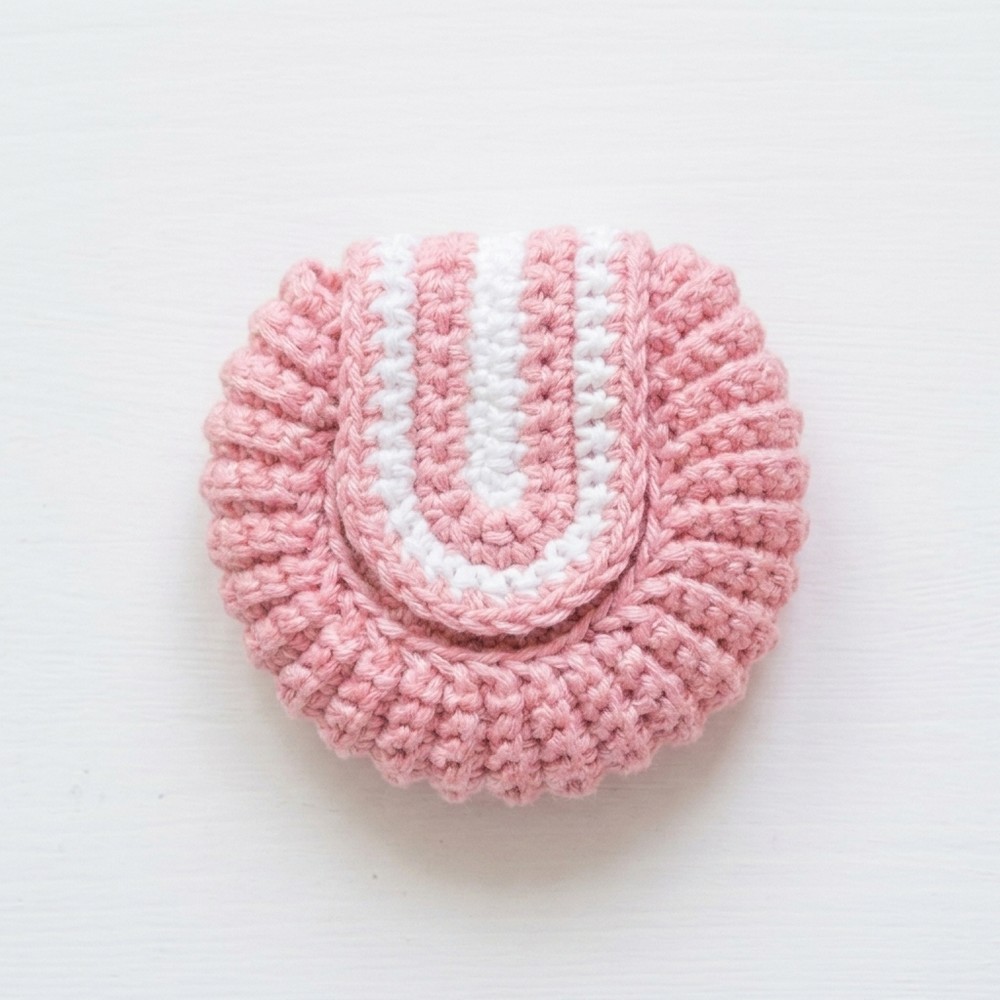
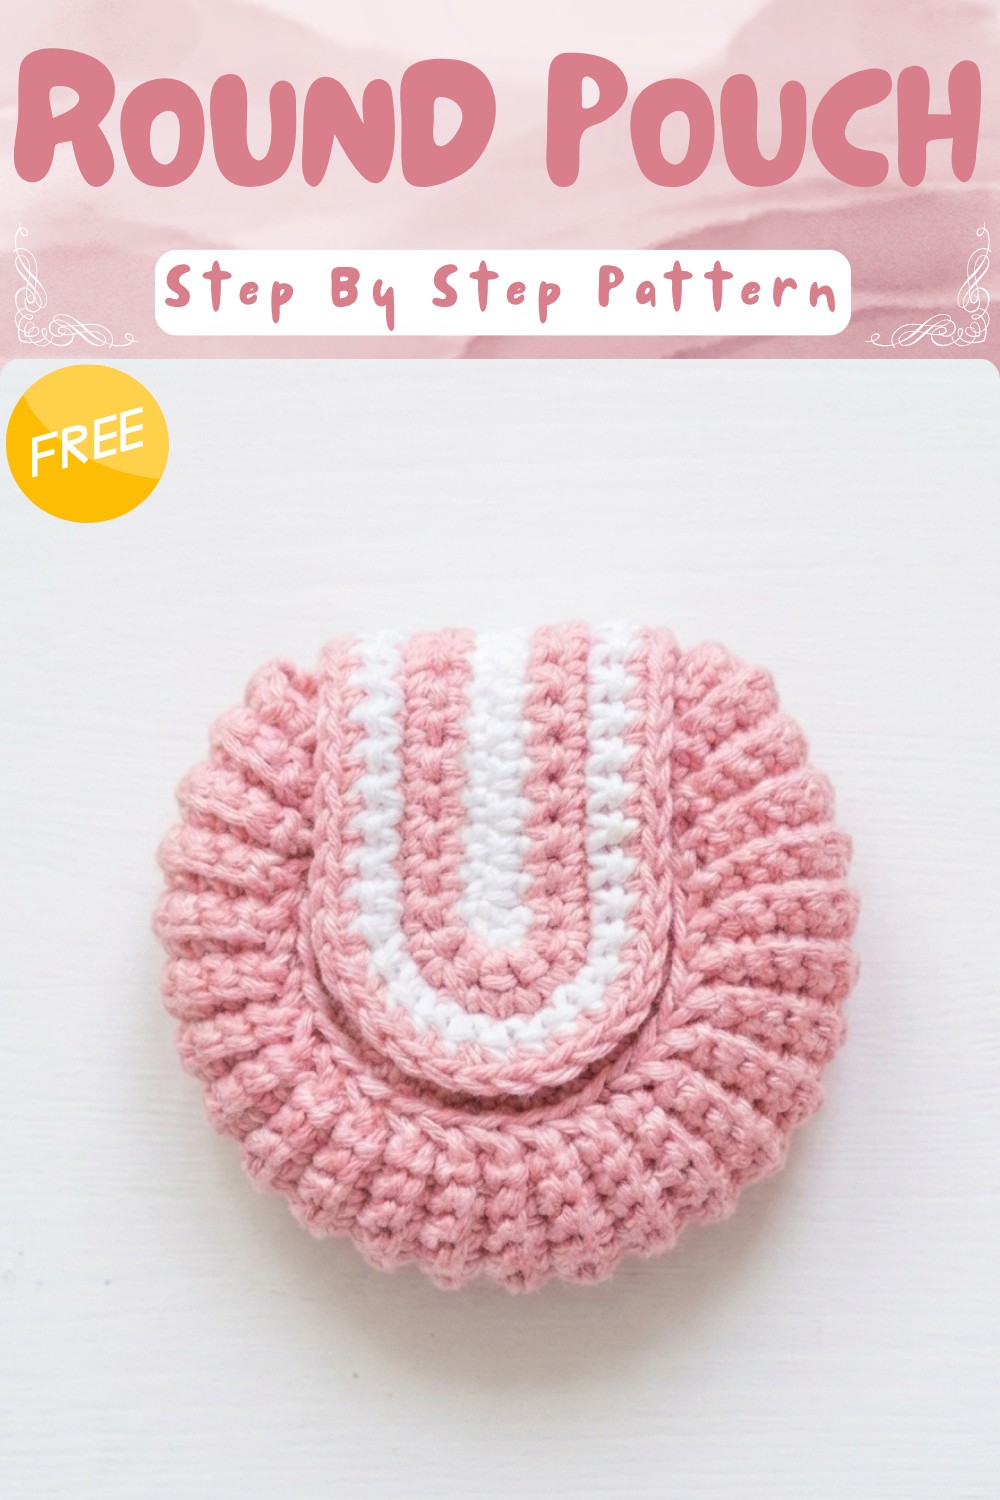
Small Crochet Round Pouch Free Pattern For Everyday Companion
Small Fre Crochet Round Pouch Pattern

Many people can enjoy making this pouch: beginners will find it simple to follow while more experienced crafters can try adding decorations or making larger versions. Using basic stitches like single crochet or double crochet, this pattern teaches useful skills while creating something practical. You can customize it to make other items, such as a small coin purse, a makeup holder, or even a fancy jewelry pouch.
Overall, this round pouch is a charming and handy accessory to have anytime. It’s great as a personal item or as a thoughtful handmade gift. If you want a quick project that looks nice and helps you stay organized, this crochet pouch pattern is a perfect choice.
Small Round Crochet Pouch (Wallet) Pattern
Before You Start
- Read the pattern once to understand construction steps—circular base, back loop flap, and assembly.
- Use 100% cotton yarn for durability and structure.
- Choose colors to suit your style; change colors for the flap for contrast.
- Keep a stitch marker handy for tracking your rounds.
- Be familiar with working in continuous rounds (no slip stitch joins).
Pattern Notes
- This pouch is worked in two identical flat circular pieces.
- The pouch “gusset/side” is built using single crochet rows worked back loop only and attached as you go, creating a seamless edge.
- The flap is made with single crochet, worked in rows, and increased at the curve.
- Fastener (snap/velcro/button) is sewn before flap attachment for easier placement.
- Seamless join and careful end-weaving make the pouch durable.
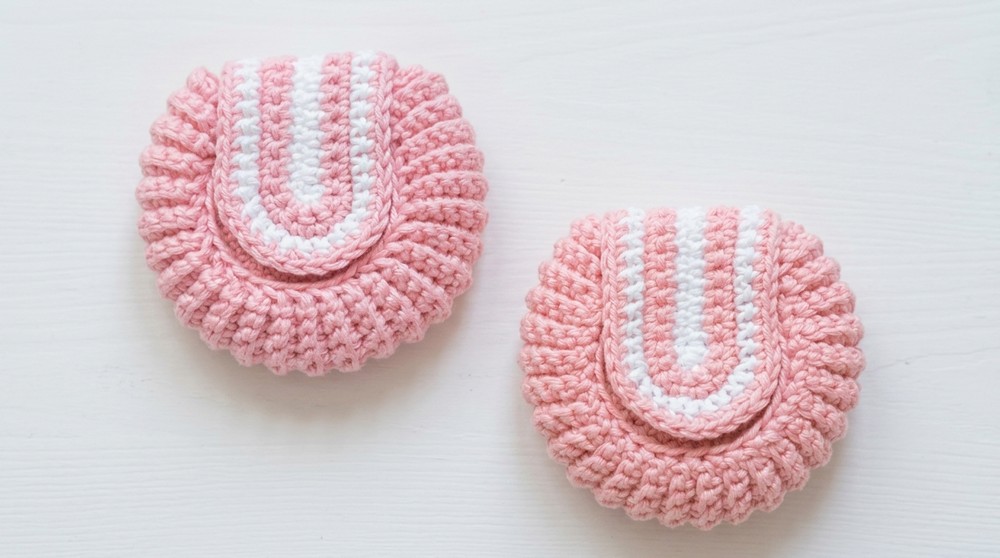
- The pouch closes with a snap, and the curves let it open wide.
How I Made the Crochet Pattern
- Created 2 simple flat circles using rounds of single crochet in the spiral method.
- Built the side gusset directly onto both circles using slip stitches, chains, and back-loop single crochet.
- Crocheted a shaped flap separately, with increases at the curve, and joined it to the pouch.
- Added a snap/fastener, then neatly seamed the flap on for a finished look.
Skill Level
Confident Beginner:
Must understand working in the round, increasing, single crochet, back loop only (BLO), color changes, and basic seaming.
Finished Size
- Pouch diameter: approx. 3″ (7.5 cm)
- Total height (with flap): approx. 3.7″ (9.5 cm)
- Depth/gusset: about 0.6″ (1.5 cm)
Materials
- 100% cotton yarn, light worsted (DK/#3 or aran/#4) in two colors
- 3.0 mm crochet hook
- Stitch marker
- Small pair of scissors
- Yarn needle/tapestry needle
- Snap/velcro/button for closure
- Sewing needle and thread (to sew fastener)
Gauge & Stitch Pattern
- 6 rounds sc in spiral = 3″ (7.5 cm) diameter circle
- 6 sc per 1″ (2.5 cm)
- Gauge not critical, but tight stitches recommended to prevent stretching.
Stitch Abbreviations
| Abbreviation | Meaning |
|---|---|
| ch | chain |
| sc | single crochet |
| BLO | back loop only |
| sl st | slip stitch |
| st, sts | stitch, stitches |
| Rnd | round |
| RS | right side |
| WS | wrong side |
Special Stitches
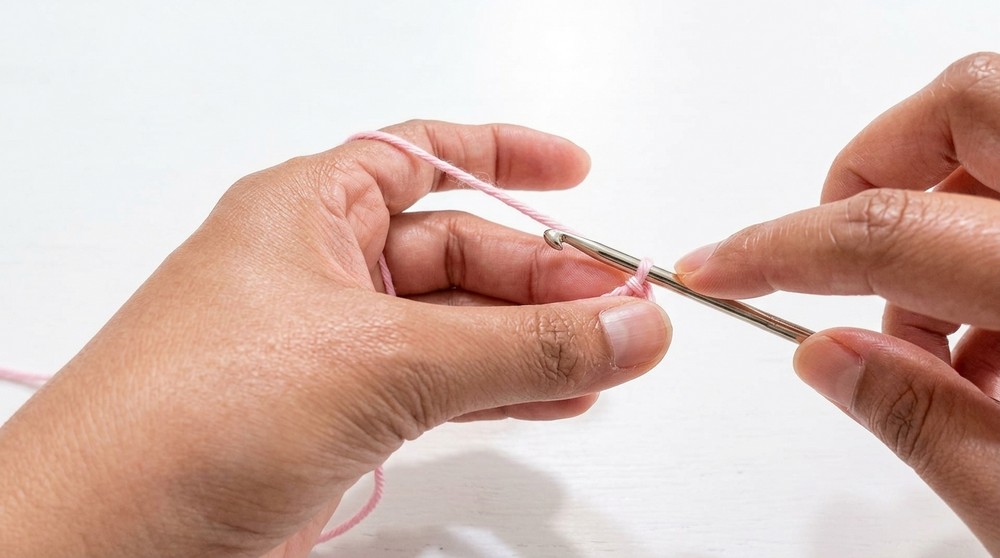
- Magic Circle:
Wrap yarn into a ring, insert hook, pull yarn through, ch 1 to secure. - BLO Single Crochet:
Insert hook into back loop only of stitch (leaving front loop unworked), then work sc as usual. - Invisible Fasten Off:
When finishing a round, use a needle to create a neat, invisible join.
The Pattern
Circular Base (Make 2)
Rnd 1:
- Work 6 sc into a magic circle (do NOT count initial ch-1 as a stitch). [6]
- Tighten ring.
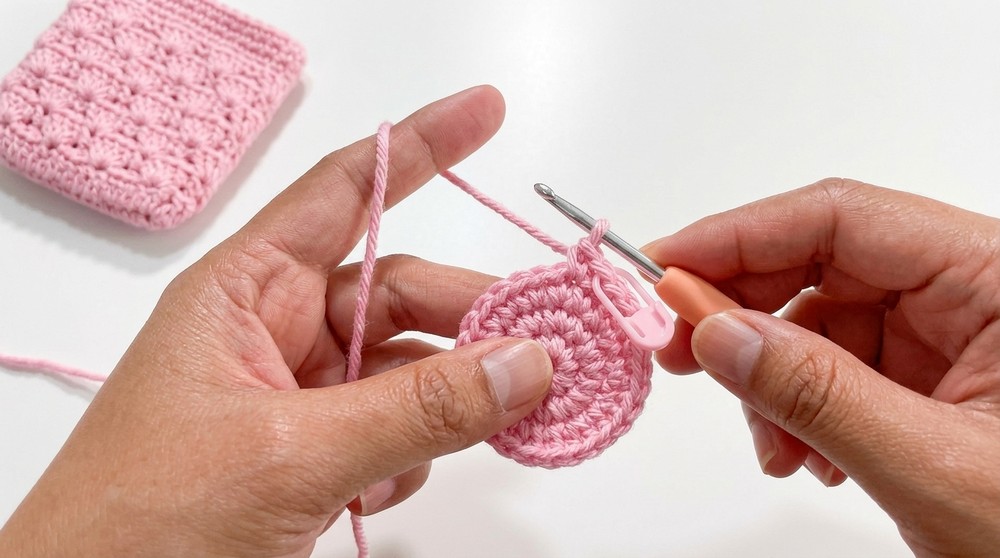
Rnd 2:
- 2 sc in each st around. [12]
Rnd 3:
- (sc in next st, 2 sc in next st) repeat around. [18]
Rnd 4:
- (sc in next 2 sts, 2 sc in next st) repeat around. [24]
Rnd 5:
- (sc in next 3 sts, 2 sc in next st) repeat around. [30]
Rnd 6:
- Sc in each st around (no increases). [30]
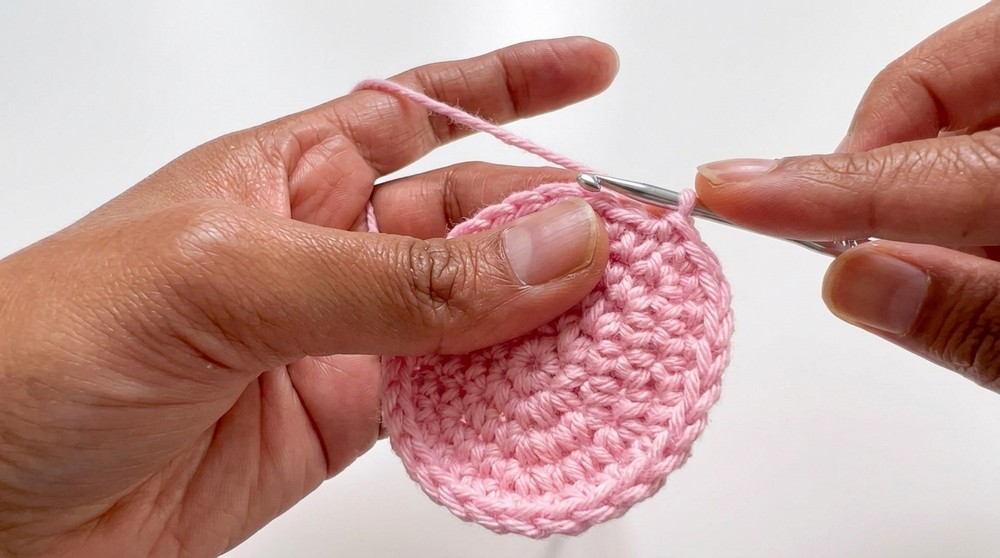
End one piece with an invisible fasten off for a neat edge (see Special Stitches for details). Do not fasten off on the second piece; set aside.
If you prefer a visual explanation: crochet a flat disk, gradually increasing each round for a smooth, circular pouch base until you have 30 single crochets around. Repeat to make two pieces.
Side and Joining Strip (Worked as You Go)
- With working yarn still attached to second circle, ch 9.
- Turn, skip first chain, sc in next 8 ch (working into the “back bump” of chain) for a neat edge.
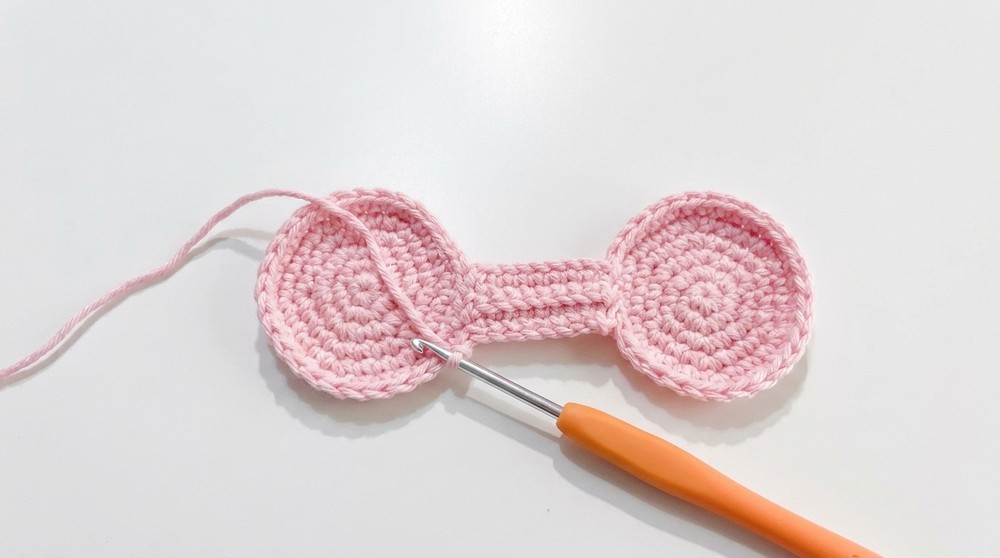
Begin attaching to first (finished-off) circle:
- Sl st to next st along edge of first circle (using back loop only for a neat inside seam).
- Ch 1, turn.
- Skip sl st just made, sc BLO in each sc across (8), turn.
- Sl st to next BACK LOOP on circle (skip the st just connected to).
- Repeat: ch 1, turn, sc BLO across, sl st to next unused BLO on circle, until 22–23 rows are worked and you have 4 stitches unworked on each side.
These steps create the walls/sides of the pouch, joining the circles with rows of single crochet as you go. All stitches of the side are done in the BLO for subtle stretch and a pleasing texture.
Finishing Gusset
- Cut yarn, leave 10″ (25 cm) tail.
- Whipstitch remaining sides for final 4 stitches of both circles to create a complete ridge and opening.
- Fasten securely and weave in all ends.
If you don’t read patterns: you’ll be joining the two circles around most of their edge with a single-crochet strip and leaving a gap at the top for the flap.
Crochet Flap
With contrasting yarn, ch 13.
Row 1:
- Turn, sc in 2nd ch from hook and in each remaining ch across (12).
Row 2:
- Ch 1, turn, sc in each st across, add 2 extra sc in last st for a gentle curve (total 14).
Row 3:
- Ch 1, turn, sc in each st across (14).
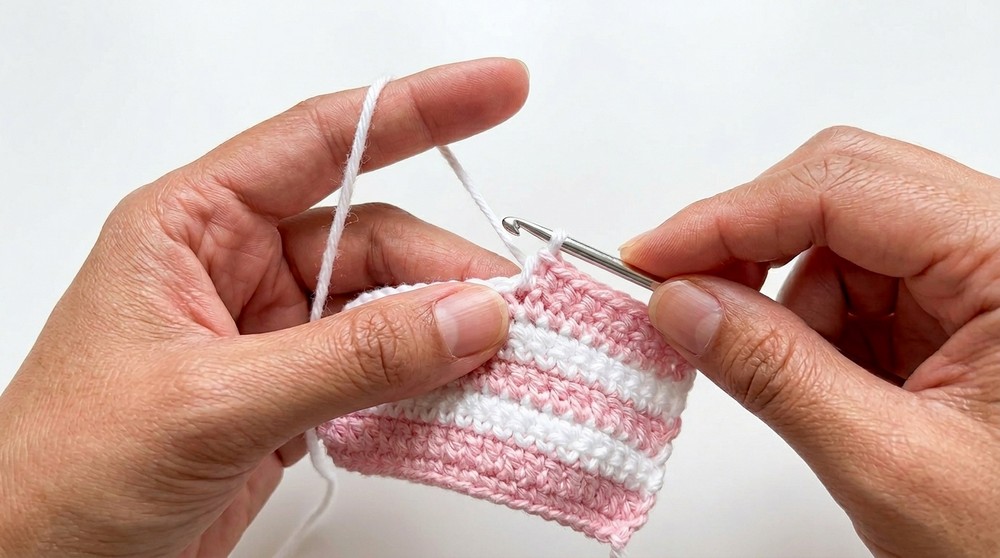
Row 4:
- Change to main color at last st if desired for a colored edge.
- Ch 1, turn, sc in each st across. Increase as needed at the midpoint for a rounded curve (up to 15 sc).
Finish off leaving a long tail for sewing.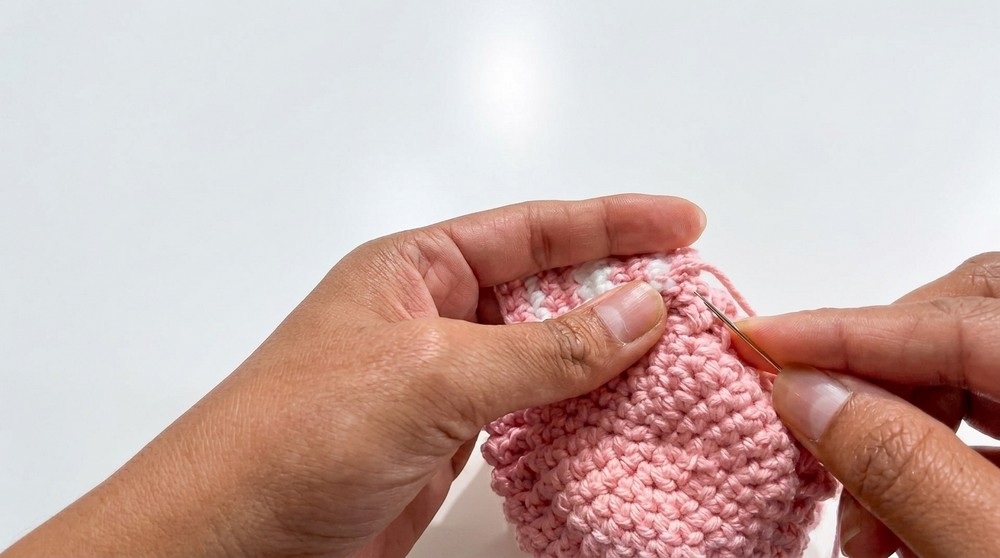
You’ve just made a half-oval or horseshoe-shaped flap to close the pouch.
Assembly & Finishing
- Attach fasteners (snap, velcro, or button) to pouch and flap before final joining for easier placement.
- Center the flap inside the opening, matching curves.
- Whipstitch or sew flap edge neatly to pouch along remaining gap, catching both pouch and flap edges.
- Weave all ends using a yarn needle.
- Tuck all loose ends to the inside for a polished finish.
- Use sewing thread and needle for securely attaching snaps/velcro.
What You Can Make With These Stitches
- Keychain coin purses and AirPods holders
- Small wallets or travel jewelry pouches
- Mini first-aid or earbud holders
- Scalable gift bags and favors by adjusting size
Summary
This adorable round crochet pouch is the perfect project for trying out spiral crochet, back-loop-only single crochet, and seamless construction. The gusset method gives the pouch surprising depth and structure, while the easy flap and snap closure provide practical utility. All you need is basic yarn, a 3 mm hook, and a little patience to sew the final pieces—and you’ll have a professional, modern mini pouch for countless uses.